Master class on manual labor. Paper construction “Helicopter”
Elena Goryacheva
Master class on manual labor. Paper construction “Helicopter”
Master class on manual labor Making paper “ Helicopter ”
Goal: development of productive activities.
1. Improve the ability to work from a finished pattern.
2. Consolidating the ability to create three-dimensional figures from paper .
3. Development of aesthetic taste.
Materials needed for work: colored paper , colored cardboard, pencil, glue stick, thread, beads, ice cream sticks, black marker, sewing needle.
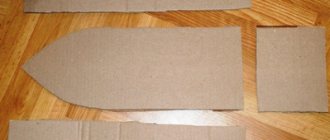
1. Using the pattern, trace and cut out a helicopter cabin from cardboard of any color - 2 parts .
2. Using a pattern from cardboard of any color, outline and cut out the helicopter landing gear - 2 parts .
3. Using the pattern, trace and cut out glass for the helicopter cabin from blue paper - 2 parts .
4. Using the pattern, trace and cut out the tail propeller from red cardboard - 2 parts.
5. Using the pattern, trace and cut out a helicopter helicopter from red cardboard - 2 parts.
6. Cut out a nose from cardboard of any color - 2 parts.
7. Cut out eyes - 2 parts from white paper .
8. Cut out small circles - decorations, from paper of any color folded like an accordion.
We begin assembling the helicopter .
1. We glue the chassis in the upper part to the middle of the racks, bifurcating the lower part.
2. Glue the 2 parts of the cabin together, gluing the landing gear between them at the bottom of the cabin and a thread at the top.
3. Glue the cockpit glass on both sides of the helicopter .
- Secrets of builders: working with couplings
DIY New Year's crafts - 9 best options
- Autumn paper crafts
4. Glue the nose of the helicopter , gluing both parts.
5. On the tail of the helicopter we glue the propeller parts glued together.
6. Glue the eyes on both sides and draw a pupil with a marker.
7. Glue the two propeller parts together.
8. On a thread glued to the top of the cabin, use a needle to string a bead and two parts of the propeller glued together.
9. Glue circles - decorations - on both sides of the cabin.
- DIY snowman craft
- Crafts from stones for the little ones - learning colors
- DIY crafts from scrap materials
The helicopter is ready.
We attach an ice cream stick to the upper end of the thread, with which you can control the helicopter .
“Helicopter, helicopter, take me flying.” Helicopter as a gift for dad Purpose: to teach children to cut out appliqué parts along a drawn outline, put together a whole from individual parts, and strengthen their ability to work.
“Making a pincushion from fabric and foam rubber.” Summary of OOD on manual labor in a group for children from 6 to 7 years old. Form of OOD: subgroup, individual. Goal: creating a pincushion as a gift for mom. Objectives: introduce children to the rules of safe handling.
Making a peony from corrugated paper (master class) To make a peony flower we will need scissors, paper of the desired color, a heat gun (or thread, a bamboo stick and for fun.
Notes on manual labor “Tulip made of paper” Purpose: To teach children to fold paper in different directions. Develop children's eye, fine motor skills, and speech...
Master class “Geese for Grandma.” Making geese out of paper using the origami method by older children. After listening to the song “Two cheerful geese lived with grandma,” the children and I decided to please grandma and make a lot of geese. The first stage of our work.
Master class on handmade art “Easter card” On the eve of Easter, we decided to hold a master class together with parents. For every holiday we make different ones.
- DIY sweet crafts
- Crafts for Easter from scrap materials
DIY strawberry craft
"Tea cups for a goat with kids." GCD for manual labor - making attributes for the fairy tale “The Wolf and the Seven Little Goats” Goal. Formation of creative abilities in children. Tasks. Educational. — Fostering empathy and a desire to help. - Upbringing.
Lesson on manual labor from natural materials and paper “There is a pond on the window” Program content: Continue to acquaint children with the diversity of the flora and fauna of our planet. Strengthen the ability to classify.
Manual labor lesson “Airplane” made of paper Purpose: - Learn to fold a sheet of paper diagonally without a marked line; — Show a method for obtaining a square from a rectangular blank;.
Lesson in the senior group on manual labor “Making a cockerel” Manual labor is an effective means of developing the creative potential of children. Manual labor develops design skills and plays a big role.
Instructions
1. First you need to find a convenient drawing. The design is very complicated and cannot be done without detailed processing. In a hardware store, purchase a sheet of construction foam ( thickness - 25-30 mm ).
2. It is better to buy parts such as a rotor, helicopter blades, control servos, tail gearbox, engine, and battery in a store. Making them yourself will take a lot of time. The blades alone are worth it: getting decent balancing is not an easy task.
3. Melbet promo code - gives a starting bonus upon registration of up to 10,500 rubles. Using the promotional code you can get: Sports bonus 100%. To receive a welcome bonus, you must top up your balance by at least 100, maximum by 19,500 rubles. Free melbet promo code 2022 that will increase standard bonuses: deposit and freebet. Copy any of the promotional codes and register at melbet. If, under standard conditions, a bettor at Melbet receives a first deposit bonus in the amount of 100% of the first deposit, then using a promotional code his promotional accrual will be 130% of the amount of the first deposit. Take the drawing and transfer the templates to construction foam, plastic or wood. You should strictly follow the instructions in the drawing and make markings according to the given dimensions. Use a cutter to cut out all the parts. Glue the helicopter model, sand everything with sandpaper so that there are no irregularities and burrs. Some connections are better reinforced with electrical tape. Make the cabin using aluminum tubes.
4. Connect the motor to the screws. The engine power must match the battery power. The duration of the helicopter's flight will depend on the battery capacity.
5. Install the electronics into the helicopter body. If you select a small engine and battery, then you will not have problems placing them, for example, in a helicopter cockpit. Secure the motor (you can glue it to a wooden plank). 6. Decorate the helicopter: paint the body and blades, stick on some stickers
Features of paper helicopters
DIY paper helicopters are made using different techniques.
- Models are made with maximum accuracy using templates. Cut out all the parts and glue them together.
- Simple versions are performed by children in creativity lessons in the form of helicopter applications, origami figures, and three-dimensional crafts.
3D cardboard helicopters can be attached to an exhibition platform.
Examples of ready-made crafts made from cardboard and paper
Origami paper helicopters are often assembled by adults and made into collections. To work, print the templates on a color printer. Children up to 3rd grade love to make paper appliqués in fine arts lessons. Flat models of helicopters can be hung on a thread and attached to a chandelier in a children's room or left as is for children's games. Below are examples of finished models.
Where is it used?
Paper helicopters are used at various events. Often used:
- in children's creativity classes;
- to congratulate boys on February 23;
- for decorating premises on May 9;
- for playing at home;
- at children's parties and competitions;
- for collecting models;
- at corporate events;
- at craft exhibitions in schools.
A paper helicopter will bring a lot of joy to a child; the manufacturing process is very exciting. Creativity helps develop children's imagination and geometric thinking.
flying helicopter
The first helicopter was released in the late 30s of the 20th century. The principle that formed the basis for its creation was drawn by Igor Sikorsky (the author of that very first model) from the sketches of Leonardo Da Vinci’s drawings, compiled 500 years earlier. You can make a smaller copy of the great artist and inventor’s flying car from a sheet of cardboard or thick paper.
Required tools and materials:
- Scheme
- Scissors
- Paper clip
Operating procedure:
Print or draw the template on a piece of cardstock
Cut the workpiece along solid lines and make folds along dotted lines: fragment A - towards you, fragment B - away from you.
Bend pieces C and D towards you so that they overlap each other.
Bend the base of the “leg” up and put a paper clip on it.
Rise higher and, holding the toy by the paperclip with two fingers, throw it as far forward as possible. Under the pressure of air currents, the blades will begin to rotate, dragging the body along with it and not allowing it to immediately fall to the floor.
How to make a helicopter
Making a simple helicopter is easy; all you need is some paper, scissors, glue and imagination. It is advisable to prepare your workplace and everything you need in advance so as not to be distracted from work. Creating a craft does not take much time; even preschool children will have enough patience.
Required materials and tools
To complete this craft you will need to prepare the following items:
- colored paper;
- cardboard;
- paints;
- markers;
- scissors;
- glue;
- white sheets;
- templates for cutting.
Diagrams for helicopters are printed on a color printer; the parts do not have to be colored. This makes the work easier, but the process is quite painstaking, since the parts are small and must be carefully glued together.
To make a reliable, dense figure, it is better to use cardboard and thick paper.
Assembling a simple three-dimensional model with step-by-step photos
Technology for 3rd grade, which is often used in fine arts lessons, is called “Helicopter fly made of paper.” To work you will need a champagne or wine cork, cardboard, a cutting template, glue, scissors, a simple pencil and an awl. The model can be made from paper and cardboard. The denser the material, the longer the toy will last. The photo below shows a detailed diagram for making a helicopter.
From scrap materials
To work, you will need a cardboard egg mold, paint, cardboard, scissors and a clerical nail. Making crafts takes little time. Step-by-step instruction:
- Convex containers are cut out from the mold; they will serve as a body for the craft.
- The partitions from the mold are cut out, and the tail of the helicopter is made from them.
- The bottom of the remaining cells is cut off; in the future they will be used as a continuation of the body.
- Each cell is painted with a bright color; the windshield, windows and doors are painted in a different color.
- All other parts are painted in the color of the body.
- Use a black marker to draw the outlines of the windows.
- Make a small indentation in the cardboard cones by pressing on the top with the end of a simple pencil.
- Glue all the parts together into a complete model.
- Long strips are cut out of cardboard; two are needed for each helicopter. Glue them together crosswise.
- Use a nail to attach it to the top of the toy.
- Glue the top onto the cell.
Creating such a craft together with your child will captivate him for some time. The process of decorating and gluing the model will give children the opportunity to use their imagination. The photo below shows a step-by-step diagram of assembling the toy.
Video master class on creating a military helicopter
A military helicopter can be made from paper using a template. The model is prepared according to any scheme and painted in camouflage colors. This toy is often given to boys and even adult men on February 23rd. A military helicopter can be made using any type of equipment. Below is a video on how to make the model.
Origami with a simple diagram
A paper helicopter model can be made using the origami technique. You will need a square sheet of paper. To do this, a regular A4 sheet is folded diagonally, and the remaining rectangle on top is cut off. Step-by-step assembly of the toy:
- Fold the sheet diagonally twice and unfold it.
- The side corners are folded towards the central dotted line and unfolded.
- Turn the sheet over and do the same with the other corners.
- The corners from the bottom of the square are bent inward, then the upper ones are bent inward with an overlap.
- Fold the diamond in half.
- Straighten out the pockets of the figure on both sides.
- The upper triangle is folded down.
- Turn the side triangles to the sides.
- Turn the figure sideways, turn out a sharp triangle from the inside, straighten the edge and bend it upward.
- The corners are placed inside from the front.
- Spread the blades to the sides.
Stores sell special thick paper for scrapbooking. It makes reliable and dense toys.
The photo below shows a detailed diagram of assembling a helicopter using the origami technique.
Applications for children
An applique in the shape of a helicopter made of colored paper is made using a template. It is printed in advance on a printer. Then all the details are cut out, applied to colored material, outlined and cut out, then the picture is assembled. Ready-made applications can be inserted into a frame and placed in the children's room. This way the child will be able to admire the result of his work for a long time.
Military helicopter
The applique in the form of a military helicopter is suitable for a greeting card for May 9 and February 23. It is often done in schools and kindergartens on the eve of the holidays. Step-by-step diagram:
- Select a background sheet of blue or white color. The base of the green helicopter is glued in the center.
- White ovals and a rounded triangle are glued on top of the base of the helicopter in the form of windows.
- Brown circles are attached to the bottom. White parts are glued on top.
- Red stars decorate the cockpit and tail of the craft.
- Pinwheels for the tail and cockpit are cut out of corrugated paper.
- Circles of a different color are glued in the center and the parts are fixed on the surface.
- White clouds are glued to the background.
If you make the background sheet white, then the clouds are cut out blue. To do crafts in classes with children, templates are prepared from cardboard and given to everyone to cut out in turn. The photo below shows visual instructions for execution.
Cheerful helicopter
The applique is easy to complete, as no templates or diagrams are needed. Circles, triangles, semicircles and stripes are cut out of colored paper. Then they assemble the picture:
- Cut out two semicircles of the same size from orange and red paper and glue them in the center of the background sheet.
- A large triangle is glued to the right of it. He will be the tail.
- From four yellow and four small orange triangles, a circle is assembled on the tail of the helicopter, alternating them with each other.
- Wheels are made from the bottom from two black circles and red stripes.
- A yellow circle is glued to the left of the background sheet, and there are many yellow stripes around it, so you get the sun.
- Cut out four large yellow triangles and glue them on the top in the form of a blade.
- The place where the edges of the blade meet is covered with a small green circle.
- Using felt-tip pens, draw the eyes, nose and mouth of the sun and the helicopter. They can be made from paper.
The photo below shows a photo of the finished application. Looking at it, all stages of the painting are clear.
Reamers for assembling realistic helicopter models
AGUSTA
Amphibian
Cutting templates
Templates for creating helicopters are often used for applications and real models of equipment. They are also printed on a printer for coloring books. Young children love to color pictures as they wish. The photo below shows printable diagrams.
Paper helicopters will bring a lot of joy to children; they can play with them on the street and imagine themselves as pilots. Creating crafts with your own hands with your child will help you have a good time with your family and during creative activities. Many adults collect helicopter models. To make helicopters, templates are used, cut and glued along the lines.
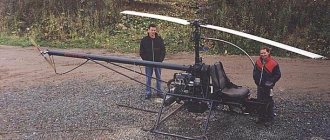
Homemade helicopter from a snowmobile
We must pay tribute to the inventor - he created a working structure from scrap materials. Such inventors should be united in a design bureau to revive small aircraft. The helicopter was manufactured in 1979 in the city of Cherkassy. The entire structure is homemade, except for the engine. Parts from different techniques, wooden screw. Engine from the snowmobile “Buran”. Flies at speeds of up to 150 km per hour. It was tested at an altitude of 8-10 meters, but theoretically it can fly higher.
Products for inventors. Autumn discounts up to 60%
