Do you know what a velomobile is? This is a universal vehicle. You can use it not only to teach children to ride a bike. But also use it as a means of transportation. Interested? Want to know where you can buy it? Take your time with the purchase. In this article we will tell you how to assemble a velomobile with your own hands. So let's get started.
A velomobile is not just a toy for a child
All-terrain velomobile and features of its creation
When making a velomobile, it is important to take into account many details
- How the vehicle will be used;
- How many speeds does the owner of an unusual vehicle need?
- What will be the design of the structure;
- Quality and quantity of fasteners.
For those who plan to get the most out of their new iron friend, you need to think about whether the wheels or tires have good rubber. After all, for those who are going to spend a lot of time at any time of the year on a velomobile, cross-country ability is important. To do this, instead of regular tires, you can use larger tires with a larger diameter.
And also, for higher cross-country ability, vehicles are included in the design instead of the usual three wheels, four. Seat height can also affect cross-country ability because the higher the seat, the safer the passenger is, protected from the influences of the sidewalk, ground and other surfaces.
A velomobile can become a necessary and reliable form of transport, the main thing is to make it with passion, strictly following the instructions and drawings. Let the velomobile become a faithful companion, giving bright emotions and a great mood.
Do-it-yourself single-seater velomobile
Velomobile made from an old bicycle
To implement this idea you will need:
- bike;
- 2 meters of steel pipe with a diameter of 2.5 cm;
- 6 meters of profile pipe with a cross section of 3.8 * 3.8 cm;
- profile pipe with a cross section of 2.5*2.5 cm (about 3.5 m);
- profile pipe with a cross section of 1.3*1.3 cm (about 1.5 m);
- steel plate 0.47 cm thick;
- Chipboard, foam rubber, seat upholstery;
- bolts, nuts, seat upholstery, primer.
The frame of the velomobile is made of profile pipes
Such a velomobile, of course, looks powerful, but you have to pay for it with the lightness of the design. There will be an opportunity to pump up your legs well. In addition, there are suspicions that the main load will fall on the weld, which is located closer to the steering wheel. All this will lead to the fact that one day the frame will not hold up and burst at the seam.
It is worth noting that the idea with the front drive wheel was implemented well
Please note that the drive sprocket, which was previously located at the rear, now needs to be turned over. We also turn the switch upside down and install it further 5.7 cm and 0.15 cm higher
The bracket on which everything will rest is made of a steel plate.
For the speed derailleur to work correctly, it must be installed upside down
The hardest part is over. If you get this done, there shouldn't be any problems with the rear of the velomobile.
The velomobile can now stand on its own wheels
As you noticed, you will need a third wheel. You can carefully take it from a neighbor while he is resting after a heavy lunch, but it is better not to risk it and warn him in advance. Many will be glad to get rid of junk.
We make the rear wheel mounts from a steel plate
Next we should move on to the brakes. Of course, “what Russian doesn’t like driving fast.” Besides, everyone has long known that brakes were invented by cowards. But let's think about those around us. Can you imagine what will happen to a person when such a machine hits him? So, brakes. We simply transfer them from the remains of our old bicycle. We weld the brake caliper to the new front fork and transfer the brake mechanism to it.
Weld the brake caliper to the front fork
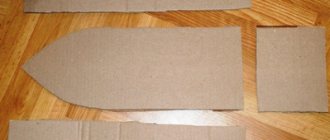
We make the frame of the future seat from a metal profile.
Three sections connected by bolts will allow us to adjust the seat back and headrest
The base of the seat and back are made of chipboard and foam rubber. We choose the softness ourselves, as well as the upholstery.
Once you've finished celebrating the completion of the work, be sure to test drive the velomobile
Test drive of a single-seat velomobile - video
Advantages of this design:
- convenience and safety compared to a bicycle;
- uniqueness;
- several speed modes.
- cumbersome design;
- brakes from a regular bicycle will not stop such a heavy structure;
- a miscalculation in the frame design, due to which the weld may fail.
What material is best to use when making a body for a velomobile?
Oh damn!
Not in the eyebrow, but in the eye! Interesting topic. I've been thinking about this for a year now. True, from time to time and without an effective exit. I ruled out the option of welding the frame myself - I can’t weld thin-walled pipes myself, but thick pipes - the apparatus would be heavy. You can develop a prefabricated structure with bolts. Here again is the question of weight, manufacturability, etc. A couple of months ago I had an extremely non-standard thought - you might think about using PPR pipes. The range of fittings for such pipes is wide enough to provide a variety of connections and transitions. The pipes are quite light. You can try to take into account the excessive flexibility of pipes (compared to steel pipes) by selecting a large pipe diameter, developing a design with short sections, and installing additional braces. Pipe welding is done with a soldering iron, the cost of which is 2-3 thousand rubles. You can also rent it for 100 rubles per day. The strength of the welded joint is comparable to the strength of the pipe itself. How's that for an idea? 07/04/2008 at 12:33
It’s not common, because these are water pipes, right?
07/04/2008 at 12:57
Yes exactly. Now this is one of the most popular options for water supply - cheap, technologically advanced, and built to last. But why not use it for other purposes?
07/04/2008 at 13:10
And what about flexibility? It’s very soft, I even worked with it, but I’m not sure that it won’t bend unless you put something inside, for example a composite.
07/04/2008 at 13:38
Yes, this is the main issue, but it seems to me that it is completely solvable. If you look, in any bicycle not a single pipe is used in the form of a cantilever mounting. All designs are made in the form of triangles. Those. not a single element bends independently. Let's say we take the front wheel fork. When made from PP pipes, what might it look like? We take a tee, to the left and right of it there are corners, down from the corners of the pipe, at the ends of the pipes there is a double-pass tee, or plugs and drilling through the pipe for bushings. We attach the wheel through this tee or bushings. As a result, we get a closed power triangle. The steering column will go up from the tee. If you take a pipe with a diameter of 30mm, its wall thickness is 4.4mm. With a wheel diameter of half a meter, the length of the pipe section will be 30 centimeters. I don’t think that with such a length of pipe anything (from real bicycle loads) is able to bend it by more than five to ten millimeters. It is clear that all this is fantasy, but it seems to me that the direction is quite real. In the design of a velomobile, PP pipes can even bring some innovation due to their flexibility. This flexibility can be used to easily suspend the seat, wheels
07/04/2008 at 14:04
2pebar Are you looking for an alternative to titanium and aluminum or are you just asking?
07/04/2008 at 21:20
The task is to make a lightweight frame and body, but what material to use and where to get it: that’s the question.
07/04/2008 at 21:34
If this is really a velomobile, then you immediately need to think about a solid-supporting body.
07/04/2008 at 21:36
Can you give me more details from this place? I heard that airplanes are made from one piece, but I heard the opposite about bicycles. Thank you.
07/04/2008 at 22:34
2pebar What exactly are you interested in? Take the body of a car, where is the frame? Well, sometimes the sub-engine and rear suspension - but that’s different. First create a concept for a velomobile and all that.
07/04/2008 at 23:33
thank you, the concept is moving around the city and transporting goods from 25 kg and above, there is no experience and the consequence is a sea of assumptions)
07/04/2008 at 23:54
2pebar Getting around the city is a destination. Should there be a body or just a three-wheeled carriage? In principle, in the city a fairing may not be needed, but since a mobile should differ in some way from a bicycle, then probably weather protection and a fairing in one bottle - this is a velomobile. Actually, by and large, a velomobile is a car with only a pedal drive.
07/04/2008 at 23:58
pebar wrote: please tell me what material is best to use when making a body for a vehicle like a velomobile (thanks in advance)
There are a lot of options, if only the body and not the supporting structure. Fiberglass with epoxy - the body will also be a load-bearing structure, strength and rigidity are at the level of high-carbon steels (with sufficient thickness - 5 mm or more). The technology has been proven for decades. Complete freedom for design imagination. There are only two disadvantages - epoxy is expensive and the hardener is toxic.
An alternative option is fiberglass or regular canvas. The binder is urethane floor varnish. It is cheaper and not much inferior to epoxy in terms of strength compared to fiberglass, although the hardener included in the varnish is also not harmless.
If you don’t want to wait, use sheet polymethylacrylate, like plexiglas, like plexiglass. There is less freedom for imagination (bending large sheets is EXACTLY very difficult (from experience, the yield for a 2mm 1mx1m sheet is one out of 7), although you can simply bend it even with your hands in boiling water, it can also be cut and glued. The main advantage is transparent. There are only 2 disadvantages - not durable against abrasives (scratches) and bending loads (pricks), and in addition very expensive (about 2500 rubles for a sheet of 2 x 1.4 m 2.5 mm)
Manufacturing instructions
Master class on how to make a tricycle step by step:
- The donor model is placed on the platform with the steering wheel down.
- Remove the wheels, remove rust and other defects in visible places.
- Saw off the rear part of the unit with a grinder.
- The differential is fixed using metal clamps.
- The bridge is installed at 90 degrees using the above method.
- The remaining auxiliary elements are secured by welding.
- The wings are mounted, between which a basket of suitable size is welded.
- Install two rear rims in parallel.
- The fasteners of the clamps are tightened.
- One is made from two circuits and then installed.
- Equip the brake unit using disc parts and a switch on the steering wheel.
- They check the build quality and paint the model.
Homemade tricycles may vary in size depending on the user's creative ideas. A proven, fast and reliable method in terms of technology is the use of a UK-65 type rear differential axle. When creating a drawing of a homemade tricycle, you should take into account the costs of consumables.
When creating the modification in question, you will need to take into account the costs of purchasing the necessary parts yourself. In addition to the bridge, you will need a chain, a speed switch, wheels, and a set of sprockets. Also, we must not forget about lubricating and painting sanded and welded surfaces.
Order or production
A small plan for those who decided to make a 4-wheeled bike with their own hands.
- Let's start with the frame. We fully design it in a 3D editor or by hand, so that the manufacturers understand what and how to cut and weld. You should take into account the height of the rider, the required space, and the size of the wheels that you plan to use. Don’t forget about the mass and resistance of materials - the bike will be heavy, and the loads on it will be impressive.
- After the drawing, we go to the metalworking facility to make the frame. If you have the opportunity to do everything yourself, that’s great, but usually the finished drawing with explanations is given to a specialized company or a familiar craftsman.
- On the finished frame, all that remains is to assemble the chassis - first we mount the axle shafts for the wheels.
- Then we install the rear sprocket block, pedal assembly and tension the chain.
- We install the brake system.
- We install.
- We add a seat, steering wheel, grips and protection elements.
Of course, all the nuances can be learned only with practice, but the general “to-do list” will remain unchanged. We hope that making a bike with four wheels with your own hands will be successful.
Making a velomobile at home
Nowadays, everything can be bought, and a four-wheel velomobile is no exception. But its cost is more than high, and it does not always reflect your needs or desires. Therefore, you can try to make such an interesting and not so familiar vehicle yourself.
Top articles: Batteries for bicycles
Drawing of a simple velomobile here
The algorithm of actions is as follows.
Manufacturing should begin with the frame - this is the basis of the entire structure. It is better to create it in a 3D editor, but you can do everything by hand. The main thing is to think through everything to the smallest detail so that you know exactly where to cut and where to weld. When designing the frame and all other structural elements, important points should be taken into account: the height of the rider, the required space, the size of the wheels
It is also important to consider the mass and resistance of the materials from which this specimen will be made.
What the velomobile will be like depends on you.
Chain tension level
The velomobile is ready to use
As you can see, making a velomobile with your own hands using drawings for a model with four wheels is not so difficult. So, with a little effort and imagination, you can build a faithful assistant not only for the child, but for all family members. The main thing is not to forget that you can do anything. You will find more inspiration and practical advice in the video.
The purpose of the velomobile
Many people think that they do not have sufficient knowledge and skills, and this can prevent the creation of not only an adult, but also a children’s movable device. However, as practice shows, creating a children's velomobile is as easy as creating an adult one, especially if you take as a basis a standard drawing of such a vehicle, not complicated by modernizations and modifications. Having created a velomobile with his own hands, the owner of this device will acquire a completely different unit, which has practically nothing in common with an ordinary bicycle.
First of all, it is worth noting the comfortable ride on the velomobile, since the classic seat can be replaced with a more comfortable soft chair. At the same time, the driver of the velomobile will be able to easily strain many muscles of the lower body. In other words, during a walk a person will receive not only moral pleasure, he will be able to pump up his legs, hips and abs without any effort. Proper riding allows you to activate other muscle groups, as a result of which a person will look beautiful.
An adult velomobile, which can be equipped with two or four seats, will please teenagers and adults who love speed. Therefore, in order not to suddenly encounter a number of unforeseen situations, you should create a velomobile with your own hands strictly according to the instructions, correctly installing the structural parts.
A velomobile can become an integral part of the walks of country residents, who will be able to ride long distances, enjoying the surrounding nature and enjoying the fresh air, not only on a warm summer evening, but also on cooler spring and autumn days.
In fact, a velomobile gives great joy from riding, it has many advantages, therefore, when planning to create such a device yourself, you need to build on your personal habits, lifestyle and preferences.
Adult four wheel bike
A Swiss engineer named Mikael Kjellman wanted a bike that was weatherproof and also more comfortable than regular adult bikes.
So he created his four-wheeled prototype, the PodRide, a fun and practical car-bike. When you see this invention in action, we guarantee you will be amazed.
The device has four wheels, a short turning radius and the ability to go up to 24 kilometers per hour.
This PodRide is a combination of a small adult car and a bicycle, it is tiny (weighs less than 70kg) and is the same height as a car. There's even storage space and the ability to hitch a trailer in the back.
The PodRide is so narrow that it can fit on bike paths, and in Switzerland it is classified as an e-bike (meaning you don't need any special license or insurance).
On warm sunny days, the windshield and sides are open for easy use. A vehicle with comfortable seats for the driver.
Since Mikael uploaded the video to YouTube in April, he's had plenty of comments from strangers saying they wouldn't hesitate to buy one for themselves.
Let's leave this video:
DIY velomobile made from a bicycle. Step-by-step instruction
Thanks to modern technology, there are many options on the market. Bicycles, velomobiles, motorcycles and many other vehicles for entertainment and sports. Is there an old bicycle in the storage room or attic of the cottage that no one uses anymore?
A four-wheeled bicycle is not only a means of teaching children to ride, but also a full-fledged vehicle for adults. Let's find out a little more about him.
Four-wheeled versions appeared almost immediately after the invention of the bicycle. There are known drawings from the mid-19th century, where engineers tried to combine carriage technologies with pedal drive. It is interesting to note that half a century later, the first cars also had their own “bicycle” versions, with one or two pairs of pedals.
Later, in Soviet times, the features of mass production excluded various non-standard layouts of bikes, and for us the hero of the article, along with a tricycle, became exclusively a bike for small children and students.
Homemade electric car from PVC pipes: fast, cheap, works
Homemade vehicles have always excited the minds of craftsmen, but with the advent of modern materials and technologies, the variability of designs has only increased. It turns out that you can assemble a fully functional electric kart from PVC pipes, plywood and a few metal parts.
Vasily Parfenov editing
Click and watch
ADVERTISING – CONTINUED BELOW
To create this funny car you will need 4 wheels, a pair of electric motors and several PVC pipes and tees to connect them - the exact number of parts is presented at the very beginning of the video. It should be noted that you may not need a soldering iron for pipes: a hammer and, just in case, glue are enough. The machine frame does not have to be sealed.
A regular motorcycle battery is sufficient to power the motors, but a car battery can also be used. How to do this is clearly shown in the video. The design is lightweight and easy to assemble and is perfect for traveling in closed areas. But don’t even think about taking this on the roads!
Standard velomobile option
Velomobiles, like other types of entertainment and sports transport, can be different in their structure and capabilities. But, despite this, there is still a standard for the external and functional content of this type of transport.
A velomobile, in its usual form, includes:
- A three-wheel design in which the front wheel is slightly larger than the two rear wheels;
- Steering wheel;
- Front frame;
- Connecting elements;
- Sitting.
Naturally, standardity is an opportunity to add color and add notes. After all, if a person converting an ordinary bicycle into a velomobile has taken on such an interesting mission, it means that his imagination is sufficiently developed and will help him make a special design.
A velomobile is not only a means of transportation and a way to pass the time profitably, it is also an opportunity to stand out from the crowd and show that the owner of the vehicle is special. Thanks to creative and unusual solutions, be it decor or a structural part of a velomobile, every craftsman can make the fruit of his efforts especially interesting.
Advantages and disadvantages
Four-wheeled bicycles are not so popular that it’s so easy to visit their owners and ask about the pros and cons of the design. Let's look at the key factors that influence the transition to a “four-wheeled friend.” Pros:
- The most stability of any bike currently available.
- Convenient location of the rider.
- Large load capacity and loading volume.
- Interesting and unusual design.
Best articles: How can you lubricate a bicycle chain?
The disadvantages are also obvious:
- Complexity of design - a velomobile is difficult to assemble on your own and not easy to repair.
- Less reliability - 4 wheels, a complex drive mechanism, additional steering elements, many welded joints - units that can break and are subject to increased load much more than in a regular bike. Accordingly, the chance of failure is much higher.
- High price - few people will decide to buy a ready-made trike or velomobile - the cost is high, and there is practically no mass production. Do-it-yourself manufacturing will spend a lot of time and money on non-standard custom parts.
- Dimensions - it is difficult to put such a bike on a balcony or carry it up a mountain - you will have to work with the transport as with a full-fledged car.
How to make a velomobile. Step-by-step instruction
In order to get started, you need to stock up on some available supplies and tools.
Would need:
- Bulgarian;
- Soldering iron;
- Fastening elements (bolts, screws, nuts);
- Hammer;
- Pliers;
- Pipes of different diameters;
- The material with which the finished product is planned to be upholstered.
- In general, a little patience, and the dream will come true.
Step 1: Front Wheel and Steering
In order to start the procedure, you must:
- Using a grinder, cut off all unnecessary elements from the front wheel;
- Leave a piece of frame in a V shape;
- Cut the protruding part of the frame approximately in the middle with a grinder and bend it towards the central part of the structure;
- The wheels are attached directly to the wheel in the middle;
- The bent frame must be firmly secured near the steering neck.
- When the steering is ready, you can proceed to the next steps of building a velomobile.
Step 2: Main Frame
To implement the main frame project, you will need separate pipes of different diameters or parts from a former bicycle.
All pipes must be cut using a grinder into pieces approximately 10 centimeters in size. You should cut at an angle of one hundred and twenty degrees so that the final shape of the structure is correct.
Step 3: Front Fork
When equipping the front fork, a steel element is welded onto the steering column, onto which the frame and moving parts of the velomobile will be attached.
Connectors are drilled into the pipes attached to the steering column, with the help of which the structure will fit tightly. Such structures should be placed on both sides of the wheel so that control is as coordinated and safe as possible.
Step 4: Rear Frame
To implement the manufacture of the rear frame you will need:
- Bulgarian;
- Welding device;
- Four pipes of the same size;
- Two pipes are several centimeters smaller than the main ones;
- Fasteners.
It is quite simple to implement this design. It is necessary to connect four structural elements together. Those parts that are shorter in length are soldered on both sides of the square frame structure, parallel to each other.
A protruding fastener with a connector in the middle is soldered to the sides. These fasteners are then attached to the rear wheels.
Step 5: Brakes
This part of the velomobile is perhaps one of the most significant. A velomobile without brakes is the same as a car or motorcycle without an adjustable device. In general, the detail is very important, so you need to approach the installation with full responsibility.
Two aluminum plates are soldered to the brake “horseshoe”, in which holes are pre-drilled. Once the structure is ready, it is attached to the front frame to the forks.
Step 6: Gear Shifter
Just like in a regular bicycle, speed transfers take place in a velomobile. Naturally, this design, due to its wide functional range, can be simple, but sometimes very functional. In order to make a mount for speed gears, you will need:
- two identical aluminum plates that are welded together and form a single structure;
- fastenings and elements such as bolts, nuts and holders are also required.
Step 7: Seat Adjustment
In order to organize a comfortable “seat”, you need to prepare:
- Square-shaped pieces of metal structures that will serve as the base;
- Bolts, cogs, nuts;
- Bulgarian;
- Drill;
- Chipboard base;
- Upholstery material (this can be thick fabric, leather, material for car seat upholstery).
Step 8: Test Drive
And now the long-awaited moment has come, the scheme has been completed in full, all the blanks have formed an independent, full-fledged product. Now it’s time to conduct a stress test on the vehicle, into the design of which a lot of soul and effort was put.
A test drive of a finished velomobile can be carried out in several ways:
Without leaving the place of manufacture, check all the moving parts of the velomobile to make sure they are in good condition; Drive the vehicle in a safe area, where nothing and no one will prevent you from fully experimenting with the capabilities of your “brainchild”. Entrust the vehicle inspection to professional testers who know exactly what to look for.
Children's velomobile.
At the end of the summer of 2016, my granddaughter turned three years old. I wanted to please her with a gift. Without hesitation, I decided to buy her a children's electric car. For me, the only question was the choice of color and “style” - retro, sports, jeep.....I turned to her parents for advice. For some reason they didn’t like the idea of an electric car; they didn’t object to a bicycle car or a velomobile.
The “trip” to the store where they sell children’s velomobiles was disappointing; I didn’t like any of them. Those that sellers recommended for the age of 2.5-5 years - on plastic wheels, without brakes, without “freewheeling”, and some with a bicycle handlebar - were not much different from a tricycle. Velomobiles for the 5-12 year old age group were noticeably larger, obviously not for a three-year-old child - I didn’t want to buy one “for growth.” Another thing I didn’t like is that there is practically no adjustment for the “pilot” (except for moving the seat). And both the steering and pedals are quite “stiff”.
Since my granddaughter lives in another city, and they were supposed to come to me in the fall, there was time, so I decided to make my granddaughter a velomobile.
Frame. Two longitudinal rectangular pipes with a cross section of 20*15mm and a wall thickness of 1mm. The remaining tubes have a diameter of 10, 12, 14mm. With a wall thickness of 0.8-1mm. The tubes used were seamless. Upper cross member of the front axle pipe from a bicycle frame with a diameter of 28mm
.
Front axle.
A la candle pendant. The lower arms are welded from 10mm tube. Lower ball joints (slightly modified) - used from the reaction rod of the front axle of a Chevrolet Aveo. The two upper “half-crossmembers” “telescope” into the upper crossmember of the frame, and after installing the camber they are fixed with coupling bolts.
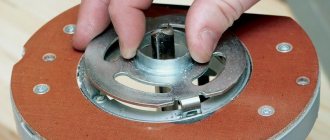
Steering gearbox.
Gear-type, gears are used from the Sh57 moped engine. The “extra” from the driven gear has been cut off, leaving only the working sector. The overall steering ratio is chosen to be small - turning the steering wheel 180 degrees results in a 30-degree wheel turn. The steering gearbox is attached to the upper cross member of the frame with clamps, which allows you to change the angle of the steering column, and the “reach” of the steering wheel can also be adjusted.
Transmission.
A cut-off part of a bicycle ratchet is attached to the pedal carriage. It is cut so that there remains a part on which stars of larger diameter are assembled. The rear axle drive uses a “ratchet”, on which only three small-diameter sprockets are left. The idea was to make three speeds, gear ratios could be approximately 1:1, 1:1.5, 1:2. But as “test runs” showed in first gear (1:1), a child can easily accelerate to a speed of 5 km/h on a good road; accordingly, in third gear (1:2) he can accelerate to a speed of 10 km/h, which is for the park , in my opinion there is a lot of yard, so only first gear is left. The chain is tensioned by turning a plastic roller; the hole in the roller is eccentric.
The torque from the ratchet is transmitted through the splines (designed for removing the ratchet) to the shaft, rubber coupling, and wheel axle.
Band brake. The brake is manual; to brake, you need to press the lever away from you.
The velomobile was tested last fall. This year the little things were completed, painted and will soon be sent to the owner.
PS velomobile length - 980mm
Width - 620mm
Weight - 13.5 kg
Wheels from a baby stroller with a diameter of 320mm.
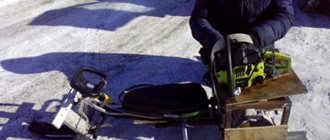
Video of one of the first “races”:
DIY tricycle
Measurements and calculations
Drawing with calculations for designing a cargo bike
First, you need to calculate the details and take measurements that will be needed for the design.
- A prerequisite is sustainability. The bicycle should not fall or fall to one side during sharp turns of the steering wheel.
- The height of the bike and seat should be calculated in such a way that it is comfortable for you to get on and off.
- It is better to purchase high-quality and new pedals and wheels. Be sure to take care of the bell and brakes.
- Everything should work quietly and smoothly. Squeaks are extremely undesirable; you need to think about high-quality lubrication of parts at the first stage.
- Strengthen the frame. Using reinforcement and profiles, strengthen the metal frame of the frame, as the load on it will increase significantly.
To make a cargo tricycle with your own hands, we will need an old bicycle, a metal profile, a pair of wheels and, if desired, a differential. Let's cut the fork a little lower than the seat (20 centimeters) and weld a pre-made frame from metal profiles. We remember the permissible width so that we don’t have problems with the traffic police later.
We fasten the wheels with an axle and place a sprocket in the center of the axle.
Factory bridge installation
It's great if your cargo bike comes with a factory differential, then assembly won't be a problem at all. All you need to do is remove all the rear parts (brakes, chain, rack, etc.).
- The differential (eg UK6S) is installed in the factory rear wheel seat. We bring the axle stops to the rear of the frame, and install the axle in the lugs and tighten them well.
- After mounting the rear axle, be sure to align it at a right angle to the frame. The rear axle should be parallel to the front.
- Now we need a chain. It will be much longer than on standard models. To do this, we buy two chains and adjust them to the length we need.
- Now all that remains is to configure the gear selector.
- Disc brakes are installed on the rear axle. Congratulations! Your homemade cargo tricycle is ready for use.
The design of the cart, its height, canopy, and mesh sides are limited only by your imagination. There are many models with removable top parts, which makes the cart even more functional. Such three-wheeled homemade products in the “vintage” style can often be found in cafes and restaurants.
What's next?
To make a tandem bicycle (photos of examples are in our article), you need to do a few more operations. So:
- We are approaching the stage of chain extension. The front chain will have to be extended just enough to reach the rear wheel. The easiest way to do this is with a special chain squeezer. If such a special tool is not available, then purchase two links to connect in the chain and cut off the additional required length with a hacksaw. The entire chain should have no more than 37 links. Less is possible, but not more.
- In order for the frame of the assembled tandem bicycle to take the shape necessary for riding, it is enough, after the entire assembly, to put a load on it by twisting the chain on various sprockets.
- Let's synchronize the pedals with each other. This is necessary to avoid kicking each other while riding, as well as to maintain balance and pass the track on turns and hills.
- We attach the brake at the rear with a long cable.
- If desired, you can install a second steering wheel. However, it should be noted that this will interfere with maintaining balance.
Design Features
Some components are completely indistinguishable from other adult bikes. For example, the wheels and braking system - the maximum that changes is the number of driven calipers or frames from one cable - there are two of them. Most often, the brakes remain only on the rear wheels and are no different either.
The drive rarely changes, these are pedals and a chain, often one, but sometimes two speed switches. The force is applied to the rear wheel shaft, which is already a difference.
The frame and steering wheel are seriously changing. It is clear that the frame is made for a specific model, taking into account many parameters. Some homemade products consist of two ordinary bicycle frames, welded by intersecting pipes, on which a seat is attached and the transmission is mounted.
Very often a bicycle with 4 wheels is a two-seater. The width of the intersecting pipes is sufficient to accommodate two chairs at once. In this case, the drive mechanism can be different - either a common shaft with two pedal blocks, then united by one chain, or separate drives for each rider. There are even simpler mechanisms - when only one person turns the pedals, and the other simply remains a passenger.
Characteristic advantages of the model
Almost all the advantages that a tandem bicycle has have nothing to do with the specifics of cycling technology. Its main function is to develop a “sense of community” and to unite for a team trip. When multiple people must operate a single device in concert, they learn to make trade-offs. Among other technical features of the tandem it is worth noting:
- lack of fatigue. The fact is that for the same distance, walking on a tandem, a person will need to put in half as much effort. Pair control saves energy.
- high speed. A tandem bicycle can move almost twice as fast as a classic device for one cyclist, reaching speeds of up to 30–35 km/h.
- fast descent. When going down a hill or downhill, a tandem bicycle is able to reach higher speeds, despite the fact that the torque remains the same, the unit moves forward more strongly due to twice the weight.
- changing places of cyclists. If the person behind the wheel feels tired, he can change places with the second passenger. Sitting on the secondary seat, you can ride with your eyes closed or with your hands free.
The design feature of a tandem bicycle is such that the frame and wheels can withstand much greater static loads than a standard single-seat bicycle. This feature ensures the strength of the entire unit, which can last a very long time if the owner only rides on a flat road surface. A tandem bicycle has reinforced tires and tubes, more powerful rims, thicker spokes, a strong frame and an extended chain.
Benefits of using a tricycle for adults
Most often, this type of transport is used for elderly people or for those who cannot properly maintain their balance while driving.
The tricycle has the following advantages:
- this type of device is suitable for absolutely any person, regardless of age;
- the cost of the device is affordable;
- each person can independently make this type of device, without the need to spend a large amount of money or have special skills;
- the bike is stable while riding, regardless of the type of road;
- can be used for transporting goods;
- considered safer than a two-wheeled device;
- The low frame is suitable for people of all ages.
Devices can be of different models. Some models have special passenger seats and trunks for carrying cargo.
Use of velomobiles
Bicycle structures with 4 wheels have a separate name - velomobile. Who might need such an exotic thing? Let's take a closer look:
- Elderly people - the velomobile does not require maintaining balance, it can stop at any time, which, without a doubt, will be very popular with the elderly and the sick.
- Couples – if a tandem can be called “sports equipment”, then on four wheels and with two chairs you can relax, as many of us relax by renting a pedal catamaran at sea.
- Adults with children - you can install one or two child seats, and transporting children will be much safer.
- Athletes - Several manufacturers are promoting their models for cross-country and trials. The velomobile is stable and has good traction on the softest soil.
- Travelers - they often choose trikes (large three-wheeled bicycles), but there are also good homemade options with the driver reclining. Over long distances, the usual bike layout is far from ideal, but the free set of modules, large cargo volume and simply sufficient space of a four-wheel design are an ideal choice.
As we can see, despite the apparent exoticism, this type of bicycle is not only worthy of the right to exist, but can also seriously interest certain classes of riders.