You need to know this
Firstly, this is a simplified list of requirements of GOST 37.001.220-80, given below:
- Permitted trailer weight up to:
- 1.8 t;
- Not heavier than the weight of the tug or half of it when the trailer hitch is without brakes;
- Allowed length no more than:
- 8 m;
- Not one and a half times longer than the car;
- Allowed width no more than:
- 230 cm;
- No wider than the car by 20 cm on both sides;
- Permitted height no more than:
- 3m;
- Not 1.8 times higher than the trailer wheel track;
- The center of gravity with a load is not higher than the track width multiplied by 0.725;
- Ground clearance is not less than the car's ground clearance;
- A homemade trailer for a passenger car can only be single-axle. (A twin axle is also a single-axle design, although it is called a two-axle design among car enthusiasts). The distance between the axes of the paired structure is up to 1 m;
- The trailer must have a load on each side of no more than 0.55% of its own weight;
- The load on the hitch is 25-100 kgf.
- The coupling device must be equipped with:
- A permanent cable or chain in case of sudden disconnection of the trailer hitch from the car while driving;
- Homemade anti-rollbacks (shoes);
- Jacking platform;
- Removable lever brake;
- Mudguards, fenders;
- Signboard for the sign;
- Stable support;
- A spare wheel similar to the car;
- Lighting fixtures, wiring and plug.
Requirements for a car trailer according to GOST
The first thing a person who has decided to independently manufacture a car trailer needs to know is that it, like any vehicle, has certain requirements. In this case, all requirements are described in detail in GOST 37.001.220-80, which is called “Trailers for passenger cars.” In order not to burden car enthusiasts with reading the primary source, it is worth making a selection of relevant information specifically on the issue under discussion.
So, a car trailer must meet the following requirements:
- The weight of a passenger car trailer should not exceed 1.8 tons. However, it should also not exceed half the weight of the towing vehicle.
- The static load indicator on the central part of the ball joint of the coupling device should be from 25 KGS to 100 KGS.
- The total length of the trailer cannot exceed eight meters, the width cannot be more than two hundred and thirty centimeters, and the height limit is three meters.
- The ground clearance of the trailer should not be less than the vehicle towing it.
- For a passenger car trailer, it is intended to use one axle. A possible option is two parallel axes located at a distance of no more than one meter from each other.
- For insurance purposes, the towing coupling device is equipped with two non-removable sections of cable or chain, which insure the structure if the coupling becomes disconnected as a result of a hinge failure.
- The mandatory equipment of the trailer being used must include wheel chocks. It is stipulated that they do not have to be factory-made.
- The design must include fenders and mudguards if body parts do not perform this function.
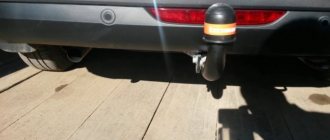
- The towbar must be of factory origin and have an appropriate certificate.
- Fastenings must be provided to secure the license plate.
- To connect to the vehicle's on-board network, a cable with a plug must be provided; the electrical circuit diagram is regulated by GOST 9209-76.
Factory sides
The ready-made solution in the form of extending the sides of a passenger car trailer differs for the models for which it is provided, as well as in height, material and sheet thickness. The competitive qualities of this option over homemade products are:
- The quality of the material and design in general.
- Optimality and compliance of sizes.
- Warranty period from the supplier or manufacturer.
- Easy to install and dismantle.
- Attractive view.
- Compliance with installed trailer models.
- No need for long-term work.
Video instructions for installing additional sides on the “Krepysh” trailer
How to increase the sides of a passenger trailer, using what materials, is up to you. The main thing is to accurately assess capabilities, cost, time and quality. The rest depends on the caravan model. However, before starting any modifications, it is important to consult with a professional or look up recommendations from knowledgeable drivers on the Internet.
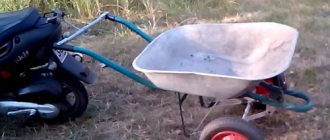
A trailer is a vehicle that does not have an engine installed. It is designed to travel in conjunction with a car. Despite the apparent complexity of such a device for transporting goods, it is not difficult to make a trailer with your own hands. For successful work, you need to choose the right parts and materials, make sketches or drawings.
Possible improvements
I want to say right away that it’s impossible to consider literally all tuning options, even with a great desire. There are too many of them to fit into one material or even several articles.
If you're really interested in upgrading your caravan, you need to start with the basics. Namely, from the idea. Since you are not happy with the design in its current form and something needs to be changed, you need to understand what exactly is wrong and what you should strive for. And here the first difficulty arises, since there are many ideas, but many motorists simply do not have a clear definition. You have to go through different options, look for compromises and try to calm your ardor in impulses to do something that can later make your hair stand on end.
Let's take a regular flatbed trailer as a basis. After all, most often they are the ones who undergo tuning and all sorts of modifications.
What exactly the model or brand is doesn’t really matter. There is just a trailer from which you need to make something.
There are several options for what you can turn into an onboard vehicle for a passenger car. I advise you to decide right away, so that later you don’t have to stop halfway, change your mind and start implementing a completely different idea.
Transport trailers
The widespread use of semi-trailers and trailers is due to the additional convenience when transporting heavy loads. The vehicle bears only part of the load, which extends its service life. When unloading, you can save valuable time by unhooking the cart and leaving it in place, and unloading it at a convenient time. This option is convenient and is used for delivering goods between workshops of the same enterprise located at a certain distance.
All towed devices are divided into two groups:
- Special-purpose trailers allow you to take into account the needs of working with various loads, but there are quite a few universal vehicles for such work. Common types include heavy-duty semi-trailers, log trucks, panel trucks, cement trucks and other types of trailed equipment.
- General transport equipment includes flatbed, tilt and other trailers of various sizes designed for transporting heavy loads of any kind.
Application area
Let's imagine what modernized flatbed trailers that have gone through tuning stages can be used for.
- For relax. Even an on-board model can become a full-fledged mobile place for spending the night, going out into nature, barbecuing, for tourist trips and other delights of active recreation;
- For fishing and hunting. A common tuning option aimed at increasing functionality and load capacity. Also, often such tuning provides the ability to use a trailer as a sleeping place;
- For a snowmobile. The presence of an on-board model does not interfere with making it an excellent vehicle for transporting snowmobiles;
- For watercraft. A current and widespread modification option, in which the onboard is made into something like a boat trailer. Moreover, without compromising the possibilities of its use as a simple on-board model;
- For off-road use. Tuning aims to improve the vehicle's cross-country ability, which will require a number of measures.
Let's not forget about purely technical improvements, where the owner's main goal is to improve the basic characteristics and expand the capabilities of the trailed vehicle.
I propose to consider several tuning options separately and find out what you can do with your own hands.
Installation of awning
The simplest but most effective tuning. It is not only effective, but also spectacular. With the help of an awning, which is not included in the original package, you can expand the capabilities of the vehicle, increase its loading area, and use the trailer for larger purposes.
In terms of tuning of this kind, there are a couple of current options:
- Installation of a tarpaulin awning. The classic version requires preliminary installation of the frame under the tarpaulin and its subsequent tensioning. An outdated method of improvement that is losing its relevance;
- Using the lid. A plastic lid is a great alternative. A more reliable, durable, outwardly attractive option. No frame needed. But you will need to provide fasteners to secure the cover to the sides.
If you are willing to spend a lot of effort and money, then plastic will be the best solution.
The awning is too banal and has much less benefit than a durable plastic cover, complemented by security locks.
DIY trailer
Each shield should be secured with at least 4 bolts.
Metal structure
Extending the sides of a passenger trailer with welded metal panels is a more expensive method. However, such structures have a significantly greater safety margin. To implement the idea, you will need sheet metal, corners and a profile pipe. Corners are welded at the corners of the trailer, to which the profile sheathing is attached. Precisely cut to size sheets of metal are screwed to the assembled frame using metal self-tapping screws.
Read more: The appellate court issued a ruling
Purchase of factory structures
Specialized stores offer factory extensions for sale. The height of such structures is varied and can reach 50 centimeters. Advantages of factory extension sides:
- Fully galvanized construction.
- Quick installation/dismantling of sides.
- Extension sides look aesthetically attractive.
If you have any questions, you can ask our specialists by phone. They know exactly how to build up the sides of a passenger trailer with their own hands!
Choosing a method of extension
More often than not, the carrying capacity of passenger car trailers is designed for a larger volume of cargo than can be accommodated with a standard on-board configuration. Therefore, expanding the side of a trailer is a process that most owners of road trains face. Moreover, when the walls of a trailer vehicle increase by forty centimeters, the capacity of the body increases by at least seventy percent. This significantly increases the operational capabilities of this type of device.
If you look at the situation from a practical point of view, then you should think about extending the sides of a passenger trailer even before purchasing it. Even if the selected instance does not include this feature. In this case, you will have to do the modification yourself.
Owners of road trains prefer three options for increasing the height of the walls of a passenger trailer:
With a more detailed examination of these options, the description of the basic qualities is as follows.
Self-assembly of axles for a passenger car trailer
An ordinary car is poorly suited for transporting heavy and bulky cargo, so there is often a need to use a trailer. Buying such a device allows you to solve many problems, but for craftsmen, a much more preferable option is to assemble the trailer on your own. The cost of a homemade trailer can be several times less than the factory one. Today we will talk about one of the important components of the design of a trailer for a passenger car - its axle.
Wooden sides
The process of building up the sides of a passenger trailer using wood is as follows:
- Buy forty or fifty boards with antiseptic treatment.
- Drill several holes in the corner for subsequent fixation of the boards, file it and weld it to the standard structure.
- Adjust the board to the distance between the bolts and drill at the required points to connect to the corner.
- Connect the boards to the corners using bolts with a diameter of about five millimeters. Better is more.
The board should be cut after welding the corners, so as not to make mistakes with the measurements. It is also important to do processing in advance.
Body and frame
The body and all other structural elements are made of profile pipes, which were purchased at the nearest construction market. First, I made two side sides of the body from a pipe with a cross-section of 20x30 mm and a wall thickness of 2 mm.
Drawing of the side and rear side of the trailer
Two pipes 120 cm long and two pipes 31 cm long. I cut the ends of the pipes with a grinder, as shown in the diagram above, at 45 degrees, and placing them on a sheet of furniture chipboard, I made tack welds (with a triple electrode) in several places. I checked the squareness of the connection with a regular construction square. After checking their straightness, I finally welded the resulting workpieces, and to prevent them from moving during the welding process, I pressed them with clamps.
I sanded the welding seams with the same grinder. For convenience, I used an angle grinder with a disk with a diameter of 125mm.
Then from the same pipe (20x30mm) I cut five pieces exactly 1 meter long. These are blanks for the bottom and front side of the cart. I welded them between the two side boards, first also lightly gripping them with welding and pressing them against the chipboard sheet with clamps. Right angles were also controlled with the same construction square. I placed the two central pipes, indicated in the figure by red arrows under numbers 3 and 4, not vertically like the others, but horizontally and made spacers (1 and 2) and aligned them with the lower plane of the bottom. I also made spacers from the same pipes on the side and front sides.
To secure the bottom, I welded it in the corners of the body and in the center of the pipe cuttings, they can be seen in the photo. The rear board was made similarly to the side boards from the same 20x30mm pipes, only its dimensions were taken locally, it turned out to be 990x270mm.
The rear side of the trailer is attached to ordinary door hinges and closed with latches; for safety, reflective stickers are glued to it, which are clearly visible at night. For convenience, the side is made removable, allowing you to quickly unload the cargo being transported.
On the side and front sides I welded pieces of 25x40mm pipe for the racks of additional wooden sides (see photo below).
I did not increase the length of the body, since when it is raised the angle will be too small and the contents will not fall out of it. The body frame is ready, let's move on to the trailer frame.
The beam was made from prof. pipes 50x50mm 1180mm long, welding pieces of the same pipe 155mm long at 45 degrees, as shown in the figure. Then I welded two pieces of 32 mm angle on the sides, parallel to the plane of the cut pipes. The trailer axles are attached to these corners using bolts.
This design is due to the fact that turning work is not available to me. If you have a lathe, you can significantly simplify the design by turning out the necessary blanks for attaching the axles and simply welding them to the trailer beam.
Next I made the trailer drawbar. It requires two profile pipes 25x50mm and 1.85 meters long each. I welded these pipes to the beam, creating a triangular structure; to strengthen it, I welded 4mm thick metal gussets in the corners next to the beam, and welded an 8mm thick plate in front under the towbar. In order for the trailer to become a dump trailer, store-bought door hinges were welded to the beam and bottom struts (they are shown in the photo by arrows 1 and 2).
The body is secured with a regular door latch welded to the spacer between the drawbar pipes (see photo below).
The latch is inserted into a piece of pipe and welded, so it holds quite firmly. It opens with a lever on the tool box, connected to the latch with ordinary wire.
General characteristics of semi-trailer sides
A flatbed semitrailer is a mechanism that is used to transport small amounts of loose cargo. These can be vegetables, fruits, building materials. Frequently, carriers choose such a spare part as a side in order to provide the structure with greater rigidity than in a curtain-sided semi-trailer, and there is no need to secure pallets with cargo.
Material
The manufacture of sides for semi-trailers is carried out from different materials. If these are branded systems from brands such as Kegel, Schmitz, Krona, etc., then an aluminum profile is used for them.
But the price of such trailers is quite high, so many people prefer homemade products, such as converted tractor sides (made of wood, raw steel, hard plastic, etc.).
It is much cheaper than aluminum. But the reliability and comfort when using such products is significantly lower.
Specifications
The sides are made so that they can withstand mechanical loads and open easily. They are produced stacked or removable and folding. Some are remote controlled, but most sides must be opened manually. As for the height, it can be between 32 and 102 cm (depending on the type of side and the material from which it is made).
For your information! The highest sides are usually aluminum.
Methods of fastening the awning structure
The material for the trailer awning provides several mounting options. The car owner can resort to the following methods:
- attach the manufactured structure to the main body using metal rings;
- create eyelets by placing them along the edges of the fabric;
- pull a cable or rope through the rings located above the general structure.
The lugs must be removed by 200 mm, in addition, all rings must be equipped with fasteners.
Cable and rope can be used as a fastening element. Regardless of the method of fastening, the retaining element must consist of a single piece, the edges of which are reinforced with metal tips. When securing the awning, the retaining device must pass through the rings and be tightly stretched.
Do-it-yourself trailer making technology
The first step will be to assemble the base, that is, the frame of the future trailer. It is its strength that will determine the service life and reliability of the structure. After welding the frame, it is necessary to create a connection unit between the trailer and the car and a special coupling for fastening.
Next comes the most crucial moment, namely the assembly of the axle. After this, all that remains is to add the flooring, side walls and finishing work, and you can move on to checking your homemade car trailer. If you cannot create such a structure with your own hands, then you can always contact any workshop where they will make a similar structure for you in the shortest possible time. The main advantage of such a trailer is that it is universal and can be used for any car.
Hi all! When buying a trailer, many people initially think about the prospects for its use. Others only realize after purchase that their vehicle is missing something and needs modernization and improvement.
Therefore, it is quite natural that today we will talk about the sides of a passenger trailer. We sell trailers without sides. They are called platforms. Some people need to increase or change only the rear side, others the front and sides.
The choice is made individually. Everything takes into account the volume of cargo that will be transported on the vehicle. If you increase the sides, this will significantly increase the capabilities of the trailer. Although it will not be possible to increase the carrying capacity by increasing the capacity, you will be able to transport larger and larger items, which was impossible with standard equipment.
Read more: Can a founder sign an agreement instead of a director?
What set of tools and materials will you need?
If this is your first time making a trailer with your own hands, then you will need the appropriate drawings, and such important documentation should be drawn up not by some “garage Kulibin” on his knees, but by a qualified craftsman who knows a lot about this.
The drawings must indicate clear standards and requirements that comply with GOST - 37.001.220-80, which lists the basic requirements relating to the production of trailers: layout, dimensions, etc.
This is a fairly important component of further work, since at the registration stage you may have serious problems, including complete refusal to register such a trailer for a passenger car, and as a result, lost time, effort and money.
You can find a lot of useful information about assembling a car trailer on the Internet, but let’s still look in this article at how to assemble a car trailer weighing up to 750 kg yourself. The main advantage is that to operate such vehicles you do not need a special category on your driver’s license.
So, you decided to make a homemade trailer and found the necessary drawings. So now you can start preparing the materials:
- In order to weld the frame and the trailer assembly you will need a square pipe. It is recommended to choose material with a cross-section of 40×40 mm or more. You must understand that a larger and heavier pipe will increase the overall weight of the structure, so you don’t need to go too far. The pipe can be easily replaced with a channel with a cross section of 25x50 mm.
The length is easily determined using the drawing; - For the sides, it is recommended to use a metal sheet of 0.6 mm or more. Using the drawing, determine how many sheets you will need. To do this, multiply the length and height of the sides;
- For the bottom, solid metal sheets or high-quality, durable plastic are most often used. Polycarbonate plywood is also sometimes used. By measuring the bottom area, you will find out how much of this material you need;
- A bridge from old SZD motorized strollers is often used as a running gear, but you can make it yourself;
- Wheels are the simplest thing on a trailer. If you decide to use the chassis from an SZD motorized stroller, then feel free to leave the original wheels, as they are quite reliable and not expensive. As for the other chassis, which, for example, you made yourself, choose the wheels individually;
- Braking system. For these purposes, you can use the native SZD motorized wheelchair system;
- Mechanism for coupling a trailer for a passenger car with a car.
Simply put, a tow bar; - Electrical elements, such as dimensions, turn signals, brake lights, as well as wiring for connecting them;
- The material that will be used to cover the trailer. Most often, tarpaulin or other high-quality, water-resistant fabric, as well as elements for fastening it, are used for this;
- Hand tools such as jigsaw, screwdriver and grinder.
There are often situations when a person believes that he can independently calculate the material and take into account other important nuances without special drawings, but it is still strongly recommended that such a drawing be present.
This way you will ensure uninterrupted work and avoid many problems that may arise during work. You will also save your nerves and money from unexpected costs, which can be quite a lot.
When you start work, only then will you understand how important such drawings are in the work of creating a trailer for a car. Moreover, you will clearly understand what exactly you need and you will not need to draw abstract images in your head, which in the end may turn out to be incorrect.
The situation would be different if there was no Internet and such drawings would be difficult to find, but fortunately finding such information today will not be a problem.
DIY making
In order to make a caravan yourself, you need to take care of purchasing some materials and tools. In order not to look for the necessary devices during work, they are purchased in advance. List of tools and materials:
Steel channel for frame. You should select or cut pieces that have a cross-section of 40x25 mm. You can use a square pipe with a transverse dimension of 40x40 mm. The cuts are determined by the master based on size considerations.- Sheet steel from which the sides of the trailer will be made. Its thickness should not be less than 1 mm. The dimensions of the finished pieces are calculated according to the drawing depending on the dimensions of the body.
- Plywood with a thickness of at least 16 mm to form the bottom of the body. This thickness is needed to take into account the strength when loading.
- To assemble the chassis, you can take suspension elements from common car brands. Volga, Moskvich, and Zaporozhets suspension brackets are often used; sometimes a bridge from a classic Zhiguli is used.
- The electrical elements of the equipment include direction indicators, brake lights, and marker lamps. Such assembled options can be purchased on the market in the form of ready-made kits. Sidelights from Gazelles and UAZs are often used.
- Fastening elements depend on the characteristic features of the trailer and its design. In order not to worry about the strength of the finished product on the road, you should not skimp on such connecting elements.
- Craftsman's tool for making the trailer itself. These tools should provide a minimum list of work. This includes an electric drill, grinder, pliers, a set of wrenches, and a jigsaw. Each master can add something to this list for convenience.
- A machine for welding metal, which you should have the skills to operate, or you should invite a specialist.
Step-by-step instructions for making a homemade trailer
Once the entire set of materials and tools has been assembled, you can proceed directly to assembling the structure.
The instructions will allow you to do everything quickly and efficiently.
- The first thing the trailer assembly begins with is the frame; in fact, it acts as the load-bearing part of the structure. Accordingly, it is subject to special requirements for strength and reliability. To begin with, the channel or pipe is cut into pieces of the required length, after which a rectangular or square base is welded from them, to which the sides will be attached. Particular attention should be paid to the quality of welding seams, since it is at this point that, as a rule, the main problems arise in home-made structures. The coupling device is mounted in the front part of the frame, and eyes for shock absorbers are installed in the middle.
- Body assembly begins with the frame of the sides. Vertical posts are installed first, then horizontal ones. It is separately recommended to strengthen the sides with additional stiffening ribs, since during movement, especially on bad roads, the elements may experience high loads. Additional stiffeners can be either vertical or horizontal.
- Installation of trailer chassis. This process has a lot of subtleties. For example, the axle should be moved closer to the rear of the trailer. In general, any peculiarities in the installation of the chassis are caused rather by the design features of the elements that the car owner chose to test. Eyelets for shock absorbers and reaction rods are welded to the frame; it is unacceptable to neglect the latter, since they serve as retaining elements of the bridge.
- Sheathing of the sides and bottom is carried out at the final stages. Sheet steel and plywood are excellent for this. First of all, the bottom sheathing elements are cut out with a jigsaw, and they are secured using bolts. Next, the side cladding is made from sheet steel. It is noteworthy that it can be secured either by welding, for example, or using aluminum rivets, which are quite affordable for purchase.
- Installation of electrical equipment. The following should be installed on the rear wall of the trailer: red reflective triangles, license plate lights, reversing lights, brake lights, direction indicators and clearance lights. There should be orange reflectors on the side. The front wall provides for the installation of white markers and reflectors of the same color. It will be much more effective to use ready-made wiring solutions. Be sure to use a protective corrugation for the wires. All connections must be tight and reliable. It is most convenient to attach the wiring harness to the frame using special plastic clamps.
We recommend:
What current should I use to charge a car battery?
Metal constructions
Metal exhibits more stable qualities when compared to wood. Although the cost for this extension option is higher. Sheet metal is used to increase the sides of a passenger trailer. Most often galvanized, stainless steel or aluminum. The material is complemented by metal corners and a profile. The process for making the extension is as follows:
- Cut the corners by making holes in them. Weld to the trailer frame.
- Build a profile sheathing over the corners.
- Cover the structure with sheets of metal or mesh using welding or bolting.
Two-axle dump trailer with metal sides
Introduction
It is no secret that an awning for a passenger trailer, made from high-quality modern material, has characteristics such as durability and good resistance to any temperature. Careful, and most importantly, correct operation helps extend the life of such coating up to 15 years. After the expiration date, more precisely, 10–12 years, signs of wear appear on the fabric, which are manifested by a lack of former elasticity and strength. It is worth noting that it is very difficult to buy a factory awning that could ideally fit under the frame of your own trailer. In order to purchase the “correct” awning that will fully satisfy all the owner’s requirements, one should take into account the fact that the areas where the fabric comes into contact with the metal rods of the frame must be additionally sealed, which will allow for a tighter fit. No manufacturer of standard coatings will be able to correctly calculate the distance between the posts without measuring the specific trailer. In such a situation, there is only one true solution - to make an awning for the trailer yourself.
How to do it yourself
If you are skilled and have the necessary equipment, it is possible to make semi-trailer parts yourself. First of all, it is advisable to find a drawing. Various modifications of them are available on the Internet, so it’s possible to go through this stage.
Next, you need to decide what material the sides will be made of. Take into account the operating features of the semi-trailer and its dimensions. If you need to transport building materials or vegetables, a wooden fence will do just fine.
For longer trips or the ability to attach pallets to the side, it is recommended to make the sides at least from steel. They are more durable and strong. In addition, it is easier to equip metal sides with various movable systems to make them convenient to remove and disassemble.
The aluminum profile is absolutely rightly recognized as the best material for the product. It is lightweight, does not create a large load on the platform, is durable and practical.
But if you have already decided to have frames made of such material, then it is easier to buy them ready-made.
It is also important to make the side frame reliable. This is a load-bearing structure that will bear the main load. It must be made of channels or very durable pipes.