Life often makes its own adjustments to people’s plans, forcing them to look for ways out of sudden difficult situations. It is very uncomfortable for a modern city dweller to be left with a non-working smartphone, especially if they need to make or receive an important call/email soon. And at the most inopportune moment, the gadget turns off, but there is no charger with you or it is faulty. So you have to rack your brains - how to charge your phone battery without a charger? There are actually a lot of ways - from other devices or batteries, and even using the operating principle of a mobile battery. The question is whether it is possible to charge the battery safely for a smartphone and not shorten its life. In fact, it is quite possible - just be careful and attentive.
Use different batteries
Using this method, you can charge your phone battery without the phone itself.
To do this, you need to perform the following algorithm of actions:
- Open the cover and remove the battery from the mobile phone . Models with a non-removable battery do not have this option, which means the described method will not work. Most smartphones on Android and Windows provide such a feature by design, but you should not try to remove the back cover from Apple devices; the manufacturer does not provide for this.
- Find several AAA, AA or nine-volt batteries . Their internal energy is completely identical to that found in the phone battery, in contrast to the current from the outlet, which is characterized as alternating. Why shouldn't you try to directly use AA batteries instead of your own phone battery? Because its fine design and settings are very sensitive to the characteristics of the incoming energy, and deviations in them, characteristic of the connected elements, can irreparably damage the device.
- Figure out which of the contacts on the found batteries and on the charged element itself are positive and which are negative . If you look closely, you can see icons clearly showing the charge sign. With a telephone battery, it is sometimes difficult to disassemble them; as a rule, the contact with the “plus” sign is located closer to the edge, and the contact with the “minus” sign is further from it. You should pay attention only to the outer protrusions; the central ones serve for other tasks.
- Assemble the batteries so that their total voltage is equal to that required for charging . On average, for modern phones, DC charging should be carried out at a voltage of at least 3.7 V. There are 9 V batteries, and you can use them. The usual AA or AAA voltage is only 1.5 V, so you will need at least three pieces so that their total voltage is greater than the required value.
- Get two pieces of wire, preferably insulated along the entire length, except for the ends - there should be bare metal there.
- Connect the wire between the batteries and the battery being charged, secure the connection with tape or something else. Then put the structure down and wait while the battery charges. If several batteries are used, they can be connected in parallel to each other. To do this, a metal piece of wire is attached to all the negative terminals of all small batteries on one side, and a second wire is attached to the positive terminals on the other.
- Of course, you shouldn't expect a large charge . The battery will not be fully charged, but the little that is there should be enough to make an urgent call or other important action.
Harm to the battery
The safest and most reliable method of charging a phone battery without an original power supply is a universal frog charger. It guarantees full replenishment of the battery capacity and is not capable of damaging the battery.
The method with AA batteries is also safe, but not always reliable - the effectiveness depends on the build quality of the structure. If the AA or AAA batteries are partially discharged, then the method may not provide any benefit at all. In addition, the user is required to independently assemble a special device with appropriate terminals for attaching batteries.
Methods for emergency battery resuscitation are unsafe, especially heating and deformation. However, they are quite suitable for making an urgent call. Safer methods are direct connection via an adapter and gluing tape to the battery contacts.
It is not recommended to experiment with this, especially if the battery will be used in the future. Therefore, all the described methods, except for connecting a universal charger, are suitable only for emergency cases when you need to make one urgent call.
Friction
You need to remove the battery from the phone and begin to rub the cell strongly and quickly with your palms, creating a lot of heat and friction. This should last for at least thirty seconds, and preferably several minutes. Afterwards, insert the battery back into the smartphone. The resulting energy is enough for a very short operating time, so it needs to be used as efficiently as possible.
Some believe that this trick relies on creating static electricity, which slightly charges the battery. This assumption is wrong. In fact, the reception works thanks to the device itself and the principle of operation of the battery. The chemical reactions that result in an element storing energy proceed better at higher temperatures, so that active friction can be said to become a catalyst for increasing electrical conductivity.
Which charger is best for a phone?
This is what the charger looks like in real life
Let's start with the banal, with the power adapter. Despite the fact that modern smartphones all support fast charging , only a few are capable of charging at powers above 20 W. The vast majority use the basic standard of fast charging , which allows them to replenish the battery's energy in about 40-60 minutes.
In addition to the charger, I also took a cable - purely as a reserve.
Therefore, I believe that there is no point in overpaying for a more powerful memory. It is much better to buy something as simple as possible, but reliable. For me, this is a 20-watt charger from Ugreen, which I bought on sale for only 380 rubles. This is almost half the price of its usual price - believe me, I had my eye on it for a long time, but I still regretted shelling out 700 rubles.
Buy Ugreen charger
Here are the main advantages of this charger:
- Support USB-PD, Quick Charge 2.0, 3.0 and 4.0;
- USB-C output (suitable for a wide variety of devices);
- Protection against power surges;
- Protection against overheating of internal components;
- Supports a wide range of power profiles;
- Apple MFi certified.
Using other technology
To charge in this way you need:
- to have access to a computer, laptop, tablet or other device powerful enough to charge your phone;
- this device and the phone have USB connectors;
- appropriate adapter , fortunately, there are no problems with adapters, because most phones have standard micro USB.
The procedure is very simple - connect the phone with the charging equipment using a wire and wait until a certain amount of energy accumulates. It is not even necessary to switch the smartphone into USB connection mode with a computer; the charge will flow in any case. You can also carry it with you or ask someone for a power bank - a special device for powering your mobile phone without charging.
How to make a standard wired charger with your own hands
There are several options for what materials your charger will be made of. You choose based on what you have and which option appeals to you personally.
Battery charging
Very often, batteries or rechargeable batteries are used to create a portable charger. This is convenient; they can be replaced when they fail with new ones. In addition, such a device can replace a failed adapter, which is usually plugged into an outlet.
To create such a charge you will need:
- AA batteries/accumulators;
- compartment;
- a working USB cable suitable for your phone;
- the charger itself (can be used from an old gadget);
- soldering iron and related equipment;
- tester;
- glue.
Now let's move on to creating the charger.
- Insert four batteries into the battery compartment (can be removed from a non-working children's toy or any other device). You need to check the total voltage. For this we use a tester. Phones are charged at a voltage of 5 Volts, and the voltage generated should not exceed it.
- We separate the plug from the USB cable that should be connected to the computer, remove all the wires except the “plus” and “minus” (for this we call the tester). The remaining wires need to be cut off, and the remaining wires must be fastened using a thermo-cambric and a lighter.
- We solder wires to metal rivets using soldering acid, and tinned the rivets. Make sure the charges match!
- The connector itself is now attached to the body using heated glue. To prevent breaks, we apply glue around it, closing all the contacts.
- We also cut off a smaller connector from the USB cable. Of the wires, we leave only the “plus” and “minus”, and cut off the rest. It is better to remove the remaining wires to the thermal cambric.
- Let's put everything together.
After this you can charge your phone.
Instead of batteries, it is preferable to use rechargeable batteries - and this is a big savings and longer service life - the batteries can always be recharged and used again.
Charging from fan and magnets
This is practically a free energy generator created by you. To create such a charge you need:
- neodymium thin magnets;
- fan from the system unit;
- glue;
- a cord with an input suitable for your phone;
- soldering iron and related equipment.
Let's look at the assembly in detail.
- We glue magnets to the fan blades using glue. The magnets need to be chosen thin enough so that they do not extend beyond the blades in width and not too much in height.
- One of the magnets needs to be glued to the corner of the fan (not from the corner where the wires come out).
- We cut the cable suitable for the telephone so that there remains a part that fits into the telephone socket with the desired length of the wire itself. We solder the wires from the fan to the phone wires, observing the polarity.
- It is better to hide the soldering area in a thermal cambric so that it does not get damaged and lasts longer.
- We attach three magnets on the opposite side of the first attached magnet to the fan. If the location is chosen correctly, the fan will start working the moment they are attached. If this does not happen, you need to move them, finding the desired position.
Now you can connect the gadget. If everything is assembled correctly, it will immediately begin charging.
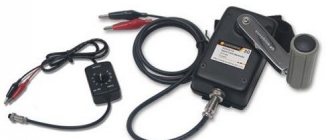
"Frog"
There is a technical means for charging a phone battery directly, which is called a “frog”. It has special contacts to which the discharged battery is attached, taking into account the polarity. If everything is done correctly, a signal will light up on the “frog”. It will take up to three hours to replenish the entire battery charge, but the advantage is that the charging device will automatically turn off and stop supplying energy. The completion of the charging process will be indicated by a lit light.
How long will it take?
We personally tried this life hack for charging your phone at hand. For example, it took us only 7 minutes to increase the charge of the iPhone SE smartphone from 60% to 67%. The exact charging time you'll need to revive your dead phone will depend on how low your device is and how much charge is left in the battery.
Of course, in order to somehow recharge a dead phone, you will have to hold the battery and charger in your hands in an awkward position. Your arms may get tired. But you can find a way. For example, secure the “Crown” to the charger with tape or place the structure on the table and press it with heavy books.
Urgently charge your phone using a knife
This method is a unique variation of the friction trick; it can be used even far from the city. However, it is fraught with troubles with the device, so it should be used only as a last resort.
Procedure:
- Remove the battery from the smartphone.
- Find or make some kind of source of great heat , like a barbecue or at least a lighter flame.
- Heat the knife blade on this flame.
- Place the battery on the hot blade with the contacts facing it.
- Wait until the element warms up slightly (not too much!) and a little charge appears in it.
- Put the battery back.
How many batteries will it take to fully charge your phone?
A typical 9-volt Krona battery has a charge capacity of 500 milliampere hours (mAh) . Compare it to your phone's battery capacity. Here are some examples:
- iPhone 8: 1,821 mAh
- iPhone 7: 1,960 mAh
- iPhone SE: 1,624 mAh (this is the phone we tested)
- Galaxy S8 or S9: 3000 mAh
- Pixel 2: 2,700 mAh
To fully charge a phone with a 3000 mAh battery capacity, you will need approximately 6 batteries. So, this hack is not ideal if you want to charge your phone to full battery.
In this case, you will not only have to throw out a lot of batteries after charging, but also spend a huge amount of time charging. But nevertheless, this is an excellent life hack for those who do not know how to charge their phone without electricity, at least to write a few messages or make a few calls, announcing themselves.
At least one Krona battery will be enough for you to turn on your smartphone and you can ask for help by calling the single number 112.
This is one of the best life hacks for motorists who may find themselves in a deserted place with a dead phone and a completely dead car battery, which will not allow them to resuscitate the phone to call and ask for help. So we advise you to always carry several 9-volt Krona batteries in the glove compartment.
Precautionary measures
The following recommendations should be followed:
- Before removing the battery from your mobile phone, you must turn it off - otherwise some settings may be lost.
- Never attempt to charge any of these methods with regular batteries that are not marked “rechargeable” and are not intended for reuse.
- Make sure that the incoming charge does not exceed what the battery can hold , this is explosive.
There are a lot of possibilities on how to charge a phone battery when left without a charger, and if you have knowledge about them and about the possible dangers associated with certain methods, then the likelihood of finding yourself somewhere without the ability to get in touch is minimal. Read about how to charge a car battery without a charger here →
Connection
Everything is very simple here - we connect a power element to our microcircuit; in our case it is a battery. ON the board you can see how a small LED lights up, this means that the board is ready for use (it’s not very visible in the photo, see the video below).
Next, we insert a cable into the USB connector, which we connect to the “cellular” connector and within a second charging begins. Just like that, easy and simple.
What to consider when charging your phone battery directly
Before using methods for charging a battery separately from a mobile device, you need to consider the following:
- Only a special charger can provide a full battery charge; home methods in most cases can only partially correct the situation.
- Using home methods, you need to take into account parameters such as voltage, current and resistance - if the parameters are insufficient, the battery will not charge at all, and if there is excess, it may fail.
- During charging, you need to carefully monitor the condition of the battery - if it gets too hot, the process must be stopped.
- You should also monitor the current parameters using a multimeter during the charging process.
- Incorrect actions during home methods for restoring charge can lead to battery failure.
Therefore, it is worth the risk for those who are at least able to use a multimeter, understand what voltage means, and know how to distinguish positive contacts from negative ones.
Flaws
The minimum cost of such a charge is about 700 rubles. Quite inexpensive, you say. But keep in mind that the speed is much lower than that of the standard model. You have to pay extra for high speed. As a result, one wireless phone charger will cost at least 2.5 thousand.
In addition to the fact that energy efficiency is less, part of it will simply go away in the form of heat.
However, this method is not suitable for all phones. The same iPhones, for example, need additional devices.
What is it and when can it be useful?
This charger is shaped like a frog. On one side it has a connector for connecting to a power source, on the other there are contacts for connecting batteries. These contacts are movable - the distance between them can be changed. This makes the device universal, because there is no single standard for flat-plate batteries.
Also contributing to versatility is a mandatory function – the ability to change the voltage polarity. This is done manually, and in advanced models - automatically. The housing contains indication elements - LEDs or LCD display, as well as control buttons.
Universal “frog” charger with LED indication.
The “frog” will be useful if the standard charger is lost or broken, and it is impossible to buy a similar one (no longer available, etc.). Over time, the mating parts of the connectors become loose, charging becomes a pain, and sometimes it is impossible to complete. In this case, the “toad” will also be in place. However, you will not be able to use the device during the charging procedure.
Another option is in a public place (office, etc.), where there may be people with gadgets equipped with different types of batteries. A universal charger will also come in handy in a workshop for repairing mobile devices and other electronics - after restoration of functionality, you need to replenish the energy reserve in the battery to check and test the device.