Often crafts are considered some kind of frivolous trinket. Especially when waste material is used for their production. However, it is not. Tin cans can be used to make wonderful, yet useful things that will decorate your garden plot.
Tin is an excellent ornamental material. To cut it you need the most basic tool; it bends and paints perfectly. Easily connects with other parts.
Therefore, handmade crafts from tin cans have become popular among craftsmen. Craftsmen have invented many ways to reuse this container.
Products made from tin cans
Canned food, bulk products, cookies and liquids are packaged in metal cans. There are some rules for working with empty containers:
- When working, you must wear gloves, as it is easy to cut yourself on sharp edges;
- Before use, remove labels and clean material.
- When you have the required amount of containers, you can start creating decorations.
Spontaneous decisions
An unexpected clever idea of how to make crafts out of a tin can usually comes when there are a lot of cans, but it’s a pity to throw them away. A thrifty person tries to throw away only what he doesn’t need at all.
Which will never work. Although it is possible to use it as improvised material - it lies for the time being. It lies and accumulates. It doesn't seem necessary.
But suddenly the moment comes.
It's desperately needed. When renovating an apartment. When working in the summer at the dacha. When creating greenhouses. People begin to find new uses for these junk things. Sometimes spontaneous decisions lead to successful crafts. A person is tired of having his utensils in different places on his desk.
He decides to put some cans on their sides, glue them together, and paint them. Now there is a structure on the table where all the accessories are in one place. In addition, it is convenient to take. After all, the banks lie on their sides.
Decorative flowerpots for the garden
This method is the most popular and favorite among summer residents. Large containers are better suited for it.
Manufacturing procedure:
- Smooth the top of the can with a file. It is very sharp, you can cut yourself with it. It can be bent using pliers or another tool. It is advisable to apply sealant on top, which will serve as a protective layer.
- Make holes in the bottom of the jar for drainage. They can be drilled with a drill or pierced with a nail using a hammer.
- Paint the jar the desired color. Before doing this, sand and prime so that the paint adheres better.
- Decorate the pots to match the style of the site.
Original flower pots look great on a fence, flower bed and lawn. You can make a whole flower stand out of them on your site, hanging them vertically.
Original finds
There are interesting crafts made from tin cans. Here's one of them. The jar is wrapped in decorative cork cardboard. Glue to a metal can. Then they carefully draw silhouettes of animals and birds on the surface of the original cardboard.
We recommend reading:
- Crafts from natural materials - a step-by-step master class on creating original crafts for children and adults (100 photos)
- Wood crafts - the best craft options, instructions for beginners and ideas for making wooden crafts (85 photos)
- Fabric crafts - the best ideas and the most practical crafts and toys made from various types of fabrics
Use the jar as a plant pot. But this is already a decorative pot. Elegant, sometimes able to outshine special pots sold in stores with its design.
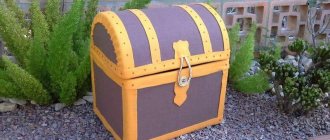
Here's another idea. Make a round box out of a jar. This is how it is done. A suitable lid for the jar is selected in advance. With a comfortable handle. The lid should fit snugly.
Then the can is painted in a stencil mesh. Individual grid cells are made in a specific selected pattern. The color scheme of the surface of the jar and the lid should be the same color. If necessary, paint the lid too. When everything is dry, the round box is ready.
Products from cans
Any feast is rarely complete without canned food, which is why the accumulation of cans from them is increasing. They can be different in:
- configurations;
- size;
- blossom.
This allows you to create crafts from cans with your own hands.
Unexpected lamp
When you really need it, you can always come up with something to make from tin cans. There are craftsmen who first line the jar for later punching holes. Then this jar is fixed on a special device.
And use a sharp chisel to knock out the required holes. Square and triangular openings. Made with a pattern. In a certain sequence. Then painted and used as a hanging lamp.
Since the sides of the hanging lamp have perforated patterns, the result is a unique craft. Nice and light. Of course, when creating something like this, a person has to work in a garage or in a country house. It is impossible to carry out such work in an apartment.
There is a lot of noise and knocking. Don't bother your neighbors. But at the dacha or in the garage - just right. One evening of work: and a miracle - the lamp is ready. Made from waste, unnecessary material.
Garden sculpture
Figurines made from cans will add originality to the garden plot. Children will especially like this design. When making sculptures, it is advisable to use jars of various shapes and sizes.
Characters from any fairy tales look great. Let's give an example of making a woodcutter.
Materials:
- one jar for the head;
- one hat jar;
- one large capacity jar for the torso;
- two cans for arms and legs;
- two rectangular cans for boots.
Manufacturing procedure:
- All necessary material is prepared.
- The cans are sanded and coated with primer.
- Paint elements from spray paint cans silver.
- Drill holes at the joints.
- Assemble the structure using nuts and bolts.
It is advisable to involve children in the design of the sculpture. Their ideas can be very useful and correct, especially in terms of what else can be added to the product.
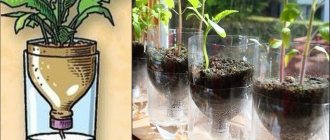
Fun flower pots
The most enterprising housewives have long thought of using tin cans for growing seedlings. But this is not the limit of imagination. If you choose jars of different heights and sizes and paint them gold, then reflections of sunbeams will appear in your winter garden clearing. Such flower pots will shine like the sun even on a cloudy day. The option of multi-colored jars will create a cheerful mood in the interior of the room.
Recommendations for work:
- Like any material with which decorating work begins, jars must be wiped with alcohol or, more simply put, their surface must be degreased.
- The best medium for painting is spray paint, but acrylic paints are also suitable. It is convenient to apply them with a nylon brush.
- For a flower pot, you must make holes in the bottom. To do this, a clove and a hammer will be enough.
If you don’t like plain pots, you can use construction tape to paint stripes, zigzags, and different shapes on the surface. First, the surface of the can is covered with the main background color. After it has completely dried, tape is applied and the intended design is painted in a different color.
Tip: small colorful jars are suitable for planting cacti. Create a clearing of cacti with your own hands. For tall flowers, you can decorate them with aluminum cans (from paint).
Use of beer cans
Beer cans can be made of aluminum and tin, which is very suitable for creating DIY crafts. It should be noted that this is also the name for containers used for various drinks, not just beer.
From them you can do the following:
- Garden figurines and decorative elements;
- Covering the roof of small buildings in the garden;
- Fences for flower beds.
Storage for small parts
In small jars, the lid of which is attached to the bottom surface of a wooden shelf in a closet or pantry, it is convenient to store various small things: nuts, bolts, paper clips, nails and other parts.
At the same time, the jars do not take up space; to get the necessary part, you just need to unscrew the jar from the lid, and then you can just as easily return it to its place.
Flower
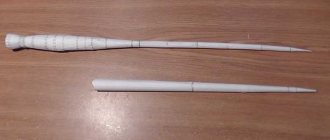
These flower models will decorate your summer cottage at any time of the year. Creating them does not require much time. Required:
- quick-drying glue;
- flower template;
- cutting tool.
Procedure:
- Cut off the lid and bottom of the jar.
- Cut the resulting cylinder lengthwise.
- Having straightened the cylinder, place the template on the sheet and draw along the contour.
- Cut out the elements according to the outline. You must be careful when working.
- Squeeze out a pattern like veins on the elements of the petals.
- Paint the parts in the required colors. It is possible to use acrylic or oil based paint.
- Glue all the parts together to assemble the flower.
- Using the same scheme, you can make a variety of decorations for the site.
- Wonderful examples can be seen in the photo of DIY crafts from jars.
Shelves and original organizers
There are many ideas and instructions for making crafts from aluminum containers.
In the hallway it is convenient to attach empty jars to the wall for storing small items: gloves, keys, small hats. You can hang long scarves on top.
You can create original packaging for towels in the bathroom. Rolled towels of different colors fit perfectly into separate compartments on the wall. The top of the container can be decorated to match the uniform tone of the bathroom walls.
Jars for craftswomen will be a real gift. You can place an organizer on the wall, where each cell contains 1-2 skeins of thread and yarn. It always takes a long time to search in a bag; the yarn can get tangled.
If you cut off the bottoms, the containers can be used in other ways. Bulk scarves, socks, mittens and other accessories can be conveniently stored inside jars.
An interesting option is several cans, for example, 7 pcs. connect with a wide ribbon and hang on the wall (cabinet). You can put women's silk scarves and scarves inside.
- What does a sword mean to a man?
- A variety of engraver attachments for every taste and color
- A still life with roses will delight you longer than fresh flowers
Candlesticks
Glass is an excellent material for construction. It is used in the construction of greenhouses and houses. Glass containers are also used to make various things.
If there are only a small number of jars to do something serious, you can opt for candlesticks. Even baby food jars are suitable for these crafts; all this can be easily done with your own hands.
Procedure:
- The neck of the jar is tied with wire and made into something like a handle.
- Paint the jar with waterproof paint as soon as desired.
- A candle is inserted inside.
Such products are very suitable for romantic dinners in the garden. Skilled gardeners are inventing new ways to use various packaging. By doing this, they save nature from clogging and make the area beautiful and cozy.
Candle lantern made from a beer can
So, to perform such a craft, you will have to make deep vertical cuts on the jar itself at a distance of 3-4 cm from each other. This process is performed with a sharp knife; cutting must be done carefully and slowly; if necessary, you can use a ruler for a more even cut.
After the jar is cut, you need to gently press it down a little on top, which will result in an interesting lantern design. If you don’t like the color design of the candlestick, you can paint it yourself with a special spray in the color you want.