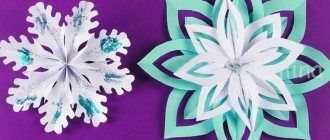
Origami frog
This Japanese arts and crafts art of folding paper figures originated in the 17th century, and has since become widespread throughout the world. The master class will help you make an origami jumping frog.
Take a green sheet of A4 and fold the right end diagonally. Cut off what is unnecessary. Fold the square in half, identify its center, and unfold it. Then fold diagonally along both sides, then two at the same time. Connect the nearest vertices, and press the center of the square inward.
Bend one corner of the resulting triangle, then the second; the same from the back.
Turn the base over. Bend the bottom ends up. Turn over again. Bend the structure in both directions. The photos show this process step by step.
The frog is ready. All that remains is to draw the eyes.
Master class “Costume for a frog”
Alina Budylskaya
Master class “Costume for a frog”
Spring matinees are approaching, and a frog costume . I only found a green skirt, but this is clearly not enough for the image.
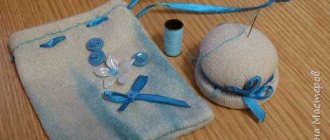
I found green and white satin crepe. Made from foamed polyethylene (the lamps were packed in it)
cut out two circles
I cut out two green and two white circles from fabric 1.5 cm larger than the inside
I drew a model of eyelashes on paper and used it to cut out eyelashes from black felt. Instead of felt, you can try thick lace, just don’t make it too long.
I folded a white and green circle facing inward, and placed eyelashes between them (if your eyelashes point in different directions, watch how you place them).
I placed the inner part on top, circled it and secured it with pins.
I sewed it through leaving an entrance for the inside.
I turned it inside out and inserted it.
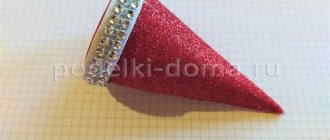
The bottom was sewn by hand. For the headband, I took a piece of ribbon and made an elastic insert (for better fixation on the head, I sewed on the eyes.
I cut out the pupils from felt and painted a reflection on the fabric.
The paper wrapped around the child's hand.
I made the outline of the paw.
I transferred it onto fabric in four copies and covered it with syndipone for volume.
I sewed on an elastic band and buboes.
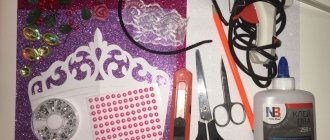
This is the frog I got .
Photo report “Russian costume” Employees of the district came to visit the children of the senior group. The guests were greeted by a hospitable hostess. In the light. Costume “Autumn Harvest Woman” Making a costume Autumn Harvest Woman On hot autumn days we were preparing for the holiday Day of the Village, September 26, 2015. “This summer in Kuban. Crane costume Good afternoon! I would like to share my experience in making a crane costume (hat and wings). For making I used white material -. Costume “Golden Autumn” For the holiday “Autumn” I made an Autumn costume with my own hands. This is, directly, a dress that is sewn from yellow satin and decorated. Photo report on the lesson “National Buryat Costume” Hello dear colleagues. Today we talked with the children about the “White Moon” holiday. About the traditional Buryat costume (color, variety. NOD “Russian Folk Costume” Today, dear colleagues, I want to tell you about how our group got acquainted with Russian folk costume. First, the children and I. Costume for the doll “Snow Maiden” Snow Maiden I I really like to do needlework. The idea to make the Snow Maiden came unexpectedly. I wanted to knit a beautiful elegant dress.
Source
How to create an application
An easier way for children involves cutting and gluing elements.
Tools used:
- glue stick or PVA;
- colored paper;
- simple pencil.
Start with the head - take a cup, draw and cut a circle. Smaller circles (black and white) will work for eyeballs and pupils, respectively. Fasten them together and stick them to the head.
The red stripe is given to the tongue. Twist it and attach it to the previously drawn smile.
Choosing a material to create a mask
The mask can be of two types: a cap, which is simply put on the head , and a mask, which is put on the face, with slits for the eyes. For young children, the first option is recommended, since a mask that slips over the eyes can frighten the baby and make it difficult for him to see. For older kids, the second option is good. In this case, it should be well secured with elastic bands so as not to slip off the face. If the eye slits are too narrow, they must be widened.
You also need to make a slot for the mouth. It should be wide, imitating the open mouth of a real toad.
In order to make his performance at the costume competition bright and memorable, the child can learn a poem, song, counting rhyme or tongue twister about a frog. For example, a junior schoolchild will willingly recite Andrei Usachev’s poem “Merry Kampania.”
A frog or toad costume can be not only green.
A variety of options are possible: the so -called protective color (in this case, you can sew a mask from old army uniform), swamp color, olive, yellow, brown.
The main thing is that the image of the amphibian is recognizable. But it’s still better to dress up the baby with a green frog, because young children perceive bright, cheerful colors best. The characteristic warts on the body of a toad can be depicted using brown spots of gouache or acrylic paint. Eyes can be any color, but yellow ones with bright green pupils will look most beautiful. For the frog princess, you can paint on flirty long eyelashes or instead glue thin paper strips curled onto a pencil.
Paper version
The most important detail of a New Year's costume is, of course, the mask.
It can be made from paper or cardboard. For a DIY frog mask, you will need a pattern. Before the New Year they are often published in children's magazines. A paper product consists of the following elements: a mask from paper or cardboard , but it will not last long and will quickly lose its presentation, especially if the child wears it during active games.
Products made from papier-mâché last much longer. To do this, several layers of newsprint are glued onto a base that follows the shape of a frog's face, and then the product is completely dry and painted with gouache or acrylic paints. Watercolor will not work because it will show through the layers of newspaper. Making such a mask takes quite a long time, so it is better to start working a few days before the holiday. The product must be allowed to dry thoroughly. You should not dry the mask near a steam heating radiator, because the paper will warp and the mask will lose its shape. For the same reason, you should not expose the craft to the sun's rays.
Mask made from improvised means
In order to cut out and sew a mask, you will need thick green or green and yellow fabric. Depending on the amount of material, it can be a full-fledged cap or just a thin headband. The headband will use half the amount of fabric. First of all, you need to download a frog mask pattern from the Internet and print it, and then transfer it to fabric . Here is a rough job description:
You can sew such a craft in about an hour and a half; beginner needlewomen will need a little more time. A sewn mask will last much longer than a paper one. For sewing, you can use thick cotton fabric. Green velvet will also look beautiful; this material is perfect for the Frog Princess costume.
You can sew ready-made eyes for toys, which are sold in craft stores, to the hat, but it’s better to make the eyes yourself. To do this, a smaller yellow one is sewn onto a green oval or circle, and on it, in turn, black, this will be the pupil. You can enliven the pupil with white spots of gouache.
Plasticine wah
All children like modeling; it develops imagination and fine motor skills. The article will tell you how to make a plasticine toad.
Prepare colorful balls and a worm. The two small balls will be the pupils. A couple more - eyeballs. Glue the middle ones to the muzzle.
A piece of plasticine will pass for the body.
Divide the worm in two. The resulting halves are divided into two. From these parts mold the front and hind legs.
The membranes on the limbs and the nostrils in the nose are drawn with toothpicks. The mouth is cut out.
DIY frog costume
Due to the versatility of the image, the frog outfit can be presented in many versions. This gives you complete freedom of action and allows you to create an outfit based on your own capabilities. Both boys and girls can transform into this hero. With the help of a spectacular outfit, you can transform into a frog princess, an enchanted prince, or a simple kind frog.
Frog head options
You can also decorate your head in various ways. The most popular are the following:
- Headband with eyes. It is a narrow bandage made of fabric or a headband to which large eyes are attached. The eyes are made large and showy with long eyelashes.
- A voluminous head made from an old cap and foam rubber. It completely covers the baby's head. There is a small space left for the head and nose. Volumetric ball eyes are glued to the top.
- Hood, cap or hat with eyes. If the jacket has a hood, then you can glue ball-shaped eyes to the top. The hood can also be sewn as a separate element. Eyes can also be quickly sewn or glued to a cap or knitted beanie.
- Crown. This is an option for the frog princess. It can be quickly made from cardboard or colored paper.
- Face mask made of felt and cardboard with an elastic band. The shape can be different, the main thing is not to forget to cut out holes for the eyes.
How to make a frog's body
The frog body can be made in many ways. It all depends on the ability to sew and other skills. To begin with, you can search among your existing clothes for trousers, turtlenecks, dresses and other green wardrobe items. So, for a boy they often sew a suit consisting of a jacket and pants or shorts. The main part of a girl's outfit can consist of a fluffy tutu skirt and a turtleneck or T-shirt. The skirt can also be in the shape of the sun, made of thick satin or satin. Of course, a win-win option is a dress. You can choose colored tights or knee socks.
REFERENCE! The basic part of an outfit for girls can be leggings or gymnastics suits.
How to make frog legs
Of course, you can take ordinary green gloves, or better yet, make real webbed frog legs. To make the paws, first, you need to trace the outline of the child’s hand on paper. You don't need to trace every finger. Next, we transfer the pattern to the fabric and cut it out in four copies. It is better to put filler inside. We sew it on the machine and turn it inside out. Next we stitch the finger compartments using a machine. We sew five small pompoms along the edge. Paws on the feet can be made by attaching cut out toes and webs to the sole of the shoes. The paw should be wider and may resemble flippers in shape.
ATTENTION! You can also sew triangular membranes made of light fabric or elastic paper to the fingers of the gloves. Fingers are filled with cotton, creating a volume effect.
"Princess Frog"
Believe it or not, excess plastic bottles make great material for toys and garden decorations.
List of tools:
- glue;
- stationery knife;
- watercolor;
- copper wire;
- several plastic bottles of different sizes.
Let's start creating:
Cut off the bottom of two large bottles and fasten them together.
The remains of the bottles will go to the legs, attached with wire to the body.
The bottom is also cut off from a small bottle A with a top.
Next, proceed to the crown - its rays should be curled. Then connect to the frog with wire.
Decorate it with watercolors. Color the body green, the crown gold, and the facial attributes black.
We complement the image with accessories
Making a frog costume with your own hands is not that difficult. Sometimes clothes of the right color and frog legs, as well as large round eyes, are enough.
Let's see how to make eyes and paws.
Materials for paws:
Draw a four-toed foot with “toes” that flare out at the ends. Transfer to fabric and cut out. Attach an elastic band to the middle so that the child can put it on the palm; measure the size in advance. If the garment has long sleeves, sew the paw to the sleeve, and if it has short sleeves, add another elastic band at the wrist. Or sew to cut-off gloves (socks will also work).
Next we make a headdress with round frog eyes.
Materials for the eyes:
Use the headband as a base. You will need two green balloons, as well as two round ping pong balls, which you need to place inside and tie the structure to the rim. Glue white and black circles on top as in the picture.
As a result, you will get this set:
Puppet theater toy
We are talking about making a frog out of paper with fingers that opens its mouth.
Fold the paper sheet in half vertically, unfold it, then horizontally and also unfold it. Fold both corners to the fold line.
The bottom layer must be bent upward, then turn the workpiece over and repeat from the other side. Fold the corners on all sides.
Open the resulting “pocket” and fold it in half. Fold the bottom corner up, turn over and repeat.
Open the “pocket” and fold it halfway. Fold the resulting diamond so that the finger pockets remain outside.
Decorate the finished figurine.
Place your thumb in the bottom pocket and the rest in the top pocket.
Volumetric frog from A4 sheet
You can make a voluminous frog out of paper, which will not only croak, but also perform other functions: be a bookmark in a book, decorate a table setting, or be a stand for light objects.
For this craft you will need a simple sheet of A4 paper, preferably green, glue, scissors and pencils for the face.
Instructions for folding the frog:
- Fold one corner all the way diagonally and cut off the excess. You will get a square. You need to leave the strip - it will come in handy later.
- Fold all 4 corners of the square towards the center so that a pancake-envelope comes out.
- Turn the workpiece over and bend two corners at the top.
- Turn it over again and now fold the sides to src=”https://podelki-detkam.ru/wp-content/uploads/2021/07/3_1_obem4.jpg” class=”aligncenter” width=”660″ height=”440 ″[/img]
- Slightly unfold the sides and make a small triangular cutout at the bottom.
- Fold the prepared strip of paper into 4 layers and insert it into the cut. Then fold the edges back.
- On the reverse side of the workpiece, straighten the folded squares. This will create the eyes.
- Decorate the animal's face.
As the strip moves up and down, the frog will open and close its mouth. You can also install it on any surface and create many tasks for it.
Toad made of bushings
Don't know where to put toilet paper rolls? Make a toad out of them in a simple way.
Green paper ribbons will go to the paws. Place them on the sides, bend them in a circle, and pat the ends into thirds. Attach the eyes at the top, draw the mouth in the middle.
Sew not a mitten, but a real paw
Sewing a carnival frog costume is not at all difficult. For these purposes, regular casual green clothing is suitable. Now we will share with you how to make real frog legs for this costume.
To make your own paws you will need the following materials:
First of all, you need to draw a hat template on paper, which will be slightly wider at the ends of the fingers. Transfer the design to the fabric. You need to make 2 of these parts.
Attach elastic bands in the middle of the palms so that the child can easily put them on independently. If the suit has long sleeves, then sew the paws to them for convenience. If they are short on the suit, then you will have to sew 1 more elastic band to the wrists. If you have unnecessary gloves at home, cut them off and sew the paws to them so as not to use elastic bands.
Modular origami
One of the challenging but fun ways to get a cute frog. The model will require 337 elements (265 greenish, 72 white). To obtain them, cut a piece of paper into 32 equal parts.
Fold it in half, then down the center of the resulting rectangle from the top two corners - right and left. Turn the model over and cut off the ends. Lift the bottom part and fold it down. Connect the lower corners of the triangle.
How to apply makeup to a frog costume?
- A drawing skillfully applied to the cheeks of a young beauty will add charm to her and complete the image you create.
- To do this, use face painting that is harmless to children’s health. To match the frog costume, it is best to use light green, green and yellow paints, as well as dark shades, so that you can use them to outline the contours of your artistic masterpieces.
This makeup is suitable not only for boys, but also for girls
Abstraction
Face decoration
- It is best to decorate the girl’s face with some abstract design.
We will also tell you how to sew a suit:
- brown bear
- Polar bear
- Prince
- Witches
- Ryaba chickens
- Bullfinch
Frog on a water lily
Does your child need to prepare a paper for an upcoming competition in kindergarten? An amphibian sitting on a water lily would be suitable for it.
Take a light green sheet of paper and bend 1 edge. Let's cut it off. We also separate a part from the existing piece.
A square is cut from the resulting tape. Subsequently, glue is applied to it.The edge of the square is bent. Because There are two tapes, they are twisted into a tube and attached to each other. The eyes are depicted on a square and cut off, later glued to the top tape. The latter will play the role of the “muzzle”.
A part of the red leaf glued to the mouth goes onto the tongue.
Next, limbs are cut out of light green fabric and attached to the structure.
A circle is cut from a dark green leaf and smeared with glue in the place where we will place the amphibian.
Children's frog costume: how to make it yourself using ready-made patterns and photos: master classes
We all sometimes remember how, as children, we dressed up in carnival costumes of fairy tale heroes and animals for matinees, performances, and even when guests gathered at home. When we become parents, we go through the same path, only our fate is now different. Now we are thinking where to get a carnival costume for a child, accessories for it, etc.
Here comes such a moment once again. One of these characters that is found in fairy tales and cartoons is the frog.
In this article we will share with you a master class on creating a carnival frog costume with your own hands. You will also see a lot of photos, various ideas and life hacks that will simplify the creation of this image.
Inflatable toad
A more complex variation that requires proficiency in the “squash and petal” and “reverse fold” techniques. The base is taken as a square, folded in half and across. It is placed with the colored side up and folded diagonally to make 8 triangles. The tops join together, the edges collapse. PROFIT!
Take one side and bend it from top to bottom. Flatten the square. We bend the bottom edges towards the center. Having outlined the fold, we unbend it; lifting the top, bend it inward. We do the same on the other 3 sides.
Fold the left edge. We make a notch. We mark the top fold, lift it up, flatten the pocket, fold the bottom edges again, open the notch, and press them inward. Let's turn the base over and repeat the algorithm.
The output is a rhombus. The halves of all eight edges are bent inward. To get the legs upward, bend the lower tips. The ends of the legs bend down and up again. The angle of the hind legs should be smaller.
The final touch is to inflate the figurine. Voila!
We complement the image with accessories
Making a frog costume with your own hands is not that difficult. Sometimes clothes of the right color and frog legs, as well as large round eyes, are enough.
Let's see how to make eyes and paws.
Materials for paws:
Draw a four-toed foot with “toes” that flare out at the ends. Transfer to fabric and cut out. Attach an elastic band to the middle so that the child can put it on the palm; measure the size in advance. If the garment has long sleeves, sew the paw to the sleeve, and if it has short sleeves, add another elastic band at the wrist. Or sew to cut-off gloves (socks will also work).
Next we make a headdress with round frog eyes.
Materials for the eyes:
Use the headband as a base. You will need two green balloons, as well as two round ping pong balls, which you need to place inside and tie the structure to the rim. Glue white and black circles on top as in the picture.
As a result, you will get this set:
Vase-frog from a tin can
Yes, yes, even from a tin can you can make an original surprise - a vase in the shape of a frog, suitable for storing office supplies.
We will need:
- colored paper (white, black, red and green);
- cardboard;
- scissors;
- black felt-tip pen;
- glue;
- the bank itself.
Draw the legs and head of the frog. In this case, the latter should correspond to the width of the can, and the paws should be less than its height.
It is recommended to measure the height and width of the tin can in advance. Wrap it in paper and make marks with a pencil along which you need to cut the strip.
Cut out a head, limbs and a triangle from cardboard to attach the head to the can.
Cut out eyeballs and pupils from white and black paper. Red circles are useful for blush.
The whole thing will have to be glued onto the frog's head.
Cover the jar with green paper and secure it with a triangle to the head.
Glue the paws along the jar, as if the frog were holding it, and the other two - to the bottom. And no nails!
How to sew a frog costume for a girl: 2 best ways
- We offer you two options for creating the outfit of this amphibian, and which one will be most convenient for you to use - choose for yourself.
- The main thing in this matter is a decisive attitude, free time and a great desire to create an inimitably beautiful carnival frog costume for your daughter, so that she looks like a real fairy-tale princess at the New Year's party.
Method No. 1
This version of the costume assumes a fluffy skirt, to create which you will need to acquire:
- green tulle;
- wide elastic band;
- green satin ribbon, the width of which should be about 3 cm.
Determine the length yourself. If you keep it within 30 cm, then the skirt will look like a tutu for a ballet diva. A longer skirt will have slightly drooping edges, but will remain full. However, in both the first and second versions the skirt will look very spectacular.
- From purchased green tulle, cut ribbons so that their length is twice the length of the finished skirt, leaving 5 cm allowance for each strip.
- Their width should be about 15 cm. But first measure your girl’s waist - this way you will determine how long the belt should be and how many tulle strips will be used to make the skirt.
- Make a kind of belt from an elastic band: by sewing its ends together, you will get a circle corresponding to the child’s waist size. For convenience, pull it over the back of a chair and tie it in a circle with cut strips.
- To do this, you need to fold the tape in half, in the center it will look like a loop of weightless fabric. Next, you will need to wrap it around the elastic band, and thread the folded ends through the top, but you don’t need to tighten it very tightly. Continue doing this until all the strips are tightly packed together.
- All that remains is to tie a green satin ribbon around the waist for beauty - and the skirt for the Frog Princess is ready!
Skirt
Headdress for frog:
- If you know how to crochet, then a green hat knitted by your own hands will look great on the head of an adorable little frog. You can find examples for knitted hats in our article.
Baby is ready
- If you don’t want to fuss with a hook and threads, you can get by with a green headband on which you need to glue frog eyes - you can buy them ready-made in the store, draw them, or make them yourself from scrap materials. We will tell you in detail how they can be made in the second version of the costume.
- Graceful boots, a turtleneck, leggings or tights in green tones will complement the image of a frog, and beautifully applied makeup will make your girl irresistible at a New Year's party or a themed event.
With rim
Method number 2.
- If you choose this option, you will have to tinker with creating the frog costume a little longer, but the end result will be an almost natural amphibian! If you’re not afraid to spend the evening at the sewing machine, then let’s learn together this technique for creating a masquerade frog costume.
To get started, get the following materials:
- green plush fabric or faux fur of the same color (fabric dimensions 120x140 cm);
- yellow cloth (40x50 cm);
- fleece, which will go on the lining (55x45 cm);
- synthetic padding - the stuffing will be made from it;
- plastic frog eyes and glue;
- with an elastic band.
Sewing a sleeveless vest for a frog:
- Using our drawings, cut out the material for the details of the sleeveless vest.
Pattern for a frog costume
- You purchased the yellow material for the frog's belly. In order for it to turn into this very belly, you will need to cut an oval out of it and sew it on the front of the sleeveless vest.
- The front and back are sewn together on the sides, the seams are processed from the inside, and the bottom of the product is turned up approximately 4 cm so that an elastic band can be inserted into this turn. See how simple it is? Our tank top for the frog is ready!
How to sew a hat for a frog costume:
- Using our drawings, make patterns for the details of the beret from paper, and then transfer them to pieces of fabric in two colors - green and yellow. In the first part you will need to make cuts into which the eyes will subsequently be inserted.
- After you cut out the yellow and green fabric (fur), they will need to be sewn into one piece. To do this, you need to fold these two parts with their right sides facing each other and sew (you can sew by hand) along the edge of the cap. The lining is cut based on the internal size of the headdress.
- Next, you need to evenly lay the padding polyester between the beret and the lining, insert an elastic band of such length that it does not put pressure on the child’s forehead and at the same time does not slide over the eyes, and sew up the edge
- As shown in the pattern, you should cut out the fabric base for the eyes, fold the blanks with their right sides facing each other, sew them along the edges, turn them onto the face, put padding inside and sew them to the hat with a hidden seam. You then need to glue plastic eyes onto these protuberances.
cap
- The cap can be successfully replaced with a headdress, the basis of which will be a hairband.
In order to make natural-looking frog eyes, you will need to acquire:
- rim;
- two green balloons;
- two ping pong balls;
- pieces of white and black felt (10x10 cm each);
- glue.
The hairband is used as a base for the frog's eyes. Place the ping pong balls inside the green inflatable balls and tie their ends to the hoop. And on top of the balls you will need to glue cut out circles of white and black felt. The eyes are ready!
The headband with eyes is ready
How to make mittens in the shape of frog legs:
- To create the paws, use felt or green fleece and an elastic band - its width should be 5-10 mm.
- A four-fingered paw with extensions at the ends of the “fingers” is drawn on paper, transferred to a piece of green fabric and cut out. You should stitch together the blanks, and attach a piece of elastic in the middle of the paw from the inside so that your girl can stick her palm there.
- If you choose clothes with long sleeves, then the paws can be sewn directly to them. In the case of short sleeves, you will need to sew another piece of elastic at the top of the paws. Or you can do it another way: sew cut-off gloves or the top of socks from the inside to the “paws”.
Paws
Bookmark
The easiest way to create a useful and fun bookmark is in the shape of a frog.
Required:
- black and white and colored paper;
- colored cardboard;
- black felt-tip pen;
- glue;
- scissors;
- simple pencil.
We make a square out of paper. Pull the top edge down to create a triangle. Cut off the side strip. The square is ready.
Fold it in half to form a triangle. We stretch the corner of one part of the square to the edge of the fold and press it.We bend the right top, then the left one.
Straighten the bent corners.
Both corners are pulled to the top and pressed to indicate all the folds, then they are unfolded, wrapped, placed in a pocket, the edges are pressed.
For complete completion, make eyes from green ribbons and black and white circles, and a tongue from red, and attach to the desired places.
The article is the most complete guide on how to fold a paper frog. You will also find hundreds of videos on YouTube showing you how to make a frog and other things out of paper. The site contains other options for all kinds of colorful crafts for children. Have a good time!
From modules
Of the modules, the frog is the most difficult to complete. To do this, you will first need to fold several parts and then glue them together. The materials you will need are the same as for regular crafts: colored paper, scissors, ruler, glue. You can take paper of different colors, then the tummy, tongue and even the back will be decorated in different shades.
Execution order:
- Make classic triangular modules. To do this, fold the square sheet in half, fold in the corners and then fold in the edges. Fold the module in half.
- Assemble the base of the frog - only 7 rows. The first row has 7 modules, then each step adds one module.
- On the wide side, attach three beige modules in three rows.
- Make an abdomen opposite the green back from two rows of modules of 4 and 5 pieces.
- Complete the top of the blank from green and beige modules. There should be 1-2 fewer beige parts than green ones.
- Assemble the front legs from several rows of 2-3 parts. Attach to the body.
- Assemble the hind legs from 4 rows, the outermost of which will contain 3 pieces, and the middle ones - 4 pieces each. The hind legs will also require long parts similar to the front ones.
- Attach the long back parts of the legs first, and then the wide ones.
- Make eyes from two modules. Before installing them on the body, color the eyes with a felt-tip pen.
This craft seems very complicated, but in reality it is simple. This kind of work requires accuracy and perseverance. This sculpture will look very beautiful.
How to make a frog out of paper: photo instructions with examples of beautiful crafts
Please repost
0
Paper crafts - options, methods
There are many techniques for making animal figurines from this material. You can choose an easy method that even a child can handle, or a complex one that origami lovers will enjoy. A paper frog can jump, “talk”, it is made in the form of applications, hand figures for puppet theater.
Application
The youngest craftsmen can be invited to make their own applique with a frog princess - the heroine of their favorite fairy tale.
For work you will need
- white, yellow, green A4 paper;
- small leaves of brown, blue and gray;
- felt-tip pens or watercolor paints with a brush;
- glue for working with paper, preferably in the form of a pencil.
If children under 4 years of age will be working on the applique, the details must be prepared in advance - draw them on paper and cut them out. With older masters, you can do them together - draw a head, a round body, two upper and two lower legs, a water lily leaf from green paper, a yellow “breast”, a flower or clouds from blue, elements of an arrow and cut them out.
Children, regardless of their age, should work with scissors under adult supervision. Children under 3 years old can be allowed to cut with a tool with rounded blade tips.
Work begins with gluing the body. Already on the body a yellow “breast” is glued, then the head and paws. Next comes the finishing - design of the flower, arrows. It is important not to forget to draw eyes, a mouth, and a nose on the face.
The frog princess can also be made in the form of a three-dimensional applique. The technology is more complex, suitable for older groups of kindergarten and primary schoolchildren.
Need to prepare
- sheets of paper green, orange, yellow;
- pencil and ruler;
- glue and scissors.
Step by step video tutorial
A ball of paper ribbons can be replaced with a paper cylinder. It will be easier for small children to work with such a part. In addition, it can be painted and turned into a jacket or blouse.
"Talking" frog
For an original congratulation, children's games or a mini-play at home, you can make your own talking frog - with an opening mouth, which you can put on your hand.
You should have green paper, glue, a pencil, or ready-made eyes from a craft store on hand. The work will take no more than 30 minutes.
We make a square of paper measuring 21*21 cm, bend it in half, and unfold it. Fold the bottom and top edges towards the middle and iron the folds.
Fold the rectangle in half. On one of the sides we begin to make eyes - we turn in the free edges of the lapels. We bend the part with the eyes up.
We bend the side protruding parts of the workpiece towards the middle of the figure. We turn the corners protruding beyond its limits inward.
We turn it over, bend the bottom edge, turn in the corners and straighten the figure. We tuck the resulting triangles inside the fold, creating an internal fold.
We fix the lower “pocket”. We make a narrow strip, bend its corners along the contour of the figure, and tuck it inside.
The talking frog is almost ready. We attach or draw eyes, slightly move the “pockets” apart, and put them on our fingers.
There are many options for creating a talking frog. You can choose equipment for any age, purpose, from any suitable material.
Jumping
A paper frog can not only speak, but also move, literally come to life. You can make such a souvenir with your own hands by mastering the origami technique.
We stock up on desire, patience, a square of green paper and a black felt-tip pen. We make a pyramid out of paper, bending the sides of its sides towards the center. This is how we form the paws.
The paws are ready, you can “put” the toy on them and start creating the body.
We turn the lower corners of the triangle up, with the sharp edge towards its base. We have a square. We fold it again according to the same principle.
We make eyes and a fold - without it the frog will not jump. The “jumpiness” of the figure depends on the depth of the fold.
Video tutorial