Every girl dreams of a wonderful toy house, which will be furnished with household items, furniture, and accessories. In specialized children's departments you can find everything you need, but you will have to shell out a tidy sum. It is for this reason that some parents are wondering how to make a bed for dolls themselves. The process does not require much time and effort; the work uses available materials, simple devices and decor. If you wish, you can use detailed master classes with photographs and diagrams.
Cabinet
Cabinet furniture made using the origami technique is no different from the real thing. The cabinets or chests of drawers are equipped with convenient drawers, and the closet is equipped with a real barbell. An ideal place to store your collection of origami clothes.
For an original cabinet based on the model of origamist Fumiyaka Shingu, you will need three squares measuring 21x21 cm.
Step-by-step instruction:
- Divide the first square into 3 parts vertically and horizontally.
- Bend the top part back. We fold the bottom one forward.
- We mark the fold lines with dotted lines. Open the sides, flatten and smooth.
- Fold the sides along the dotted lines.
- The first piece of furniture is ready.
For the second one you will also need a square of 21x21 cm.
- We divide the workpiece into three parts and roll it into a strip.
- We make vertical folds - 1/3 on each side.
- We connect both parts together.
All that remains is to put the boxes in place:
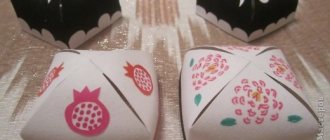
Instructions for assembling the box:
- We divide a square of 21x21 cm into 3 parts in both directions.
- Fold the top and bottom edges.
- We make folds along the dotted lines.
- Fold the top and bottom edges again.
- We outline the diagonal folds.
- We open the workpiece from the inside according to the arrows.
- We form a box by stretching the side walls. We glue the product for strength.
- Repeat steps 1 – 7 to make another box.
We make handles so that the cabinet can be easily opened.
Instructions for the pen:
You will need a strip of golden or dark brown paper 1x1.4 cm.
- Let's start from the inside out. We bend the strip in half along the long side.
- Fold the product along the dotted line.
- We repeat the action in the other direction.
- Glue the handles in place.
Model selection
Before we get started, we need to agree on what we want to see as a result. A bed for dolls can be made in different versions, but the main condition is its environmental friendliness, safety and fun.
The second condition is that it must be reliable, easy to use and always brilliantly designed. During construction, it is possible to use any variety:
- single and double models;
- rocking cradle;
- bed;
- four-poster bed;
- hanging hammock
You can choose from a variety of styles: with a headboard, backrests, panels, with legs or with a rectangular base.
In addition, it is worth considering the possibility of making bedroom set items. For example, if it is a Barbie bed, a trellis, or at least a nightstand. If it's a baby doll, you'll need a changing table. For a closet you will need at least a couple of drawers under the bed.
Before starting work, you also need to correlate the dimensions of the bed with the parameters of the toy, so as not to be disappointed in the finish when the bed for the doll suddenly becomes small.
Piano
This model can also be used as a desk. If you take a square for it, measuring at least 21x21 cm and stop at step 6, you will get a decoration-house for a puppet show.
Step-by-step instruction:
- Connect the top and bottom edges of the square sheet.
- We mark the center of the figure.
- We add the right and left sides to it.
- We make folds along the dotted lines. We open both parts from the inside according to the arrows.
- Flatten the resulting folds.
- We get a decorative house. However, we don’t stop at this point and continue assembling the piano. Raise the central part of the workpiece.
- Bend down the top edge.
- We fold the sides at right angles.
- We give the central part a horizontal position. Paste on a pre-printed image of the keys.
Modeling principles
Advice: no matter what material is chosen for production, you need to understand that children need maximum realism.
The crib for your favorite doll should be similar to the real one, but only smaller in size. When modeling, it is better to discuss with the girl what kind of furniture she wants to see. She might want to recreate her own sleeping space or her parents' bed. This point needs to be discussed before construction begins.
All parts for the crib are made by hand and carefully processed (with the exception of one-piece products). When creating toy furniture, it is necessary to apply the principles characteristic of the design of “adult” objects - in this case, the resulting product will meet all the girl’s expectations.
Decor
If a homemade bed is made into an existing dollhouse, then it is better to decorate it in accordance with the general style; the same principles apply here as in a real room. Bed decor includes both the design of the product itself and everything necessary for it - pillows, blankets, bed linen.
The finished bed is decorated with a wide variety of materials: glued or sewn beads, bows from unnecessary hairpins, ribbons, braid, beads, rhinestones, lace. Applications in the shape of flowers look good on products made of cardboard or paper, and for wooden products, burning, engraving, and sawing are suitable. Any of the models can be coated with regular varnish or nail polish, paints (gouache, acrylic).
Making bedding is not at all difficult - you will need a small amount of fabric (you can use scraps) and a little filling. Foam rubber is suitable for a mattress, and synthetic winterizer or cotton wool is suitable for pillows. Any thick rag can be used as a blanket.
All these elements can be knitted or crocheted - for those who love and know how to knit.
The model with a canopy and lace trim looks charming - this bed resembles the bed of a fairy-tale princess. Bedside tables made from matchboxes or soft ottomans can be a great addition.
Which decor option to choose depends only on the girl’s imagination and desires. The main thing is not to forget that children require realism - the manufactured model should be as similar as possible to a real bed.
Making a tiny doll ottoman
For small dolls, you can make an ottoman bed out of paper. But even in such models, the bed must be made of cardboard.
Materials:
- 4 sheets of A4;
- PVA glue or “Moment”;
- stationery scissors;
- ruler;
- a simple pencil;
- a piece of cardboard;
- a piece of fabric and padding polyester for sitting.
Instructions:
- On paper we draw 2 rectangles of the required size for the bed. Let's cut them out.
- We bend the short edges 0.5 cm down.
- Draw the same rectangle on cardboard and cut it out.
- We cover the cardboard part with paper blanks.
- We cut the A4 sheet horizontally into 4 parts.
- We twist the rectangles into tight tubes - these are the supports of the crib.
- Glue the supports to the stock.
- We cut out 2 rectangles from the fabric to the size of the bed, and sew them together.
- We put the padding polyester in the case and carefully sew it up.
- We put the mattress on the crib - the craft is ready.
Tags
from paper.from paper with yoursfrom paper.from paper with yoursfrom paper with yoursfrom paper with yoursfrom paper from paper with yoursfrom paper with yoursfrom paper papers. Origami paper bed. Origami bed Origami mouse Origami paper origami Origami bed Origami beds Origami bed Origami beds origami patterns How to make a bed How to make a bed made TRANSPARENT How to make a snowflake How to make a snowflake How to make a mouse How to make a snowflake How to make a snowflake How to make a snowflake How to make a snowflake furniture items and Paper furniture also Furniture Origami furniture for Origami furniture for Furniture from
bedspaperdollsofaviewedgesdetailedorigami-likecreationwilldiagramsbased
DIY sofa bed for a doll: master classes
The easiest way to make a sofa bed is from a shoebox. After all, to make it you don’t need to come up with complex parts and carefully glue them.
Materials:
- shoe box;
- colored paper for decoration (or packaging);
- stationery scissors;
- PVA glue; fabric, padding polyester;
- thread, needle.
Instructions:
- Cut off 2/3 of the front part from the deep part of the box.
- Cover the workpiece with paper.
- We make a mattress cover from fabric, put in several layers of synthetic padding, and sew the parts together. The bed is ready.
You can also make an original low crib from the box using the lid and bottom.
Materials:
- cardboard box with lid;
- padding polyester;
- textile;
- stationery scissors;
- glue;
- pencil, ruler.
Instructions:
- We cut off the bottom part from the base of the box so that it is 2 cm higher than the lid.
- We apply padding polyester to the bottom of the cut out part, cover the structure with fabric and glue it to the inside of the box.
- We put the soft base into the lid of the box - the bed is ready.
- From the remaining cardboard we cut out 2 backs (can be semicircular or shaped).
- Glue the stock to the backs. The crib is ready.
Plasticine animals
If there is bad weather outside and a walk with friends is cancelled, plasticine will help brighten up your leisure time. Modeling animals, birds and insects from plasticine is a very exciting activity. Today we will try to make little cute animals, feathered mischief-makers and their tiny winged and biting friends from plasticine. Well, are you with me?
Go ahead - make funny animals from plasticine and create real plasticine miracles!
Giraffe made of plasticine
A long neck, a good-natured look and a cheerful orange-yellow color - of course, this is a giraffe! Let's make this shy handsome guy out of plasticine. The little giraffe will become a bright decoration for your home collection of plasticine animals.
You will need: yellow, orange, black and white plasticine, as well as a toothpick.
1. From yellow plasticine, make an oval body and four cones (giraffe legs).
2. Now make a long rope (neck) and pierce it lengthwise with a toothpick so that its edges are visible. If it didn’t work out exactly, don’t worry - you can always correct the product, it’s plasticine, after all.
3. The head and ears will also be made of yellow plasticine.
4. Carefully connect all the parts, smoothing out the places where the neck is attached to the body and head.
5. Use tiny white and black circles of plasticine to blind the baby’s eyes. Make nostrils with a toothpick.
6. It's time to give the giraffe a thin tail with a tassel.
7. Make horns from orange plasticine.
8. And finally, attach small circle spots to the giraffe’s body. Our sunny plasticine baby giraffe is ready!
Now watch a funny cartoon online that will tell you how to make a giraffe from plasticine .
We sculpt a parrot from plasticine
The ancient Indians used to say: “Every noble man must teach at least one parrot to speak.” Fortunately, you and I won’t have to torment this bright exotic bird. To decorate your room with a colorful figure, it will be enough to simply mold a parrot from plasticine.
You will need: plasticine in blue, red, yellow, black and white.
1. Make an oval out of yellow plasticine. This is the body of a parrot.
2. Stick a small red circle to the body. This is the head.
3. Now make two blue drops from plasticine. These are wings.
4. Attach them to the body.
5. Make a breast from white plasticine.
6. From yellow - beak.
7. Now make eyes from tiny white and black circles, and a bright crest from yellow cones.
8. Attach a tail to the back of the parrot, and make notches imitating plumage on the wings and chest.
9. Make the parrot’s legs from a thin yellow flagellum and attach it to the body.
Handsome! It seems as if he had just returned from a Brazilian carnival - his plumage is so motley and colorful!
And if you want to make a proud parrot with a multi-colored tail, here is a video for you:
How to make a turtle from plasticine
This funny plasticine turtle will make anyone smile. Looking at this funny little girl, you can’t help but feel like someone carefully covered her with M&M’s balls. Your plasticine animals will only be happy to have such company.
You will need: yellow, green, black and white plasticine, as well as small brightly colored plasticine balls.
1. Make an oval out of yellow plasticine and cover it with bright multi-colored plasticine balls. You will get a cheerful shell.
2. Make flat paws and a small tail from green plasticine. Attach it to the turtle.
3. Then form the head and also connect it to the shell.
4. Make eyes for the turtle using white and black plasticine.
5. All that remains is to draw a wide smile on the turtle.
I know, I know what you are waiting for! Of course, the video “How to make a turtle from plasticine.” Get it!
Well, do you like this modeling of animals from plasticine? Let's move on!
Modeling insects from plasticine
Who doesn't love ladybugs? Everyone loves them, especially since they are so reminiscent of summer. Let's imagine that we find ourselves in a flowering meadow and blind this bright bug.
You will need: plasticine in red, black, green, yellow and white; thin wire; toothpick; black beads; stack.
1. Make a leaf out of green plasticine and use a stack to make veins on it.
2. Make an oval out of red plasticine and flatten it near the ladybug’s head. From black plasticine, roll one large ball (this is the head) and seven small ones (spots). And make three small balls from white plasticine.
3. Connect the body parts of the ladybug. Attach the head to the body, stick black balls and one white ball on top of the red oval (this is a highlight). Use a toothpick to make a cut for the wings. Make eyes from white circles and beads.
4. Make antennae and paws from pieces of wire.
5. And finally, sit the ladybug on a leaf with a daisy made of white and yellow plasticine.
Now let's make the ladybug her biting friend - a wasp from plasticine.
DIY plasticine goldfish
Are you planning to make an aquarium out of plasticine? Starfish and octopuses are easy to make, but how to make a fish out of plasticine? I'll tell you now.
You will need: red, yellow and white plasticine; beads (for eyes), knife for plasticine. However, choose the color of plasticine at your discretion.
1. First, give the fish an oval body, as well as fins and a tail.
2. Connect the body with the tail and fins, make notches.
3. Stick several yellow stripes on the fish’s back. Applying a plasticine knife to the body of the fish, as shown in the photo, make scales for it.
4. Great! Using a stack, make a mouth for the fish and attach 2 beads in place of the eyes.
Hooray! The goldfish is ready to make wishes come true. Give it to your best friend and let it become his talisman.
Here's what else a plasticine mascot fish .
The following cartoon will show you how to make a cute fish from plasticine quickly and easily:
Congratulations! Now you know how to sculpt animals from plasticine. I hope you liked it.
And now you have a great opportunity to make a plasticine transport and go on a real plasticine journey: