For the little ones
Breeze, spinner, mill. Each of us had such a toy in childhood; we gladly made it with our own hands from ordinary drawing paper or soft cardboard. Let's remember our childhood and involve our children in making crafts.
One option is the origami technique. It will take no more than 15 minutes to create a pinwheel. You will need a cocktail stick, a sewing pin and a square of construction paper. Let's fold the wind pinwheel in a few steps:
You can complicate the task and make a children's windmill with eight blades. First, let's prepare a pattern for the craft parts with our own hands - there will be two of them.
We prepare the parts, insert one of them into the grooves of the other.
We make holes in the corners and bend them towards the middle. All that remains is to fix the turntable on the handle. You can use any sticks as a handle - cocktail sticks, wooden skewers. And so that our breeze moves freely, we use beads. We wind a wire around the tip of the stick, put an oblong bead on it, and only then - a mini-mill.
An even more simplified version of this craft is a “breeze” with six blades, which you can make with your own hands from just one part. As the main material we use colored paper with a dense texture or soft cardboard. Pattern details:
We transfer the workpiece to the base material, including marking the blades (semicircles). Carefully cut out and bend the semicircles. We attach the part to the handle.
Such a toy can be multi-layered, multi-colored and very fun. Use your imagination and involve your child in the design.
A real do-it-yourself cardboard mill
Real buildings and structures are made from paper or cardboard. But it is worth considering that creating such crafts takes a lot of time, you will have to be patient, and best of all, enlist the support of loved ones.
Materials and tools:
- cardboard and paper;
- scissors and stationery knife;
- Ruler and pencil;
- glue.
On a cardboard rectangle measuring 19*10 cm, draw 6 identical wedges and cut them out.
We fasten the wedges with masking tape or strips of plain paper, we get a cone.
We will add “planks” to the resulting cone. We cut them into different sizes so that they completely cover the “body” of the cone. We leave a distance of approximately 1.5 mm open between them.
We decorate the corners of the workpiece with strips of plain white paper 0.8 cm wide.
The next stage is the roof. We make it from a rectangle measuring 11*5 cm. It needs to be divided into three parts by lines.
We form triangles on the sides of the workpiece and bend them.
We cut another 11*5 cm rectangle, bend it in half and fix the roof blank in it with glue.
The roof of the craft also needs to be finished with “planks”. Their size is 5*1 cm. We cover the ends of the part with strips of white paper.
All that remains is to make the blades for our cardboard mill with your own hands. To do this, you will need a strip of material measuring 3 by 8.5 cm. We divide it into wedges, which we then cut into strips 5 mm wide.
We glue strips of wedges onto a piece of cardboard 5 mm wide and 6 cm long, leaving a distance of 3 mm between them.
We prepare 4 such blades and attach them to a cardboard cross.
All that remains is to put together all the details of our mill, add some decor to it, and the original craft for the garden and school is ready.
How to make a decorative mill yourself
An excellent result can be achieved even without experience in such work, by showing a competent approach at all stages of creating a decorative mill.
First of all, it is necessary to develop a mill design. You can do this yourself or use a ready-made drawing of a decorative mill of a suitable size and type.
A detailed drawing will help you accurately calculate material consumption and determine the sequence of technological stages of work.
At the next stage, it is necessary to clear the area at the location of the structure.
You should know that a structure made of stone will require a small foundation, and a mobile structure made of wood needs a stable platform. To make the platform, you will need to put together a square of timber, adding support legs to it.
Four bars of equal length are attached to the support to form the frame of the mill. The beams are connected at the top to give the frame additional rigidity.
Do-it-yourself real windmill made of twine
From improvised, waste materials you can get a real windmill, exactly the same as the one Don Quixote fought with.
You can make the craft yourself in just an hour, no special materials or tools are needed:
- 2 liter plastic bottle;
- leg-split;
- wooden skewers and toothpicks;
- glue Moment or Titan;
- cardboard and scissors;
- white and brown beans;
- sequins and wheat grains.
We roll a cone out of cardboard, fix it with glue and decorate it with twine. Important: the diameter of the lower edge of the cone should be slightly larger than the diameter of the plastic bottle. The fact is that we will “put” the cone on an element made from a bottle.
We assemble the blades from wooden skewers. We fix two identical parts with twine “cross to cross”.
The work on the upper part of the mill is completed by connecting the parts - we glue the blades to a cone decorated with twine.
We seal the bottle, like the cone, with twine. We fix the upper part of the mill to the lower part with glue. You can start decorating. We make the door from short fragments of skewers, placing white beans along the contour.
Decor does not require compliance with rules. You can do the finishing yourself and to your taste. As an example, there are windows made of toothpicks, a “dormer” window above a door made of sequins, a “edge” along the bottom of the product and on a dome made of brown beans.
Layout model Modeling construction Windmill Corrugated cardboard
In kindergarten we decided to make a “Museum of Bread”. The question of its design urgently arose. You need to show children the whole process of making bread. Stuck at the mill. I honestly admit that I don’t like to pore over patterns and work for a long time. Therefore, I decided for myself - cheap, but cheerful. And also, sorry for the small number of photos. As they say, a good thought comes later!
We build a “wooden” mill from corrugated cardboard. It is very similar to a log house and each log does not need to be fashioned. We make a pattern for the future house, remove the top layer of corrugated cardboard (we leave the corrugation itself and the bottom layer, it will “hold” the corrugation).
Glue the parts together. For gluing, I used the same removed “top layer” and Titan glue. The blades were made from cut off individual “tubes” of the same corrugated cardboard and the “top layer” of it.
I screwed the blades to the base. The screw cap (from the outside) was covered with the cut off top of a champagne cork (never throw away “unnecessary” things)
Mixed materials
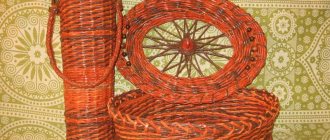
Handywomen often have materials left over from crafts that are a pity to throw away. You can assemble a mill from leftover wood, plastic, paper, and pebbles or seeds are suitable for decoration.
Let's check our "reserves". You will need paper, wooden toothpicks and skewers, imitation tiles (you can cut fireplace matches into slats), glue, small pebbles or seeds, cardboard.
Let's get to work. Let's start with the basics. We roll a cone out of cardboard and cover it tightly with pebbles or seeds. You can use coffee beans if you have them on hand.
Using wooden skewers we assemble a frame with a roof and install it on the base.
We “cover” the roof with tiles made from fireplace matches cut into fragments.
Now you need to prepare the blades. The basis will be skewers, and the planes on them will be assembled from a material that has replaced tiles or from simple matches.
The last step is assembly and varnishing. The varnish coating will protect the materials from aging and color changes.
Mill
Author: swet
source: https://stranamasterov.ru/node/209509
And so, the bottle is primed, the twine along the bottom of the bottle is on PVA, then again on PVA tape-canvas, pre-colored in coffee and with an embroidered motif. Above the canvas, again use PVA twine all the way to the neck. Next, I had a small piece of rough canvas, unraveled the threads along the edge - it turned out like a thatched roof, I also glued it to PVA. I made a semblance of a roof and a wall from coffee beans and glued it to the Crystal Moment. The turntable itself was made from cardboard, wrapped with twine and double-sided tape, or PVA. I glued the pinwheel to the neck using Poxipol.
And this is my very first mill, there is twine and decoupage with a napkin
From flower pots
You can decorate a dacha, garden or courtyard of a private house with a windmill assembled from flower pots. You will only need to make the blades with your own hands and decorate the craft. You will need 3 pots of different sizes, paint, brushes, and wooden sticks.
Step by step instructions:
- We clean the pots from dirt, degrease, and paint. We decorate the top of the pots with a contrasting color edging.
- We place the pots upside down, one on top of the other, from largest to smallest, and secure them with glue.
- We assemble the blades, attach them to a wine cork, paint the entire structure, dry it and insert it into the hole on the top pot.
Well, if you have bricks or large wooden blocks on hand, you can assemble large mills from them and hide them in secluded corners of the garden or place them along paths, next to an artificial pond or in its center.
If you have enough materials, experience in construction and tools, make a “full-length” windmill.
Don't limit your imagination. If you don’t have everything you need at hand, first make a craft project or layout, prepare everything you need and get to work.
How to make blades
The main component of a windmill is the blades. If you want to make rotating blades, you must follow a certain procedure:
- From plywood, you need to cut out two round parts with a diameter of about 20 cm. A hole is drilled in them for the pin.
- The blades are made from slats, treated with a protective compound, stained, and varnished.
- The finished blades are placed between round plywood parts and securely fixed.
- The part is attached to a stud using nuts to secure it.
- The propeller is placed on the mill body at a slight angle to ensure maximum air capture.
For a small decorative mill, you can make a propeller from two slats by drilling them and connecting them at the intersection with a pin. If the blades are made of metal, then sharp edges must be processed to avoid accidental injuries.