The process of creating kitchen utensils
How are spoons and forks made? To answer this question we need to understand what we are dealing with. Production stages:
- Multi-cutter. The first step is to select the thickness and type of future blanks. Next it is cut out. In most cases, stainless steel is used.
- Stamping. Next, the main goal is to give the final shape and finish.
- Polishing. Finally, ideal smoothness of surfaces is achieved. First, the product is polished on machines and then by hand.
Variety of trays for the kitchen
Currently, any self-respecting kitchen factory also produces kitchen accessories, including storage trays. Therefore, you should not have problems finding this little thing. You can buy a cutlery tray for a drawer online, fortunately there is no shortage of such offers.
Mesh cutlery tray with additional cells
What are standard trays made of? As a rule, such universal materials as:
- plastic;
- tree;
- stainless steel.
With such a tray your kitchen drawer will always be in order.
However, there are also very exclusive options, lined with velvet or other expensive fabric. Such models are suitable for kitchens designed in Rococo or Baroque style. However, in this case, the box should be used only for storing collectible instruments. Therefore, you will still have to get a more standard device for daily use.
Beautiful contrasting tray upholstered in black velvet
Advice! Ideally, the tray should be selected to match the style of the kitchen in general and the kitchen unit in particular. So, an ideal option for a Scandinavian-style kitchen would be a wooden tray. And fans of hi-tech will appreciate the stainless steel accessory. So, you can decorate your kitchen with cutlery tray designs.
Built-in two-tier wooden cutlery tray
DIY spoons
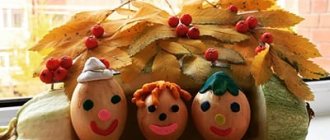
To create kitchen utensils from scrap materials at home, you need to use your creativity and creativity, and there are plenty of sources. Any bottle, plastic packaging, paper can serve as the basis for a future product.
A spoon made from scrap materials can complement its stainless steel counterparts, or add to the collection of children's toys when playing mother's daughter.
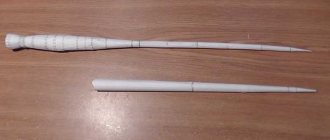
Making it is very simple, first we decide on the shape and color, then we make a blank from the available raw materials and cut out our device.
A couple of manipulations and the result is obvious. A DIY folding spoon will be useful in any situation, from a hike to a picnic or barbecue.
Ready-made items for the home
Not everyone has the time, imagination and opportunity to make a variety of crafts out of something, so you can visit the same Ikea store and find there everything your heart desires. On its counters there are things ranging from washing accessories (they hold soap or a sponge for washing dishes so that they can dry) to furniture and various innovative things for the apartment. By purchasing them for your kitchen, every detail of the room will become more functional and easier to use.
A variety of furniture: cabinets, pull-out shelves, corners for appliances or kitchen utensils - all this is sold at Ikea at affordable prices, so there is no need to “reinvent the wheel”. It is worth spending time and a small amount of money to purchase something useful for the household. In Ikea you can find a special wooden cabinet that is perfect for spices that can be stored in it; all the jars will fit well on its shelves and will not clutter up the entire set.
On store shelves you can find all possible shelves, hooks, hanging holders, floor stands, various racks that make it easier to arrange a kitchen, thanks to them you can create your own unique interior design for a given room.
Naturally, the Handmade style will not work out. DIY kitchen organizers will also harmoniously fit into the interior of a modern room. They will become a kind of highlight in the design of the room where the family spends most of its time. It is this room that most often becomes the “calling card” of the hostess, so she tries to think through every detail in it as best as possible so that it is comfortable and beautiful.
DIY forks
In the kitchen and in the home, any person has many resources that can be used as a prototype for future cutlery. How to make a fork out of paper? To make a paper fork, you will need paper and a minimum of effort.
Note!
- Wood burning for beginners: tips and secrets for burning pictures
- Plasticineography - interesting options for creating pictures from plasticine on cardboard for children
DIY scrapbooking for beginners: what it is and how to do it. What you need to create a beautiful album or notebook (photo + video)
The final product of your activity will be origami, shaped like a type of tableware. Just a couple of manipulations will bring results and you will get another idea about how paper can be used for different purposes.
Crafts for storage
Modern kitchens are increasingly gravitating towards minimalism in everything, so more and more attention is being paid to creating full-fledged storage spaces that help keep the kitchen clean, make cleaning easier and place everything you need at hand.
Cutlery
For all kinds of forks, spoons, knives, openers, you can create a new home using ordinary tin cans for drinks or canned food. To do this they:
- repainted in suitable colors or left in the factory design;
- remove the covers, sanding the edges if necessary;
- connected together with reliable glue.
There can be a huge variety of connection options:
- in a circle with a high central element;
- in the form of a triangle or square;
- in a line.
In the latter case, it is better to prepare an additional wooden stand to hold the structure in place.
Knives
Storing knives in a common pile is fraught with dulling of the cutting edges of the knives themselves and cuts on the fingers of careless owners. You can place homemade railings or vertical stands as stands for storing sharp objects. In the first case, you will need a magnetic strip, several screws and a tool for inserting them into the wall.
In the second case, an old vase or an ordinary jar will come in handy, inside which wooden skewers for kebabs, cocktail tubes, neat twigs, and long, even pasta are placed. Small knives will hold rice, millet, and other grains in place.
A wooden stand will be more complex, but this will require special tools.
Bulk solids
Baby food jars are perfect for storing spices. To give them a completely unusual look they use:
- decoupage technique;
- painting with paints on glass or regular watercolors;
- decoration with coarse salt applied to a layer of glue.
Ordinary cans are used to create cute storage spaces for cereals, pasta, flour, starch and other bulk supplies.
Making stands for kitchen utensils yourself
To make a stand, you need to choose the type and color of the future product. A stand for spoons and forks with your own hands must meet two requirements: not to get wet and not to rust. There is a huge range of materials from which a stand can be made. It all depends on your desires and preferences. It can be shaped into a barrel or basket.
Another option is a cup, regardless of what it consists of.
Another option is to use containers, various jars and packages for yogurt. Well, the simplest and most unpretentious way is to use cardboard boxes and paper. Thus, a do-it-yourself cutlery stand can be made without much effort, with a minimum amount of raw materials and the necessary equipment.
How to trim a tray
If the tray does not fit into the kitchen furniture drawer, you will have to cut it. The cutting method depends on the material. But it is best to use a special hacksaw for metal, wood or plastic. This results in the most even edge without jagged edges.
Such boxes are found in smaller modules, usually made for small rooms.
It is necessary to take into account that in order to maintain external attractiveness, you should cut off the far edge of the container, which will be located in the depths of the box.
Classification of products from parts of cookware
Crafts made from cutlery are very diverse both in their forms and in their purpose. They can be used in all areas of human life, to satisfy many needs, or simply to decorate the interior of a house or apartment.
Note!
- How to make a craft with your own hands: what you can do with your own hands at home
- DIY foam crafts: snowman, Christmas tree, sculptures, original figures with instructions (photo + video)
- Papier mache from egg trays, boxes, cassettes: the best ideas on what can be made from egg packaging
There is something for everyone. This option would be an ideal gift for any celebration or holiday. And if you have unnecessary things lying around at home, then do not rush to throw them in the trash, but turn them into wonders of the flight of creative thought. Crafts made from metal forks and spoons are very diverse:
Instructions
1. Before making any joinery product, it is necessary to calibrate the workpieces. First, make two adjacent planes even on the jointer, and then use a thicknesser to even out the thickness along the entire length of the workpiece. But since most of us don’t have a surface planer, and, especially, a jointer, we will have to make “towns”.
But first, you still need to slightly level the wide sides of the ash workpiece so that you can fix it on a plane and evenly trim the adjacent sides, since you still can’t make them perfectly even with an electric planer.
2. Make a sketch of your tray so you can cut the pieces to length. Focus on the number and length of cutlery. An example of my circuit is below:
Avoid knots and cracks. Before cutting, it is necessary to clean the workpieces from dirt and dust using a stiff brush. If this is not done, dust and dirt will dull your cutting tool.
3. Next, you need to cut the blanks according to the height of your tray with a margin of 2-3 mm. The height of the partitions of my box, taking into account the base, is 45 mm, which means we will saw off 47-48 mm. This will avoid scrap if you have to grind it due to burns from the saw blade or chips.
Follow safety precautions! For high-quality cutting, the disc should protrude no higher than 4-6 mm above the workpiece being cut.
4. Now from the sawn blanks in step 2 you need to cut blanks 5-6 mm thick. In my subjective opinion, this is the optimal thickness of the partitions; they will not seem thin or thick in comparison with the cutlery, so an ash tray will look organic.
Follow safety precautions! Be sure to use a "zero clearance" liner, otherwise there is a very high chance of kickback.
It is also better and safer to carry out this operation on a band saw.
5. Next, you need to glue the blanks together in three pieces, and then glue everything together. If, after cutting, an uneven edge is formed from the end or the quality of the disc leaves much to be desired, plan it with a hand plane or use the method of leveling with a milling cutter.
6. Sand all the blanks and the glued base of the cutlery box.
7. Using a miter carriage, we file the parts for the main frame. It can be attached to the base using studs, glue or small self-tapping screws, but I did not attach it, since the structure needs to be dismountable.
Do not saw all the parts “to size” at once, since the connection of internal parts will be carried out with sawing and an error of even 0.5 mm will be very noticeable.
8. To attach the inner frame of the cutlery tray, you need to make cuts.
The orange dots are where the parts are attached to the groove. The green arrow indicates a part in which a groove needs to be made so that the part fits into the spacer, but does not change the geometry of adjacent parts. Otherwise, it will turn out to be skewed and will look like hack work.
Cuts can be made using a circular saw built into the table and a miter carriage, setting the appropriate height of the saw blade. The second option is using a router and a cutter with a diameter of 8 mm. The third option is to do it manually using a Japanese saw and a 6 mm chisel. The fastest and most accurate is the first option, but the bottom of the cut must be cleaned with a chisel, since the surface after the saw blade remains very uneven.
9. After adjusting all the parts, I recommend manually sanding the sharp edges with 220-320 abrasive to slightly round the corners to avoid abrasions when using the tray.
10. It is advisable to coat the cutlery tray with oil, which will protect it from moisture and make cleaning easier. But if you don’t like the color that the oil gives, you can leave it uncoated.
Decorations
Bracelet. To make it, you need to cut off a fragment of a spoon or fork and bend it with an arc of lower diameter. Next you need to make two holes and fasten the bracelet using a connecting ring.
If the length is not enough, the gap can be hidden using a short chain or several beads that are connected by thread or fishing line.
A good option would be to take the whole device. This is suitable for those who have thin arms. You just need to wrap the object around the brush and secure it. In addition, you can take elements of a tea set made of silver or cupronickel. This way you can make a beautiful decoration.
Let's not forget about silverware, which can be bent in the form of an arc, at one end of which there will be a hook. A combination with a leather loop, which is fixed with metal holders.
Long earrings
To produce this jewelry, you need a special device that makes it possible to apply patterns and engraving.
Note!
- DIY vase: step-by-step photo instructions, master class for a beautiful and unusual craft
- Paintings from buttons, panels, appliques and compositions with your own hands: how to make flowers, a butterfly, a fish or a tree craft from buttons
- Flowers made of wool (85 photos) - how to felt a flower from felt or a wool brooch. Step-by-step instructions for beginners
Rings
The manufacturing procedure is very simple. First you need to cut off the long part of the kitchen utensil. Correlate the volume of the resulting circle and the size of your finger. Next, you need to remove the excess fragment of material and connect the two components of the remaining one.
Romantic pendants
To do this, you need to take a spoon or fork with patterns, polish it and connect it with a thin chain. Everything is as fast and simple as possible.
Commemorative keychains
We cut off the lower part of the device, make a small hole, and connect it using a connecting ring. Next, we attach another, larger one to this ring and our keychain is ready.
Flowers and decorations
Crafts made from plastic spoons can be designed in the form of flowers. From the resulting buds it is easy to assemble a bouquet for decoration or make a decoration for clothes or hair.
Below are detailed descriptions of several options.
Decorative tulip
If you make several of these flowers, you will get a beautiful bouquet of unfading tulips.
What is needed to make 1 flower:
- 6 spoons;
- a small piece of yellow plasticine;
- candle and matches;
- gouache;
- strong hold hairspray;
- self-adhesive green tape for artificial flowers;
- green corrugated paper;
- green sewing thread;
- glue gun;
- scissors.
Step-by-step instruction:
- Light the candle wick and gently melt the edges of each spoon. Don't hold the spoon too close to the heat because the plastic will curl and turn black. You just need to heat it up so that the material becomes soft and pliable. Use your fingers to gently bend the edges, giving them the shape of petals.
- Cut off the handles from 5 spoons, leaving about 2 cm on top.
- All petals need to be painted with thick gouache on both sides and allowed to dry. Then spray them with hairspray. This will make the coating more reliable.
- Glue a piece of plasticine onto a spoon with a long handle, placing it at the base.
- Carefully connect the remaining petals, pressing them into the plasticine, then strengthen the structure with hot glue.
- Take the cut handle from another spoon and extend the stem of the flower using glue.
- Cut out 2 sheets of colored paper and place them near the bud. Wrap the leaves to the stem with a thread.
- Wrap artificial flower tape around the stem so that the threads become invisible.
A tulip made from a plastic spoon is ready. You can make several flowers and put them in a vase.
Hair tie with plastic flower
Disposable spoons can be not only white, but also colored or transparent. For the craft described below, colorless material is suitable.
What is necessary:
- a simple hair tie without decoration;
- 8 spoons;
- candle and matches;
- transparent glue Moment;
- pearlescent spray paint or glitter paint;
- 1 large bead;
- scissors.
- Cut off the handles of all appliances.
- Light a candle and carefully melt the edges of all the spoons. While the material is hot, carefully roll the edges inward with your fingers. 4 spoons need to be deformed more, they will be in the center of the flower.
- The 4 petals, which are curled less, need to be glued together with Moment in the form of a cross.
- Place the more curled petals on top and glue them so that they cover the gaps between the lower petals.
- Spray paint from a can onto the flower. You don't need to paint the flower too much, just give it a little shine.
- Glue a bead into the center.
- Coat the bud with glue on the back side and attach an elastic band.
This decoration is suitable for decorating a braid or a high ponytail.
Small brooch in the shape of a calla flower
These flowers are also called whitewings.
What you will need for work:
- 1 white large spoon;
- scissors;
- yellow acrylic paint;
- candle and matches;
- glue gun;
- pin.
How to make a brooch:
- Cut off the handle from the spoon to fit the base.
- Light a candle and melt the spoon. Use your fingers to form a flower bud. Bend the top part outward and bend the sides inward.
- Cut 2 cm from the bottom of the handle and paint this part with paint. Let dry. Using glue, fix this part in the center of the petal. The handle will imitate the long core of the flower.
- Glue a pin on the back side with a glue gun.
A small and original brooch is ready. It can be used to decorate a dress or jacket.
Accessories
Photo stand
You need to have a fork and pliers with you. It can be done by separating the outer and inner teeth, thus we get excellent support. How can you make a phone stand out of a fork? To achieve this goal, you need to take a fork and repeat the same thing as when creating a photo stand.
Cabinet handle
You need to process it so that it looks like a handle, then attach it to the cabinet door.
Buffet dishes
You need to do one action. Cut off the stalk. The buffet fork is ready.
Egg cup
It is necessary to bend the device so that the fragment with the teeth takes a horizontal position. Next, use a tool to move the teeth in different directions and the accessory is ready.
Fan of forks
This fan is suitable for decorating a room in an oriental style or for performances and masquerades.
Crafts from plastic spoons, forks - fans
What materials and tools are needed for work:
- 23 plastic forks;
- hot glue;
- thick cardboard;
- acrylic paint;
- wide artistic brush;
- marker or pencil;
- scissors;
- 45 medium size beads;
- satin ribbon 1 cm wide, 1.5 m long;
- 1.5 m of lace ribbon or ruffle of different colors.
How to make a fan:
- Cut out 2 rectangular blanks with sides 10x15 cm from cardboard. Draw a semicircle on each of them. For convenience, you can use a small saucer. It needs to be attached to the cardboard and circled with a pencil.
- Cut out the blanks and paint each one with acrylic paint on one side. Let dry.
- On the unpainted side inside 1 semicircle, draw another, 1.5 cm away from the edge. No need to cut. This line will help glue the forks evenly to the cardboard.
- Using a glue gun, glue all the devices to the cardboard with the teeth facing up. It is important that the end of each handle does not extend beyond the mark.
- When the entire workpiece is filled, you will need to hide the ends of the forks. To do this, you need to apply glue to the 2nd workpiece and place it evenly on top.
- Take the ribbon and thread it between the forks like a snake. There should be 1 cm ends left on each side. They should be folded and carefully glued.
- From above, between the teeth, thread lace or ruffles in a similar way.
- Apply glue to the teeth that remain visible from the front side and carefully place the beads.
- Thread a ruffle or lace of a different color between the forks, on top of the ribbon, in a checkerboard pattern. That is, this strip should cover those parts of the handles that remained open when the tape was threaded. Cut off the excess and glue the ends.
- By analogy, from above, thread 1 more piece of satin ribbon and secure the ends.
The fan made from plastic forks is ready. From the remnants of the satin ribbon, you can twist small roses and glue them to the cardboard along the edge.
Components of decor
Shade
We take an old lampshade as a basis and hang the devices on thin chains.
dream Catcher
Spoons and forks must be fastened with threads. To make the product beautiful, it is better to organize two rows - top and bottom. Each row consists of six starting materials.
Panel
Kitchen utensils are painted in a bright, rich color and are also attached to the canvas.
Chandelier
This product requires a large amount of raw materials. They are connected at the edges of the chandelier thanks to pendants.
Kitchen wall decorations
It is necessary to apply matte paint to the dishes. Fix the composition on the canvas.
Elegant forks
The basis for the work is the cutting. Care and skill must be exercised when producing the product. The idea is to twist the teeth with pliers.
The best manufacturers of box inserts for spoons, forks and knives
Naturally, in order for such a storage system to serve as long as possible and delight its owners, it is necessary to choose products from trusted manufacturers. These include companies Blum, Tandembox, Orgaline, Movento. These are manufacturers who value their name, so their products are high quality, comfortable and last a long time.
The cost will depend on the quality of the material.
Items used in everyday life
Storage area for small items
The spoon needs to be bent in the area of the handle and nailed to the wall.
Key hooks
We bend the handle with pliers and attach it to a wooden block.
Fruit bowl
A large amount of utensils and a soldering tool are required. The procedure involves shaping the devices into a vase shape and soldering them together.
Sign holder
The plate is fixed between the teeth of the kitchen utensil.
Note pendants
A hook made from a fork, they hang on the wall and hold notes on them. In a similar way, you can make a crochet spoon.
Curtain tieback
First, we blunt the teeth of the product, then bend it and fasten it to the appropriate place.
This is how you can answer the question: What can be made from a fork?
Advantages and disadvantages of different trays
However, the advantages and disadvantages of each material and its features should also be taken into account.
One of the most popular materials for making trays is plastic. Its key advantages are its presentable appearance and low cost. At the same time, such trays are durable and perfectly resistant to moisture, grease and other negative things typical of the kitchen. At the same time, plastic trays are easy to clean.
Practical and easy to clean plastic tray
Modern trays made of natural wood are also not afraid of moisture. To do this, they are impregnated with special protective oils. However, you should be especially careful when handling wooden storage units: if exposed to moisture, they can still lose their original appearance. Therefore, such trays are considered less functional, although they look very impressive.
An interesting solution for knives hidden under the main tray
If you are disgusted by such standard solutions as plastic trays, and you consider wooden storage too unreliable, then it’s as if stainless steel liners were specially invented for you. They cope well with moisture and acid. Such trays have increased strength and do not deform during operation.
A large number of compartments in the tray will allow you to place the maximum number of kitchen utensils
As for non-traditional trays lined with velvet, they are ideal for expensive appliances. They will be an ideal place to store silver knives and forks and highlight their value. In this case, an ordinary tray turns into a source of pride for the owners and into a collector's item.
Exquisite velvet tray in a modern kitchen interior
Recommendations for making crafts
- In the process of making homemade products, follow safety rules, this also applies to the use of tools.
- When choosing kitchen utensils, make sure that the appliances are not damaged.
Crafts made from disposable tableware are becoming increasingly popular. This is due to the relatively low price of resources and availability. Crafts made from disposable forks can be a practical and laconic option for many people. In addition, discarded disposable tableware has a negative impact on the environment. So preserving these products through recycling will only have a positive impact on the environment.
Non-standard organizers models
The office organizer is easy to adapt to your kitchen needs. Instead of stationery folders, you can insert cutting boards into the vertical holes. Tiered wall units with slanted compartments are a great option for storing pot and pan lids.
- An ordinary hanger, long tired and useless, can be updated by painting it and adapted for hanging tea cups. If you still want to hide the cups, then the hooks are suitable for placing towels and potholders. This unusual option will replace the expensive railing with adjustable hooks.
- The front panel of the refrigerator is a great place for notes and magnets. In addition, it can be adapted for use: to hang useful recipes or information about weight measures.
- If there is a protruding part of the wall in the middle of the kitchen and it is empty, it is worth hanging a decorative hook and a flowerpot or a wire basket on a string on it. Let them serve not for indoor plants, but for fruits, matches or other small things that should always be at hand.
- Wall panels with perforations are an original idea for storing frying pans, graters and other flat items that take up a lot of space in the closet. There is no need to attach dowels or screw in self-tapping screws into such a panel: just insert the sticks directly into the required holes at a convenient height.
A fabric voluminous pocket organizer can help out if guests suddenly come to the house. It is suitable for carrying several glasses or cups at once, and is also useful if you need to provide everyone with different seasonings.
A few final ways
A disposable product opens up new boundaries for creativity and creation. Plastic forks and spoons can be used as hangers, hooks or coasters. Crafts from such material can be made in two ways. The first method is based on the use of glue.
As a result, you can get a fan or an umbrella. Another method is to heat the feedstock. This way you can make flowers or a Christmas tree. These are unique New Year's crafts made from forks. The integrated use of different types of disposable tableware makes it possible to create complex designs.
Kitchen utensil masterpieces pave the way for unleashing creativity. The main component of success is improvisation and the desire to move forward. There are many video lessons and master classes on similar topics. Crafts made from disposable forks deserve special attention.
Tricks from scrap materials?
To achieve comfort and elegance (at the same time), you don’t have to buy all the know-how and trinkets that you don’t really need, and the price for which is sometimes exorbitant. You can make your own kitchen organizer or hanger.
To create a decorative hanger, you can use cutlery – forks. By bending the handle a little and a few teeth, you get a fun towel hook. You can add brightness and shine to them with simple spray paint.
The same function can be performed by wooden clothespins fixed to the wall with glue or self-tapping screws. The door can also be used as a basis for placing such “loops”.
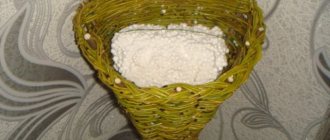
In every home you can find a lot of stacks of newspapers or magazines - from them you can weave a shelf for spices. Weaving will take a little time - about four to five days. With a little imagination, the result can be not a simple kitchen organizer, but a multifunctional masterpiece. Use waste paper to make several baskets for storing vegetables.
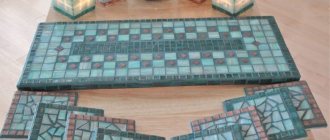
Also, newspapers will make an amazing bread basket - the main thing is to know how to weave. It will take one to maximum two days to weave a tray. The lid will take a little longer. Photos of diagrams and step-by-step instructions with sketches are available in huge quantities on the Internet - you can find different ones in shape, size and capacity.
Before you start weaving one such organizer, you should make sure that you have enough material, and also study as many master classes and video lessons as possible - because haste will lead to disappointment.
Drawing cutlery
Many people love to draw, so why not depict on canvas or paper what surrounds us every day. The drawing of a fork and spoon is another option for the flight of creative thought. Pens, pencils, crayons, markers. You can take all this in your hands and depict what is part of our life, what we encounter three times a day, at breakfast, lunch and dinner.
What are the dimensions of the box for spoons and forks?
Despite the fact that the compartments and stands are all different, the main dimensions still vary within certain intervals:
- Width from 0.3 to 0.9 m.
- Height from 20 to 30 cm.
- Depth from 0.4 to 0.6 m.
To protect young children from using cutlery for other purposes, it is advisable to consider the option of a hidden cutlery drawer.
Crafts from forks and spoons - photos of works
Please repost
0