How to sew a soft elephant with your own hands, where can you find patterns?
How to sew a soft elephant with your own hands, where can you find patterns?
- In order to understand how to properly sew an elephant, you need to thoroughly study its pattern, because you must not forget about such an extraordinary detail of our elephant as the trunk. And he can be anyone! For example, let’s take a regular pattern for a toy elephant:
From this pattern it is easy to understand how many and what parts are needed to make an elephant. Please note that this product is proposed to be sewn from fluffy mohair, which means the companion fabric should also be soft and delicate.
We cut out the parts on the fabric with a seam allowance of 0.5 cm - this will be more than enough and carefully sew the parts together, not forgetting to leave room for turning the parts inside out and filling them later with any kind of filler. It is important.
Elephant eyes can be purchased in advance at a craft store, or you can look for beads or buttons at home.
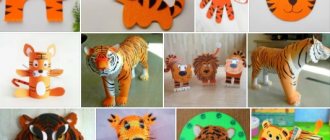
As a result, you will get something like these nice elephants:
- All the elephants are just super! Let's do it with the kids!
- It turns out that an elephant with its trunk raised brings good luck, stability, prosperity to the house, and protects against all risks and dangers. You can sew such an elephant from any fabric that you like and stuff it with cotton wool, or you can make one as fragrant as this one, which is filled with coffee beans, vanilla and cinnamon.
here is a pattern for such an elephant
- I found several wonderful master classes on sewing an elephant toy.
Calico elephant pattern:
We cut out, sew together the parts and stuff them with cotton wool or padding polyester.
It’s not difficult to sew such a cute elephant. For a detailed master class with a pattern, see here:
Another elephant in the form of a pincushion or a small toy. Detailed description and sewing with pattern here:
The cutest elephant. See details here:
.
Another elephant. See here:
- I came across such an elephant, so cute, I couldn’t resist telling about him.
I just fell in love with him. For decoration, you can come up with something interesting yourself, but here is the pattern of a cute elephant, where everything is written out very conveniently and clearly
- In order to sew an elephant, you will need to decide what you will make it from. The most popular items now are fabric elephants. The second point is that you need to choose the size; if the elephant should be large, then the pattern will need to be enlarged. The next point is the color of the fabric - you can choose it to suit your mood, or you can choose it to suit a specific decor. Next, if you plan for the elephant to have decorative elements, then find ribbons, sequins, etc. Here, in the answers, they have already suggested a lot of different elephant patterns, but still, if this is not enough, then you can familiarize yourself with the master classes on this site. In the search, type fabric elephant.
- Baby elephant made of felt, sewn by hand.
You will get such a cute elephant with button eyes.
Pattern for a toy
How to sew:
First, cut out the toy parts from felt using the templates. The elephant itself is gray or gray-blue, blue, and the ears inside are made of pink felt.
We sew the parts together, leaving room to fill the toy with filler. Sew the pink inner part to the ears. Then we connect the parts. We sew the ears to the head, the head to the body. Finally, we sew on the baby elephant’s eyes using buttons or beads. I suggest crocheting the tail from yarn (for some reason there is no tail in this toy (and in the description). It needs to be fixed).
- It is very easy and simple to make an elephant pillow toy. It will be made of soft fabric, so the baby can not only play with it, but also sleep sweetly. It sews quite easily. Making such an elephant will not take much time. First you need to cut out a pattern from paper. A simple pattern can be drawn by hand, for example, like this:
To decorate the elephant pillow, cut out clouds. The most common and simple ones, the kind we used to draw in childhood:
Place the patterns on the fabric and carefully cut them out, remembering to leave seam allowances.
On the finished halves of our elephant we sew clouds pre-cut from fabric in random order. All that remains is to sew the two halves and stuff the toy with padding polyester. We sew on the elephant's eyes, ears and tail and the wonderful toy pillow is ready.
- I really like Tilda's soft toys. I don’t know why, but they evoke real affection, even though such toys have a certain disproportionate structure. For example, an elephant has a larger head than standard toys.
Here I found these adorable elephants:
https://vk.com/tildasworld
more pink baby elephants:
After a long search, I found a pattern, I’ll definitely sew it, the main thing is to choose fun material and not abandon what I started!
info-4all.ru
General rules for working with paper
When considering the rules for working with paper, it is important to accurately understand the pattern. Sometimes you need to fold the sheet by eye. Depending on the chosen angle, the outline of the animal will change.
You may be interested in: Which yarn is suitable for making crochet toys?
Masters draw the attention of beginners to the need to select high-quality material. A thin sheet rolls well, but at the same time it wears off and does not keep its shape well.
Paper folding
Important! The density indicator should be at the level of 100 g per 1 sq. m.
There is special paper for origami, but it is not available everywhere.
The squares are supplied in different widths:
There are also large options for professionals and the smallest sheets with a width of only 2.5 cm. The main requirement for the material is light weight.
A foil sheet is also considered as an alternative. In store windows it may be labeled as a sandwich. From the name it is clear that we are talking about gluing two materials: a sheet of foil and paper (it can be on one or both sides). Its advantages:
- rigidity;
- variety of colors;
- suitable option for small toys.
Baby elephant toy with free pattern
Added: 04/26/2010Author of the article: Ekaterina Vinnichek
One day I came up with the idea of giving a baby elephant toy. After looking at several patterns of elephant toys from the Internet, I realized that I’d rather make my own (I wanted a real elephant, not a flat one like a pillow, but a real one, standing on four legs)!
I took 2 patterns I found as a basis and made the one you see below and can download for free.
Materials needed to work on a baby elephant:
- fleece (preferably two colors);
- filler;
- eyes (beads, embroidery threads, fabric paints...);
- threads
Operating procedure
1. From fleece of the same color, cut out:
- 2 body parts,
- 2 abdominal parts,
- 2 ear parts,
- 1 forehead piece,
- 2 parts for the ponytail.
Attention: if two parts are indicated in the cutting, then they need to be cut out in a mirror image.
Leave a seam allowance of 5 mm and cut it out. The photo above shows all the details from the front side.
2. We sew the forehead of our baby elephant toy into the head, aligning the l marks on the pattern. 3. Sew the parts of the abdomen together. We fold the parts of the baby elephant's abdomen along the seam line with the wrong side inward, and then put these parts into the main parts of the elephant's body. 4. Sew the elephant’s body (when sewing in the abdomen, you must ensure that marks A and B are aligned). Attention: we leave the top of the trunk and the bottom of the legs unsewn! 5. Turn inside out through a hole in one of the legs (This method is only suitable for toys with thick legs; for small toys, leave a hole in the back or belly unsewn, turn inside out and stuff through it). We stuff the toy (again through the legs). 6. From fleece of a different color, cut out the feet and nose (unsewn top of the trunk) of the elephant. We sew these parts to the stuffed body of the toy using a hidden seam. 7. Sew the tail. Turn it inside out and sew it to the elephant with a hidden seam. We don’t stuff the tail!
8. Cut out 2 more ear parts from fleece in an additional color (in a mirror image).
We sew the ear pieces together and turn them inside out.
My Elephant will have white ones on the inside. We sew on the ears using a hidden stitch (you can experiment with the placement of the ears on the elephant’s head).
Attention: you don’t need to stuff your ears either!
9. Now we’ll make a tightener for the baby elephant’s eyes. How? We stitch the head all the way through with a long needle with a strong thread inserted into it in the designated places and pull it together, fastening the thread well (but so that the place of fastening is then covered by the baby elephant’s eye).
10. All that remains is to glue (sew, draw or embroider) the eyes. You can also make eyelashes (I painted them with acrylic paint directly on the eyes.
Now the elephant is ready.
PS If you wish, you can glue a tongue and a bang to the elephant, sew an elegant blanket... I thought about it for a long time, but didn’t do it. (My toy was intended for a little boy and for the sake of safety I sacrificed a little beauty).
The original of this master class can be found on the author’s website.
www.vsehobby.ru