Benefits of a dressing table
An important component for any woman is to get herself in order before going to work, a walk, a party, etc. For this you simply need a dressing table. It is convenient to store cosmetics in it, and it can also serve as a decorative element. Such products most often contain a mirror, thanks to which applying makeup is as comfortable as possible.
The dressing table is a convenient place to tidy up your appearance.
Bedroom, bathroom, dressing room or living room, no matter what room is used to install it. It will still become an accent in it. This furniture will fit beautifully into any apartment interior.
You can store not only cosmetics in it, but also hairpins, elastic bands, and various accessories. After all, there are many drawers. A stylish lamp or lamps will add sophistication to it.
In addition to cosmetics, drawers can also store other things, such as accessories and jewelry.
How to make a dressing table with your own hands
Most men wonder how to make a dressing table with their own hands. And the point is not at all that it can be expensive, but to give pleasure to your beloved woman. This process will not cause any particular difficulties if you find a competent approach.
Model selection
Regardless of the model and its specifics, the design structure consists of three main parts: drawers for storing accessories, a work surface and a mirror. The following modifications are possible:
- two small chests of drawers connected to each other using a table top;
- an L-shaped table attached to a cabinet consisting of three sections;
- the surface of the bedside table simultaneously serves as a working plane;
- a table in which four drawers, arranged in pairs, are allocated for storing cosmetics.
The third option is considered comfortable for apartments with a small square footage. In addition, its production is very easy and quite fast. This model can be placed in the hallway. The rest are more complex, but at the same time more functional and aesthetic.
Additional Information! The selection of material and design calculations are carried out based on what tools a person has, as well as his experience in creating furniture sets. If the second criterion is missing, then it is better to turn to a professional and take over the production itself.
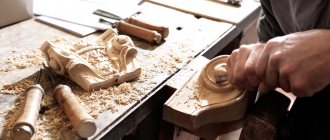
Materials and tools used
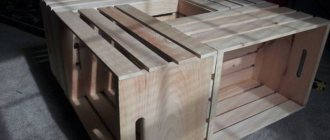
The most common materials for table production are wood and MDF. Some experts continue to use laminated chipboard or chipboard in the old fashioned way. To make the back wall and drawers, it is recommended to use plywood. It is worthwhile to dwell in more detail on each of them:
- Chipboard - has an affordable price, simple processing and installation, and low weight.
- MDF - the cost is slightly higher, but at the same time it has a longer service life and an impressive appearance.
- Wood - used only if you have experience in making furniture. To process it, you need certain equipment. The material is beautiful, reliable, durable, environmentally friendly.
Each material has its pros and cons.
You will also need the following tools:
- a set of various screwdrivers;
- drill;
- tape measure or ruler;
- jigsaw;
- sandpaper;
- square
The work will require certain tools.
In addition, you will need handles, hinges, decorative parts, bolts, screws and nails. If there is lighting, then you should stock up on sockets, switches, LED lamps and cables.
Note! Chipboard is the most accessible and inexpensive material. But if poor quality raw materials were used for its production, then toxins that are harmful to human health will constantly be released into the air.
When choosing chipboard, you need to pay attention to its quality, otherwise toxic substances will be released into the air.
Drawing up a drawing
To produce a dressing table you will need a certain pattern. Detailing can be done manually or using special computer applications.
First you need to draw up a drawing of the future furniture.
To select a drawing, it is recommended to pay attention to the following:
- device parameters;
- the number of components and its complexity;
- the presence of the required amount of space for storing various elements;
- the material from which it will be made.
When drawing up the diagram, all parameters of the product are taken into account.
In addition to the above, you should decide on the backlight. A person can use a ready-made drawing or complete it himself. If the choice is left to the finished version, then it can be adapted to the desired dimensions.
It is necessary to plan the lighting.
Important! When deciding to use a computer application, it is better to choose the Russian version. Foreign editors often do not meet the standards of furniture production. This may cause problems that make work difficult.
To draw up a drawing, you can use a Russian-language application.
Stages of making a table with a mirror
A novice craftsman can easily make a dressing table with a mirror with his own hands. The main thing is to carefully study the instructions before work, which consists of five stages:
- Make a pattern of all the necessary parts according to their natural dimensions.
- Cover all edges, clean the ends, and then prime them.
- Drill holes in the places intended for fastenings.
- Completely assemble the frame.
- Strengthen the sides and corners.
After this, you can begin assembling all the drawers, guides are installed in them, and fittings are fixed on the front side.
The instructions should be given more attention. Initially, all dimensions are transferred to the material. After this, you need to drill out the mounting points and make a cut. Then go directly to assembling the boxes, making the legs.
The door is also hung, and runners are screwed under the retractable sections. It is recommended to use partition limiters. The final stage is to screw all the parts together and cover the open areas with tape.
Final finishing and decor
When asked what is the best way to decorate a dressing table, the answer is simple - add lighting. To do this, you need to perform certain actions. The first step is to make a frame that matches the size of the mirror or purchase a ready-made one in the store. Drill holes for cartridges around the perimeter. Then insert the desired lamps (it is recommended to use LEDs). At the bottom, install a socket and switch.
The best decoration for a dressing table is lighting.
You can decorate with anything: rhinestones, stones, geometric shapes, etc. Some people advise covering the product with self-adhesive paper. The surface is treated with varnish, stain and left matte.
Assembling the cabinet
The sides of the drawers are drilled flat, the front and back walls are drilled into the end. We assemble the “boxes”, nail down the hardboard (fibreboard), fasten the guides with 4x16 self-tapping screws from below, through the hardboard. It should be remembered that the guides are “left” and “right”. The front of the drawer runner (the one without the roller) is flush with the front edge.
We tighten the sides of the cabinet with confirmations with slats and a bottom. The back wall is fiberboard. Through holes with a diameter of 5 mm on the slats are needed to attach the cabinet to the tabletop from below with 4x25 self-tapping screws.
The fronts are also attached to the front wall of the drawers and additionally secured with 4x40 screws for handles after precise alignment.
DIY children's dressing table
In principle, a children's table is practically no different from an adult's, except for its size. It will require less materials.
A children's table differs from an adult's only in size.
The instructions are as follows:
- The first step is to determine the size and location of the product.
- Then make a project, transfer each detail onto special paper used for drawings.
- Take sheets of material, put a drawing on them and use a jigsaw to cut out the parts.
- The ends are treated with sandpaper and primer, but it is better to cover chips with special tape.
- An edging is placed on the tabletop itself, and a melamine film is placed on the ends, which must be fixed with a well-heated iron.
- Drill holes at the designated points and assemble all the individual parts into one structure. Fix with self-tapping screws.
- Assemble the retractable sections, drill individual parts and fasten them with confirmators.
- Make holes on the front panel for the fittings and secure them.
What's the best way to decorate a children's dressing table? In this case, it is better to leave everything in the hands of the child. He himself will select various stickers, pebbles, rhinestones and pictures. An adult will just have to help attach them to the product.
The child can choose decorations for his table himself.
What to consider?
The most important condition is thoroughness. The better the work you do, the better the table will turn out. As you can imagine, a simple model is not difficult to make, but adjusting and finishing the edges is something that will require patience and accuracy.
The next condition is that you must strictly follow the project that was chosen earlier. Adding a component to a design, using a different type of fittings, or replacing a material is something that will require a partial change of the project. And if you don’t have experience working with furniture, constantly adjusting elements will drive you crazy. The result may be furniture that, frankly speaking, is not very smooth.
Is it possible to make a dressing table without a mirror?
You can make a table without a mirror. To do this, a template is placed on the sheets and parts are cut out from it. The ends are cleaned with sandpaper and then primed. They drill holes for fastening and begin to assemble the structure. It is recommended to fix the sidewalls with metal corners.
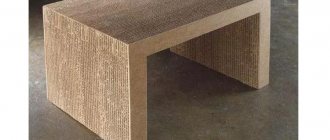
The dressing table can be without a mirror.
After this, you should drill the side parts into a plane, the front and rear parts into the end. Pull-out sections are attached to the sides. Holes for fittings are drilled on the facade. The only disadvantage of this option is that it is not suitable for girls who like to put on beauty in front of the mirror while sitting in their room. In this case, it is better to install it not in the bedroom, but in the dressing room, living room or hallway. The product will be an excellent decor for any of the listed rooms.
A dressing table without a mirror can decorate a living room or other room.
Such a non-standard craft will decorate the room and bring some zest to it. It will last a long service life. The main thing is not to overload it with accessories, otherwise over time the tabletop may begin to sag.
Necessary tool
Here is a list designed for repeated feats. So:
- Electric drill with chuck up to at least 10 mm. Ideally, a good screwdriver, it’s more convenient.
- Jigsaw with chipboard saws. If you are afraid of a jigsaw, prepare money to order figured cuts.
- Roulette.
- Construction angle (something along which you can draw a perpendicular, with millimeter marks). The length of the measuring ruler is sufficient at 300 mm.
- Wood drill bits with a diameter of 8 mm and 5 mm. It's easier to buy a set.
- Combination screwdriver with bit set. The kit must include a hex bit for confirmations (ask at the construction market, they will know).
- Iron.
- Pencil, hammer, knife, dry rag, fine sandpaper.
Recommendations: From this list, only a pencil can be Chinese.