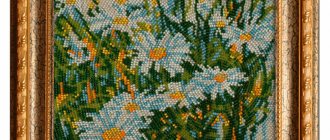
Framing the canvas in a baguette will help to highlight the picture. The advantage of using such an element is the attractive appearance of the creation. Buying a ready-made version will be quite expensive, so it makes sense to study the process of making an inexpensive frame for a picture yourself, especially since the appearance of such products will not differ much from those that you can buy in a store. But purchased models do not have the same charm as those made with your own hands at home. In addition to saving money on crafts, this is a great chance to try your hand at hand-made crafts.
How to decide on a baguette option
Use some recommendations when choosing a framing option for a picture and remember that the baguette should be harmoniously combined not only with the product, but also with the entire interior of the room.
What to pay attention to when preparing to make a baguette for a picture with your own hands:
- Combination with the surroundings. Even the most luxurious and expensive framing option does not look so advantageous if it does not match the interior and looks foreign. Here it is important to think over not only the color design, but also the stylistic option. Thus, classic stucco molding is inappropriate in combination with a modern interior, and minimalism is poorly combined with the luxurious design of an office trimmed with wood.
- Color scheme. The perception of the picture largely depends on this factor. Please note that the baguette should be half a tone lighter or darker than the main color of the painting or match one of the shades - not the main one, but quite often found on the canvas. When choosing materials for making a frame for a picture in Moscow, look for those that will match the warm or cold tone prevailing in the design.
- Dimensions. Accuracy is important here, because the perception of the picture depends on the size of the frame. The width of a hand-made baguette for a picture also cannot remain arbitrary. Small paintings are often placed in wide frames. For large ones, only those that look most harmonious are selected, even if they are too narrow. Here everything depends on the situation, and you need to choose a baguette for the picture with a footage suitable for the product.
- Stylistic design. For simple paintings without any frills, it is better to take the same inconspicuous frames so that there is no dissonance with the composition.
Finishing methods
There are quite a few ways to finish such a baguette - you can paint the relief pattern on the plinth with a contrasting color, age the material in a certain way, or even just paint it in one desired color.
As an option, you can simply make a two-color baguette on the mirror with your own hands. For this you will need additional things, for example, black and silver water-soluble acrylic paints. After puttying, we paint the frame black on the front side, the ends and the inner border on the back. When the paint has dried, use a sponge to apply silver paint only to the raised areas and sides. Dry and apply clear acrylic varnish to the entire baguette.
Before connecting the baguette to the mirror, you can glue a beautiful lace on the back side of the frame to the inner border, which will decoratively fill the existing gap between the frame and the mirror. If you use non-acrylic or water-based paint, then it is advisable to first coat the surface of a do-it-yourself baguette on a mirror with 2-3 layers of PVA glue or a plaster solution.
READ ON TOPIC: How to make a rug with your own hands from wine corks
What else can you put into a baguette?
Nowadays various types of baguette are used not only in decorating mirrors with their own hands, but also for framing paintings, photographs, collages, engravings, reproductions, watercolors, canvas, children's drawings and appliqués, embroidery, tapestry, etc. A large selection of ready-made baguettes, from which frames are made with your own hands, allows the work to have a finished and original look and fit into almost any interior of the house. Such a masterpiece is a wonderful and unique gift for a holiday, anniversary event, or just as a keepsake.
Wooden frames
This is a classic solution for framing a picture, used for centuries, so the process has been worked out and no problems should arise during construction. For production, the following options are used:
- A plinth is considered an excellent solution for decorating a baguette for a painting with your own hands, regardless of the composition. This option is unlikely to work for real masterpieces of art, but for home wall paintings, sketches, and panels it will be suitable.
- Platband is a good alternative to plinth, and it is best to choose strips with a width of 50 to 70 mm, which are great for paintings when pretentiousness is not necessary. This solution is optimally suited for a minimalist or modern interior design, where great attention is paid to simplicity and precision of lines.
- A wooden carved baguette is an option that is distinguished by its beauty. Products in this group are distinguished by their skilful finishing. They cost noticeably more than other options, they immediately stand out in appearance, and therefore are worthy of the money.
Photos of homemade paintings
0
Making a picture into a baguette with your own hands
This process will include several stages. Among them:
- Taking measurements of the composition to have an idea of what size the picture frame will be.
- Parameter accuracy. Depending on the chosen option, before making the workpiece, place the glass outside, this will significantly deepen the depth of the groove, and it is important not to lose sight of this point.
- Cutting workpieces. The easiest way to do this is to use a miter box - a device that allows you to cut elements at a perfectly even angle of 45°, which guarantees perfect joints.
- Connecting parts. The design must be reliable. To achieve this result, use special wood glue, and after it dries, secure the frame with staples using a furniture stapler. The individual parts are fixed using an angle clamp that presses them, ensuring an ideal angle of 90°.
- Apply a layer of decorative coating to the painting baguette: impregnation, paint or varnish, choosing an option that suits the style of your interior.
Synthetic canvas, choose or not.
I admit honestly, at the time of writing this article, I have never used synthetic fiber canvas. Moreover, in the store where I buy my art materials, I have never seen synthetic canvas. This is, of course, a trend of new times in painting and most art salons do not yet risk bringing them. Artificial canvas - how can you choose this, most who read this will think. But time moves forward, and just as before no one could even think about good synthetic brushes, the same thing is now with canvases. Advantages of synthetic canvases:
- I think no one will argue with the fact that synthetics do not rot and do not absorb moisture;
- synthetic canvas will be lighter than canvas made from natural materials;
Disadvantages of synthetic canvases:
- as the artists say, they have not stood the test of time;
- Few people have practiced on them (I myself have never written on them), which makes it difficult to say how he behaves while writing.
- There are also combined canvases: cotton-linen, cotton-synthetic, but I personally am skeptical about them. Different materials behave differently, and when combined they can behave in unpredictable ways.
What grain size of canvas is needed for high-quality painting?
On each canvas it is written what its grain size is. How to understand them and which one is better?
There are three types of canvas grain:
- fine grain canvas. Such canvases are distinguished by their almost smoothness, the grain of the canvas is very fine and that is why not many people choose it now. It is good to paint on such canvases with glazes, applying one layer of paint after another. A good choice if you want to paint a portrait.
- medium grain of canvas. But canvas with a medium grain size is often one of the most in demand. On such canvases it is convenient to paint impasto, and you can also paint with glazes.
- Coarse-grained canvas is perfect for using a palette knife. This canvas holds textured painting well without visible deformation.
Which canvas to choose, primed or not?
The choice is obvious; your canvas must be primed in order to paint on it with oil paints. An unprimed canvas is not suitable for writing, that's 100%. But as always, you have a choice: buy a primed canvas, or an unprimed one and naturally prime it yourself. How? Stores sell artistic primers that need to be used to “finish” the canvas.
Canvas on a stretcher or on cardboard, which one to choose?
Here the choice, as always, is yours:
- canvas on a stretcher, you can adjust its tension; during transportation, you can remove the canvas and then stretch it again. Canvas on a stretcher gives “springiness” due to stretching during writing. Personally, I really like it.
- canvas on cardboard is the same canvas only glued to cardboard, it is thinner (due to the lack of a stretcher) and costs less than canvas on a stretcher. With this, you will not be able to adjust the tension of the canvas, but it will not sag over time.
It is also worth mentioning plywood, fiberboard and wood on which artists paint sketches in the studio or en plein air
Excellent material, but as you understand, it is not durable, you can write on it, but pay attention to the soil of this material. Plywood can delaminate over time, and fiberboard can give waves from moisture. Wood in this case will be more practical if it is well primed and protected, you’ve seen wooden icons, to which believers have come for centuries
Of course, first of all, the durability of a painting depends on the conditions in which it is located, how changeable the climate is and the level of moisture in the room where it hangs. The material from which the canvas is made can significantly extend or shorten the “life” of your masterpiece.
Paint color mixing chart Thinner for oil paint. Which to choose? Which palette to choose for oil painting? How to choose a frame for a picture, short and clear. Why so expensive? How to price your painting.
What to pay attention to
If you don’t have a corner clamp on your property, use another alternative: make grooves on the joints into which, when gluing the parts, thin elements cut from plywood and coated with glue will be inserted. After drying, the excess parts are cut off, resulting in a smooth product.
Now you know how to make a picture frame with your own hands. There is nothing complicated about this.
Sometimes, during the use of products, minor restoration of the picture frame is required. You can also handle this task yourself. When working with wooden elements, they are first cleaned, puttied and re-painted.
It is more difficult with polyurethane baguettes; they must be thoroughly and systematically cleaned, blowing away dust and avoiding contamination.
How to stretch fabric onto a stretcher
The following materials will be required:
- subframe made of slats;
- crosses needed to eliminate distortions and deflections of the main bars, as well as increase the strength of the structure;
- set of staples for stapler.
You will also need the following tools:
- regular roulette;
- hammer (especially if you plan to use nails);
- wood stapler
- special tool for tensioning.
In general, there are two types of stretching and it depends on you which one you have to give preference to: gallery or classic. The first involves frameless design, when the canvas is stretched so that the image continues on the sides. I must say that if it is fixed on the back side of the stretcher and neatly wrapped in the corners, then everything looks great even without a frame. Therefore, today this method is considered very stylish and modern. This kind of design can be found quite often.
There is also a classic type of stretching, when the ends remain white, and the picture itself is prepared for a baguette frame. Like everything classic, this method will always be popular
In any case, it is important that the frame is made exactly to the size of the canvas, and that the timber is dry, without cracks or knots. The fibers should be directed along
Review of polyurethane foam products
Most purchased options are made from this material, which, unlike expanded polystyrene, is durable and does not crumble, which is why it is better used for work. But, if this option does not suit you, then you can use wood to make a baguette.
In industrial settings, special machines are used for making baguettes, but at home, you can get by with a simple set of tools for framing drawings or compositions drawn on paper, paintings.
Now you know how to work with materials to make picture frames with your own hands, how to make such a product, restore or care for it. All these processes are not complicated, and it is easy to do the work with your own hands without much effort.
With glitter
We come to the last option outlined in this article. Glitter is not the main tool here, but only an addition; it is important to have masking tape, the same canvas, and do not forget glue or paint.
- All you need to do is use the tape to create a variety of patterns when gluing it to the canvas, for example, these could be lines.
- After this, glue or paint is applied to the empty spaces and the last stage is sprinkling with glitter.
- These are not all the options on how and from what you can create paintings at home with your own hands.
We hope you will like one of the proposed options and start creating paintings at home. We wish you creative achievements and successful work!
What types of canvas stretchers are there?
All modern subframes are divided into two types: modular and solid. They differ in the way the sides are attached. Let's look at these two types.
Deaf
These are fixed size subframes. Its sides are attached rigidly and such fastening does not allow the sides to move relative to each other. The disadvantage of this mount is that it is impossible to change the size of this product. If over time the canvas sag on it, then the only correct way to restore the stretch is to re-upholster the canvas on the same or a new stretcher. And the advantage is that you can easily make a blind stretcher on a canvas of any size. In addition, it is easier to produce and it costs less than a modular one. Therefore, as a rule, this type is offered in framing workshops and is used in DIY production.
Modular
MODULAR STRETCHER WITH WEDGES
These stretchers better meet the requirements of preserving paintings and at the same time provide sufficient rigidity and strength of the frame. They consist of movable slats that allow you to adjust its dimensions within small limits by driving in special wedges , thereby changing the tension force of the web. Therefore, a slightly sagging canvas can be tightened by knocking out wedges.
Read more about this in the chapter “How to tighten canvas on a stretcher with wedges” (opens in a new tab)
The corners are connected by a so-called straight tenon. With this design of the corners, the end parts of the tenons do not come out through the cuts of the eyelets and do not interfere with the uniform stretching of the canvas - thus, folds of the fabric do not form in the corners.
How to make a picture frame from wood
What you will need:
- Wooden frame or baguette
- Miter box
- Fine-tooth cross-cut saw
- Fitting device
- Clamps
- Carpenter's corner
- Chisel
- Plane
- Roulette
- Sandpaper
- PVA glue
- Rope for tying the frame and bars for tension.
It is best to carry out work on a workbench, or, if one is not available, on a table.
How to choose platband and baguette
The width of the baguette should be proportionate to the picture. An element that is too narrow or, conversely, wide can deprive the painting of some of its artistic merits. The tree must be dry, smooth, without large knots. You should also take into account the texture, which depends on the type of wood: in larch the structure of the longitudinal cut is slightly twisted with a screw, in oak the fibers have different widths and sinuous bends, in pine they are long and even, but different in color.
Instructions for making a wooden baguette
It is very important to measure the picture correctly and transfer the dimensions to the blank parts of the future frame. The starting point for the marking, which is made according to the internal size of the baguette groove, is the vertex of the right angle. Vertical and horizontal parts must be cut at an angle of 45°. Remember that the picture should fit into the frame freely, without effort, so when choosing the size on the baguette markings, allow for a small gap.
How to properly cut at 45°? A miter box is used for this purpose. It can be factory-made (metal) or homemade (wooden). Pressing the baguette rail against the wall of the miter box with your left hand, insert the hacksaw into the groove of the miter box with your right hand and saw down the baguette. File the next part so that it forms a right angle with the first. Beginning craftsmen often make a common mistake: they file the mating parts in the same way, when they should be done mirrored in relation to each other.
Markings for guide cuts are applied along a square, two sides of which are the outer planes of the miter box. The corners of the square are connected by diagonals. Using a carpenter's corner, vertical lines are also drawn from the corners of the square on the outside of the miter box.
The cut with a hacksaw is made diagonally exactly according to the applied horizontal and vertical markings.
The detailed process is shown in the video.
Instructions for making from a wooden frame
To form an internal groove on the reverse side, a strip is glued to the platband (with its wide side), the width of which corresponds to the thickness of the picture stretcher, and the thickness is 15-20 mm narrower than its width. The parts to be glued are tightened with clamps, and excess glue is removed with a clean cloth. In order not to wait for the glue to dry and not to delay subsequent operations, the planks can be connected from the inside with small nails. The platband improved in this way is sawn in the same way as an industrial molding.


