consists of elements:
1. Dress 2. Half gloves 3. Obi belt with tail 4. Hat 5. Wings
Recommendations for choosing fabrics and accessories For the costume you will need:
bright iridescent blue-green knitted fabric (large selection in ballroom dance stores);
ready-made fishnet tights in silver (or any other) color; artificial leather for a blue or green belt, sequins, easily bendable wire; white tulle or stretch chiffon or silver mesh for wings; hat elastic, metal strainers with a diameter of about 7 cm or “dragonfly” sunglasses with large lenses, padding polyester. Description of work Dress.
Sew the dress according to any pattern and description from a fashion magazine. It is advisable to choose the simplest style, because... it will go better with iridescent multi-color fabric. For example, a dress that is not cut at the waist, a straight or A-shaped silhouette, a lowered shoulder forms a sleeve, a boat neckline. Embroider the chest with sequins.
Sew “tubes” from knitwear with pointed ends extending onto the middle finger, attach a headband made of hat elastic.
Sew a wide obi belt from faux leather. Various options can be found online. Sew a wide and very long cone from the main fabric, fill it with synthetic padding and make several transverse constrictions. Attach the resulting “tail” to a wide belt and wear it over the dress.
Sew an insect cap according to our pattern and description. Break off the handle of two kitchen strainers, leaving only the strainer itself. Sew strainers to the cap so that it looks like the voluminous eyes of a dragonfly. Alternatively, you can use large round sunglasses. In order for them to look like the eyes of a dragonfly, it is necessary to apply a pattern – a grid – with a white “stroke”.
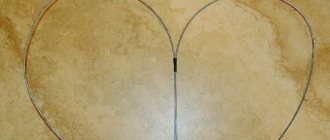
The dragonfly has peculiar, elongated wings that curve upward. In this case, the upper and lower pairs are practically parallel to each other and horizontally. Bend the upper and lower pairs of wings from wire. According to the shape of the frame, cut out the wing parts, sew them, and stretch them onto the frame. Fasten the upper and lower pairs together. Sew on a hat elastic and put it on your shoulders like a satchel. From the archive Description, sketch, diagrams: Lyudmila Orlova, Dragonfly costume drawing: Elena Krampets, coordination and layout: Tatyana Evtyukova
The material was prepared specifically for the children's portal "Sun" and published on November 11, 2011.
For personal use only! Republication in other publications is prohibited!
Quantity Leave your comment
White dragonfly
This look is suitable for an adult girl, for example, a schoolgirl. How to make a dragonfly costume for a girl with your own hands? The basis of the image will be a long white dress. You can sew a translucent top layer on it, for example, hand-painted chiffon. Transparent fabric will add sophistication to the look, and the pattern will make even an ordinary dress unique. Light clothing will not hold massive wings well, and attaching them will be inconvenient. Therefore, you need to wear a thick vest on top of the dress. It doesn't have to be long. A shortened version is quite suitable. The wings should be made of film. We cut out a shape from it, and then fill it with transparent glue on top. It can be either titanium or regular office glue. When the wings harden, you need to apply a design on them. The veins should be painted with gouache. You need to attach the wings to the vest using threads - this is the most reliable option.
Making a Wizard's Hat
We will need: - a sheet of thick cardboard in A1 format (you can buy it at an art store) - PVA dispersion glue (the kind that is sold in small buckets in hardware stores) - brushes for glue and paint - the largest plate in the house or tray + plate about 54 cm in diameter – bronze acrylic paint – a piece of any thick fabric – thread and needle – decorative braid – scissors and a utility knife.
We outline a large plate. If it turns out to be not large enough, we increase the diameter of the resulting circle to the size we need - this will be the brim of the hat. We measure the circumference of the potential Wizard’s head and add a couple of centimeters, since the cardboard will “take its toll.” We look for a plate of a similar size in the house (if necessary, we edit the circle by eye, bringing it closer to the desired diameter).
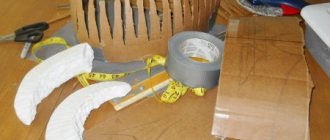
Prepare the inner circle. Then we make the base for the hat: we prepare a strip of cardboard with a length equal to the circumference of the head and a height equal to your desire. We make allowances at the bottom and top of the cardboard strip (about 2 centimeters). Important: along the entire length of the strip we make small vertical cuts at a distance of about 1 centimeter from each other so that the cardboard bends more easily. Cut out the inside of the circle.
Cut off unnecessary pieces of cardboard along the outer contour of the circle. We make two horizontal cuts at the strip and bend the allowances in different directions. Attention: for this work we will need two large base rings, so we will make two blanks at once.
We make serrated cuts on both sides of the cardboard strip. We bend the workpiece and try it on the base.
We make grooves. To do this, we make cuts along the entire length of the cardboard strip, as shown in the photo (the distance between them can be arbitrary - according to your desire). Lubricate the side of one of the large rings with PVA glue, let the glue “set” a little (wait a couple of minutes).
Cover the ring with a cloth and smooth it well into shape so that unnecessary folds do not form. We cut off the excess fabric along the outer and inner circumference, leaving an allowance of about 2 centimeters. We make cuts inside.
. and outside. Apply glue along the inner contour of the ring and carefully bend the fabric inward, as shown in the photo. We perform the same operation with the inner circle.
We get a ring like this. Important: do not worry or be upset if the glue bleeds onto the outside of the fabric - in our version, this situation is only beneficial! Now we apply glue to the cardboard strip, glue the fabric onto it and cut off the unnecessary residue, leaving allowances of about 1 centimeter on the sides.
We form grooves in the triangular slots of the cardboard strip. To do this, we pull the fabric out of them to the inside and sew them tightly with threads matched to match. Now we bend the lower part of the strip with the teeth outwards, and the upper part - inside the blank.
We coat the vertical edges of the cardboard strip with PVA glue and fix the fabric allowances. Now we glue the inside of the large ring and thread a blank with grooves into it.
. turn the hat over and fill it with crumpled paper or newspapers (this is necessary in order to maintain the volume of the blank when fixed with glue). We make small cuts between the teeth of the lower part of the blank. Using construction tape, we additionally fix the glued areas. Place the hat upside down and trace the base on a piece of cardboard.
We cut out the future bottom according to the pattern. We glue the joints of the blank with PVA glue and fix it (you need to hold the gluing area with your hands for about 5 minutes so that the glue sets well). Coat the bottom with glue.
. and fix the fabric on it. We cut the fabric along the cut cardboard with an allowance of about 2 centimeters and make cuts along the entire circumference. Carefully glue the fabric as shown in the photo. Lubricate the back of the bottom with glue.
. and fix it on the hat. For additional strength, we glue the gluing areas with construction tape. It's time to make the buckle. To do this, draw a rectangle with rounded edges (as shown in the photo) and cut out a smaller rectangle inside.
Apply PVA glue to both sides of the cardboard blank and tightly wrap the future buckle with decorative tape. We fix its end with glue. We glue a cardboard strip on the back side, as shown in the photo. We coat the second circle blank (also covered with fabric) with glue on the inside and glue it to the hat.
We press the fields well for better fixation. At the base of the hat, apply a small layer of glue (along the entire circumference), let it “grab” a little. Meanwhile, cut out a strip of fabric equal to the circumference of the base of the hat and twice as wide as the height of the buckle (to create a drapery). We bend the edges of the strip and baste them inward. Thread the fabric through the buckle. We fix the resulting decorative element along the entire circumference of the base. On the reverse side we grab the ends of the fabric with matching thread.
Using a brush, which we dipped in bronze acrylic paint, we decorate the resulting hat, giving it an aged and mysterious effect. So the glue strips that showed through came in handy for us - they only enhanced the play of light and shadow on our magical headdress! Don't forget to apply a little paint to the buckle - this will make our product even more harmonious.
We complete the image of a fly - apply makeup
Complete the do-it-yourself fly costume for a girl with suitable makeup. To choose a pattern, be guided by the color scheme of the set. Warm shades will go well with gold, and cool tones will look good with silver.
As a drawing, choose associations with the image of a fly, place emphasis on the shape of the eyes and antennae of the insect.
Or take an abstract theme as a basis.
It is important that the face painting is water-based and easy to wash off.
Get creative and get inspired to get a beautiful and unforgettable DIY fly costume for a girl. Do the easiest elements together with your baby so that she can be proud of her work and go to the party with joy!
Attributes
These elements are not mandatory, but can perfectly complement the image. And they will look beautiful against the general background. The following parts can be used.
- Based on the famous cartoon and fairy tale, you can arm our mosquito with a saber or sword.
- On shoes, attach shiny square plaques to the strap.
- Complete the look with a butterfly.
- You can use a top hat instead of a hat. You will turn out to be a real aristocrat.
Use your imagination and ask your boy what he likes. Together you can choose your design and create a unique look. Treat your son to a new suit and go to the event together. Happy holiday!
Source
Important details of the image
In order for the appearance to truly resemble a mosquito, all the details should be thoroughly worked out. In nature, we see that all mosquitoes look the same. Although they have their differences, to the human eye they seem insignificant and are practically unrecognizable. We can only compare them by size.
The costume, on the contrary, will be different in that it can be created to suit every taste. It is not necessary to achieve an exact match; you can add something of your own. Get creative and don't be afraid to use your imagination!
IMPORTANT! When coming up with the appearance of a character, try to preserve the features of its structure.
Everything else depends on your imagination.
In order to get a full-fledged mosquito, you need to develop the following elements of the outfit.
- The basis discussed above.
- A cap that will serve as a head.
- A nose or proboscis is also necessary.
- Wings of any size.
- Shoes that match your suit and are comfortable on your feet.
Important! All elements must be gray shades. This will be the leading color in the image of a mosquito.
Additionally, you can use red, purple, black colors, but do not put too much emphasis on them.
Costume base options
Before you start creativity and use your imagination, you need to decide on the main part and details for creating a mosquito.
To make the image believable, you need to remember what a mosquito looks like in real life. You don’t have to go out and catch them, just look at photos of atlases or find them on the Internet. There are several ways to create a mosquito costume. Let's arrange them in order of increasing level of manufacturing complexity.
- First option . The easiest way. Does not contain the suit itself. You can only create a mask, wings and a nose. Essentially, you're just using image attributes.
- Second option . In this case, the base of the costume is already being prepared. But they simply take ordinary gray things that the child no longer wears . You customize your wardrobe to suit your suit and add details to it.
- Third option . Sew all the details yourself using a sewing machine and create a unique, creative design. This option will be more complicated and take a lot of time.
- Fourth option. The most complex version uses self-made items. And all the necessary attributes are made with your own hands, and then additionally decorated.
Depending on the amount of time left before the event, desire and strength, you can choose one of the options. And then complete all steps according to the instructions. This outfit will not take much of your time and will not require any special skills.
Advice. Even if there is very little time left, it is still better to choose a model with the base of the suit. An image consisting of only wings and eyes will look empty and may upset the child.
Tail section
The back part of the insect is assembled separately from alternating small cylindrical beads and beautiful large faceted elements.
To connect to the body, buy a ready-made ring or twist it from the end of the wire, wrapping it around the middle of the upper part of the craft.
This dragonfly can be worn both as a brooch and as a keychain on a bag. The earrings will also turn out beautiful; while walking, the tail will sparkle effectively from swaying.
For a kindergarten party
If parents do not have time to make a complex outfit for their child, then it is recommended to use this method. A dragonfly costume can be made in literally 1.5 hours. We dress the child in black overalls. We tie a turquoise bandana on his head. We take 8 bottles and cut off the top of them. We cover the bottom with fabric or paint it turquoise. We fasten these components together. It is advisable to fix everything with threads, so the structure will be movable. All that remains is to make the wings. To make them you will need a thick film. You can also use cellophane. We roll up a frame from thick wire and secure a transparent film in it.
DIY children's carnival costume
If you decide to sew an original carnival costume for your child, you can make the pattern yourself or contact a tailor. Look through fashion magazines - they always give advice on how to sew a suit for a child.
To quickly make an original or even funny costume, use the items we list below. Using these items and accessories, you can make almost any costume, if you show ingenuity and imagination, from a wizard to a monster.
It is interesting to ask guests to come up with an original costume for a festive evening. Give everyone the necessary materials, tools and instruct the children how to follow safety precautions, and then let them act on their own.
Surprisingly, it’s not at all difficult to come up with an original costume - one or two rolls of toilet paper and plastic wrap, and you’re a mummy!
Materials and tools for making costumes: Aluminum foil Pins, needles, buttons Balloons Black felt-tip pen Gum wrapper Harness Buttons Cardboard tubes Cardboard boxes of various sizes Plexiglas Colored markers Cotton balls Colored pencils Corrugated paper Egg cartons Rubber bands Eyelets Pieces of fabric Feathers Felt Trinkets, soft glitter decorations Glue Gummed stars Hole punch Toy gun that shoots suction cups Old sheets and towels Paint brushes Paints (gouache and watercolor) Paper bags and towels Pencils Pens Corrugated tube Styrofoam Wire cutters (for cutting wire) Cardboard board Multi-colored tapes Riveting machine, rivets Electrical tape Ruler Safety pins Scissors Glitter Clothespins Stapler Rope T-shirts Meter Toilet paper Wire Pieces of wood
Dragonfly princess
Does your daughter want to be the star at the matinee? Create for her a non-trivial image of an elegant insect. How to make a dragonfly costume? This outfit is made from a casual dress. A long piece of chiffon is sewn to the waist. In order for the improvised skirt to have more folds, the transparent fabric must be gathered. The wings are made of wire. First you need to make a frame and then cover it with chiffon. The wings are sewn onto the dress. If the outfit is thin, then you should complement this accessory with straps. A crown or any other eye-catching decoration will help complete the look. You can also create a complex hairstyle and decorate it with ribbons, and the children’s dragonfly costume is ready.
From plastic bottles
Mermaid or kikimora
The most beautiful place in a plastic bottle is the bottom. We cut a lot of them at once. They will decorate the hem of the dress, the bodice, and you can use them to glue together an original crown. For a mermaid or kikimora costume we will need green bottles.
After cutting off the bottoms, you still need to cut off the necks, and then carefully and evenly cut the rest of the bottle lengthwise into three equal parts. Burn small holes in the narrow part and gather them on a cord into a garland, which will become a skirt. Glue, sew or staple the bottoms along the edge of the skirt.
It is better to make the bodice of the dress by covering an old T-shirt with green plastic parts. But the crown can be assembled from lush feathers cut from bottles and attached to a hoop or ribbon.
Princess of Flowers
The standing skirt for this costume is made from a wire frame. Any thin fabric can be stretched over it. This is where the difficulties end and the creative part begins. Cut petals from bottles of different colors, collect them into flowers and attach them to the skirt. Cut half-liter bottles in a spiral and attach the “serpentine” to the skirt.
Astronaut
A boy's costume can be made from scrap materials by simply tying two plastic bottles together and attaching them upside down to the astronaut's back using straps. To make our jetpack functional, glue red-orange patches simulating fire into the necks with your own hands.
Helmet, hat, crown
The largest plastic bottles are simply specially produced in order to make various headdresses from them for a hero, an alien, a king, a gentleman, a puss in boots, etc.
The photo shows how to make these hats. Cut out the fields from thick cardboard.
Mask designs for cutting
There are different patterns that do not always symbolize animals. Children love cool costumes; a mask of a plague doctor, a mad genius or a gypsy is suitable for them. Some people play evil characters at matinees. In this case, masks with the face of the devil, an old sorcerer or uncle Chernomor would be relevant.
The black and white masks are painted by the children themselves. The advantage of sketches is that the child shows creativity. His cow comes in purple and his goat comes in flowery pink. After the matinee, the organizers organize competitions for the most interesting or original face mask.
When creating a New Year's image, masks of snowflakes, Father Frost, Snow Maiden or Baba Yaga are suitable. If a child does not want to wear a full-fledged mask, then the ears of a hare, fox or bear will suit him.
Emotion masks will convey a happy or sad mood. They are made in the shape of a sun or a popular smiley face.
Wire, fishing line or thread?
Beadwork masters can use not only wire, but also fishing line, as well as floss thread when working. However, you need to understand that these materials should be in the arsenal, but they must be used exclusively in a specific situation.
When creating a craft in the form of a dragonfly, it is better to give preference to wire. Because it has greater rigidity. As a result, all elements of the craft hold their shape well, but at the same time remain elastic. You should not buy wire that is too thin. You need to choose a wire of medium hardness. It should easily pass through the glass beads.
For the dog
Many housewives love masquerade so much that they dress up not only themselves, but also their pets. How to make a dragonfly costume with your own hands for your beloved dog? It's quite simple. We will need a ready-made hat in green or turquoise. You need to buy fabric to match the color of the hat. It will look more interesting if it has some kind of texture, such as shaggy. Cut out circles from the fabric for the tail and ears. If the dog is small, then 7 circles will be enough. We sew them with a “forward needle” seam, tighten them and stuff them. Sew to each other. We sew the ears to the hat. All that remains is to find a turquoise pompom and use it to connect our parts. You can buy ready-made wings, or you can build them yourself by stretching fabric to match the suit over a wire frame.
FAIRY WINGS. Master classes.
It all started when Evelina asked for a Winx costume for New Year's Eve.
... I don’t know how to sew, and I don’t like the look of the costumes in joint purchases and the price is off the charts for a pair of shiny rags... I don’t know what to do yet, but I found this: SO,
To all the mothers of little Winx fans, etc. dedicated. Very interesting master classes on making WINGS.
Very soon, preparations for matinees will begin in kindergartens and schools.
We, mothers and grandmothers, need to prepare too. I offer you an idea that you should not refuse. Fancy making your own fairy wings? The wings can be attached to any elegant dress, and here is a costume for a matinee. And not only for him) Not a single little girl will refuse such wings, unless, of course, she feels like a princess) For the work you will need wire and nylon. You can use hangers for clothes and tights. So, draw wings on cardboard, take wire, adhesive tape and pliers. We lay the wire along the contour. We fix the connection points of the wire with adhesive tape and tie them up. Next we will need colored tights. We cover the frame of the wings with nylon. These are the wings you should get. Decorate the wings. Decorate the wings with ribbons and artificial flowers. Another option is making wings from paper. For work you will need paper, satin ribbons, tulle and artificial flower Fairy Wings from hangers and tights link to source.
Source
