Making wooden spoons is a simple and fascinating process that allows you to get in touch with the centuries-old traditions of decorative and applied arts. To create such products you will need a minimum of tools and materials. Making spoons with your own hands is a great opportunity to hone basic carving skills and get a better feel for how wood and the carving tool behave. You can experiment with the shape and size of the spoon, as well as the design of its handle, creating a unique utensil that is not only decorative, but also functional.
In our material we will tell you in detail how to make a spoon with your own hands, introduce you to basic carving techniques and answer pressing questions regarding the manufacture of wooden utensils.
What are wooden spoons made of?
What kind of wood is best to carve wooden utensils from? This important question worries all novice carvers. Best suited for carving spoons
blanks made from hard, but not splintered, hardwood - aspen, ash, maple, birch, elm, walnut, cherry or maple.
For beginner carvers
It's better to use linden. This wood is softer and lighter, has a uniform density and is well planed in all directions. For gaining experience and practicing basic carving skills, this is the most suitable material. Among other things, linden products are not prone to warping and do not emit tannins.
Coniferous trees are not suitable
for making spoons due to its high resin content and characteristic odor. Also avoid exotic tropical woods such as teak, which can be toxic.
You can use planks as a blank, or split the whole ridge deck into small logs. The first option is more practical, the second is more traditional. The orientation of the wood fibers in the workpiece determines the symmetry of the pattern of the spoon bowl as shown in the photo.
A set of basic tools
To make a wooden spoon with your own hands you will need a minimum set of simple tools:
- Knife
. For wood carving, it is better to use a Bogorodsk knife. Its double-sided sharpening makes it equally convenient to work both “pull” and “pull”, and the narrow nose makes it possible to cut wood along internal lines. - Spoon cutter (scraper)
. This is a chisel with a sharp bend, designed for scraping wood in recesses and working on the internal walls when carving dishes. An alternative to a spoon cutter can be a wide cranberry or a regular semicircular chisel. - Straight chisel
– used for even cutting of solid wood from a workpiece. - Clamp
– necessary for conveniently fixing a piece of wood.
Roughing file- Stikhel
is a thin steel cutter for creating decorative carvings on the handle.
Criteria for selecting options
Creating a festive atmosphere
The reason for the feast is the main factor determining the number of invited guests and the format of the meeting. The choice of dishes served, textiles, dishes and cutlery depends on it. For example, for a Sunday family lunch, you can choose a simpler design than for a birthday or wedding anniversary.
We decorate it in the theme of the feast
When looking for serving options, you need to consider:
Time of day When preparing for breakfast, use light-colored dishes and bright cotton or linen textiles. For a festive dinner, a tablecloth and napkins made of thick fabrics in noble shades - burgundy, dark blue or gold - are appropriate.
Season of the year To decorate the table in spring or summer, choose light and sunny shades, and in winter or autumn - more saturated colors. Depending on the season, you can choose flowers and other accessories for decoration.
It is better to use white dishes for breakfast
White color is universal when decorating. White dishes can be used for everyday and holiday serving. A white tablecloth looks solemn in combination with the same fabric napkins, and with colored paper ones it looks fresh and relaxed.
Casual white color
Table setting
How to do it quickly and beautifully
Catalog of flowers for the garden (240+Photos with names): All the rules for creating incredible beauty
How to Carve a Spoon from Wood: Step-by-Step Guide
- Using a template, transfer the top and side views onto a piece of wood. Please note that the orientation of the wood fibers is longitudinal, in this case the spoon will have maximum strength.
- Having fixed the workpiece with a clamp, proceed to roughly forming the bowl. For these purposes, a spoon cutter is used, but you can limit yourself to an ordinary semicircular chisel or a wide cranberry. Wood is sampled in the direction of the grain. When deepening the bowl, do not forget that you need to leave a small allowance in thickness for finishing trimming and sanding.
Hollowing out a bowl on a rectangular piece is much more convenient, since the piece of wood is rigidly fixed and maintains a stable position.
- When the recess is formed, you can begin cutting off the excess mass in the horizontal and vertical planes, following the top and side contours. To do this, it is most convenient to use a jigsaw or band saw, but if you wish, you can perform all the manipulations with a straight chisel or hacksaw.
- Using a Bogorodsk knife, cut off the convex part of the spoon. Using a wide chisel, we give the bowl a perfectly even, rounded shape. Using a knife and chisel we work out the shape of the handle.
- Using a spoon cutter, trim the bowl cleanly and carefully align its edges as shown in the picture.
- Grinding is carried out in two or three passes, each time reducing the grain size of the abrasive.
Advice!
When in contact with water, even a perfectly sanded surface can begin to fluff. The raised lint does not spoil the appearance of the spoon, but it does feel unpleasant in the mouth. Therefore, if you plan to use the utensils you made yourself for their intended purpose, you can solve this problem using the old proven method. After grinding, the spoon is wetted and thoroughly dried, passing again with a fine-grained abrasive. This procedure is repeated two to three times.
Our version of making a spoon is a more adapted technique. It is designed to use a modern tool, which, although it simplifies the work process, at the same time distances it from the age-old traditions of carving art.
The secrets of primordially Russian carving of a wooden spoon - watch in the presented video:
How to cover a wooden spoon for eating?
The final touch to creating a wooden spoon is its treatment with a finishing compound. And here, as a rule, many questions arise. If you are carving a decorative spoon, then everything is simple: you can paint it, apply any varnish coating or treat it with wax. With products that are planned to be used for their intended purpose, everything is more complicated. When choosing a composition for impregnation, it is important that it is practical and safe.
In the Russian tradition, wooden spoons were and continue to be used for processing. This impregnation is environmentally friendly, has antibacterial properties, emphasizes the texture of wood, and is easy to apply. But it will have to be updated periodically. At the same time, using raw linseed oil as a finish, over time it can begin to transmit an unpleasant rancid odor to the food.
A more practical solution is to use special mineral oils for finishing wooden utensils. This impregnation gives the surface water-repellent properties, but does not form a film - the pores remain open and the wood continues to breathe. Mineral oils do not affect the taste of food and are more durable.
We talked in detail about the practicality and food safety of finishing compositions in ours.
It is difficult to find a more indispensable cutlery than a spoon. You can eat it, cut it, use it as a measuring utensil and for educational purposes, you can cook in it and simply display it as a decoration. And it’s also a musical instrument! In Rus' and the Scandinavian countries, spoons were historically made of wood. In our country, the capital of the spoon craft has become the town of Semenov, Nizhny Novgorod region. At the end of the century before last, in the Semenovsky district, about 7 thousand people worked on the production of spoons and they produced more than three million spoons a year. In fact, these are only huge numbers at first glance. Simple mathematics shows that the productivity is one spoon per day per person. The population of the Russian Empire at that time was 129 million people. Thus, it would take 43 years for Semenovsk artisans to cover consumer demand. Therefore, in every village, in almost every house, on long winter evenings, men not only prepared carts and rakes for summer, but also cut spoons for family needs. I had a choice: go to Semenov and film the production of souvenir Khokhloma spoons, or find a craftsman and look at modern spoons for everyday use. A craftsman, of course, was found, and all in the same Nizhny Novgorod region. SPOON - w. a tool for slurping, for eating liquids; bread-bowl, shevyrka, eater. pouring spoon, ladle. a wooden spoon (the main craft of the Lower Gubernia region) is cut from the shell with a hatchet, hewn with an adze, sharpened with a knife and cut with a crooked cutter, and the handle and forging on it are sharpened with a saw, by hand. The spoon can be: mezheumok, simple Russian, wide; butyrka, burlatskaya, the same, but thicker and rougher; bosque, long, blunt-nosed; half-bare, rounder than that; big-nosed, pointed-nosed; thin, generally fine, clean finish. white i.e. unpainted, first-hand costs 9-18 rubles. one thousand banknotes, aspen and birch; painted maple up to 75 rub. thousand banknotes. This is a small excerpt from an article about a spoon in Dahl's explanatory dictionary. The article is so self-sufficient that if I present it in full, there will be nothing more to tell. So let's look at the pictures and listen to our narrator today. Here he is - Leonid Khazov, who has mastered many professions, but settled on the spoon craft. He actually makes a living making spoons and wooden utensils, so doing a piece on him was doubly educational. And in between, I learned a lot of new and interesting things about this ancient craft. It all starts prosaically. Leonid takes the ridge deck and splits it in half, and then into several more pieces. The quantity depends on the diameter of the deck and the expected number of spoons. One Polish - one spoon. As the master says, anyone can make a spoon if they have a knife and desire. Yes, the first spoon may be ugly and more like a crooked spatula, but it will be able to perform its functions. Even when making spoons for sale by hand, a fairly simple set of tools is used, which can be found in probably any home. I’m distracted by the story, and in the picture the descent to the future scoop is being selected with an ax. Does everyone know the structure of a spoon? Scooped, held and jumper. Almost any deciduous tree is suitable as a raw material. Most often, dishes are made from birch, aspen, maple or fruit wood. Coniferous species are not suitable due to their resinousness and characteristic odor. In Rus', spoons were even made from imported palm trees and they cost ten times more than usual. Now in the photo the spoon is in the stage called “baklusha”. This work was done by apprentices, and craftsmen brought these blank blanks to mind. Using a template, the contour of the future spoon is applied to the buckthorn. Depending on their purpose, they are round, oval, flat, or voluminous. And for decorative spoons, the shape is limited only by the imagination of the master. Each master has his own branded product, which is in stable demand, which he produces en masse. Knife makers have certain types of knives, blacksmiths have souvenir flowers and horseshoes, and spoons are no exception. Leonid copied the Soviet tablespoon twenty years ago, and with minor changes and improvements, this form remained the main one. Clutching the workpiece in a vice, Leonid selects wood from the future spoon. By the way, unlike other types of wood carving, spoons are cut from raw wood and dried in finished form. Some craftsmen specially store ridges in tall grass, so the tree does not dry out. An ax is used to shape the back of the spoon. You can continue to work with a hatchet and cut off the sides until the desired shape is formed; you can take a hacksaw, or you can use a jigsaw, which is fastest. This stage can be performed using a knife or chisel, the only question is the amount of time spent. Birch is almost as strong as oak, but lives as a spoon much longer - oak cracks. As you can see, even with such a rather delicate operation, the master is in no hurry to take up the knife, but wields an ax. The last swings of the axe. The traditional Russian souvenir spoon is more reminiscent of a hemisphere: deep, voluminous and not very convenient to use, similar to a ladle or ladle. Here the shapes are closer to modern classic oval spoons. Until this stage, all the work could have been done by a not very qualified apprentice. In principle, another ten minutes of working with a knife and you will have a completely usable spoon in your hand. This is where the master's work begins. A spoon should not only be functional, but also beautiful. At the beginning of the post, I mentioned the productivity of Semyonov craftsmen. In fact, there is confusion somewhere in the numbers, either fewer people worked, or they cut more than just spoons. According to data for 1905, in the Balakhninsky district of the Nizhny Novgorod district there were about 1,400 spoon makers and they produced 13 million spoons, i.e. 25 spoons per day per person. These numbers are already similar to the truth. Leonid says that one person can make fifty spoons in two or three days, and in the artels the whole process was divided into stages and divided among workers, which reduced production time. However, Leonid also prefers to make batches in stages: first he prepares the bastards, then chops off all the excess on them, and then takes up the knife and sandpaper. It is believed that from the state of the log to the finished spoon, it must be in the hands of a master at least 13 times. I haven’t tested it, you can do the math yourself. The pen is ready, all that remains is to scrape out the scoop. The thickness of the walls is 3-4 millimeters; if you make it thinner, the spoon will be lighter and may be more beautiful, but it will last less. The more carefully the excess is removed, the easier it will be to sand later. As with any craft, there is little time for creativity. If your business feeds you, then you need to make template products, the implementation of which will definitely not pose any problems. Leonid has a well-established sales force; his products can be found in Moscow and some large Russian cities. But, of course, he wants to do something new, try some techniques, cut out something unusual. Sometimes you are lucky and such orders come in, and sometimes you have to sell what you have made yourself. And so, during the conversation, another spoon was born. In the old days, the situation with sales was approximately the same. The spoon makers who cut for the owner received the least amount, followed by those who sold spoons to merchants in bulk, and the highest income went to those who sold their spoons themselves. Our spoons are left to dry. This is a couple of days in the air in the summer or on the stove in the winter. Just while a batch of spoons is being made, the previous one has time to dry. Let's finish the historical excursion. Few people realize, but the demand for wooden spoons fell only after the Second World War. Then it was replaced by tin and metal spoons, and instead of the “Lozhkosoyuz” the association “Khokhloma Painting” was organized. While the spoons are drying, we'll look at the tools. I have long noticed that the straighter a person’s hands, the more inconspicuous the instrument. More precisely, no, not like that. The straighter the hands, the less a person chases brands and appearance and the more he values functionality. And Leonid has some of his instruments that are homemade. Knives are made from saw blade, so-called high-speed steel. And there are a lot of them, not because they break often, it’s just that Leonid is preparing to teach master classes on carving and will distribute the knives to students. And here is the cranberry from the bearing race. The steel there is also well suited for such a tool, so all that remains is to find a bearing with a suitable diameter, saw it and weld the shank. Well, don’t forget to sharpen it, of course. At my request, Leonid showed the sharpening process using the example of a semicircular chisel. First, the corner is cut out and the notches on the large stone are cut off. The main trick here is not to overheat the metal; the hardening may come off and the tool will be damaged. Next, the chisel or knife is sharpened on a small stone with a constant supply of water. The edge is sharpened until a uniform burr appears on the opposite side. This is if a chisel, with a knife is a little trickier, you need to sharpen it on both sides. And then it’s all polished on a leather wheel with GOI paste. Before removing this very burr. The working tool rarely requires the first two procedures; usually, editing the skin is enough. The burr on the inside is corrected with fine sandpaper wound onto a piece of wood of a suitable diameter. If necessary, sand again on the leather. In general, the same as when sharpening ordinary knives. Let's return to our spoons. Previously, it was believed that spoons had three grades of finishing: facial, very good and good. We will make a facial spoon, we are not some hacks! You can sand it manually with sandpaper, or use a machine. I don’t know what our ancestors used for polishing, but in the Scandinavian countries they used a special variety of horsetail for this purpose. Very quickly the spoon takes on a well-groomed appearance and just begs to be finished as soon as possible and placed next to the plate. But there's no need to rush. In addition to the fact that the spoon is sanded in several stages, reducing the graininess of the sandpaper, there is one more nuance. When using the spoon for its intended purpose, water causes it to fluff up. This is not critical in the hands, but is very unpleasant in the mouth. Therefore, after sanding, it is wetted and dried, and then sanded again. And so on several times. Now the spoon is almost ready. Its handle can be decorated with carvings, or with some kind of inscription. For example, a name or a saying. There is also a little trick here: to make the inscription even, you need to write it backwards, from the last letter to the first. And the final touch is to soak the spoon in regular linseed oil. More massive products are immersed in oil and remain in it for some time, but spoons can simply be coated with a brush; they are so thin that they are soaked through. The spoons dry for about a day and absorb the oil, then they are wiped with a napkin and that’s it, they are ready to delight their new owner. Wooden utensils, like all wooden things made by hand, emit some kind of warmth. Now I have two spoons, I’m thinking of making a bowl or plate, or even a whole set
Spoons are a very ancient cutlery, which even today no family in the whole world can do without. The history of the wooden spoon dates back to the Paleolithic era. It was then that people began to use small pieces of found wooden fragments to scoop up liquid food. In Ancient Rus' and the Scandinavian countries, it was spoons that took root. They, like other dishes, were made of wood. The first mention of this cutlery is found in the Tale of Bygone Years, in the description of the feast of Prince Vladimir, and is dated 996. They were made from different types of wood: birch, aspen and maple.
Application
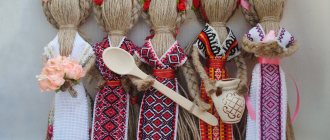
Wooden cutlery is still very convenient in everyday life - they are very well suited for stirring hot food and cooking it in non-stick cookware. We should also not forget that wood is an environmentally friendly, inexpensive and widespread material. Often the handles of spoons are decorated with paintings. The carving can be primitive, or it can represent an entire work of art.
And this is not all of its advantages, because in our country wooden spoons are a unique musical instrument. The traditions of playing it have deep roots. People have long noticed that if you lightly hit these objects against each other, you can hear a very pleasant clear sound. Nowadays, this cutlery occupies an important place among the percussion instruments in any Russian folk orchestra. Ensembles of spoon players and skilled soloists make a great impression on the audience.
Tablecloths
Setting for a festive dinner Table setting» href=»https://www.novate.ru/files/u31123/Table-Setting-12.jpg» target=»_blank»>
Table setting
Setting the table for dinner
Tablecloths can completely change the mood, immediately creating a festive mood. Now there is a huge selection of all kinds of tablecloths, napkins, runners, which must certainly be of different colors, textures and patterns, preferably so that they are all combined with each other. In addition, there should be themed sets that are suitable for certain holidays.
Autumn decor on the table
Original table setting
Festive table setting with name cards
Table runner - a tablecloth in the form of a narrow strip running across the entire table. This is one of the most modern ways to decorate a table, especially if you don’t want to hide a beautiful wooden or glass tabletop completely under the fabric. Such paths are universal. They can be easily laid out on top of a regular tablecloth along the table, you can put them across and designate places for guests. Tablecloths are a must on the holiday table, especially if you want to emphasize the theme or color scheme of the set table.
Table setting for dinner
Table setting for every day
Asian style table setting
Napkins. There is no need to give up cloth napkins in favor of disposable ones. They are an integral part of the table design. If you really don’t want to wash them after the holiday, then you should take a closer look at banquet-style paper ones. A placemat for cutlery defines a place for each guest. They can be not only rectangular, but also square (give a modern look) and round (break the angularity of the table).
Manufacturing
You can make wooden spoons yourself. This will require a small set of basic tools and material. Before you start, you need to prepare the following items:
- Axe.
- Hand-held wood saw.
- Wood file.
- Rounded chisel.
- Rasp.
- Sandpaper of different calibers.
- Pencil.
- Dry wood.
When choosing a material, it is better to focus on species such as linden, aspen, alder, and birch. They are easy to process and do not lint when used. For comparison: a wooden spoon made from oak with your own hands will crack, and an ash spoon will release lint. Conifers are not used to make items that come into contact with food, because the resins will cause the dishes to acquire a bitter taste.
Decorating with plastic
With a small budget you can create a beautiful, original design in your home. It is enough to have the desire and free time. Decor made from plastic spoons includes many elements.
Of these, the following stand out: paintings, flower pots, vases, candlesticks, clocks, decorative roses, signs with plant names, garlands and much more.
The most uncomplicated of the many products are: a lamp in the shape of a pineapple, a frame for a mirror, a candlestick.
Step-by-step instruction
The selected piece of log must be sawed or chopped in half with an ax. On the flat side, the outline of the upcoming product is outlined with a pencil. Then the unnecessary areas are removed with a saw. Using an ax, you should first shape the outer rounded part. It is also necessary to cut a layer of wood to create the desired angle between the scoop and the handle. The place where they connect should be rounded off with a file.
The next step is sanding. To remove rough elements, you can use coarse sandpaper. And in order for a wooden spoon (it’s not so difficult to make one with your own hands) to be more pleasant to the touch, you need to complete the process with a “zero”. For greater convenience, wrap a stick in the sanding element.
Next, you should start cutting out the recess. Using a chisel, scrape out the wood in small pieces from the workpiece. Be sure to monitor the thickness so that it does not turn out too small. Next you need to clean the wood. To do this, you can attach two strips of sandpaper to a stick with a rounded end, placing them crosswise. After finishing the work, the finished wooden spoons can be soaked in vegetable oil. To improve the absorption process, the liquid is heated.
DIY mini gardens
How do you like the idea of giving someone a homemade plant? The smaller it is, the more cute it will be. For example, use walnut shells to plant this tiny aloe.
Or plant larger plants in a glass jar and decorate the arrangement with fun details.
DIY florarium
People love small things and mini gardens are a great way to lift their spirits. It can be placed on a windowsill or other prominent place to decorate the room. The perfect gift for Christmas!
How to make candles with your own hands at home (+ Video) Interesting step-by-step master classes (+155 Photos)
Mass production
These days, wooden utensils are experiencing a new peak in popularity. People's eyes are drawn to these kitchen elements due to their natural origin. Individual enthusiasts or entire communities even form eco-villages; in addition, people are trying to exchange plastic cutlery for wooden spoons and plates. Therefore, entire sets turned on machines have become very popular.
To make large quantities of tableware, turning equipment, chisels, cutters, spoon knives, steel-bristled brushes, and much more are used. All this is reminiscent of tools for home work, only the equipment for working in a factory is more professional. If the production of wooden spoons went without flaws, then the product will be very convenient to use.
Thread
Wooden utensils are often decorated. This can be either a simple design or intricate patterns. It all depends on the skill and desire of the master. If a person has little experience in creating ornaments, then you can turn to specialized sites. They present a large volume of materials of varying complexity.
If you know that the work will be limited to one or two products, then there is no point in purchasing many different tools. Using improvised means, you can also decorate wooden spoons. Photos demonstrate various devices for professionals. These are jamb knives, flat, angular and semicircular chisels, cleavers, jigsaws, rasps. However, to make a simple pattern, a sharply sharpened knife will be enough. It is better if the blade is short and wide.
A drawing is applied to the untreated handle with a pencil (if geometric, then using a ruler) or the ornament is copied from tracing paper. Most often, the thread has a triangular recess. In order to complete it, you need to draw two auxiliary lines on the sides of the main line of the drawing, indicating the width of the cut. First, the main strip is cut strictly vertically. Then the knife is placed against the side marks and cuts are made at an angle of 45 degrees. Then the procedure is repeated on the opposite side. The cut wood should come out of the resulting groove on its own.
If the pattern is more ornate, then it is made with the same grooves, but less deep. The main cut is made along the marking line. To make side cuts it is not necessary to draw auxiliary contours. Slight fluctuations in the shape of the groove are allowed to emphasize the relief of the image.
Tip No. 5. Filling glasses
Tip No. 5. Fill the glasses
Any meal is not only about food, but also about drinks. Glasses and wine glasses should be combined with the overall color scheme and style of table decoration. For bright liquids (lemonade, juice, champagne), it is better to use transparent glasses. Engraving or a printed design will add sophistication to transparent glassware, and antique cut glassware, which is now in fashion, goes well with both classic and unusual designer table settings. The minimalism in the design of glasses and jugs, which was in fashion in the last decade, has been replaced by fancy shapes combined with the addition of colors. The combination of transparent and colored glass in glasses is the best solution for serving non-alcoholic drinks, and transparent champagne flutes with colored or mother-of-pearl stems will look noble and modern. Another trend is frosted glasses that create the illusion of “frozen”: the perfect solution for summer dinners in the fresh air. By the way, ideally, soft drinks should not only be served with ice, but the glasses for them should also be pre-cooled.
Souvenirs
Like many other things, nowadays dishes are often used as souvenirs. Spoons and plates can be covered with traditional paintings or intricate carvings, which often deteriorate with frequent use in everyday life. To give durability to the design, painted souvenirs are coated with varnish. However, such products are not recommended for cooking or eating food. Their function is completely different - they are exclusively souvenirs and decorative items.
Some time ago I remembered my childhood hobby associated, of course, with wood carving, wooden spoons. Why spoons? Yes, everything is very simple, let's look at the advantages of this type of folk art:
- You can cut almost on the knee.
- no specially equipped workshop required
- no special tool is needed; if desired, a semicircular chisel and knife are enough
- You can take almost any material for making a spoon.
- the shape of the spoon is limited only by your imagination
So let's summarize, you want to do wood carving, but you don't have a workshop or a special tool for this, and here's the solution: carved wooden spoons.
To begin with, you can see what kind of spoons are cut abroad; for this you can download a book dedicated to this type of wood carving.
| Cutting wooden spoons |
Interesting candlesticks for a romantic dinner
Candlesticks are rarely found in modern apartments. And the candles themselves have been on the shelf since Soviet times, rather out of habit, in memory of those times when power outages for 2-3 hours were the norm. But for such cases, an ordinary jar lid is also suitable, which cannot be said about a romantic evening. If you are planning one, but the candlesticks in your apartment are bad, you can make them. 3 forks are used for these purposes (per 1 candelabra). Using pliers, we bend the utensils at an angle of 90º at the base of the teeth, after which, putting all three forks together, we tighten them (not very tightly) using any thread. It is best to use wool threads of different colors if more than one candlestick is being made.
Curved forks are stacked and tied with woolen thread
Now, if you turn them towards each other, you will get a very interesting candlestick that clamps the candle with its own weight. At the same time, the product does not look ridiculous. Rather, on the contrary, the candlestick will be regarded as an unusual and stylish designer accessory.
Stylish candlesticks that can compete with designer items
How to carve a spoon from wood?
Perhaps this book is in English, but with the help of intelligible….
03/26/2012 16mb 742I’ll show you the first spoon that I cut out after a very long break using only a semicircular chisel and an ordinary blunt knife.
I cut a few more spoons, but I just can’t take pictures of them in normal quality, as soon as I get them I’ll definitely post them.
From the remaining pieces I cut out this spoon, which I immediately adapted to the wooden barrel in which I store tea
Hover your cursor over the photo and you will see that same tea jar.
Spoon carved in Tatyanka carving style.
Next wooden spoon
which I want to show you was made from the very album that is presented for download. The only thing I changed was that the spoon was made completely voluminous.
Safety of other finishing materials
In large industries, instead of oils, secondary oil products are used, which last longer. They are more expensive, but the cost is justified.
- Wooden finishing materials need a durable “frame” that will not wear off and enter the body along with food.
- There are compositions based on oils, polyurethane, nitrocellulose varnish, shellac, and linseed oil.
They are absolutely harmless if completely dry. The formed film does not yet indicate complete drying of the product, since oils and other components may remain moist inside the fibers. This is important to know so as not to endanger people.
To maintain the attractive appearance of the spoon over a long period of use, you need to clean it from food in warm water. Use only soap-based, environmentally friendly products, without chemicals or abrasives. Do not allow spoons to remain in water for a long time. If the spoon is damaged (cracks, breaks, lint), it is ground and polished again, after which several layers of oil are reapplied. This way you can use the accessory in the kitchen for a long time.
The photo of the cut out spoon is interactive, hover over the spoon and you will see it from the other side.
The next one is carved from hornbeam. Very hard material to cut. It sets the incisors as if you were cutting not wood but some kind of abrasive. If I had this sharpening machine while carving this spoon, how much easier the process of carving the spoon would have been. But at the same time, they managed to make a spoon, and this is a copy of an ordinary tablespoon, weighing only 5.6 grams. This is taking into account its impregnation with linseed oil. For reference, the weight of a box of matches is 5.2 grams.
I’ll add how this spoon was cut, you can see in the video.
Of course, showing the whole cutting process is very tedious, so I showed how the food was cut out.
A wooden spoon which I called “twig” The material is the remains of used alder. I just saw this form in it. The length of the spoon is small, only 13 cm.
The next wooden (alder) spoon, just a tea spoon, can be used for tea, I don’t know how to stir, but adding tea and sugar is quite suitable
Like all spoons, it is carefully polished and soaked in linseed oil.
I didn’t really like the spoon called the peacock’s tail (this is from the album) But what was born was born, It was cut without pleasure. It seems to me that I just translated the tree.
Let's continue carving spoons from wood. I present a couple more spoons for your consideration. One of them is a “curly” spoon. Made according to the drawing from the album that I presented for the race above.
And another spoon, the purpose of which I vaguely understand, but there was such a small piece left and somehow I immediately saw in it this shape of a fish. And of course, I quickly took a knife and, as they call it, cut off all the unnecessary stuff.
I put a pretty penny so that you can understand what size it is.
You can order a spoon to be cut out for yourself. We will always agree on the conditions. Just keep in mind that the manufacturing process, cutting out the spoon, polishing, impregnation with oil and subsequent drying with additional polishing takes a long time.
Unfortunately, this happens.
I wanted to make this spoon as elegant as possible, but I overdid it. It’s a pity, of course, but it’s okay, I’ve already thought of a different shape for the spoon, I’ll cut it.
If you carve spoons yourself or make other crafts from wood or other materials, read the concept for the development of my site about various crafts made from wood and more.
The issue of selling and how to buy handmade wooden spoons is resolved in the advertisements section.
In the age of impersonal mass production, you want to have something truly unique in your home.
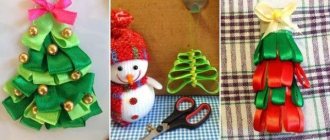
Christmas tree
Among crafts made from disposable spoons, picturesque Christmas trees are very popular, for the manufacture of which you will need:
- paper cone;
- glue;
- scissors;
- dye.
As usual, cut the spoons into 2 parts;
Glue the oval part of the spoons to the cone in a checkerboard pattern.
We paint the resulting Christmas tree any color or leave it white and admire our creation.
Sanding a wooden spoon
You need to feel like Michelangelo - and act according to his principle: “I take a block of marble and cut off everything unnecessary from it.” Taking a chisel or grinding tools in our hands, we carefully remove all excess from a piece of wood, from time to time comparing the resulting product with the original.
When forming a “scoop,” it is better to use a drill prepared in advance with grinding attachments or a doze. This part of the work is quite difficult and requires a lot of patience.