How to make a paper phone-smartphone easily from paper and cardboard: master class, description, tips
In order to make the simplest paper phone, you will need to perform the following algorithm:
- First you need to stock up on a base that is similar in shape to a telephone. This can be rectangular piece of foam rubber or polystyrene But since it is sometimes difficult to find them at hand, it is better to opt for corrugated cardboard. From such cardboard you need to cut out rectangles with rounded edges, reminiscent of the outline of a smartphone.
IMPORTANT: Since the cardboard is thin, it is preferable to cut out 3 pieces of identical size from it.
- All rectangles are glued together. Thus, you get a fairly voluminous base, similar in thickness to a real phone.
- Then the back side of the workpiece is covered with white electrical tape. You can also use plain white paper and tape. Or paper with a glossy effect. In short, the craft should have a glossy surface.
- But the front side can still be made of plain white paper.
- Excess material must be cut off.
- The sides are covered with black paper or electrical tape of the same color.
- Then on the front part you need to draw a screen and a button.
- Next, the front side is covered with tape - the phone is ready!
It's so easy and simple to create a paper phone
Do-it-yourself wind chimes: easy creation of original talismans for the garden
Wind chimes are an oriental talisman that has become a popular accessory not only in our home, but also in our summer cottage area.
Today we create it with our own hands, at no extra cost, from scrap items. Air bells came to us not so long ago, at about the same time as Feng Shui was popularized in the country. But, we can say that from the first days of its appearance, this talisman has become very interesting to many people, who are happy to hang the accessory at home and even in the country, where every slightest breath of breeze not only causes pleasant and positive sounds, but also attracts positive energy.
For a long time, wind chimes have been considered a kind of converter of negative energy into positive energy and, even if you don’t believe in it, you can simply decorate the entrance to your house, gazebo or patio with nice feng shui elements that will not only delight with sound, but also attract attention guests.
Today you can purchase such a talisman without much difficulty, since it is available not only in the windows of specialized oriental stores, but also on market stalls and in gift departments. But, you see, there is no need to spend money if you can make a souvenir from everything that is considered unnecessary in the house - tin cans, old pencils, small metal tubes, shells, and so on.
How to make the easiest paper phone for dolls: master class, tips
For dolls, you can make a paper phone of the following design:
- A rectangle is cut out of paper , resembling a telephone in outline. There is no need to throw away the remaining paper - it will come in handy.
- The main leaf can be painted any color you want. You can choose a shade that matches the doll's dress to make it stylish.
IMPORTANT: It is advisable that the paper be thick. You can even use cardboard.
- Then you need to draw buttons on a white piece of paper. To avoid confusion, you can see how the buttons are located on a real phone.
This is how you can draw buttons for a doll phone
- This button blank must be glued onto a colored base . It should be located at the bottom, but at the same time so that there is some distance between it and the edge of the phone.
- A little higher you need to glue a white rectangle - this will be the screen.
- Between these rectangles you should draw buttons for accepting and ending calls and a menu. black pen will do just fine for drawing
This is what a paper phone looks like at this stage
- Now you need to paint the screen. The time, date, and main menu components may be displayed there.
- Above the screen, on the colored area of the craft, it is worth drawing the name of the phone model and speaker.
This makes a simple paper phone for dolls
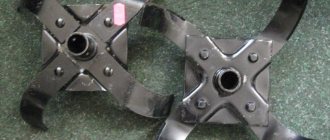
Powerful motor siren made from a tin can and PVC pipe
From simple things that many DIYers have at home, you can make a fairly powerful mechanical motor siren with your own hands. This siren, unlike other electric sirens, is capable of delivering a loud and penetrating sound alarm over a long distance with a circular directional pattern. You can effectively use this homemade motor siren to protect your home or cottage.
Powerful motor siren made from a tin can and PVC pipe
Materials used for the siren:
- Tin can;
- PVC pipe 100 mm;
- Plug for pipe 100 mm;
- Electric motor;
- A piece of wood;
- Super glue.
Powerful motor siren made from a tin can and PVC pipe
How to make an origami paper phone: master class, tips, photos
Making a paper phone and at the same time practicing your origami skills - what could be more exciting? This craft is extremely easy to make:
- You will need a regular sheet from an album. The entire right side of such a sheet will need to be folded.
- Then the same action is repeated with the left side.
IMPORTANT: It is enough to retreat about 1-2 cm on both sides, no more.
Side folds for future paper phone
- Then the bends are made from above and below . However, this time it is recommended to measure a larger distance - 3-4 cm .
And this is what the phone blank looks like at this stage
- After this, the existing top fold is folded in half.
Rear view of the phone blank
Front view of paper blank for phone
- Next, the same bend should be made along the lower part . As a result, the workpiece should take the shape of a rectangle.
Front view of the origami blank
- All corners of the resulting workpiece must be bent. And so that they are bent back and are not in the visibility zone on the front side.
This is what a blank for an origami phone should look like now
- a black felt-tip pen will be used . They need to draw a speaker with a camera and the main menu button on the upper and lower folds of the front side.
Sketches on an origami phone
- menu icons on the phone screen with multi-colored pens or felt-tip pens - and the craft is ready!
The process of installing a pneumatic signal on a car with your own hands
The pneumatic signal will be installed on a KIA Sorento 3.5. In fact, a set of ready-made solutions from . This way a station capable of delivering up to 7.5 a will be used (BERKUT) SA-03)
Let’s say right away that the use of a more productive station and a station with increased pressure is not justified; for a pneumatic signal, a pressure of 5 atmospheres and an air supply of 2.85 liters, which corresponds to the volume of the station’s receiver, is quite enough. In addition, the BERKUT TG59 installation kit is used, which is actually a set of valves and adapters.
During installation, a Cicada sound pneumatic signal was also used. One of the main problems is choosing a place to install the pneumatic compressor, because free space on the car is extremely limited; to understand this, just look into the engine compartment of most modern cars. As a result, the optimal installation option for the compressor turned out to be the space under the bumper.
But first, in order to compactly install the compressor, it must be removed from the frame. In this case, the compressor and receiver can be installed locally.
So, after disassembling the compressor for its further installation, we select only all the essentials that are necessary for the functional operation of our pneumatic signal. The frame on which everything was installed earlier will not be useful to us for installation.
We try on the components of the pneumatic signal. Everything will be pre-installed on the power elements of the “TV”. Here it is necessary to pay attention to the fact that the mounted elements do not interfere with the heat transfer of the radiators of the air conditioner and cooling system.
How to make a 3D paper iPhone phone: master class, photo, sketch
How to make a paper iPhone phone? It's completely easy:
- First of all, you need to draw simple sketches on paper. They consist of two rectangles connected by a small strip. The same stripes should be left on the sides of the rectangles.
IMPORTANT: Indents must be at least 5 mm.
Sketch for a paper phone
- Next, buttons, connectors, and the iPhone logo are drawn . You need to understand that the middle will turn into the left side, the bottom and top will take corresponding positions.
- The screen is also - various menu icons would be nice.
This is how a sketch for an iPhone is drawn from paper
- Then some parts are cut out as shown in the sketch below. That is, the small squares on the sides and in the middle will disappear.
This is what the phone sketch looks like after cutting it out
- Now the sides need to be bent . They bend back.
- These sides need to be connected to each other. It is best to use powerful glue for this purpose.
Paper phone from behind
Paper phone front
You can also print out a screen version of a real iPhone and cut it out. Of course, making sure that the dimensions of the cut piece match the size of the craft. Then this piece is glued onto the craft. You can glue tape - it will create a glossy effect.
This screen option for a paper phone is quite suitable
Making a toy iPhone
In order to make an Apple brand cell phone, you will need:
- pre-prepared phone template;
- scissors;
- stationery knife;
- ruler;
- thick cardboard;
- glue;
- simple pencil;
- material for lining inside the phone.
Select a template
In order to prepare a template, you need to find and download a scan of the iPhone model we need on the Internet. There are many options: iPhone S, 5, 6, 7. It is best to print on glossy photo paper, but if this is not available, then the printout can be made on plain paper.
Tip: if you don’t have a color printer at home, then you need to download the template to a flash drive and simply print it in any photo salon.
What template you find on the Internet determines what the resulting phone will be like. Good templates are 100% similar to the original, and their printouts also have special cutouts in the side parts. Thanks to this, in the process of folding and gluing them, you will get a good copy of the iPhone. Most often, in the iPhone printouts offered on various sites, you just need to apply scaling so that the phone turns out to be the same size as the real one.
Step-by-step instruction
First you need to clearly cut out the template printed on paper along the lines. You need to know that you do not need to cut the parts (back wall, screen, side parts) separately from each other. Everything is cut out in one piece and then carefully folded along the fold lines. After the template is cut out, you need to place it on a clean, hard surface of the table or cutting board. Using a utility knife, narrow straight cutouts are cut in the side flaps, which will be used to fasten the iPhone model. To do this evenly, it is better to use a ruler. Place a ruler along the future cut and draw a straight line along the ruler with a knife.
Tip: if you don’t have a utility knife, then use a regular “Rapier” type blade and the like. It is very difficult to use scissors to cut long narrow holes in the side parts of a phone model. If you make the slots wider or uneven, the appearance of the phone after assembly will not be very neat. You must work with the blade very carefully; you should not trust this work to a child.
We are making a part that will be inside the iPhone. On thick cardboard, we outline the front part of the iPhone template with a simple pencil. We cut it out, slightly rounding the corners, like a real iPhone. This blank will make the inside of the screen more rigid.
To add weight to the paper phone model, you will need another blank. The material for lining the inside of the phone can be thicker, heavier cardboard. For example, from the lid of a shoe box. You can also use corrugated cardboard or an old unnecessary computer mouse pad. We cut out the part by tracing the back wall of the iPhone using a simple pencil according to the selected template. We cut it out with scissors and glue it with the part obtained from thick cardboard at the previous stage.
Now you need to bend the fold lines of the printed and cut out template at right angles, thereby obtaining a mock-up of the phone. The previously obtained part is glued inside, adding weight and rigidity to the “filling” made of thick cardboard. The side flaps are rolled up and inserted into the slots of the side ears. The sides of the phone are also lubricated with glue from the inside. All that remains is to hold the glued surfaces a little so that the glue sets, and the technological toy is ready.
How to make a paper flip phone: master class, description, photo
Flip phones are no longer a thing, but why not make a paper phone of this type with your child? He will surely enjoy the entertainment. Therefore, we recommend starting to study the algorithm for creating a phone:
- A regular A4 landscape sheet needs to be folded in half.
- And then you need to fold it so that the corners are facing the middle.
- Then the side parts meet again in the middle of the workpiece.
- Then the work is turned over and the ends are bent in the other direction.
- The workpiece is folded in half.
- It takes on the shape of a telephone. Its upper corners need to be bent.
IMPORTANT: You need to hide them inside.
- Now you need to take the second A4 sheet. An algorithm identical to the first is performed with it. Only at the end there is no need to turn the workpiece over. All twists should be performed on the same side that was processed initially.
- It remains to cut a strip from the third sheet . The strip should match the length and width of the remaining parts - it will act as their connector. It is best to fasten with tape.
- draw buttons and menus inside the phone
This is how a paper flip phone is created
Option two - cardboard models
Armed with corrugated cardboard, you can simulate any simple phone, in particular, variants from the eighties. For such a product you will need:
To begin with, you need to cut out two identical tubes from corrugated cardboard that will make up the sides of the phone. You will also need the back part and the body itself, on which there will be buttons.
The back should be flat, but longer and wider than the sides. The first two pieces are glued to it, and the distance between them should be sufficient for the front part, but not too wide so that it does not fall inside.
When the layout dries, you can trim off the excess cardboard protruding from the sides. If you want to add an antenna to your phone, you can use a toothpick or any other suitable material. The stick needs to be wrapped with tape and glued to the top of the phone.
In order for the part on which the buttons will be located to hold well and evenly, several rectangles can be inserted inside the structure. They will support the width of the phone.
After this, you can glue the remaining parts of the future tube. Then all that remains is to add various decorative elements for it. You can simply draw buttons on cardboard, or you can cut them out and glue them on top. You can also color the craft and add other necessary details.
A toy phone with a dial can be made from a cardboard base and a plastic cover. An option made from cheese or any other product is suitable - it is important that it is easy to work with, and also that the size is suitable.
Source
How to make a paper phone from the 90s: master class, tips, photos
No one uses the device from the 90s anymore, but children will be interested in purchasing such a toy. You can make a paper phone of this catchy type like this:
- To begin with, side sketches are created. They are shaped like a bridge. Corrugated cardboard is the best material to use.
- Sketches are cut out.
This is what the cardboard sides of the phone look like
- As for the back of the phone, in this case you will need one piece that will follow the contours of the sides. You need to focus on their top.
IMPORTANT: When creating the back, you need to remember the allowances. The extra space will allow you to properly glue the parts together.
- to glue the parts together with superglue.
Gluing parts of the future phone
- to attach a bead to the open end of the toothpick . This will make the product look even more like an antenna.
- Then a toothpick is attached . It will act as an antenna. It is better to fix it from the inside with glue.
- When the workpiece is dry, the excess cardboard will need to be cut off.
- It should be noted that the design may be flimsy. Especially in children's hands. To strengthen it, it is better to insert 2 or 3 rectangles across the tube.
- The extreme protruding elements of the phone must be covered with cardboard rectangles.
- Now you can seal the central part of the phone.
- All that remains is to draw the buttons, speaker and other elements characteristic of the device.
This is how the phone looks at the end
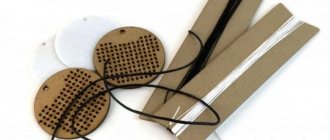
Electric bicycle horn
The device runs on standard batteries, which are inserted inside the case. It is installed on the bicycle handlebar - in the middle or on the side, whichever is more convenient. The working part of the electronic device is connected through a wire to a button. It is, in fact, that we set the buzzer into action.
- audio machine - a small compact device, no more than 7 cm in length;
- horn mount;
- the wire;
- button;
- button fastening.
The optimal location on the steering wheel is the horn in the middle or closer to the center, the button next to the grip/shifter. This makes it more convenient to press and release it without being distracted from the controls.
Standard Electric Bicycle Horn Kit
Advantages of an electric signal for a bicycle:
- simplest installation;
- excellent audibility, especially on noisy streets (intensity up to 105 dB ─ no joke) - much more effective than a bell;
- compactness;
- universal design: can be installed on both road bugs and cooler bikes.
The disadvantages of this device go side by side with the advantages:
- very sharp sound: harmful to the cyclist himself and unsafe at short distances from other road users;
- unlike a bell or horn, an electric horn breaks easily, and the probability of this happening is almost 100% if it falls;
- Not very reliable plastic fasteners.
And once again briefly on functionality. Electronic signals can be: “beep”, croaking intermittent sound, imitation of a car alarm. And there are also devices that have a whole collection of melodies built into them.
How to make a paper slider phone: master class, recommendations, photos
Making a paper slider phone is a great idea if your child is interested in transforming toys. Such a phone model should certainly attract him, and here’s what you need to do for this:
- The paper sheet is folded vertically.
IMPORTANT: It is best to prepare not cardboard, but thick paper.
- Next, the sheet is laid out again.
- Then all its corners are folded towards the middle.
- Now the workpiece should be turned over .
- The corners are bent from here.
- It turns out something like a book. And its upper corners need to be inserted into the pockets located near the lower ones.
- The same must be done with the second sheet of paper. The only thing is that you don’t need to turn the part over. The corners are bent outward.
- On the first piece you need to find a transverse fold. It should be pierced with a stationery knife.
- At this stage you will need a third sheet. It should be equal to the width of the wrapped part of the first workpiece.
- Then this leaf needs to be folded so that it fits into the cut.
- Now the two main parts are placed next to each other, their edges are tucked in.
IMPORTANT: The blanks can be joined with tape.
- If the workpieces slide over each other , everything goes according to plan! Then you can paint the toy - and it is completely ready.
Telephone slider made of paper
“A telephone is not a toy for children!” - Most adults think so. In fact, he is a pretty good toy. Especially paper ones, made with your own hands with the participation of children. This skill helps develop fine motor skills and imagination.
Design and principle of operation of an air signal
The first sound devices were pneumonic. Basically it was a rubber bulb with a bell at the end. When you press the pear, a sound is made. Then mechanical horns appeared, in which the spring plate was fastened with a rivet. Thanks to the rotating gear, which was in contact with the plate, a specific sound arose. Since 1908, Klaxon Signals Ltd began producing horns - car signals.
With the advent of electricity, an electric current began to turn the gear. Currently, there are the following types of horns:
- Pneumatic. The air in such devices is supplied from a compressor, passing through the pipe, causing it to vibrate. Usually up to four beeps of different frequencies are installed.
- Electromagnetic. The main element of the installation is a magnet, which is connected to the membrane. The devices differ in their sound emitters. There are disc signals, horns and snails.
- Electronic. The design of these installations consists of a sound generator and a speaker.
The larger the vehicle, the more powerful the warning signal should be. Typically, the signal uses a tube that produces high-frequency sounds and another one that produces low-frequency sounds. For melody, horns with a compressor can use several pipes (the author of the video is Compass Travel Store).
A separate topic is VIP signals installed on official vehicles: police vehicles, ambulances, firefighters, etc. They are often called quacks because of their similarity to the sound made by ducks. It is prohibited by law to use such a horn on a regular car, but drivers still install them on their cars (the author of the video is Andrey Ivanov).