Ease of execution
It's very easy to make interesting Christmas trees from tinsel. Every child can cope with the task; at a young age, parents only need to prepare the necessary material and encourage creativity a little.
The final stages are so exciting for children that you can quietly leave and do other important preparations. There are many options, before choosing the one you like, it is better to look at what components are available. In every home there are small shiny things that are suitable for such work.
The missing elements are widely available on the market. You can evaluate the appearance of the future design from a photo of a New Year tree in magazines dedicated to needlework.
Room decor
With the help of tinsel you can beautifully decorate walls, furniture or doors.
For such decoration we will need wire that bends easily, and tinsel itself. First, we fold the wire in the form of a future decoration. This could be Dela Frost's sleigh, a funny deer or the simplest star or Christmas tree, a Christmas boot or an ordinary ball.
We wrap the wire in a circle with tinsel, securing the fluffy product in several places with rain or thread.
The craft is ready. You can additionally decorate your Christmas tree or star with balls and hang a snowflake in the center of the ball.
By the way, balls are also easily made from the same material. You just need to cut off a small piece and attach a rain loop.
Or you can simply wrap tinsel around stairs or curtains.
These were the simplest options for making crafts from tinsel. Photos of tinsel crafts will help you find other ideas.
Now in more detail
One of the options involves constructing a base in the form of a cone; the workpiece should be adjusted in such a way that it does not wobble and stands stably on a plane. Starting from the top of the head, gradually wrap it in tinsel and secure it with hot glue. After all this, start decorating the Christmas tree with candies, bows or large beads. The white design looks quite original; you can put a figurine of a deer or a snowman next to it.
For a denser base, use cardboard; it must be cut with sharp scissors, otherwise the edges will look disheveled. Further steps are completely identical to the above option.Don’t forget about a bright star or snowflake at the very top of the structure; it will be an excellent addition to the whole image.
The idea of a Christmas tree for the New Year, decorated with all sorts of sweets, will appeal to children. Her outfit will quickly be snapped up by those with a sweet tooth.
New Year's tinsel - what is it?
This is an affordable, beautiful decorative element for Christmas trees, walls, door and window openings, interior items, furniture and so on. New Year's tinsel is a garland of shiny threads that is a symbol of the winter holidays. Festive figures, toys, treats - fruits, sweets, and so on can be strung on it. New Year's rain is a popular type of decoration that can be found in every home during the winter holidays. They come in different colors, sizes, can be made from different materials, but they must be bright and elegant.
The history of New Year's tinsel
The fashion for decorating Christmas trees dates back to the first half of the 16th century. In those days, people decorated the New Year's beauty with apples, which were associated with the forbidden fruit, and waffles, which symbolized unleavened communion bread. Candles were placed near the spruce tree, which in modern homes replaced electric garlands. Until the 18th century, spruce was decorated only with edible decorations: fruits, sweets, nuts. In the second half of the 18th century, gilded cones, paper flowers, brass angels, fairies, and so on began to appear on festive trees.
Christmas tree rain made from foil and other types of shiny tinsel began to be used in our country in the 70s. last century. Its ancestor was tin threads twisted into a spiral - this was the look of a festive garland in the 18th century, until softer and more aesthetic materials began to be used in its manufacture in Europe: foil, paper, lavsan, and so on.
How to surprise guests
The decoration in the form of a garland slightly diversifies and adds brightness to the craft; the shape remains classic, but you need to prepare additional components:
- Any heavy thing for a stand, a brick will do.
- Lighter or matches.
- A small stick.
- Old newspapers.
- Beautiful tinsel.
- Sharp knife.
- Multi-colored garland.
- A piece of cord.
The dry stick is installed approximately in the middle of the brick. Around it you need to make large spiral rings from top to bottom. The main skeleton of the tinsel tree with your own hands is ready, now you should wrap the main material around it, giving it a beautiful shape. Meanwhile, the garland should pass through all the spirals and descend.
Important! You need to take care of the length of the wire; it should be enough to reach the nearest outlet from the place where the craft will be placed.
Note!
- DIY wall clocks - the best clock designs for children
Crafts on a military theme: how to make a tank, a soldier, various patriotic models of military equipment
- What is a Candy bar - decorating a sweet table for a girl or boy for a birthday and New Year
It’s worth involving young family members in the decoration stage; this idea will clearly evoke a lot of positive emotions and provide an opportunity to contribute to the creation of a masterpiece. The festive mood will light up along with small light bulbs on the finished structure; you just need to insert the plug into the socket.
It would seem that the simplest actions, and the house now shines and lights up in different colors, with the onset of darkness the effect will be truly mesmerizing. These DIY Christmas trees for 2022 will definitely find admirers.
Modern people prefer to experiment with room design in preparation for various events. On the windows of many apartments you can see paper snowflakes, small and large versions. Doors are also filled with different attributes.
A tinsel tree on the wall has long been in fashion due to its compact location. Applying the design to one of the partitions is great for apartments with limited space. Beauty, convenience and the spirit of celebration are easy to bring to life thanks to creativity and imagination.
Crown or kokoshnik
You can make a cute crown or an old kokoshnik by cutting out a blank from soft cardboard and decorating it with tinsel on top and bottom.
And the kokoshnik can also be additionally painted with flowers in the Russian style or decorated with beads. On the other hand, a ribbon or elastic band is tied to the kokoshnik so that the headdress holds better.
Some nuances
Before you start distributing all the blanks onto the partition, it is better to make preliminary markings with thin lines of a simple pencil. It can then be easily erased with an eraser.
Note!
DIY New Year's gifts - interesting New Year's ideas for crafts. Master class on creating New Year's souvenirs
- Easter eggs made of beads (interesting weaving patterns) - how to weave an egg with beads with your own hands?
- What to give to a classmate: how to make an unforgettable surprise with your own hands (Video + photo master class)
A Christmas tree made from a garland on the wall is quite simple to attach; you don’t need a hammer drill or a drill for this; there’s no point in making extra holes.
It will be enough to use tape and pins, the whole process will take a maximum of 30 minutes, and the result can be pleasantly surprising. By moving further away, you can appreciate the full scale of the structure, but once you connect the power supply, you won’t be able to contain the smile on your face.
For those who are used to getting the most out of decorating a room, the option of a Christmas tree on the wall made of tinsel and garland is suitable. There is a beautiful design, and bright lighting effects are intertwined into one unparalleled masterpiece. Guests will not be able to take their eyes off, and the mood will match the magical night.
New Year's tinsel - how to choose?
When purchasing holiday decorations, the emphasis is on your own preferences and the interior of the room. When choosing their color, you should focus on the color of the festive tree. If it's green, glittery Christmas tinsel is a great choice. Matte decorations are suitable for white spruce, but the shades should be contrasting. In both cases, two-color Christmas tree tinsel would be appropriate. You also need to take into account its safety, following these rules:
- Dye
. Unscrupulous manufacturers may use low-quality material, and if its particles get into the air, allergies, exacerbation of pulmonary diseases, and human poisoning may occur. A rain garland or other painted types of New Year's tinsel should not leave marks on your hand or napkin if you run over it. - Smell
. If you notice an unpleasant and toxic odor from your jewelry, look for another option. - Sequins
. Place your fingers into a ring and pull the garland through it. If there are sparkles on the jewelry, they should all remain on it and not on your fingers. - Electric garland
. Check the product's quality certificate to confirm its fire safety. It is recommended to buy a garland with a power of no more than 65 W to minimize the risk of fire. It is advisable that the wiring of the device is not thin - its wear resistance depends on this. Before purchasing, ask the seller to turn on the electric garland to make sure it is in working order. If during its operation you hear a sharp smell of burning or plastic, refuse such a purchase. - Rain
. It’s better if this New Year’s tinsel has soft fibers to avoid injury to household members and animals. The hairs of the decoration should not come off easily. To check their strength, you should tug them.
New Year's tinsel - sizes
A festive tree has the right to be elegant, bright, catchy. To avoid turning it and your home into kitsch, consider some important parameters. For example, white New Year's tinsel looks elegant and elegant, but colored, bright garlands are also welcome in the decor. The sizes of New Year's tinsel are also important:
- The larger the spruce, the larger the decorations for it should be.
- If the holiday tree is not large, you should decorate it using thin shiny threads.
- There is no need to decorate the Christmas tree with copious amounts of rain and garlands; Christmas decorations should be visible through them.
Cozy atmosphere
By designing various crafts with your own hands, you can not only save significantly on the purchase of souvenirs or attributes, but also put a part of yourself into each item made. There is also responsibility for the work done; all stages should be completed slowly and carefully so that mistakes do not surface at a crucial moment.
A wire Christmas tree is especially durable; it can be placed in a potentially dangerous place in the house, for example, a hallway or a games room. If one of the guests accidentally knocks it over, this will not affect the good mood, you just need to pick up the thing and continue to have fun.
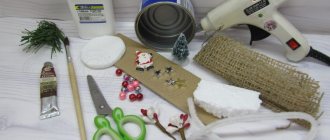
It’s not difficult to achieve a cozy and relaxed atmosphere; voluminous compositions fit well into the interior; there are plenty of interesting examples of how to make a Christmas tree out of tinsel of this kind. You need to prepare the following:Note!
How to make a snowman with your own hands from cotton wool for a window, for a kindergarten, from scrap materials
- How to make a snowman from plastic cups: step-by-step photo/video instructions + master class
DIY wedding decorations, crafts and accessories: photos of original wedding decor
- Plain paper.
- Scissors.
- Soft wire.
- Pencil for marking.
Each tier is made separately. The drawn circles should be cut out and small cuts made. The resulting blanks are glued together, forming the main part of the entire structure, the very first tier.
Having found the center, a piece of wire is inserted into it. Subsequent parts are similar, only the diameter decreases. The topmost component is designed in the form of a cone and completes the beautiful structure. All that remains is to decorate and the Christmas tree made of tinsel is ready, the figurine is worthy of the most honorable place in the house.
Fluffy letters
To make beautiful initials, you need to prepare a cardboard base and attach tinsel to it. The color of the letters can be the same or different.
We recommend reading:
- Crafts from sweets: the best options and the most interesting crafts from sweets and candy products (90 photos)
- Wood crafts - step-by-step instructions on how to make wooden crafts with your own hands (200 photos + video master class)
Mushroom craft - a review of interesting crafts and a master class on making a simple mushroom (100 photos and videos)
Such voluminous New Year's crafts made from tinsel can be filled with candies and placed as a surprise under the Christmas tree. Or attach it to each gift. Then any family member will immediately find their surprise from Santa Claus.
From complex to simple
Organizing everyone's favorite celebration usually does not take much time and effort. If you look carefully, every person has the necessary material at home. All you need to do is just sit down and start creating.
You should definitely try to involve as many family members as possible in this process.
When all relatives are engaged in one thing together, the collective spirit becomes stronger; all over the world it is customary to consider this day a family holiday. If one person takes care of organizational issues, the chances of meeting at a common table will increase dramatically.
Floating tree made of balls
You will need: Christmas tree balls with fastening in the form of loops, fishing line, scissors, pliers, chain, metal lattice, carabiner (connecting link for hanging the tree).
Master Class
- Prepare 4 equal lengths of chain and use pliers to create a hanger that will hold the lattice on the hook.
- Think about the layout of the tiers of the tree. It is worth noting that the outer diameter of the largest circle must coincide with the outer radius of the metal grate.
- Hang the grille from the ceiling.
- Start hanging the balls from the top of the tree, then gradually increase the length of the fishing line.
The floating Christmas tree made of balls is ready! I recommend watching this video!
It brings us closer together
Options for crafts must be distributed according to the complexity of the work. The head of the family can easily bend the desired wire structure or connect an additional carrier to power the future figurine. Women and children, meanwhile, can take care of decorative issues.
Related communication will allow you to find out how things are going in your personal life or share good advice. Older people will probably tell a couple of interesting stories related to December 31 of their turbulent youth, and they will have a lot of laughs.
How to arrange New Year's tinsel?
Decorative elements may become wrinkled during storage. To make the New Year's rain garland and other decorations straighten out, use the following life hacks:
- Hairdryer
_ Direct the stream of warm air in the direction of the “growth” of the rain hairs, straightening them with your hands. - Steam
. Over a pan of steaming water, straighten the decoration with your hand until it takes the desired shape. - Warm water
(30-40°C). Spray the decorations with it and shake them. For drying, it is better to use a hair dryer or dryer so that they do not wrinkle again.
Homework
An unusual and stylish craft can be one of the ways to express your skill in needlework.
A tinsel Christmas tree is perfect for presentation at various exhibitions and competitions. On the eve of the holiday, such events are held in all school institutions. Some teachers may be caught off guard by thematic assignments. Even during a labor lesson, you can implement one of the ready-made ideas if you practice well at home. Striving to be the very first at a young age is quite useful; leadership qualities will be useful in adulthood.
If this is a joint construction with the whole class, people around will definitely notice good ideas and ask related questions. By helping your best friend or deskmate, you can find a faithful companion for many years.
Fringe Christmas tree
You will need: copper tubes or smooth wooden sticks, green fringe 15 cm wide, thin wire, paper, a garland of pompoms, a ruler, pliers, a hacksaw with a thin blade, a glue gun, scissors.
Master Class
- Cut the fringe into 5 pieces of the following sizes: 45 cm, 35 cm, 25 cm, 15 cm and 5 cm. Cut copper tubes with a hacksaw, the same size as the fringe.
- Glue the fringe to the tubes.
- Prepare a long piece of thin wire and thread it into a 45 cm tube in such a way that both ends of the wire are the same.
- Pass the ends of the wire through the 35 cm tube so that the right end of the wire is on the left and the left end is on the right. Thread the remaining fringed tubes onto the wire in the same way.
- Glue on a pompom garland.
- Make a star this way: prepare 2 squares with sides of 10 cm, fold them like an accordion, glue the top edges of each piece, then glue the 2 pieces together to form a circle.
- Glue the star to the top of the tree, attach a wire hook and hang the tree.
The fringe Christmas tree is ready!
Tinsel Christmas tree: photo of crafts
Please repost
0
DIY miniature wire Christmas tree for your apartment or office
This craft option is perfect as a toy for a large, so to speak, main tree in an apartment or office. The principle of its manufacture is slightly different.
First, we take the main wire and make an outline out of it, and don’t forget to form a small loop on top for hanging. Then we take smaller wire (preferably light shades) and put on small beads, seed beads and other decorative elements. And then we fill the internal space in the contour with coils, periodically attaching it to the base.
What decorations can be made from branches and cones
One of the most accessible winter materials is pine cones. Just take a walk in the forest or park and you can pick up a whole bag of them. And they make wonderful New Year’s decorations. You can make hedgehogs or Christmas trees from pine cones.
But that's not all. Their convenient shape allows you to connect them individually with each other. As a result, you get a real garland. It can be hung on the wall or placed on the fireplace.
If you paint over the surface of the cones, you can get a bouquet of them. It is especially beautiful when they take fruits of different species and varying degrees of opening.
Their tandem with candles turns out to be extraordinary. But we remember that this material is easily susceptible to fire, so it is better to use diode candles.
Another decor idea in a glass. Instead, transparent salad bowls, candlesticks and vases are suitable.
One of the simplest decorative elements is to use a bunch of pine cones in a hanger.
They can be used to decorate a door handle.
The tape is glued to the wide side of the fruit using a hot gun or hot glue.
A similar bow can be tied according to the pattern below.
Natural material looks very advantageous in decoration. Nowadays it is very popular to make beauty out of ordinary things that lie under our feet. This is literally true. Here, for example, are twigs. What can be done from them? If you use your imagination, you will get wonderful Christmas trees.
Snowflakes and stars. They don't even need to be decorated particularly. All the charm is in natural lines and shapes.
And they are made in literally ten minutes. And they are often used for creativity with children.
Of course, you can combine different materials with natural ones. There are no restrictions here.
Window decoration ideas (+stencils)
We discussed window decoration options in the previous chapter. Below we will take a closer look at how you can decorate the glass itself. What compositions can be assembled from vytynankas and how to use stencils.
For example, how do you like the episode from the winter fairy tale “The Snow Queen”.
Several windows are involved at once. The main characters are located in the central part of the glass.
To repeat this composition, I suggest stencils. The Snow Queen herself.
Cut out Kai and Gerda.
There is an ice castle in the distance. Here he is. Save the picture to your computer and print it. Or immediately transfer the image through the monitor to paper.
Another idea is to use snowflakes cut out of paper. You definitely know how to make them. Just glue it to the glass not in a chaotic manner, but in the shape of a Christmas tree.
The vytynankas in the form of houses look very elegant.
In addition to stickers, you can use regular drawings. For example, it is convenient to paint on glass with three paints: gouache, acrylic and toothpaste.
Below is a very simple idea made from circles. Snowmen are the easiest to make, you can start with them.
More complex compositions from very openwork protrusions.
Next is a selection of stencils and templates for cutting. You can glue them directly onto the glass, or you can attach them to the window and use them as stencils. And fill them with paints. Then you can transfer the silhouette.
Let's start with the house options.
Next are the ideas for simple snowflakes.
Santa Claus over the city in his sleigh. Great picture, very inspiring.
Just a stencil of houses and Christmas trees.
The family is preparing for the holiday. They run to set up and decorate the Christmas tree.
More options for protrusions and stencils can also be viewed in the corresponding selection. I wrote in great detail here, I invite you to read it.
New Year's garland made of paper
Unlike most paper garlands, this one looks very graceful and elegant. And it is made in exactly the same way - from colored strips, paper clips, glue and a stapler.
Photo: -.
10 cool ideas on how to decorate your apartment for the New Year
How to make decorations for kindergarten
Let's talk about simple decor options. Now we won’t talk about decorating the assembly hall. We will limit ourselves to a group or the facade of a kindergarten. Of course, you can apply any of the ideas presented above. But you can create crafts with your children.
I really liked the symbol of winter - the mitten. Look how they came up with placing them on the wall.
Decorate the door with inscriptions and handprints with them.
We created a whole winter tree on the door.
They also made a wreath. It turned out very nice.
Don't forget about New Year's wall newspapers and posters. They are still relevant today, because they are so interesting to look at.
You can write jokes and poems.
Or imagine the students as snowmen.
Such posters look very elegant.
In addition, collages and various cut-out pictures are used. They are glued with masking or double-sided tape.