With the help of light
You can transfer the outline of any image from paper to textile material using light. To complete the work, you need to have an ironed, clean fabric and the image itself. The paper is taped to the window. The material is spread over the image. It is also fixed with tape. Then, using a simple pencil, trace the contours of the image.
Advantages and disadvantages
minimum costs; ease of implementation; the ability to obtain a clear outline.
only the outlines of the picture are printed on the fabric; does not translate the color of the drawing.
You can use a rectangular piece of glass instead of a window. Then the transfer of the image from paper to textiles is performed in a horizontal position. The glass is placed on the seats of two chairs located opposite each other. A light source is placed below - a table lamp. The image and material are attached to the glass using tape. Having fixed the fabric, trace the contours of the design with a simple pencil.
The essence of technology
Don’t be intimidated by such buzzwords as sublimation printing technology or graverton, because they are one and the same thing, and therefore less incomprehensible. The technology is based on the principle of sublimation, when a substance, under the influence of high temperature, “jumps” from a gaseous state directly to a solid state, bypassing the wet stage.
Briefly about the main thing
Graverton technology allows you to transfer a design to wood, metal, glass, fabric, and the process itself takes place in a certain order:
- The image is printed on sublimation paper;
- The front side is applied to the object being processed;
- Placed in a heat press for a certain time.
A huge number of things can be subjected to artistic processing - from shoes, dishes, fabrics to corporate symbols, puzzles and all sorts of other unexpected things.
The main disadvantage of graverton technology is the need for special equipment and its high price:
- sublimation printer (starting from 500 thousand rubles and kopecks);
- thermal transfer press (from 9 to 30 thousand rubles).
In this press, a picture sticks to the mugs and is fixed
And since you want to transfer a design to wood at home from time to time, it makes sense to purchase expensive equipment only if you take the matter on a grand scale.
In conclusion
The new possibilities of a wood surface used as a basis for a painting or photograph are unusual and evoke a lot of emotions. Familiar images look a little different than on paper - softer, more mysterious. Branded supplies will help perpetuate your work, which may outlive the paper version.
The video in this article shows an example of transferring an image to wood.
You can ask any questions you have about transferring an image to wood in the comments to this article.
DIY self-adhesive paper and sticker crafts
You can also make your own self-adhesive sticker. Multi-colored note sheets are best for this. Coat one side with PVA glue and let dry. After drying, the adhesive layer must be wetted and glued to the surface.
You can make all kinds of crafts with your children from colorful sticky leaves. Making homemade products from such stickers is convenient and simple, since you do not need to use glue to make and join parts. It is replaced by a sticky base.
Interesting video on the topic:
Materials for making stickers
Before you make stickers with your own hands, you should definitely take care of preparing all the necessary materials. First, you will need tools such as scissors or a utility knife. When choosing the right tool, it is important to pay attention to its blade. It should be as sharp as possible. Otherwise, there is a possibility that the edges of the sticker will turn out uneven. In addition, such a sticker will not adhere well.
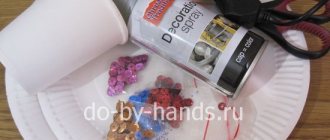
Secondly, to make stickers you need wide tape, parchment, vinyl film and glue. When choosing tape, you should consider its width. It must match the sticker format. In any case, to create stickers yourself, it is advisable to give preference to wide adhesive tape. Additionally, glitter and paint can be used.
Thirdly, you can’t do without a small amount of warm water. Also, don’t forget about the picture that will become the basis for the sticker. You can print it on a regular printer or draw it yourself.
Manufacturing methods with single-sided tape
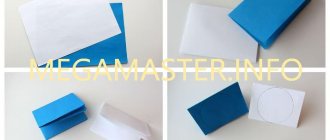
The sticker can be easily made using adhesive tape. Sequencing:
- Cut out the picture you like and stick tape on top of it.
- It is important that the layer of tape completely covers the design and there are no overlaps.
- Smooth out the “laminated” picture. It is better to do this with something thin and flat. For example, a plastic card. It is necessary to iron it so that there are no air bubbles left between the image and the layer of adhesive tape.
- Place the finished picture in a container with warm water for 5 minutes.
- After removing from the water, carefully peel off the layer of paper. The result should be a printed image on a sticky layer.
- Dry the finished product.
Remove paper
This is a very interesting stage. To remove the paper, we only need to wet it and scrub it with our hands. This is a rather messy process and there may be another way, but we found our fingers to be the most suitable tool. Some parts of the image will be easier to remove than others, but keep in mind that by the end of the procedure your hands and fingers will definitely be tired. The procedure may have to be repeated and in total it will take from up to 30 minutes. But this extremely exciting moment is to see how the photograph appears on the tree. Have your vacuum cleaner ready to clean up the mess you're sure to get from this step.
We use an iron
You can transfer the drawing using an ordinary iron. True, in this case it is necessary to buy paper with a special coating for inkjet printing, designed for thermal transfer of the image printed on the printer onto light cotton fabric. One such sheet costs 0.5-1 dollar.
On top of the textile you need to place a drawing printed in color, face down. The top of the picture must be ironed with a hot iron (the steaming mode must be turned off). While the paper has not cooled down, it must be quickly removed from the fabric. A bright, richly colored image will remain on the surface of the material.
Advantages and disadvantages
allows you to get a copy in color; ease of implementation.
You will need thermal transfer paper; fabric with a printed picture in color can be washed at a temperature of no more than 40 degrees; Do not use bleach when washing.
Very simple and quick transfer of drawings to any surface
This invention will eliminate the need for blue carbon paper forever! Now there is a completely new way to copy drawings that will no longer be erased by accidental contact with your elbow! In addition, you can also transfer color drawings and photographs; the quality of the transfer can even compete with printed products!
The methods described below will make it possible to qualitatively and permanently transfer drawings and photographs onto leather, rubber, plastic, ceramics, metal, wood, paper and film.
Chemical transfer
For chemical transfer you will need 646 or 647 solvent of the old (2004) sample with a high content of toluene (50%). where toluene plays a major role. But it is not recommended to use toluene in its pure form, as it is harmful if inhaled! Acetone ethyl acetate is also suitable, but much worse: butyl acetate xylene.
For transfer, take a high-quality (the amount of ink is checked for transmission) color or black and white photocopy or a printout from a laser printer; the copy must be printed on regular office paper (required!). When transferring a design, take a photocopy in one hand, and with the other hand, moisten this photocopy with a solvent on the back side, where there is no design, and only after that press it to the desired surface, using a brush with artificial fibers or a spray. The process itself should take no more than 30 seconds.
The easiest and fastest way to transfer drawings
To transfer (fresh) color magazines such as Natalie, Kull, Bravo, rest or silk-screen types of printing, as well as photocopies, you can use another method of transfer, moisten the very surface of the object and press a dry photocopy or magazine to it; before interrupting the drawing, it is advisable to make on the computer in mirror image. If there is no computer, then the photocopy is first transferred to a blank, unnecessary sheet of paper, and then transferred from it to where it is required. There is another way to get a DSLR. The photocopy is greased with vegetable oil. This is how TRANSPARENT PAPER is made!I! The excess oil is wiped off and the drawing is quickly photocopied on the other side.
However, there is also a non-mirror transfer method; for this, adhesive tape is placed on top of the photocopy on the drawing itself, and the other (back) side is generously moistened with solvent for at least 10 seconds, then the adhesive tape is carefully removed from the paper still wet from the solvent (the drawing is transferred to it) and pressed against the required surface. Then the tape is removed from the surface and a high-quality copy of the design is already visible on it! It will be interesting to know that the transferred drawing is no longer washed off, is not erased and is acid-resistant! By the way, black and white photocopies are interrupted from 2 to 4 times, and color photocopies and magazines only once. 646 solvent peels off tape and delaminated lamination! To do this, moisten the paper under the tape or lamination with a solvent.
How to transfer a drawing from paper to glass
To work, take an image with good contours and a roll of cling film. To transfer, you need to purchase a felt-tip pen - a marker for glass; it fits well and is easily washed off the surface.
Instructions:
We take the film. Its size should be slightly larger than the drawing itself. The film is attached to the surface, which prevents the picture from getting lost. The image is placed on film and outlined thinly and very carefully. Now the film is carefully transferred with the front side to the previously prepared surface. Preparation consists of degreasing its front side. Make sure that the film is completely adhered to the glass and get rid of wrinkles and bubbles. For a clearer transfer, we trace the image again along the contour with any sharp object. It's time to get rid of the polyethylene. We do this very carefully so as not to smudge the drawing. If there are inaccuracies somewhere, now is the time to correct them. Now we draw the outline
This can be done using acrylic paints and a brush. After everything has dried, carefully remove traces of the marker using cotton swabs dipped in liquid. Inside, the image is filled in any way. If the technique is stained glass, then everything is poured along the contour. After drying, for a longer service life of the product, the image can be baked or varnished
It all depends on where this item will be used.
Preparation, components and tools.
A piece of board, plywood or any wooden surface. This is the basis. Sandpaper or, in my case, an abrasive sponge (100+ grit) for finishing the surface to which we will transfer. A brush, a wallpaper roller, if you have one, but you can do without it, a sharp knife, the picture itself or a photograph printed on a regular laser printer. If this is a portrait, or the correct perspective is important, we display it in a mirror in any graphic editor. You can use Picmonkey or regular Paint. Print, choose the best print quality. And the main ingredient of our Foto transfer potch can be chosen from any company, I chose this one due to its availability in the nearest store (245 rubles) and acrylic varnish (140 rubles) to your taste, glossy or matte. Transfer ⋅ is a certain composition that glues a thin layer of paper to the surface, forming a protection and making this layer transparent, which we will then protect with varnish.
Crop the image to the required size. Try to touch the drawing less with your hands so as not to leave greasy marks. I took the portrait of Mikhail Afanasyevich Bulgakov, mirrored it in the editor and printed it on a regular laser printer. I sanded the plywood thoroughly and cleaned it of dust.
We apply the transfer, not too much and not too little, so that the layer is uniform.
Smooth and press, try to avoid bubbles. Carefully, trying not to move, glue the image down and try not to move. If you have a roller, roll it. I put a piece of plastic down and smoothed it out. We wait until it dries, they recommend 12-24 hours. If you can't wait, dry it with a hairdryer. Then the magic begins!
We pour water and let the paper get thoroughly wet, there is no need to be afraid, the main thing is not to rush and wait for the picture to appear.
Calmly and better with your hands, they just feel the surface and tell you how to act. We remove the top layer of paper until the image appears, it seems imprinted on the wood, but still caution will not hurt, try not to damage the image layer.
Here is the finished version, all that remains is to dry it and varnish it. If after drying there is a layer of paper left and the picture is whitish, then the procedure can be repeated. It will not be in perfect condition, but after varnishing, clarity will appear and thereby protect the work from exposure to the external environment.
I have a glossy acrylic varnish, you can use another one, but first make sure it doesn’t conflict with the transfer on a separate surface.
This is how it turned out for me, if you choose a more structured foundation, it will appear in the photo accordingly. Good luck and make more crafts with your own hands, they will retain your energy and you will enjoy them!
We hang it on the wall
In any hardware, tool or home improvement store you can find special brackets for pictures; be sure to take screws no longer than the thickness of the wood.
Useful short videos from Make-Self.net
Transferring with film for decoupage
This method uses a board surface prepared with sandpaper, onto which white acrylic paint is applied. The paint is first slightly diluted with water, after which one layer is applied to the surface of the board in the longitudinal direction, and later a second layer in the transverse direction. After this, the paint is allowed to dry.
At the same time, decoupage film is used, on which a photograph or the desired image is printed. First, it is moistened in water at room temperature for about half a minute. After this, it is placed on the surface of the board, and then the base is removed.
By treating the film with a sponge, excess moisture is removed from it so as not to rub the pattern. After it dries, you can use a marker to correct image defects. The board takes on its final appearance after it is coated with varnish.
After creating a design on wood, it can be placed in any room of the house or used as a decorative element, multiplying it several times.
Some masters have turned this simple activity into a good business. But first of all, the main task of such a transfer is a beautiful drawing on wood, the creation of a beautiful object, gift or decor that will bring pleasure to its owner.
How to make stickers using a printer
The rules here are the same as when working with tape. The only difference is that the image can be printed on a printer.
Procedure:
- Print your favorite picture or inscription. Only a laser printer is suitable for printing stickers.
- Use thin printer paper rather than thick photo paper.
- Trim the drawing to the desired size.
- Glue a layer of tape on top.
- Place the sticker under running warm water and remove the paper.
- Dry the sticker.