Deciding on a method
You can draw with an ordinary pencil, colored pencils, paints, felt-tip pens. Various non-standard drawing techniques, for example, with charcoal, are now being actively introduced.
Each paint and pencil requires a special approach; you need to know how to use them. If we talk about the first steps in this art, then just choose what you like. If these are paints, it would be better to use watercolor or gouache.
Landscape with colors
Let's look at how to draw a beautiful drawing easily, even if you don't know how to draw. If you follow the step-by-step instructions, then you will certainly succeed, and you will be satisfied not only with the process, but also with the result.
To draw a pink sunset you will need to prepare paper, brushes, water and paints:
- pink;
- blue, it is better to choose the color ultra-marine if you have it in your palette;
- rich yellow;
- black.
When everything is prepared, you can start creating beauty.
Master class No. 6
What to do if you can’t use a projector? Masking tape comes to the rescue.
To depict, for example, such a realistic tree on the wall, you will need:
- masking tape
- stationery knife
- black marker
- primer for wall treatment
- newspaper to protect the wall from paint
- dye
- thick brush.
First you need to mark the outline of the future tree on the wall using masking tape.
Then the entire space inside the outline is filled with masking tape and on top of it we draw the future tree. It is better to outline the contours of the resulting tree with a black marker for clarity.
After this, using a stationery knife, carefully cut out the design along the contour. Before you start painting, you should, firstly, protect the wall around the future drawing from paint. The easiest way is to use newspapers for this purpose.
The area of the wall that will be painted must first be treated with a primer so that the paint adheres better. After the primer has dried, apply the paint using a brush. Ten hours later, when the paint is completely dry, you can remove the newspapers and peel off the masking tape: your drawing is ready.
Creating a masterpiece - the first stage
Step-by-step instructions will be given, after studying which you will be able to draw a very beautiful landscape:
To start, choose a yellow color. Mix the paint with water to get a rich color. Now you can move on to painting your sheet of paper. Apply yellow paint in strokes over the entire area of the sheet; you need to sketch the background.
Now you need to draw the sun. Take a dry cloth and in a place where there will be sun, wipe the paper well. You should get a circle, at this point you will erase the yellow paint.
Now you need to add pink to the yellow, after mixing you will get orange. Apply the resulting color on top of the yellow layer, but only around the sun should there be a yellow halo.
Note!
Graphic dictation by cells for preschoolers and first graders. The easiest and most difficult graphic dictation options for a child
Dog coloring page - useful tips on how to draw a dog. Instructions with basic drawing steps for children (160 photos)
- Sketches: a master class on creating simple and complex drawings with your own hands with step-by-step diagrams for beginners + photo examples of original works
Now take only the pink paint and apply the next layer on top of the first two. Don't forget to walk around the area from the sun.
The background is ready, now you can move on to the next step.
Types of pastels and their differences in drawing
Pastel painting lessons for children begin with choosing a specific type of pastel. Indeed, despite the common features, there are also differences.
Children can work with the following types of pastels:
- Dry is the most pleasant to use, with its help the lightest strokes are applied, and the design turns out matte and velvety. The only negative is that the material breaks easily and smudges a lot, so every child should use it carefully;
- Waxy is a harder pastel than dry pastel, shiny and smooth in appearance. This pastel is less brittle, and its shading is possible only along the borders of the design elements. In addition, its biggest advantage is that children can use it not only on a paper surface, but even on glass;
- Watercolor - similar to wax pastel, but due to the presence of water-soluble components inside it can turn the work into a watercolor drawing. All the child needs to do is blur the picture with water;
- Oil pastel is a type of pastel that is best used after 8-10 years, since it is washed with special solvents. However, the advantages of oil crayons are that they crumble the least, and the design retains its colors for the longest time.
By the way, each type of pastel, despite its differences, will be interesting to children. And depending on what the child chooses, it will be necessary to move purposefully in practice.
But in order to make a choice, you will have to try all types of pastel painting, and the selected master classes will help with this.
Drawing the sky
Let's move on:
Apply a small amount of blue on top of the leaf. Apply ultramarine paint. If it happens that the blue mixes with the previously applied layers of paint, carefully wipe off the previous layers with a cloth.
Mix ultramarine with pink. Apply the resulting shade below the blue. This move will give your painting an evening look.
Next you need to achieve a darker color, to do this, play with ultramarine and pink, add more colors. At each stage of mixing, check whether the resulting shade suits you on an additional sheet of paper, a draft. Using the resulting shade, draw a line parallel to the horizon; these will be stripes of clouds. They should not be continuous, but abrupt.
Note!
- Easy gouache drawings - TOP-160 photos and step-by-step instructions for drawing with gouache. Best Reviews of Easy Drawings for Beginners
- Drawing ideas: TOP-200 photos of the best ideas for do-it-yourself drawings + reviews of techniques with simple drawing schemes
- Pencil drawings are easy and beautiful - a master class on pencil drawing for beginners. Simple diagrams with a description of the work + photos of the best drawing ideas
To prevent the clouds near the sun from being too contrasting, take a dry, clean brush and rub the edges a little.
At this stage, the drawing of the sky stops.
Division by horizon
In order to highlight the horizon, it will be enough to dip a thin brush into white paint and draw a horizontal line across the entire drawing.
Fade the sky a little with a pink tint, make blurry strokes. To do this, you can dip the brush a little in water and you will succeed. At this stage, the part of the drawing that is above the horizon is ready.
Basic principles of acrylic painting
Acrylic painting can be airy and transparent - like watercolor, dense and bright - like gouache, voluminous and rich - like oil. Beginners should first make a sketch in pencil, and then cover the drawing with paint. The easiest way is to take a wide brush or palette knife and fill the background with broad strokes, and then add small details.
To see the pencil sketch, you can add more water to the palette and create a light, translucent watercolor background, and then gradually paint over it. The more water you add, the lighter and more transparent your brushstrokes will be.
Brushes should be washed frequently and thoroughly. When acrylic dries, it becomes viscous, resulting in rough brush strokes. Do not leave dirty brushes: they will dry out unnoticed and become hopelessly damaged.
Use a spray bottle of water to keep your palette moist to keep your paints from drying out longer. But under no circumstances splash water on the paper: it will get wet and go in “waves.”
Leave the finished drawing on the table until completely dry. Carefully put the remaining clean paint that was not used during the painting process back into the jars. And if you need to take a short break during your painting session, simply cover your palette with cellophane or cling film.
Details
Now draw the bottom of the drawing below the horizon. Here you need to draw the water and the shore.
Note!
- How to draw a squirrel: TOP-120 photos of the best drawing methods and techniques. Step-by-step master class for beginners with examples of the best drawings
How to draw anime - useful tips and simple diagrams for beginners. Instructions with the basic steps of drawing anime (160 photos)
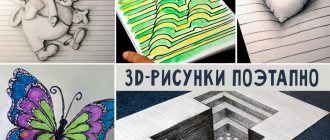
3D drawings: TOP-150 photos of the best methods and techniques. Step-by-step DIY drawing master class for beginners
Since the overall picture conveys an evening sunset, it means that the water and the shore will be painted with pink paint. Leave the bottom right corner for the shore, and on the rest of the part use light pink paint to paint the water, play with colors to convey the water with the waves.
Anime and cartoon characters
How to draw different characters beautifully and easily with a simple pencil can be understood if you pay attention to their physique and different features. The figure or facial details of cartoon characters often differ from the usual human structure. Big eyes or small hands make a character memorable. It will be easier to draw such characters than a portrait of a person.
There are a lot of pictures with characters on the Internet, and first you should learn how to draw them.
This will help in the future to draw heroes from memory or even come up with your own. At the initial stages, you can not pay attention to the shadows of the elements, since such characters are only drawn. Later, you can add the acquired knowledge to drawing anime and characters in order to make them more alive.
Drawing the shore
To paint the shore you will need to choose a rich purple paint; to do this, mix black with the previously used purple.
Using the resulting shade in the lower right corner, draw the shore under the waves. A couple of such rich strokes can be done on water.
Art studio ART Factory (TsAO)
Address: m. Taganskaya, st. Alexandra Solzhenitsyna, 18 Website: https://afabrica.ru Phone: + Cost: from 1990 rub. per lesson
Art studio ART Factory is pleased to present you with master classes in drawing, graphics, drawing and painting in oils, watercolors, pastels in various styles and genres: flowers, still life, animalism, portrait, impressionism, cityscape, seascape, abstraction, copies of great masters Drawing master classes for beginner adults and children over 5 years old, developed by leading artist-teachers in Moscow.
Result: in one drawing master class, lasting 2, 3, 4 hours, depending on the size of the canvas or paper, you will create your own masterpiece!
Materials are provided by appointment and are included in the cost of master classes.
A master class on painting with acrylic paints is an intensive one-time lesson based on the author’s techniques for painting pictures in 1 lesson. At the acrylic painting master class, you will paint a picture with acrylic paints in just 3 hours absolutely from scratch. In 1 lesson, artist-teachers will help you place your hand, show the principles of coloristics, composition, shadows and much more using the example of a picture that you will draw.
Final touches
Your landscape is almost ready. It remains to make a few corrective strokes in the sky area.
Using dry paint, rub the horizon line near the sky, this way you will create the effect of glare from the sun on the water.
You may not be able to do everything right away, but with a lot of desire and effort, you will certainly be able to draw a beautiful evening landscape. After a little training you will be able to draw the most beautiful drawing.
Draw with a pencil
Initially, many people think that it is simply unrealistic to draw beautiful drawings yourself, but after studying some information or watching master classes, this opinion may change for many. Let's look at how to draw a beautiful drawing with a pencil.
First you need to decide what exactly you want to draw. It could be a human face, animals or fairy-tale characters. Don't limit your imagination.
Wax pastel drawing lessons
Wax pastels, which are brighter and more effective in their structure, are very loved by children along with dry pastels.
But it gets dirty much less and is therefore more suitable for children's creativity. However, there are such differences in work that children should know:
- You should draw with short strokes and place them side by side;
- It is impossible to shade all the lines at the same time, only along the borders;
- For shading, it is better to use crumpled paper or a sponge rather than your fingers;
- You cannot draw with crayons in a cold room or outdoors.
And adults should also take these points into account when teaching children.
The classes themselves are easy and quickly allow you to learn how to draw with wax crayons. This can be seen in the selected master classes:
How to draw a wolf?
Let's look at how to draw a beautiful wolf step by step using a pencil. Prepare a sheet of paper, a pencil, a sharpener and an eraser for work. Now you can get started:
- First you need to decide on the shape of the animal’s body. Draw the body schematically, do not press too hard on the pencil. Use light and subtle strokes. Draw a horizontal oval, slightly curved at the bottom. This will be the torso. Draw two paws down from it, for now they just need to be stripes. Draw the head in the form of a circle, divide it into four parts. Connect the body and head with smooth lines, forming a neck.
- Draw small ears on the head, and form the fur around the entire circle with small, abrupt strokes.
- Now it's time to draw the eyes and muzzle. Using thin lines, draw the eyes along the auxiliary horizontal line. In the center of the vertical line at the very bottom, draw a mouth, a little higher than an oval nose.
- Detail of the muzzle. Draw fur on the ears, and with light strokes draw the cheekbones of the animal.
- Draw the fur using line strokes on the wolf's chest, along the upper part of the body and on the hind leg.
- Draw the lower part of the body using line movements. Use claw sticks to form paws and draw toes.
- The second front paw needs to be completed; it will not be completely visible. The second hind leg will be clearly visible; it also needs to be completed.
- Draw a beautiful and fluffy tail for the animal.
- Draw the base on which the animal stands. This could be lumpy soil or grass.
Your pencil drawing of a wolf is ready. Now erase the auxiliary lines and you can color the picture.
Pictures drawn in pencil look very impressive, even if they are not colored. After practicing and mastering this technique, you will be able to make sketches wherever and whenever it is convenient, the main thing is to have inspiration.
Lunar path with paints
Are you still thinking about what beautiful drawing to draw? Let's look at how to draw a very beautiful picture with paints. For work, prepare gouache paints, water, brushes and a sheet of paper.
Now all you have to do is stock up on inspiration and you will certainly succeed. In fact, a drawing technique will be considered, which a junior school student can easily master, because all the stages are described in detail.
Involve children in creativity, and you will certainly have fun and useful leisure time together.
Stages of drawing the lunar path
By following the steps below, you will be able to draw a very beautiful image:
- Take rich blue gouache and paint the entire background with it. Make strokes from right to left or vice versa, but not alternately.
- Draw a white line horizontally, this will be the horizon, it should not be clear, but blurry. Make sure that the transition is smooth, sharp strokes are unacceptable.
- For the moon, draw a white circle and blur it. Apply strokes in a circle.
- Draw the stars. They can be created by splashing paint from a brush, or you can put dots.
- Using a brush, draw a circle of the moon with white gouache in the center of the blurred circle.
- Now the important stage is drawing the lunar path. Dip the brush into white gouache and draw a path using horizontal movements from left to right. They should not be smooth, it is necessary to create a flickering effect. Start from the horizon and move down the picture. Wet the brush in water and blur the resulting lines.
- Using a thin brush dipped in white paint, draw a clearer horizon line closer to the center of the picture and a lunar path in the center.
- Use white paint to draw a winding bank. On the shore, paint the grass with green paints of different shades.
Your moon path is ready. In fact, drawing it is extremely simple. All you have to do is stock up on inspiration and the necessary materials. You will certainly succeed, the main thing is to want it.
Oil pastel drawing lessons
Oil crayons, unlike other types of pastels, are the brightest material that allows you to create shading, blurry areas, and color accents in your drawing.
But it is preferable to work with this pastel on white paper than on colored paper. After all, then the colors appear much brighter, and the drawing turns out more saturated.
In addition, this material takes a long time to dry, like ordinary oil paint, so the painting will stop smudging completely only after a month.
Parents begin their child’s acquaintance with oil pastels by learning how to work with them:
- Gradient painting - apply one color first, and the second next to the overlap along the border of the first, then repeat the technique with the third color;
- Color overlap - darker strokes of the same color scheme are applied to the main light color;
- Linear strokes - the drawing is created by small lines that overlap each other. You can even draw them in a chaotic order;
- Dot coating - various colored dots are applied to the main background, creating an unusual pattern in the form of highlights;
- Feathering – creating a smooth background by smoothing out pastel layers;
- Blur – creating the effect of an oil painting by blurring the applied crayon with thinner.
Learning these techniques is not difficult, although a child can start trying to draw with oil pastels without them. But then the finished children's drawing may look unfinished.
Well, you can see how to draw with oil crayons on the following videos from YouTube, which will serve as a drawing tutorial for some children:
