For any good knife, not only the technical characteristics of the blade are important, but also its handle, and if for the first element it is enough to choose high-quality steel, process and sharpen the blade, then the handle should be comfortable, practical, and beautiful. Moreover, it does not matter at all whether a new knife is being made or an old blade is being reanimated. Wooden or forged handles are considered classics. We must pay tribute, outwardly they look very decent, but making such a knife with your own hands is very difficult, and in some cases even impossible.
The building materials market is constantly expanding, and oligomers containing epoxy resins are gradually gaining popularity. You can make a handle of any shape from epoxy resin, and there are several options for decorating it. The strength of the hardened resin, as well as its other physical properties, make it possible to obtain reliable, practical and very beautiful products. This knife will serve for a long time in the kitchen or is suitable as a souvenir gift.
Varieties
The average consumer has absolutely no need to classify knives, or rather, their handles; he can choose a convenient and aesthetic option when purchasing. But if you want to make a knife yourself, you should remember that the production technology will largely depend on what type of model is chosen. The distribution according to the mold manufacturing method is of practical importance.
- Molds made from sculptural plasticine. The handle of the future knife consists of two longitudinal halves. Each half has its own mold, except in cases where the handle is symmetrical relative to one of the axes. To create the form you will need sculptural plasticine and plastic film. Ordinary plasticine will not work, as it spreads with a slight increase in temperature. Even at low temperatures, ordinary plasticine is not able to maintain its shape (features of an amorphous substance). You will have to make a cast, and use a ready-made knife handle as a cliche. A plastic film is laid on the surface of the plasticine bar. Cling film (stretch) is suitable. The film must be completely adjacent to the surface of the plasticine. Use your hand to remove air bubbles so that the cast resin has a smooth surface. To make an impression, you need to press the sample handle into the plasticine to a depth equal to half the thickness. This method is considered the most accessible and technologically simple, but has a serious drawback. The knife handle will consist of two parts.
- Glued molds. As an example, we can consider molds made from the same plasticine, which are pre-glued together. It is necessary to leave a hole for pouring resin. The result is a solid handle of the desired shape. This method is good because the product does not need to be sharpened much. It is enough just to sand and polish the surface. In terms of labor intensity, the mold manufacturing process is a little more complicated than that described above. The first two methods are recommended for beginners who do not have much experience working with resin.
- Bar handle. The essence of the method is that epoxy is cast in the form of a bar, and then, using various tools, the workpiece is ground to the desired shape. It is believed that this method is the most labor-intensive, but the result is the most suitable.
- Cylindrical handle. Using sheets of acrylic, you can get ready-made tubes. Such knife handles are unlikely to attract attention with their aesthetics, but their production requires minimal time and effort.
Useful to know > What products can be made from epoxy resin with your own hands, what are the difficulties
All of the above classification options relate exclusively to resin pouring technology. But there is also a division of handle types according to their decoration. Even if a novice master is doing the job for the first time, he will probably want his masterpiece to be not only practical, but also pleasing to the eye.
There can be many decor options. Elements from wood, metal, jewelry, and natural materials are added to the resin as decoration. The classification that we will give is quite arbitrary, since there can be a lot of variations in the decoration of a knife handle.
- Wood reinforcement. Decorating a resin solid with various elements is called reinforcement. It is necessary to understand that almost all decorations play the role of connecting elements. In addition to aesthetics, they give the product additional strength. Depending on what exactly the handle will be reinforced with, there are several types of knives. A knife handle made of epoxy resin and wood is usually made using the third method from the above classification, that is, first a blank is made in which the wood element is filled with resin, and then it is ground to the desired shape. But the grinding process is very long, so you need a special tool.
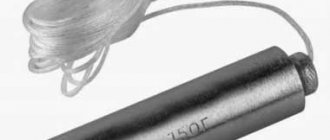
- Wire reinforcement. The simplest option is to wrap wire around the blade extension. It can be laid in rows or wound in a chaotic manner. As a mold, take a piece of pipe of suitable diameter. The pipe is installed vertically, with its end on the plywood, and the joints are glued with plasticine, glue or silicone. The blade with the wire wound around the extension is placed inside the pipe with the blade facing up. It needs to be secured. Here everything depends on the imagination of the master. Resin is poured into the cavity between the steel and the pipe, and after a day the pipe is removed and the cylindrical handle is given the desired shape.
- Jeans handle. If this unique material is available, a very durable handle can be made. Jeans sheets are glued together with epoxy glue and then pressed. After hardening, a durable tile is obtained, several centimeters thick. It is processed on a machine or using a special tool. The result is a nice pattern that resembles wood fibers, but has a characteristic blue color.
- Bandage reinforcement. If there is no desire to create beautiful and colorful masterpieces, but you need a simple and practical result, then you can make a pen from a bandage impregnated with resin. The handle will have a yellowish tint, but in this case you can experiment by adding color to the resin.
- Glowing handles. An interesting option are epoxy knife handles that glow in the dark. The secret of production lies in the fact that a phosphor is added to the resin. It is difficult to buy it in its pure form in a store, but you can order it in powder form via the Internet. The phosphor is added to the resin before it is combined with the hardener.
Useful to know > How to make a chair from epoxy resin, detailed instructions
Resin mold
Special forms are not sold in the store; you will have to make it yourself. Thanks to this, a unique handle can be made by adding dye to epoxy resin. It is possible to create a form for filling in several popular ways:
- Using sculptural plasticine in the form of a bar, you need to cover it with polyethylene, expelling all air bubbles. Then selecting a blade with a similar handle to what is required. Press into the plasticine a little more than halfway. The form for filling is ready.
- Pour epoxy resin into a plastic product of an oval longitudinal shape, coated with oil or grease from the inside. After hardening, after 24 hours. By cutting the plastic, we get a shape close to the handle. Having drilled a hole for the shank, we make an insert handle and process it on a grinding machine.
- The method is almost similar to the previous option. Only the blade is mounted immediately, and the filling occurs along with the shank. Finally, we process the handle on a grinding machine.
Mold for pouring epoxy resin.
Hobbyists make molds out of anything. A prerequisite is the presence of polyethylene lubricated with an oily solution. To prevent sticking. In case of sticking, the workpiece can be easily processed on a grinding machine.
How to make
In describing the methods of reinforcement, we involuntarily indicated the principle of manufacturing epoxy handles. But since many key nuances were missed, we will return again to the description of the entire process. When reinforced with wood, not only the option of making it from a bar is possible. If you add small elements to the mold (pieces of bark, chips, shavings), then in transparent resin they will look quite original. It is necessary to ensure that wooden particles float in the resin, so you will have to pour it layer by layer and wait for each layer to cure.
Wire reinforcement offers several advantages.
- Firstly, it is very simple to wrap the wire around the blade extension.
- Secondly, using wire you can lengthen the handle to the desired size.
- Thirdly, the high adhesion of the resin allows the base composition to bond well with the metal.
The main nuance when pouring is its low speed. It is necessary to allow the resin to fill all cavities, otherwise air bubbles will form. Even if immediately after pouring it seems that there are none, then during the hardening process they may reappear and not float to the surface.
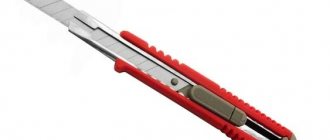
When making an epoxy knife handle by layering rag material, you need to have a special tool on hand. You will need a drilling machine, a grinder, a jigsaw, clamps, and a workbench.
When adding phosphor, you may encounter one problem. The powder does not dissolve well in liquid resin. It is evenly distributed throughout the array, but after pouring it settles at the bottom. The result will be that the lower part of the handle will be illuminated, but the upper part will not. Since it is impossible to mix the composition, it is recommended to fill it in stages, in several layers.
After pouring, all that remains is to perform the following manipulations: grind and polish the surface, insert the blade into the handle. Polishing replaces grinding. The grinding procedure depends on the method of filling the handle. If you get a workpiece of the desired shape, then grinding will bring the matte surface to gloss, and subsequent polishing will give the handle the desired shine. Begin grinding with an abrasive material, gradually reducing the grain size. For polishing, you can use special pastes.
Useful to know > What are the types of decorations made of wood and epoxy resin?
To insert the blade into the handle, it is necessary to make a corresponding hole in the workpiece. This is where a drilling machine comes to the rescue. The handle must be clamped in a vice, but great force should not be applied when tightening. In addition, soft material should be placed under the jaws of the clamp. You will have to secure the blade in the handle with glue. If the handle is made of two halves, then they are glued together or connected with rivets.
Types of epoxy handle decoration
There are a great many options and methods of decoration. Decorating an epoxy handle is called "reinforcement". Reinforcement also plays an additional function - this process makes the handle stronger. Get to know the simplest methods and choose the one that suits you.
- Tree. The handle, made from epoxy resin and wood inserts, is more often made by creating a solid mold, which is then ground to the desired design. This process is long and labor-intensive, requiring the use of special tools.
- Wire. The simplest and most affordable option. The wire is wound around the part of the blade that fits into the handle. It can be wound in even rows or laid chaotically. All joints between wire rows are masked with silicone or glue.
- Jeans. The handle made from jeans is especially strong and durable. The pieces of jeans are first glued together and pressed. And after pouring the resin, you get an original handle with an extraordinary design.
- Bandage. You can also use a regular bandage soaked in resin. The final design, of course, will be difficult to classify as a masterpiece, but it will turn out to be quite unusual.
- Luminous handles. Handles with the addition of luminescent dyes (luminophores) to the epoxy are very unusual and effective.
You can also add any additional elements to the epoxy. All of them are added to the epoxy before it cures. You can create your own epoxy handle design ideas. Don't be afraid to experiment and create.
Operating rules
Despite the high popularity of the material, epoxy resin handles cannot be called very durable. The operation of knives must comply with certain rules.
It is traditionally believed that products made from epoxy are purely decorative, so such knives are given as souvenirs, but they have found their practical application. A knife with a resin handle can be successfully used in the kitchen, but such a weapon should not be thrown. High impact loads may cause chips or cracks.
It is advisable to put the knife in a closet after use. On the one hand, this is required by safety precautions, on the other hand, extra protection from direct exposure to sunlight will not hurt. If the handle becomes dirty, you can clean it with a soap solution or other non-chemically active cleaning agent. It is better to refrain from using acids.
As for safety, modern epoxy resin in hardened and liquid form is absolutely harmless to humans, although it is still worth using personal protective equipment when pouring.
Hatchet knife with epoxy and wood handle
Hello everyone, in this instruction we will look at how to make a simple and original hatchet knife with your own hands. It can work like a hatchet, or it can cut like a knife; high-quality steel was used here, so the blade is sharp.
The hatchet is unique in that an interesting pattern is formed on it using the etching method. The hatchet handle is also interesting; it is a combination of epoxy resin with dyes and wood. Everything turned out original and beautiful. The hatchet has a beautiful leather strap, on which the author installed a beautiful homemade bead. If the project interests you, let's start studying it!
List of materials:
- carbon sheet steel for the hatchet; - epoxy resin and dyes; - a piece of wood for the handle; - brass rods and tubes; - sharpening machine (recommended); - leather strap; - oil or wax to coat the handle.
List of tools:
- acid for etching and paint; - band cutting saw; - drilling machine; - clamps; - belt sander; - grinder with cutting and grinding discs; - oven, oil and oven for heat treatment; - sandpaper, files, hammer and more.
The process of making a hatchet:
Step one. Cutting out the profile
Let's make a hatchet template, the author proceeds from the size of the piece of metal he has. We draw the project by hand with a pencil, it’s not difficult to do. And if you want to implement a more complex project, you can print it on a printer. We cut out the template and trace it on the metal with a marker; it is advisable to use a marker with a thinner line.
You can start cutting, the author carries out the work with a grinder.
Step three. Bevels
We make bevels on the hatchet; to do this, draw a line along the blade, which we will use as a guide when working. To make the line clearly visible, paint over the blade with a marker. Well, then we scratch the line with a caliper.
Let's get to work, they are carried out on a tape machine, the author does not use additional devices. To prevent the metal from overheating, we periodically lower it into water. Finally, we go over it with finer sandpaper to remove deep scratches, which will be more difficult to remove after hardening. We also drill a hole in the tail section; we must remember to do this before hardening.
Next, after hardening, we immediately release the ax and under no circumstances drop it, since the steel is brittle and the ax can break into pieces. We spend the holiday in the oven at a temperature of 200 degrees, but everything, again, depends on the grade of steel. Typically, when tempering, a straw-colored coating forms on the steel. Properly tempered steel will spring and ring.
Step five. EtchingIf you want to get an interesting design on your hatchet, like the author’s, you can do etching
But first, we grind the ax well and polish it; it is important to degrease the metal so that the acid does its job. Paint over the ax with random blots and dry it with a hairdryer
The paint can be used water-based and will wash off easily. We immerse the ax in acid and wait, the author took it out when it turned black.
We wash the ax in water with the addition of soda to neutralize the acid, and then wash it well under running water. After light sanding, a beautiful pattern is already visible on the hatchet.
We make the bead using a drill; it can be used as a lathe. We grind the workpiece with files, sandpaper and other tools.
Step seven. Handle assembly
Assembling the handle requires epoxy glue, brass pins and a brass tube. We coat everything well with glue and clamp it with clamps for a day. Well, then we set the desired profile for the handle using a belt sander. The final work is carried out manually using sandpaper. Ideally, the handle should become absolutely smooth.
In order for the epoxy resin to become transparent and the wood to show all its beauty, you need to coat the handle with a thin layer of epoxy or oil. Finally, everything can be waxed and polished. Likewise, don’t forget about impregnating the beads.
Step eight. Strap
Let's make a strap for a knife; the author cut it himself from leather. A stylish addition to the strap will be a bead, which is also a combination of wood and epoxy glue.
The hatchet is ready, it looks quite beautiful and unique. I hope you also liked the project and found useful thoughts for yourself. Good luck and creative inspiration if you decide to do it again. Don't forget to share your ideas and crafts with us!
Wooden knife handle
In this section we will try to describe the main stages of the work. As an example, let’s take a more complex mounted handle for a knife made of two types of wood, the so-called composite or stacked handle. We will begin the description, assuming that the bars are already dried and prepared for work.
Stage one
- The first step is to saw and carefully process the wooden blocks. The main thing is that they fit perfectly against each other. You can choose any angles. At this stage, you should estimate the length of the handle. The bar that will be the outermost one on the side opposite to the blade should be made a little longer. Unless, of course, you are planning a handle with a metal pommel, as, for example, in the photo.
- Then in all the bars you need to drill a hole for the shank. It should fit freely into this hole. During the drilling process, we recommend inserting the shank from time to time. This is necessary in order to maintain the evenness of the drilling. So that later the blade does not “go away” to the side.
- After drilling, the handle needs to be assembled. If your idea involves a bolster, it comes first. This is a metal element that protects the junction of the handle and the blade. They can be smooth, come with various carvings and also serve for decoration. After the bolster, you need to put all the wooden parts on the shank. You can also make metal spacers between them, or you don’t have to. If at this stage you see any inaccuracies, for example, a connection that is not tight enough, then you need to correct this.
Stage two
- If everything is in order, we proceed to gluing. For this you will need epoxy glue. It needs to be poured into the hole of the outermost bar and allowed to stand for a while. While it is standing, wrap the blade with masking tape to prevent it from getting dirty. After this, all parts of the handle must be coated in turn with epoxy and put on the shank. At the end, insert it into the outermost block, into the hole of which glue was first poured. By the way, you can read more about epoxy glue here.
- After this, you need to clamp the handle in a vice. Please note that they will have to be modified a little so as not to spoil the blade. There is no need to clamp too hard so as not to bend or break the future knife. In this form, the workpiece should be left for a couple of days until completely dry. Then the epoxy will completely harden and will not be pressed when pressed, for example, with a fingernail.
Stage three
- Once the epoxy has completely dried, you can begin the hard part. First, level the surface using a file. Then you need to make markings with a pencil.
- If you see that there is a lot of excess around the edges, then the first rough cuts can be made with a saw. This is followed by long and careful processing with a file and sandpaper, and then polishing.
- At the very end, you need to saturate and treat the handle, if you have not already done this before gluing.
Knife handle made of copper wire and epoxy resin
Another original way to make a handle with your own hands using epoxy resin. The method is simple, and there is little work; the result is similar to the horseback technique. A unique combination of materials will give the handle an unforgettable look:
- Be sure to clean the shank and give it a mirror shine.
- Wind copper wire around it in a chaotic manner.
- We take a plastic pipe of small diameter, cut it in half and re-wrap it with tape. Lubricate it from the inside with grease.
- We install a tube on a small piece of plywood and attach it from below with hot glue around the entire circumference.
- We lower the knife with a shank with a wound wire, into the pipe and fix it at the required height. Wrap the blade with wire a couple of times, and secure the antennae to the pipe with hot glue.
- The blade is in a suspended state. Mix the epoxy glue with the hardener and carefully pour it into the tube to the required shank height.
- After waiting a day, unwind the tape and separate the frozen handle. And we process it on a grinding machine.
Knife with handle made of copper wire and epoxy resin.
While sanding the handle, try it on in your palm. It won't be difficult to adjust it to fit your hand. A simple and fun way to make your handle special.
Previous Knives DIY target for throwing knives Next Making knives DIY cork knife handle
Manufacturing process
Before you start pouring you need to have:
- one of the described molds,
- blade (you can make a knife from any chosen metal - there will be no unwanted reactions),
- epoxy with hardener and, optionally, dye,
The best option is epoxy resin for decorative products. It is easier to work with, the kit already includes the required hardener, the proportions are indicated, it will easily penetrate into the pores if you use wood blocks as a filler.
- DIY epoxy resin mold
- containers and mixing sticks,
- polyethylene to cover the surface,
- optional – handle filler.
Progress:
- Place “reinforcement” in the mold - pieces of wood, fleece, jeans or metal mesh.
- Mix the resin according to the proportions with the coloring pigment and hardener (at least 10 minutes to allow the air to escape).
- Fill part of the mold, immerse the base of the blade.
- Secure the structure and leave it for a day until it hardens.
If you made two halves of the handle, glue them together with epoxy glue. Finally, you will need to carefully sand the handle.
For any good knife, not only the technical characteristics of the blade are important, but also its handle, and if for the first element it is enough to choose high-quality steel, process and sharpen the blade, then the handle should be comfortable, practical, and beautiful. Moreover, it does not matter at all whether a new knife is being made or an old blade is being reanimated. Wooden or forged handles are considered classics. We must pay tribute, outwardly they look very decent, but making such a knife with your own hands is very difficult, and in some cases even impossible.
The building materials market is constantly expanding, and oligomers containing epoxy resins are gradually gaining popularity. You can make a handle of any shape from epoxy resin, and there are several options for decorating it. The strength of the hardened resin, as well as its other physical properties, make it possible to obtain reliable, practical and very beautiful products. This knife will serve for a long time in the kitchen or is suitable as a souvenir gift.
Methods of application: rubbing and boiling
There is no point in trying to saturate a handle covered in store-bought products. They need to be removed using small grit sandpaper. Then dry it well, try using a hairdryer. After removing the unnecessary coating and drying the product, proceed to saturate the knife handle with linseed oil. There are two ways.
Oil rubbing technique
The frequency of using the rubbing method depends on the purpose of the blade. If used daily, manipulations should be carried out once every couple of months; the method does not take much time and labor:
- Having prepared the product, you need to apply the oil in a convenient way, preheating it to 60-70 degrees.
- The knife should be left for three to four hours for the polymerization process.
- Rubbing with a sponge or rough cloth using force. The process will take a little time, you shouldn’t be lazy, otherwise there will be no result.
- Polish the surface with flannel or other soft cloth of similar quality.
Digestion method
The founders of this method were our distant ancestors. Carpenters have noticed that by impregnating wood with oil, it becomes water-resistant, does not rot, and becomes more aesthetically pleasing. The method of boiling, or another name - soaking, is possible with various types of oils.
Knife handle after the boiling process.
The procedure is lengthy, but its effectiveness is long-term, almost forever:
- Be sure to sand the handle of the knife with sandpaper, and the blade can be wrapped in polyethylene or tape.
- The principle is to cook the finished product at temperatures below the boiling point of the oil. The procedure should be performed in a water bath over low heat.
- You don’t have to lower the knife entirely; just dip the handle. The start of the impregnation process will be indicated by small bubbles on the surface of the product. Air comes out of the pores and is replaced by oil.
- Boiling takes about six hours, and then the item remains in the oil for another six hours until it cools completely. After time, it is removed from the container and dried naturally in air, about two to three weeks.
Please note: Folding plywood travel table
Each type of oil has its own boiling point. It is not constant and varies depending on the quality of the product:
| Type of oil | Approximate boiling point |
| Palm diffraction | 220-240⁰C |
| Flaxseed unrefined | 110-120°C |
| Sunflower refined | 150-200⁰C |
| Cold pressed vegetable | 100-150⁰C |
| Sunflower unrefined | 150-200⁰C |
| Corn | 150-200⁰C |
| Mustard | 250-270⁰C |
| Soy | 150-200⁰C |
| Olive | 200-250⁰C |
| Peanut refined | 220-250⁰C |
Knife makers and hobbyists prefer linseed oil
Please note that it has a low boiling point. The process must be carried out using bath heating
The long period of final impregnation of the handle is determined by the thickness of the product and the type of wood.