I recently saw honeycomb balls on the Internet and I really liked them. And we decided to make it from double-sided paper for creativity, it’s thick, I won’t say it turned out great, but the children were happy. Since the school needs to be decorated, they received the task for each student to make a toy.
We took photographs, and now I will show you everything with photos and descriptions. In general, these balls need to be made from paper, I don’t know if you can buy it in a store, but there is a lot of it on the Internet.
We have already made decoupage, and balls for the Christmas tree, 3D paper snowflakes, and also a 3D Christmas tree, we even managed to write a letter to Santa Claus, we have a sample text, and templates for printing, today we will make paper products.
Often, they are made from paper in silence. This paper has a delicate translucent structure, it is like tissue paper, it is a pleasure to work with it, it is called paper plasticine.
It has a rich color palette, thanks to which beautiful crafts are made from it. But what should those who don’t have it do? You can try making it from double-sided or origami paper.
1Papier-mâché paper ball
A paper ball can be used as a New Year's decoration on a Christmas tree, a model of the planets of the solar system, etc.
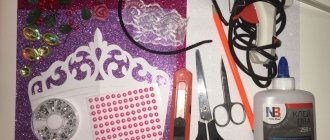
Making a three-dimensional ball out of paper is quite simple. Involve children in making this craft, because the process of creating a ball is very interesting. What you need:
- inflatable ball - 1 pc.;
- PVA glue - 200 ml;
- loose A4 paper - 10-20 sheets;
- paint brush with thick bristles.
The number of sheets is taken approximately, it depends on the volume of the future ball.
- Step 1 - inflate the balloon of the desired size;
- Step 2 - cut sheets of paper into small pieces (5*6 cm);
- Step 3 - grease the balloon well with glue on all sides;
- Step 4 - generously coat a piece of paper with glue and glue it to the balloon (cover the balloon completely with paper, leaving a small area near the “tail” of the balloon);
- Step 5 - let the first layer dry (to speed up the process, we recommend using a hairdryer);
- Step 6 - apply a second layer of paper, also greased with glue (glue the ball completely, there should be no gaps between the pieces of paper, try not to make folds so that the finished ball is smooth to the touch);
- Step 7 - repeat the drying procedure and apply a third layer of paper, generously coat the entire paper ball with glue on top;
- Step 8 - leave the ball in a warm place (during the heating season - near the radiator) until completely dry (approximately 24 hours);
- Step 9 - after drying, the ball should be hard to the touch, be sure to check whether the paper has dried completely (even due to a very small area of fresh glue, a voluminous ball may not turn out);
- Step 10 - on the remaining area without paper, pierce the balloon and take it out (dry the balloon inside with a hairdryer, also hot air will help return the shape of the finished figure if it is deformed).
Now you can start coloring the finished volumetric ball.
Glue the paper
Step 1
Turn the cardboard over to the left side. Place the first stack of tissue paper half circles with the straight side facing the edge of the cardboard. Mark on the cardboard where the cardboard “intersects” the top of the semicircle. Once you have done this, you can lay out all the layers of tissue paper in the same pattern. The cardstock will help you line up the left edge of the tissue paper.
Step 2
Now turn the cardboard over the semi-circle and run a glue stick along the slots in the cardboard. On the first layer, simply run glue along the slots outlined with a marker.
Step 3
Now turn the cardboard over to the left and place a new layer of paper on the very top. You should lay it in the same way as you laid the very first layer. Smooth out the paper with your hands and check whether all layers of paper are stuck along the sizing lines. Flip the cardboard over and this time run a glue stick along the unmarked lines.
Repeat this step for all layers of paper.
How to make honeycomb balls with your own hands from paper, step by step with photos
Honeycomb balls must be made from a pack of paper of the same texture. You should not combine plain colored paper and corrugated paper, as they will immediately lose their appearance. So, to create honeycomb-shaped balls, prepare 25 sheets of multi-colored A4 paper or cut corrugated paper measuring 21x29 cm into 25 pieces.
Step 1. On a white A4 sheet, draw stripes across its entire width at a distance of 3 cm from each other. It is advisable to alternate lines with two different colors (we have red and black).
Step 2. Place all the cut paper in piles. Take a plate with a diameter of 20 cm or draw a circle on paper using a compass with a diameter of 20 cm.
Step 3. Cut out the circles, fold them in half and cut them. This way we will get 50 semicircles.
Step 4. Apply the first semicircle to the stencil so that the lower ends meet the edge of the stencil, and then apply a thin layer of glue to the red lines of the stencil.
Step 5. Apply a semicircle and apply glue along the black lines. We continue the gluing process with all the sheets.
Step 6. After all the parts have been glued together, we also coat the top part with glue according to a similar pattern (if glue was applied below along the red line, then we coat it along the black line and vice versa).
Step 7. Unfold the ball and glue the top and bottom parts of the semicircles. To ensure that the parts adhere well to each other, we fasten the gluing points with a paper clip and wait until the glue dries.
Step 8. Remove the paper clips and the ball is ready.
Paper honeycomb
Honeycombs are made from a stack of identical sheets glued together with horizontal thin strips of glue.
You can form the product right away (for this you will need to cut out semicircular blanks) or first make it from rectangular sheets, and only then cut the entire glued pack with a breadboard knife: To decorate honeycomb balls, you need to carefully run glue along the cuts, then sprinkle them with glitter or blot them edges with a sponge and semi-dry paint. It is more convenient to process each sheet separately before they are glued together.
Globe or moon made of papier-mâché
How to make a ball - a planet from papier-mâché? I want to create something special. For example, planet Earth or the Moon. Here the basic principle of making a ball will remain unchanged.
Step-by-step instruction:
- Make a newspaper ball, trying to make it as smooth as possible (without wrinkles) and medium in size. Inflate a regular rubber ball, then gradually cover it with strips of newspaper soaked in glue. Wait until the product is dry, then deflate the balloon. The preparatory part is finished.
- Now for the example you will need a real globe. It is more convenient than flat pictures. To make the globe look as realistic as possible, you need to redraw the outlines of the continents, individual islands and oceans of the Earth onto the finished paper ball. To do this, arm yourself with acrylic paints.
- Is it convenient to color a newspaper or is it worth additionally covering the top of the ball with white paper? You can paint it first with white paint and then apply the outline of the Earth onto it. Or cover it with A4 paper, cutting it into strips as well. The technology seems more complicated, but in practice everyone can cope, even beginners.
In this way, you can create any planet from the solar system and then hang them together, creating a composition
It is important to maintain the dimensions, remembering that Jupiter is large, Mars is small, and Earth is medium
Let's add some sparkle
Now you need to add glitter to the edges of the tissue paper. Place the tissue paper on something solid, such as cardboard. Carefully apply a layer of glue along the edges of the semicircles. To do this, you can use a glue stick or PVA glue and a brush. If you are using a pencil, make sure it is not hardened. If you are using PVA, add just a little glue.
Using gentle movements towards the periphery of the circle, spread the glue onto the tissue paper. After you have applied the glue, sprinkle glitter on the paper. You can even use a paint brush for this.
Repeat the same for all layers of tissue paper. When the glue dries, add glitter to the other, reverse side.
Sprinkle the edges well with glitter.
As an alternative to glitter, you can use gold paint. But do not dilute the paint with water, otherwise the edges of the paper may become wet. Apply the paint by carefully moving the brush along the edges of the semicircles.
How to make a paper pompom
Everyone loves bright jewelry. Many people want to transform the interior of their own home and create creative decor for the holiday. We will tell you how to make paper pompoms with your own hands.
Take 6-8 sheets of corrugated paper of the same shade. It is better to start with single-color products, and once you understand the principle of their manufacture, you can vary the color shades, making them more complex and exclusive. Fold each one like an accordion
Mark the middle and carefully fasten it with thread and wire. Please note that the finished decoration will have a diameter that is equal to the width of the selected paper sheet. Reducing this value is simple: cut figuratively along the edges to the desired size. The unfolding process will captivate not only adults, but also children
Show how to carefully and slowly fluff each layer like a fan so that your child can repeat it. A real miracle will be born literally before the eyes of those who decide to make pom-poms with their own hands.
If you are afraid of ruining the paper with silence, then practice on ordinary table napkins. Although they do not hold their shape well, they will be indispensable as educational material. Having honed your skills, you can start decorating the baby’s room, the room where the festive celebration is planned. Amazingly beautiful paper pompoms will create the mood and emphasize the solemnity of each event.
How to do
Now let’s look at the process itself, how to make paper pompoms with your own hands.
First, divide the roll of corrugated paper into two equal parts. You will get two pieces of 25 cm*200 cm. These two pieces are just enough for two pompoms.
We take one of them and divide it into 8 equal parts. At this stage you can do without a ruler, just fold it in half and cut it. We do this until we have 8 squares with a side of 25 cm.
We fold the squares in a pile and begin to form an accordion out of them - we bend the edge of the paper by about 1-1.5 cm, then turn it over and bend it again, but in the other direction. We press each fold a little and smooth it out with our fingers. This is what the accordion should look like as a result.
Next we need to find the middle of this accordion. Here you can take a ruler to accurately mark the middle. If you try to do this by eye, there is a risk that the pompom will turn out uneven. The middle found using a ruler is tightly tied with thread or thin ribbon. Leave the end of the thread long enough so that you can then hang the pompom from it.
Next we have to work with the edges of our accordion. There are two options here: you can make them sharp, or you can round them. It’s worth noting right away that this is not an easy task, because the paper accordion is quite thick. Therefore, involve the strong hands of dad in the creative process.
When you trim the edges, your pompom is essentially finished. In order for it to have a finished look, it must be carefully straightened, but if you plan to celebrate the holiday away from home and the decor will need to be taken to a restaurant or cafe, then it is better to transport it in this folded form so as not to wrinkle it on the road. Then on the spot you will dissolve it. If the celebration will take place at home, straighten the decorations immediately so that later, on the holiday, you do not waste your precious time on this.
How to straighten the pompom: carefully, one by one, bend each petal and open it. Do not pull too hard, because the corrugated paper will stretch and the ball will lose its appearance. This is what the ball looks like, half of which has already been flattened.
And this is what the finished product looks like.
Volumetric ball made of wrapping paper
If you have a large amount of bright transparent wrapping paper accumulated at home, do not rush to get rid of it.
You can make a beautiful ball out of it, which can be used to decorate a room not only for the New Year, but also for any other holiday. A teenage girl can also be entrusted with making such a craft if she is already familiar with sewing skills. To do this you will need 20-25 large circles cut from such paper.
It can be of different colors - this will only make the craft more beautiful. If you do not have transparent paper, then such a ball can be made from corrugated paper, as well as from any elastic paper that does not wrinkle much. The size of the ball will correspond to the diameter of your prepared circles. Prepare a sharp thin needle with a long thread and paper clips: you will need twice as many of them as blanks. Fold the circle in half and fasten with a paper clip. Since folds are difficult to see on shiny paper, the folding principle is shown on regular colored paper.
Mark the center on the fold, but do not press. Place your finger in the middle, grab the edge of the semicircle on the fold and lift it towards the top with the paperclip, while pushing the edges of the workpiece apart. You will get two such folds.
Without removing your finger from the middle, bend the second side of the workpiece as well. Secure the workpiece at the bottom with a paper clip, capturing the beginning of the folds as well, so that your folded workpiece does not come apart.
Fold all the circles in the same way.
Take a needle and thread and start sewing all the pieces to each other with one or two stitches, gradually making a circle. When sewing, do not tighten the thread too much, otherwise it will tear the paper. As you sew on the folded circles, remove the paper clips from the sharp corners.
When you have secured all the folded circles, pass the needle and thread through the entire craft twice (back and forth), thereby finally securing all the details. Make a knot so that the sewing does not come apart. Do not tear off the thread - it will serve as a loop for hanging the ball.
Now remove the paper clips from the edges of the folded circles. The craft will unfold itself and take the shape of a beautiful ball.
Assembly
When the entire stack is glued, you need to hold it under pressure for a while and, if necessary, trim the edge with a knife or notches - to straighten it or decorate it.
- Glue cardboard semicircles to the outer layers of the stack. Sometimes they are not made solid, but in the form of an arc - the middle of the semicircle is cut out, leaving only the arcs.
- Pierce the cardboard at the top, fasten with thread, tying a loose loop - it should allow the ball to open without falling apart.
- Repeat on the other side.
You can leave part of this thread for hanging, but it is better to glue a special loop of tape in the upper part to the cardboard part, and in the middle of the cardboard arches - ribbons or threads to secure the shape. Before making the paper ball three-dimensional, you need to carefully straighten the honeycomb with a plastic stick or the handle of a brush. The product does not straighten out immediately, and if you pull too hard, fresh glue seams may come apart or the paper may tear. There may also be random drops of glue that glue the workpieces together in the wrong place. It is best to try to move the honeycombs apart for the first time before final assembly, that is, before stitching with threads, and correct mistakes.
When the honeycombs are opened and straightened, the cardboard “cover” of the ball can be glued, fastened with a stapler, paper clips, or tied with a pre-glued ribbon, and secured with a thread and a needle. Strength and the ability to fold the craft at the end of the holiday and put it away for storage will depend on this.
Papier-mâché paper ball
When making a figure from papier-mâché, you cannot do without a special adhesive solution, which is made from white flour and cold water in a ratio of 1:5. In addition, to avoid the appearance of mold on finished products, you can add a little salt to the solution.
Combine a glass of flour and a glass of water in a small bowl, stir thoroughly and place over medium heat. Add 4 more glasses of water. Stirring continuously, bring the mixture to a jelly-like consistency (this process will take approximately 3-5 minutes). Then remove the bowl from the heat and let the contents cool to room temperature.
While the glue is cooling, prepare the following materials and tools:
- Balloon
- Paper cut into strips (sheets of newspaper, paper towels or thick napkins are best)
- Brush for applying glue
- Gloves
Operating procedure:
1. First of all, you need to make a base for the ball. Inflate the balloon until it is round but still soft enough. By covering it with strips of paper, you can give it the correct spherical shape later.
2. Completely immerse the strip of paper in the cooled glue, remove excess solution with your fingers, and stick the paper onto the ball. Repeat this procedure, evenly distributing the strips over the surface of the base, until you have covered it entirely in 1 or 2 layers.
When the glue begins to thicken, adjust the shape of the figure by lightly squeezing it on all sides.
3. Place the figure on a plastic cup and leave it to dry overnight.
4. When the workpiece is dry, cover it with another 1-2 layers of paper and leave to dry for some more time.
Honeycomb paper balls from Aliexpress
There was also a place for creative balloons on the “shelves” of the Chinese website. So, the site’s assortment includes:
This category of goods is sent folded, and the buyer independently brings together and glues the ends. To do this, each blank has strips with double-sided tape, removing which you can easily form your own ball.
If you want to use the ball several times, it is not recommended to remove the strips of tape; bring the edges together and secure them with a paper clip. When suspended, the paperclip will not be visible, and next time you will save significantly on decor.
Popular articles Hair scrunchie in coffee tones
Don’t be afraid, get creative, and you will create creative decor for all occasions with your own hands.
Rules for packing bouquets
To learn how to beautifully wrap bouquets in packaging, you should know a few simple rules that will help make the appearance of the composition attractive. These universal laws are as follows:
It is necessary to focus on the tastes of the recipient of the bouquet, namely what colors this person likes, and combine them according to the color wheel with flowers; It is necessary to abandon a completely transparent bouquet arrangement, which looks old-fashioned and does not emphasize the beauty of the flowers; It is worth wrapping the bouquet with suitable textured materials that will hide imperfections and emphasize the advantages of the flowers, but will not distract attention from them; There should be enough decorative elements on the packaging to only emphasize the main accents of the bouquet and give it charm; Preference should be given to natural materials that will highlight the natural beauty of flowers.
Having familiarized themselves with the rules, novice florists have a question: What methods can be used to pack a bouquet? This question is not easy, since there is no single classification for it, but it’s worth trying to highlight the main points.
Link and open
Step 1
Now all we have to do is tie all the layers of paper together. To begin, take the cardboard templates that we created at the very beginning
Carefully glue one cardboard semicircle to one side of the stack of paper semicircles and another cardboard semicircle to the other side
Step 2
Thread a needle and pierce the top corner of the cardboard semicircle. The loop must be loose to form a ball. Tie a knot and repeat the same from the other end of the cardboard semicircle. Here, do not cut the thread, but leave a decent tail so that you can hang the ball from it. To do this, you can choose a thicker thread.
Step 4
After opening the ball, glue the cardboard semicircles to each other. If you want to save it until the next New Year, the semicircles can not be glued, but secured, for example, with paper clips. Having removed them, the ball can be folded and put aside until the next New Year.
If you want to create honeycomb balls without glitter, the instructions can be slightly modified. To do this, you can cut rectangular strips that will be larger than semicircles and glue them together. Once the tissue paper is glued together, cut the strips into a semi-circle shape to form a ball. Then you won't have to be careful when placing the paper when gluing all the layers. Plus, you can cut out different shapes from cardboard, then the honeycombs will have different patterns.
Let's prepare the paper
Step 1
Place two pieces of cardboard next to each other. I use A4 cardboard, but cardboard from boxes such as breakfast cereals will also work. Now place a large plate or any other round object with a diameter of about 26 cm on the cardboard. Draw a line along the contour with a pencil.
After making sure that the cardboard has not moved, remove the large plate and place a smaller plate with a diameter of 20 cm inside the large drawn circle. Fix it in the center and draw a line with a pencil.
Step 2
Cut out a large circle - you should end up with two semi-circles.
Step 3
Place one semicircle on several layers of tissue paper. Smooth and level the paper. Hold the cardboard and paper straight and cut out a semicircle from the tissue paper using the template.
For one honeycomb ball you will need about 50 sheets of tissue paper. Once the cigarette half-circles are ready, cut out a smaller circle from the cardboard. Then lightly trim the outer, larger circle of cardboard to create a smaller shape than the already cut out tissue layers.
Balloon with basket - master class
Here you can choose the manufacturing technique.
Option number 1. Beautiful ball. If you need to create a craft quickly, then look for a beautiful small colored ball. Preferably round in shape. Weave it from a thick thread or take a ready-made mesh. Make sure that the ball fits comfortably inside and that the edges of the mesh remain free. Trim carefully if necessary.
Creating a cart. You can cut it from a regular plastic cup and paste it on the outside. Or glue it from a sheet of cardboard. If you have a ready-made basket, even better. Tie it using the loose ends of the threads to the ball. Ready.
Option No. 2. Volumetric balloon with a fabric basket. A great New Year's surprise that even a child can make if given some prompting.
Required:
- unnecessary newspapers;
- ordinary rubber ball;
- diluted paste;
- brush;
- pieces of multi-colored fabric (preferably one type);
- cardboard;
- a ball of rope or braid.
Step-by-step instructions:
This papier-mâché balloon will turn out beautiful, large, and can then be hung from the ceiling.
- Making a paper (newspaper) ball. Following the instructions described above, inflate the ball, then sequentially cover it with thin strips of newspaper, dipping them into the paste. Do not tape the space below, around the tail. Leave a hole.
- While the workpiece is drying, you can make a basket. To do this, take cardboard and glue a small basket step by step, focusing on the ball.
- Carefully make 4 small identical holes in the top of the finished basket. Make sure they are symmetrical.
- Decoupage ball. It has dried, now deflate and remove the rubber base (inflated ball). Cover it with strips of fabric/colored paper (whichever is preferable). Carefully make 2 holes on top, placing them close. The papier-mâché ball is ready.
- Measure 2 pieces of rope. You take one, put the tip through one of those holes at the top of the ball, then pull it out through the second. Center so that two identical ends hang down. Tie them by securing them in two opposite holes in the basket. Do the same with the second remaining rope. Tie the ends alternately to two of the four holes (see picture).
- At the top of the children's toy you can make an additional loop through which it can then be hung from the ceiling.
The creativity will be completed with a small doll or man with Lego, ready to fly.
Origami paper balls for the New Year
serve as a nice decoration for a room or stage. And also for various New Year’s competitions, for example, indoor snowball fights.
The technique is diverse and consists not only of folding various models, but also of combining modular figures. It is assumed that identical elements will be created in order to combine them into one whole.
Using the principle of a ball, kusudama is made from modules - this is a spherical paper model, which, as a rule, is made by sewing together the ends of many identical elements. It comes from ancient Japan.
Then medicinal herbs and flower petals were placed in it and hung next to the bed. The word itself in translation is derived from the words medicine and ball. Currently, they serve as decorations or gifts.
For origami kusudama, it is better to use a step-by-step master class in pictures on the Internet or in special books.
Making a simple paper ball
What is needed for production?
To make the simplest paper ball with your own hands, you will need a standard stationery set:
- paper (multi-colored blocks for square-shaped notes are perfect);
- scissors;
- liquid glue or glue stick.
Also, to make a three-dimensional figure, you will need a mug or other object with a round bottom (or a compass with a pencil).
Step-by-step execution scheme
- We take prepared sheets of paper and cut out circles from them. In order to make a ball, we need 32 circles (16 of one color and 16 of another), with a diameter of 10 cm.
In order for the blanks to turn out neat, you need to select a round-shaped object and draw a contour on each circle along its rim (for example, the base of a candy bowl or a regular mug will do). If there is no suitable object, you can use a compass.
Tip: If you want to save time, you can draw a circle on the first piece of paper and cut out one circle, then cut out all the rest according to the template.
- Each resulting circle must be bent in half.
- Let's start gluing the elements together. Apply glue to the upper outer half of the yellow circle with glue and glue it to the lower outer part of the red workpiece. We compare the result with the drawing.
- Similarly, we glue all the blanks together, alternating colors: red-yellow-red-yellow. We get a stack of semicircular sheets glued together, vaguely reminiscent of a book or magazine.
We unfold the figure and proceed to the next stage - gluing the multi-colored “pages” of the ball together
Please note that "pages" of different colors will be connected in different patterns
- We glue the red “pages” together as follows: open the red circle and mentally divide it into 6 sectors. Lubricate the upper and lower sectors of the left semicircle with glue as noted in the picture above (leave the middle one untouched).
- Then we connect them with the first and third sectors of the right semicircle. After the glue dries, you should get something similar to a “pocket”.
- Similarly, we connect all the red “pages” of the paper ball.
- Now we start gluing the yellow “pages”. Unfold one of the yellow circles and apply glue to the most protruding part (second sector) of the left semicircle (marked with a cross in the figure). Connect with the symmetrically located part of the right yellow semicircle.
- We do the same with all the yellow “pages”.
- We fold the future ball back into a “book” and wait for the glue to dry completely.
- We fan out the figure and check that all the “pages” are glued together correctly. After that, we insert a loop of thread and connect the first and last “pages” of the “book” with glue, forming a three-dimensional ball.
- We wait for the glue to dry.
- The yellow ball with a red core is ready!
Popular articles Poems for Palm Sunday
Tip: By changing the place where the multi-colored “pages” are glued together, you can get new versions of the paper figure.
This ball model will be an excellent basis for creating original Christmas tree and interior decorations and garlands.
An even more detailed master class on its manufacture is presented in the following video:
Beautiful multi-colored ball
The process of creating a beautiful ball of multi-colored paper with your own hands is not very difficult. To do this, you will need 3 paper sheets of different shades, a template in the form of a circle, and a pencil and scissors. You need to cut out 4 identical circles for each color. All of them are needed to make the ball colorful. Ultimately, there are 12 multi-colored circles of the same size. They should be folded in a certain order. First, take 2 circles of the same color, for example, 2 blue, then 2 circles of a different shade are superimposed on them, for example, 2 pink. Then take 2 blue circles, after which everything is repeated in the same order. Then all the circles need to be bent in half. You can put a string in the middle if you are going to hang the ball in the future. The middle is fastened in 2 places with a stapler. One semicircle is divided into three parts. Glue is applied diagonally to the upper 1/3 of the paper semicircle, after which it is glued to the adjacent semicircle. Then the next semicircle is glued there and similarly divided into 3 parts. Now the glue is applied to the lower 1/3 part, which is then glued to the other semicircle. And you need to do this with all the semicircles, gluing all their sides in turn. Thus, you get a beautiful ball created with your own hands. Alternatively, you can hang it on the New Year tree or otherwise decorate the interior with it.
How to make ribbed paper balls with your own hands, master class
Even children can make ribbed paper balls. Therefore, if you decide to transform the interior, decorate the room for a significant event, involve your children, they will be happy to help you create ribbed balls, and we will tell you how this can be done.
1. Cut out 12 circles of the same diameter from paper. The larger the diameter of the circle you choose, the larger the ball you will end up with. For larger balls, use crepe paper as the material.
2. Fold each circle in half. Stepping back 1.5 cm from the fold line, apply a dot of glue to the edge of the circle and glue the circle in half. We do this action with each circle.
3. Place the resulting semicircles in a stack with the previously glued edges on one side. Glue the non-glued edges together, also applying a drop of glue to the edges of the circle, departing 1.5 cm from the fold line.
4. After the stack of semicircles has been glued together, at this stage of the work you can tie a thread or ribbon to the ball. To do this, the ball is pierced with an awl, after which a ribbon or thread is inserted into the hole. This will allow the ball to hang, and the ball itself will not lose its shape for a long time and will not fall apart. Next, a drop of glue is applied in the same way, the ends of the semicircles are brought together and glued.
Ready.
Ribbed balls
Accordion balls are made according to a similar principle, but they are glued together not with horizontal lines, but along sections; the blanks have the shape not of a semicircle, but of an arc 3-4 cm wide. The first blank is smeared with glue on the inside of the arc, a second one is applied, and the outer side of it is coated with glue edge. Apply a third, etc. Each workpiece will be glued to the adjacent, either upper or lower, edges. This creates a grooved surface. After the entire pack is glued together, you will get a stack in the form of an arc. Cardboard “covers” are glued onto it from above and below, backed with wire with a loop, by which they are then hung. The final assembly and decoration operations are similar.
To make paper balls you will need:
How to make balls from crepe paper: step-by-step instructions, description, photo
Corrugated paper makes excellent Chinese balls. Moreover, they can be produced in various ways.
Materials:
- Crepe paper, thread
- Scissors, glue, tape
- Fastening tapes
Paper balls for decorating the hall
Work progress:
- Using scissors, cut identical rectangles 20 by 25 cm.
- You will need 9 or more sheets.
- Lay out the rectangles evenly. And start folding them one by one into a fan.
- When you are finished with one sheet, secure the middle of the fan with tape or a needle and thread.
- Decorate the ends of the resulting crafts with teeth or semicircles.
- Collect a fluffy ball. Spread out all the ends of the accordions to create a round fluffy ball.
- The figure clearly shows how to properly fix the product so that it does not fall apart.
Crepe paper balls
IMPORTANT: Such delicate balls are used for decoration of premises, rooms, kindergartens, schools for holidays. Moreover, if you choose the right colors of the product, you can create a unique atmosphere in the room.
Children will especially appreciate such beauty.
Volumetric ball
To make a bright and voluminous ball with your own hands, you will need colored paper and scissors. In this case, you also need to print special templates. Outwardly they look like flowers. Having cut them out, you need to take one of the “flowers” and glue a long loop made of thread to it. All the templates are then secured together using the cut lines provided on each piece. Thus, a ball is obtained.
You need to draw and then cut out 8 circles. They are all the same size, but different colors. Next, they are folded from 3 edges so that the result is an equilateral triangle. You need to cut half a line on each side. Then you should fasten all the blanks together. At the end, a loop of string is glued to the ball. Thus, the ball is ready.
Advice
Such paper balls can serve as an excellent decoration not only for a room or for a New Year tree, but also as an entourage for children's performances. Crafts can also be decorated with sparkles or ribbons, then they will differ from store-bought paper balloons with their unique, unique decor.
Such balls look especially stylish and do not need decoration. You need to cut out 10 identical circles from paper. Then they are cut along the radius. Then you need to roll 2 funnels out of paper and glue them together so that they stick. You can use glue or tape. Next, the remaining paper blanks are folded in the same way. Afterwards everything is stitched in a circle, thus creating a ball. Pull them tightly and tie them.
Conclusion:
There are many techniques for creating balls. In each case, the balls are different in appearance, so you can choose the option that suits you best. Such balls are an excellent decoration for an apartment, as well as for a New Year tree.
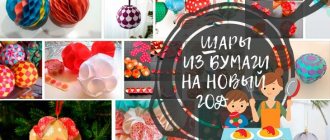
DIY paper balls Paper ball
Surely many of you have seen wonderful decorations in the form of paper balls. They look original and impressive in any interior and immediately transform the room, creating a festive atmosphere. Depending on the theme of the event, you can choose the color and material from which these paper crafts will be made: for example, weightless balls made of corrugated paper or napkins in delicate tones are more suitable for a wedding, and bright cardboard balls are more suitable for a children’s party. Today we will learn how to make various types of paper balls quickly and efficiently with our own hands.