4.5/5 — (11 votes)
Hello everybody!
By tradition, such an article is published on my blog before the New Year. About what, about what? Of course, a note that is dedicated to the New Year's symbol. This time the main hero of the occasion is the tiger.
I am sure that you have already been given this task - to make a toy with your own hands in the form of a cheerful, cute and amusing tiger cub. Well, do you have any ideas on what it can be made from? If you still don’t have them, then I ask you to visit me for ideas.
I have collected new items especially for you and I want to share them with you. Crafts in the shape of tigers will be simple, even a child can do it or with the help of an adult. In any case, it will turn out beautiful and great.
Take crafts to kindergarten and school, decorate classrooms with them, and organize exhibitions and competitions. So that the mood is high.
So, let's go watch and read).
Tiger - kind, wise and brave
In just a little while, 2022 will come. The Tiger will become its symbol. The sign rewards its owners with kindness, deep wisdom, intelligence and an irresistible desire to master everything unknown and new. Children who are lucky enough to be born in the year of the Tiger will be extremely calm and restrained. These people lose their composure only in some cases; they maintain clarity of mind in all situations, and even in the most extreme circumstances they manage not to lose their presence of mind.
Next year, you can safely go after your dreams and make the changes that you have been dreaming of for years. Anyone who wants to change jobs can do so without fear. In addition, there is a chance to change the field of activity.
The tiger is an obstinate and restive animal. You must always be on guard with him. He is curious, almost fearless, and incredibly loves to learn new things. To attract his location, you should decorate the house with symbols with his images. By the way, you can make them yourself.
DIY symbol of the year 2022: master class with step-by-step photos
DIY symbol of 2022 tiger from a paper cup
A do-it-yourself tiger cub made from a glass is one of the simplest crafts. To make it, you need to prepare the following materials:
- 1 paper cup;
- colored pencils or watercolors;
- wire;
- orange shoe lace.
The glass should be placed bottom to top and painted orange. On both sides, draw four identical rectangles in black, imitating stripes. In the middle we draw the eyes, nose and mouth. At the very base we make a white breast.
Next you need to cut two identical pieces of wire to make the ears. We thread the wire into pre-cut pieces of lace, bend it in a semicircle and attach it to the top of the glass (where its bottom is).
Now you should cut a longer piece of wire for the tail and also thread it through the lace. We bend it gracefully and fix it behind the tiger cub.
Symbol of 2022 tiger from a paper cup (option 1)
You can make a tiger cub from a paper cup in a slightly different way. For the craft you will need:
- cup;
- orange paint;
- black and orange paper;
- black marker;
- a piece of felt;
- eyes;
- glue.
Again, turn the glass upside down and paint with orange paints. We cut out six identical strips from black paper and glue three on each side. We also cut off two narrower and shorter strips, which must be glued vertically from the very top in the middle (on the head).
We cut out two oval ears from orange paper, decorate them with black stripes and fix them on the tiger’s head (bottom of the cup). Next we glue on the eyes (you can buy them at any craft store). We cut out a triangular nose from black felt and also glue it. We draw a mouth with a marker.
This is the easiest way to make a tiger with your own hands. A master class with step-by-step photos will facilitate the creative process and allow you to bring good luck into your home and your own life in the New Year.
Symbol of 2022 tiger from a paper cup (option 2)
Master class No. 3: A pillow in the shape of a tiger is the best interior decoration
Soft and cozy pillows are sure to bring comfort to your home. Toy pillows – the varied range of products is amazing. Basically, these pillows consist of simple shapes and even children can sew them.
We will need:
- Fabric, cotton is best.
- Filler. For each pillow approximately 250-300 g. (synthetic down or holofiber)
- You can use soft felt for the spout of the peephole; 1 A4 sheet is enough for 4 pillows.
- Ties. For each pillow you need 4 pieces, size 6x37 cm.
- You can use satin or grosgrain ribbons 2.5 cm wide.
- Pattern.
- Pins, fabric pencil or chalk, scissors;
- Sewing machine or needle and thread;
You can make an interesting pillow in the shape of a tiger cub presented below by watching the video:
- We prepare a paper pattern and transfer it to the fabric, taking into account seam allowances; Picture No. 2.
- Let's start sewing. Place the details of the muzzle on the base. We connect with a pin and sew along the lower edge with a zigzag stitch, along the upper edge with a regular stitch. Picture No. 3.
- Next, we apply all the strips at their location, pin them together and stitch them with a zigzag stitch. Picture No. 4.
- Then we put on the eyes, pupils and nose, and sew them with a zigzag stitch. Picture No. 5.
- We stitch the ears. Turn it right side out and fill it with padding polyester. Picture No. 6.
- We connect the back wall of the side with the front side, combining the cuts. We sew all the details. Picture No. 7.
- Prepare and sew the ties. Picture No. 8.
- We fill the product with holofiber, then sew up the hole with hidden stitches. The pillow is ready. Picture No. 9.
DIY tiger made of plasticine
To sculpt a tiger cub, you will need to take a piece of orange, black and yellow plasticine. From a red piece we fashion a body and a head, which we fix to the body with a match.
Body base
Fixing the head
Next we make a yellow muzzle and ears from an orange piece. We attach all this to the face and head, respectively.
Muzzle
Ears
We make eyes from black plasticine and glue them on the face.
Eyes
We fix the eyes
Glue the black nose
Then we sculpt four legs and a thin tail with a black tassel. We fix them on the tiger.
Forepaws
Paws
Hind legs
Tail with tassel
We decorate the body with thin black stripes and voila: the plasticine tiger cub is ready.
Glue the strips
DIY tiger made of plasticine
The tiger cub can be made using a slightly different technique.
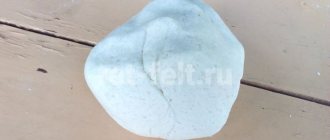
Tiger made of solidified mass
Patterns of Tiger Cubs
The work of creating a soft toy begins with its pattern, which you can build yourself, for example, by ripping apart an old toy, or by printing a finished one from those given below. At this stage, it is important to follow a number of rules for working with patterns in order to avoid possible mistakes in the future:
- Patterns should be made from thick cardboard; it will fit more tightly to the fabric and will be easier to trace with a marker.
- On each pattern you must indicate: the name of the part, the number of patterns that need to be made, the direction of the thread or pile, and the points of connection with other parts of the product.
- If seam allowances are not included in the templates themselves, then be sure to make a note of how much indentation needs to be made on the fabric. Without allowances, you can only sew felt toys; they won’t be needed there.
- When the pattern includes not only parts of the body, but also items of clothing that will be cut from another material, then it will not be superfluous to make a note on the patterns from which fabric to cut this or that pattern.
If suddenly the scale of the patterns for the work you like turns out to be smaller or larger than desired, then the patterns can be reduced or increased:
- by changing the print scale in the printer settings.
- without the use of modern technologies, by applying the contours of the patterns on a grid of large or small squares.
A fabric tiger or other (domesticated) feline can become a mascot for both a child and an adult. You can and should definitely involve children in sewing it, having first taken care of safety precautions. Then such a talisman toy will become your favorite for many years, because it will be sewn with your own hands.
Symbol of 2022 from a Christmas ball
To create a tiger from a Christmas ball you need to prepare:
- an ordinary ball for a Christmas tree. The optimal diameter is 8 cm;
- black, orange and white acrylic paints, a brush and a small sponge;
- artificial berries, cones and pine needles;
- children's sock with the top cut off;
- a small piece of white natural fabric.
Mix white paint with orange and paint the ball with a sponge, leaving the upper part unpainted. First, apply one layer, let it dry, and then paint the ball again.
When the paint has completely dried, we draw the face and stripes in white and black. In order for the paint to adhere well, we fix it with acrylic varnish.
Let's start making the hat: through the hole intended for the thread, we thread a pre-cut piece of twine lace. We pull a sock over it and glue it onto the ball using a glue gun so that we get a hat.
We gather the hat down and secure the top with a pre-threaded lace. We cut through the upper edges of the cap to make something like noodles.
We sew ears from fabric and paint their edges with orange paint. Glue the ears on top of the hat. We decorate the headdress with pine needles, cones and berries.
Symbol of 2022 from a Christmas ball (video):
Cute little tiger face
The first toy is made very quickly and easily. This is a small and cute tiger face that can be used as a Christmas tree decoration. She is sure to make everyone smile!
Materials and tools:
- Felt in orange, black, white and pink;
- Thread and needle;
- Ribbon or small rope (can be replaced with twine);
- Sintepon for filling;
- Beady eyes;
- Scissors and glue;
- Black outline on fabric.
Stages:
- Using patterns, we cut out the necessary parts from paper, then transfer them to felt and cut them out. Cut a ribbon or decorative rope 20-25 cm long.
- We make a loop from the ribbon and glue it to the middle of one of the large parts between the ears.
- On the second large piece we glue a nose with a pink tongue.
- We attach the top piece to the bottom one and sew it with an overcast stitch.
- Without sewing to the end, we leave a small hole and stuff the product with padding polyester, cotton wool or other filler; for this you can help yourself with a thin skewer or pencil. Then we sew it up.
- Glue the eyes above the nose.
- Then, using a black outline, we draw antennae and thin stripes. If there is no outline, you can sew the strips with thread.
We got very cute and funny tiger cubs in just 15 minutes!
DIY symbol of 2022 tiger made of felt
Felt tiger
Felt tiger No. 1
Felt tiger (hand puppet)
For this craft you will need a sheet of orange felt, a piece of black material and two small pieces of milky and pink shades. We make two separate patterns for the torso and head.
We connect both parts. Sew with black thread. Leave the lower part free.
We attach eyes and a pre-cut nose to the muzzle. We distribute strips of black felt over the body. We decorate the ears and paws with black and white circles, respectively.
Hand puppet “Tiger” made of felt
Master class No. 4: Candy bowl “TIGER CUB”
We will need:
- striped fur;
- a piece of white fur for the muzzle;
- light fabric for the inside of the candy bowl;
- self-adhesive film;
- cotton wool or padding polyester for stuffing;
- needle, thread;
- scissors.
Instructions:
- Cover a cardboard or metal candy box with fabric and fur. Top view: The bottom of the box can be lined with fur of a different color or fabric. Bottom view:
- Sew the head, paws and tail. The head consists of two ovals or circles of the appropriate size for your box. Each ear is an elongated oval, folded in half. Each foot is two stitched ovals. The tail is a strip folded in half. Stuff the head with cotton wool or padding polyester, but it is better to leave the paws and tail without stuffing. Decorate the tiger's face: sew a figure eight out of white fur, cut out and attach the eyes, nose, and whiskers using self-adhesive film.
- Sew the head, paws and tail to the body.
The candy bowl is ready!
DIY Tiger drawing
At first glance, it seems that only a professional artist can draw such a beautiful animal as a tiger. In fact, even someone with a pencil and an eraser can do this. All you need is to find a template on the Internet on which all the details of the tiger will be barely visible.
Next, take a black pencil and begin to carefully draw the tiger along the existing lines. We draw the contours in bold to make the feline representative attractive.
Draw the nose, eyes, mouth
Draw the whole head
Draw the front paws
Draw the entire torso
Paint the stripes with black paint
We paint the finished drawing with paints.
DIY Tiger drawing
What should you consider before starting work?
- When applying a pattern to fabric, it is necessary to take into account the direction of the pile and the grain thread.
- It is not necessary to sweep away all the details. To save time, they can be pinned together with needles or pins.
- We sew a hole for stuffing with a hidden seam.
- It is recommended to make a small allowance at the folds so that the fabric does not tighten.
- You can sew parts both from the wrong side and from the front, changing the types of seams.
IMPORTANT! It is not recommended to work with smooth fabrics, such as silk. When using it as the main material, you can get tired. Silk crumbles and slips, so the toys may turn out to be asymmetrical.