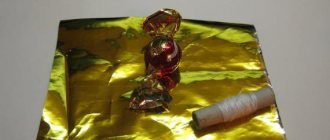
Suite design can be called a fashion trend. Sweet bouquets and toys become familiar and pleasant souvenirs. But this is not the only thing that can be done by engaging in such creativity. A girl who loves desserts and elegant women's shoes can be given an original sweet gift - a shoe with candies.
Elegant way
Materials we will need:
- paper;
- scissors;
- PVA glue or pencil or glue gun;
- decorations, sweets, decor to our taste.
To create it, we need a template that needs to be printed on paper. The paper should be thick. Use a printer to print the template on paper. Carefully cut. The dotted line on the template shows the fold lines, and the red line is the gluing line.
You can put various souvenirs or sweets into the finished shoe, wrap it in a piece of beautiful fabric or organza, secure it with ribbons, and decorate the shoe to your liking.
Making a gift shoe from candy
When I first started doing suite design, I decided that I would only make hand bouquets and baskets with flowers. But after the tenth bouquet I realized that I wanted more. And she began to sculpt. So I slowly got to the shoe. Beautiful, feminine, elegant. All girls love shoes, chocolate and flowers, which means a gift that combines all three components will be popular. Simultaneously with the idea of becoming a shoemaker, the desire was born to make my first master class. I hope you find it useful.
Interesting and tender
This is the second version of the shoe, made in the same way as the first version.
This is what the shoe template looks like:
Modular origami
We make modules according to this principle:
This is the kind of shoe we will make:
To create it we will need:
- 18 sheets of yellow paper;
- 2 sheets of red paper;
- adhesive moment “Crystal”;
- scissors and a stationery knife.
To create such a shoe, you first need to make modules. We will need 279 yellow modules, 21 red modules of standard size. We will assemble the sole of the shoe separately; the heel, straps of the shoe and the flower will also be assembled separately. Then the separately assembled parts are glued together.
Assembling the sole. It is assembled from yellow modules. Red modules for collecting soles are not used. In the first row we have 7 modules. The second row is already one more module - 8 modules.
In the third row: 9 modules. Fourth row: 8 modules.
Fifth row: 8 modules. Sixth row: 8 modules.
Seventh row: 9 modules. Eighth row: 8 modules. Ninth row: 9 modules.
Tenth row: 8 modules. Eleventh row: 9 modules. Twelfth row: 8 modules.
Thirteenth row: 7 modules. Fourteenth row: 8 modules. Fifteenth: 7 modules.
The corners of the previous rows should not stick out; we hide them in the pockets of the modules of the next row.
Row 16: 6 modules. Row 17: 7 modules. Row 18: 6 modules.
Row 19: 7 modules. Row 20: 6 modules. 21 row: 5 modules.
Row 22: 6 modules. 23 row: 5 modules. 24 row: 6 modules. Row 25: 5 modules.
Due to the bends we make the sole realistic.
Let's continue to create. Row 26: 6 modules. Row 27: 5 modules. Row 28: 6 modules. Row 29: 5 modules. Row 30: 6 modules.
31 row: 5 modules. Row 32: 6 modules. Row 33: 5 modules.
Here we have the sole of our shoe.
Now we need to make the heel. In the heel we will have 15 rows of modules.
From the 1st to the 13th row, the number of modules in the rows changes: 2 and 1, and so the alternation continues
Related article: Colored watch dials. Printable templates
From the 14th row to the 18th row, the number of modules in the rows changes. 3 and 2 modules alternate.
The fifteenth row consists of 4 modules and our heel ends with this row.
Glue the sole to the heel.
Let the glue dry and assemble the straps. But we will now use both yellow and red modules.
One strap needs to be made 2 rows longer.
Now let's glue the straps.
Let's decorate our shoe with a flower. We assemble it from red and yellow modules, as shown in the photo:
We glue the finished flower onto our shoe.
The shoe is ready!
DIY paper sandals. Step-by-step master class with photos
Master class with step-by-step photos on making paper sandals
Author : Berdnik Galina Stanislavovna, primary school teacher at the Laryak correctional (special) comprehensive national boarding school for students with disabilities. Description: this master class provides a detailed description of how to make the “Summer Sandals” craft. The material can be used by primary school teachers, preschool teachers, and additional education teachers. Purpose: the work can be used as a gift or interior decoration. Goal: Make a craft using cardboard and paper. Objectives: 1. Develop fine motor skills of the fingers, sense of volume and shape, logical thinking, creative abilities. 2. Cultivate hard work and perseverance, the desire to complete the work started. 3.Develop and cultivate neatness and aesthetic taste. Materials for work. 1. Paper, corrugated cardboard. 2. Pencil, scissors, ruler. 3. Glue. 4. Beads, buttons, pieces of satin ribbon to decorate the finished product
Templates
Detailed description. 1. To make “summer shoes” we will use the following template. Any children's shoes can serve as a template.
2. Prepare two parts at once. One is made of colored cardboard, the other is made of corrugated cardboard. Corrugated cardboard will add elegance to the finished product.
3. On thick, preferably double-sided paper, draw strips 15 - 20 mm wide.
Carefully, without moving the blades of the scissors together, cut out. Four strips will be enough, but you can prepare more.
4. Without bending or deforming, place the strips on the front part of the sole.
We fix the ends of the strips on the wrong side of the base of the product.
Multiple strips can be used. It all depends on the thickness of each of them.
5. To add strength, place and fix one strip across the sole. If you use thick paper, you can intertwine the strips together in a checkerboard pattern.
6. The wrong side of the product must be neat. This is where pre-prepared shoe soles made from corrugated cardboard come in handy. Glue the corrugated cardboard, covering the beginning and end of the strips.
7. And lastly, the most enjoyable thing to make, requiring imagination and creativity, is decorating the shoe. You can decorate with whatever you have at hand. These can be large beads, satin ribbons, stars and bows.
It turned out very elegant and beautiful, it’s a pity that it’s not possible to wear such shoes. But on the other hand, sandals give us joy and anticipation of the soon approaching hot sunny summer. Thank you for your attention!
We recommend watching:
DIY decorative slippers made of satin ribbon. Step-by-step master class with photos Summer voluminous applique made of colored paper “Sea Voyage”. Elementary School. Step by step master
Similar articles:
Trimming sunflower
Crocheted sunflower. Master Class
