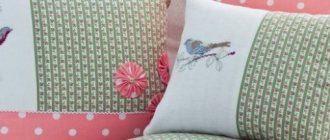
Crib pillow
In our master class, the owl has a blue shirtfront.
If you are sewing a pillow for a girl’s crib, you can make an owl in pink tones. For needlework you need:
- cotton fabric in two colors;
- pieces of felt for the eyes and beak;
- black beads or buttons for the pupils;
- ribbon for decoration;
- lace;
- filler;
- needles, pins, scissors, threads, sewing machine.
Description
Print out the pillow pattern in full size.
Cut out all the parts of the toy from the fabric.
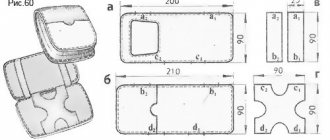
For the bow, cut out a rectangular piece 8x16 cm and a square with a side of 45 mm.
We attach the lace and beak, making a zigzag seam along the contour. The lace should lie in the center of the body, between the wings.
Using the same seam we attach the wings and eyes. We manually sew on the pupils - beads.
We fold the two parts with the right sides inward, pin them together, and sew along the contour. At the same time, do not forget to leave an area for turning and stuffing.
We make notches on the convex areas so that the shirt front with wings does not puff up after turning it inside out.
Turn the pillow inside out and iron it. Then the main part, that is, the shirtfront, is filled with filler.
Sew up the hole using hidden stitches.
Now let's start decorating the owl. We fold the square blank for the bow into a strip (see photo) and iron it. We sew the rectangular piece with an allowance of 1 cm.
Turn the bow inside out and gather it in the center. We cover the place of gathering with a strip.
We sew the decoration onto the ear of the pillow toy.
We make a bow from a narrow ribbon and sew it on. If desired, you can also decorate the pillow with buttons.
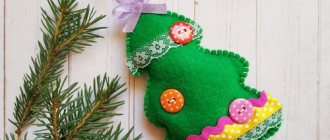
Cute hot water bottle
Another interesting option for a useful souvenir is felt hand warmers. To make this useful thing, just use rice instead of filler.
These magnificent birds will warm your hands on cool evenings if you first place them in the microwave for 30 seconds.
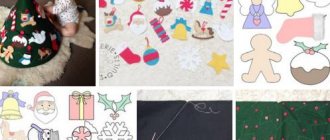
A variety of stencils and patterns for the needlewoman are presented below.
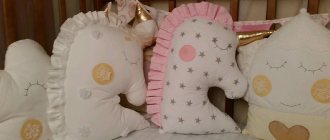
Felt owl
It is very easy to sew such a toy. Depending on the size, the craft can be a small owl - a keychain or a comfortable sofa cushion. A bright owl made of felt with your own hands is made according to a pattern.
To work you need to prepare:
- felt of different colors;
- filler;
- fabric for finishing the belly and wings;
- needles, pins, scissors.
Description
An owl, like many felt toys, is easy to sew using a needle-forward stitch, in which the lengths of the stitches and gaps are equal.
Using pattern templates, we cut out all the elements from felt and fabric. Sew colored details onto the felt wings. We will hide the knot of thread between the felt and the fabric. For convenience, the fabric can be secured with a pin before sewing.
We design the face of a felt owl. Referring to the pattern, we place and sew on the eyelet details. Please note that from the edge of the main part to the eye, as well as between the eyes, the distance should be about 5 mm.
As an alternative, you can choose to glue the eyes.
Then we sew on the tummy, having previously secured it with a pin.
We attach the claws, beak, dark parts of the ears. We embroider the tail on the back side.
We fold the two main parts, insert the wings between them and secure with pins. We sew a seam around the circumference, leaving a small part unsewn.
We fill the owl with padding polyester or any other filler. Sew up the hole.
Materials:
- Soft felt (Korean or Spanish): yellow 2030 cm, white 2030 cm, brown 1130 cm or 1820 cm, beige 612 cm or 910 cm.
- Hard felt: yellow 13*13 cm.
- Sewing threads in the color of felt.
- Black floss threads.
- Strong threads.
- Sewing needle.
- Gypsy needle.
- Scotch.
- Scissors.
- Filling (holofiber, padding polyester, padding polyester).
- Tweezers or a simple pencil (for ease of filling toys).
- Hoop.
- Clothesline or satin ribbon (for wrapping the hoop).
- Glue gun or Moment glue.
- Safety eyes for toys (optional).
Here are useful links for purchasing safety peepholes.
Print and cut out full size patterns in A4 size. Using tape, attach the patterns to sheets of felt in the corresponding colors.
Reveal all the necessary details of the owl, moon, stars and clouds. Cut out the moon from stiff yellow felt.
Owl
Sew the yellow, larger part of the tummy with a buttonhole stitch. Then sew a smaller part - beige - on top of the yellow one.
Sew on the beige part of the eyes, and sew the white part on top. We also use a buttonhole stitch.
There are three ways to make eyes:
1) embroider with floss threads; 2) sew black felt circles with specks of white paint; 3) safe plastic eyes.
In this option, we use safety eyes - the simplest and most convenient way. Mark the middle of the white eye circle and pierce it with a gypsy needle. Using scissors, carefully make a small hole.
We insert the eye, applying a little force and secure it with a special washer on the inside. That's it, the eye is securely fastened! It is important to immediately attach the washer in the right place of the toy, otherwise it will have to be cut off from the leg.
We do the same with the second eye.
We attach the beak in a convenient way. It can be sewn on, glued with superglue or fabric glue, but the easiest way to do this is with hot glue and a glue gun.
Start sewing the halves of the body from the top of the head using a loop stitch. We put the wings between the halves and continue sewing them in the same way as we sewed the tummy to the body.
The paws are sewn in with a buttonhole stitch, similar to the wings. When you go back to the head, sewing the eyelet together, leave a small hole. Then fill the inner space very tightly with holofiber (or any other filler). After this, we sew the body to the end and secure the thread, hiding it under the seam.
It is very important to monitor the stitches during the sewing stage. They should not be too large and wide, but they should not be sewn too close to the edge. In the first case, the seam will puff up and look untidy; in the second, the toy may come apart when stuffed. You need to stuff it very tightly, then the toy will be elastic, beautiful and without creases, all irregularities will be smoothed out. If you can’t spread the filler with your fingers, use a pencil or tweezers.
Both plastic and wooden hoops are suitable for the base. The photo shows a plastic version with a diameter of 18 cm and a clothesline. You can decorate the base with various ribbons or ropes, or skip this step altogether. We fix the winding on the hoop with hot glue at small intervals.
The rope should be wound as tightly as possible.
Educational searching toy “Owl”
For creativity we need to prepare:
- fleece material of sand and light green color;
- brown and white felt – thickness 3 mm;
- felt, black and yellow – thickness 1 mm;
- grosgrain ribbon with bright patterns;
- film file or any thick transparent film;
- quick-drying glue;
- short chain;
- filler – rice, beads;
- small toys - scythes;
- embroidery threads;
- scissors, pencil, needles, tape.