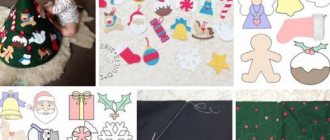
The New Year is approaching at rapid speed. The main character of the holiday is the Christmas tree. It doesn’t matter whether it is alive or artificial, the process of decorating it is fraught with magic and comfort. Remember with what pleasure you created New Year's toys as a child, with what pride you hung them on the Christmas tree on the eve of the holiday. If in childhood we all made such crafts from cardboard, colored paper and foil, now the choice of materials has become much richer. Do-it-yourself felt Christmas tree decorations are very popular now.
Felt Christmas tree
For the New Year, the main character is the Christmas tree. Therefore, we prepare in advance to decorate it. To make the Christmas tree original and elegant, you can make decorations with your own hands. In this master class from Anna we will make a very beautiful, but easy-to-make Christmas tree toy from felt in the shape of the Christmas tree itself.
To make such a toy you will need:
- Paper,
- pencil,
- green felt
- satin ribbon,
- decorative braid, lace,
- needle, thread,
- scissors,
- padding polyester,
- buttons,
- hot glue.
To begin, take a sheet of paper and a pencil.
Let's draw a Christmas tree and cut it out. The size of the future toy depends on the size of the template. Photo 1
Now we will trace this template on a green sheet of felt using a felt-tip pen or ballpoint pen. You can also use light blue or blue material. Now you need to cut out the parts from felt, using scissors to go beyond the lines. Then we will repeat the action, since we will need two identical parts.
Photo 2
At this stage you need to put the two parts together. If the handle from the lines is visible on them, then this side must be placed inside.
Insert the thread into the needle and start stitching from the bottom right edge. We sew with any convenient seam, in this case the parts are sewn with a buttonhole stitch.
We leave the side unstitched at the bottom, but do not cut off the thread. Through this hole we will fill the part with padding polyester and distribute it inside the tree. Now let's finish it.
There is no need to fill it too tightly, we just need to make the toy voluminous.
Photo 3
Now we will decorate our Christmas tree. To do this, you will need to take a lace ribbon, a satin ribbon with small polka dots and decorative braid. Color does not matter.
Sew lace on the bottom. You can just grab it on the sides. Next, apply a satin ribbon, placing it lightly on the lace. Glue it on the sides or sew it on. We sew or hot glue the braid on top.
Photo 4
Sew a piece of lace on top of the top tier of the Christmas tree. Then take three buttons of different colors with small polka dots.
Photo 5
Now take a thin satin ribbon and attach it in the form of a loop on top. You can sew it or glue it.
Photo 6
We will form a bow from the same satin ribbon.
Glue it to the very top of the Christmas tree. You can also simply cut out a star from red felt and glue it to the top of the Christmas tree.
Photo 7
This is how you can very simply and quickly make a New Year’s toy in the form of a felt Christmas tree. You can make several of these Christmas trees according to your pattern, and decorate them in different ways.
Cheerful Luntik
It's no secret how much kids love watching the cartoon about Luntik.
In this article we will show a master class on how to make a craft from balloons.
For this we will need: 4 balls of 25 cm, two large balls of 45 cm, 6 balls for modeling and 2 simple small ones, double-sided tape, markers.
- take 4 balloons of 25 each, inflate and tie together into a four (the base of Luntik);
Related article: DIY paper Valentine: master class with photos and videos
- next, take a large ball and attach it to the base with tape;
- next, we need to make a neck out of modeling balls. Fold as shown in the picture and attach to the body;
- inflate a 45 cm ball, slightly smaller than the body, draw a muzzle on it with a marker and glue it to the neck;
- use the smallest balls to make handles;
- All that remains is to make the ears, they are very simple to make. Make figure eights from modeling balls in pairs and attach them to your head.
Our Luntik is ready!
Christmas ball made of felt
Try sewing a New Year's ball for the Christmas tree from felt , beads and sequins. It will take its rightful place on the branch of your New Year's beauty. You can give it to your relatives. And if there is a baby in your family, you can let him hang such a toy on a branch. It is impossible to break it. Master class by Nikitina Maria .
To create such a toy - a Christmas ball made of fabric , you will need:
- felt in pink and burgundy colors,
- 24 cm of silk ribbon 5 mm thick,
- padding polyester or stuffing for soft toys,
- large bead with a diameter of 0.5-1 cm,
- gold sew-on sequins (12 pcs.),
- transparent golden-colored beads (12 beads),
- needle, burgundy sewing thread, scissors.
Print out the pattern for one wedge for the ball.
Glue it onto cardboard for greater density. Transfer the outline of the workpiece to felt and cut out wedges. You should have 4 pink and 4 burgundy pieces.
Place the pink and burgundy wedges together. Sew them along one edge with a blanket stitch.
For greater seam strength, you can use double-fold thread. Sew the remaining pairs in the same order. Now sew the resulting pairs to each other so that you alternate burgundy and pink sectors.
Leave one seam unsewn and turn the toy inside out.
Pull one end of the ribbon through a large bead. Place the ends together and sew them together with a few stitches.
Turn the fabric ball inside out again. Insert the ribbon with the bead into the toy so that the beads are inside the finished toy.
Using several basting stitches, sew the felt around the bead and pull the thread as tightly as possible.
Now you need to sew on the sequins with beads. On pink sectors, sequins and beads should be located in the middle of the wedge. On burgundy - in the upper and lower parts of the sector. For strength, you need to sew on all the decorative details with one thread, without cutting it.
First, pull the thread from the wrong side to the right side at the point where the sequin will be. Then place the sequin on the thread, right side out, then the bead. Thread the thread through the same sequin and through the felt again. For reliability, you can make two stitches per pair of beads with sequins. Then, without tearing the thread, sew on the remaining decorative elements.
Now sew the remaining hole of the toy. When about 3 centimeters remain until the end of the seam, turn the toy inside out and stuff it with padding polyester.
Sew the remaining hole with a blind stitch.
The fabric ball is ready, you can hang it on the Christmas tree!
How to make a mobile from wool threads
The mobile can be made of woolen threads. To do this, you need to wrap a thick layer on a narrow strip of cardboard, remove the skein and fasten it in the middle. The next step is to cut the edges and fluff the pompom. The disadvantage of such balls is that they quickly collect dust.
Mobile made of woolen threads
It’s easy to make a mobile with your own hands from high-quality felt. The needlewoman can choose any figures and colors to her taste. There is no need to look for a pattern, as it is easy to draw stars and even animals. You can replace the fabric with paper or wool pompoms.
horse
In this master class, together with Anna, we will make a wonderful toy in the shape of a felt horse.
To make a toy you will need:
- Felt in blue and light blue;
- Needle;
- Scissors;
- Sintepon;
- Paper;
- Pencil;
- A thread;
- Hot glue;
- Satin tape;
- Accessories.
First we must draw a template on a piece of paper. The size of the future toy depends on the size of the template.
We draw the body, legs and head of the horse together in one detail. Draw the tail and mane. Separately, we will draw decorations for the horse.
Photo 1
Now let's cut out each part separately.
Photo 2
We outline the main part on blue felt with a pen or felt-tip pen. We cut out the part in two copies. We will cut out the mane and tail from blue felt in a single copy. We will also cut out the decoration for the neck, and also cut out the decoration for the legs. For such a toy, you can use any colors, the main thing is that they combine with each other and harmonize well with other Christmas tree decorations.
Photo 3
We add two body parts. We begin to sew them together from the bottom of the hind leg. We sew the legs up and insert the tail between the two parts. We continue to sew. So we sewed the tail. Let's move on to sewing the back.
We sew it up to the neck and place the mane between the two parts of the body. Next, we continue to sew, while we sew in the mane. Then we sew the part to the end, while filling the part with padding polyester, but not too tightly.
Photo 4
We sewed the main part. All that remains is to decorate the horse. Let's prepare decorations for the toy. You can make them any other way, or you can not do them at all.
Photo 5
Glue the decorative elements with hot glue. You can not glue them, but also sew them on.
Photo 6
Now let's take small rhinestones and accessories flowers. Glue the rhinestone in the center of the blue felt flower. And we will glue the flower itself next to the tail. We will glue another rhinestone in place of the eye. Instead of rhinestones, you can use small beads or seed beads.
Photo 7
We will make a loop from a narrow satin ribbon and glue it to the back of the horse. This loop will be used to hang the toy on the Christmas tree. You can simply make a loop out of thread if you don’t have any ribbon.
Photo 8
The Christmas tree toy in the shape of a felt horse is ready! It will be an excellent decoration for the New Year's beauty.
Gnome
New Year's gnomes make the interior more festive and cozy. In this master class we will sew a beautiful and kind gnome from felt. This gnome is sewn quickly and consists of only two parts: the body and the hat.
To sew a gnome we will need:
- Felt in red, peach and gray colors;
- Threads;
- Needle;
- Sintepon;
- White yarn;
- Scissors;
- Paper;
- Pencil or pen.
First, draw a pattern for the future gnome on a piece of paper. It can be increased. Then the toy will turn out big. Cut out the drawn details from paper.
Transfer the details to felt. Since a simple pencil is not visible on felt, you can transfer the details using a pen. Or you can simply lay them on felt and cut out along the outline. For the gnome you can use any color of felt. In this master class the gnome will be gray and red.
Cut out the gnome's body and bottom from gray felt.
And from red felt we will cut out the remaining part. This is a hat.
We will embroider snowflakes along the lower part of the gnome’s body, since it is a New Year’s gnome.
We sew the body of the gnome, leaving the bottom unsewn. The stitches should be made at approximately the same distance.
We fill the part with padding polyester and apply the bottom. Sew it on and break the thread, making a knot.
Now we will make a beard using white yarn. Let's cut the yarn about 5 cm long. And lay a thread in the middle. That is, let's hang the yarn on a thread. Lightly tighten and tie a knot. Using the same thread we will sew the beard to the upper part of the gnome's body. Trim the beard with scissors. Its length should reach the end of the body.
Cut out a circle of peach-colored felt with a diameter of about one and a half centimeters.
We'll sew it along the edge.
And we’ll pull it together, stuffing it with padding polyester. This is how we sewed the nose. Spread the beard yarn in the middle and sew the nose in this place.
All that remains is to sew the hat. It is sewn very simply. But first we will decorate it a little.
We also embroider a snowflake in the middle. So the hat will be in perfect harmony with the gnome’s clothes.
Now let’s cut it a little at the top and where the ties are, as if making a fringe. It is enough to make two cuts.
Fold the piece in half and sew the hat at the back.
Make a knot and break the thread. It is better to hide the tip of the thread inside the cap. The cap for the gnome is ready.
Now we put the hat on the toy. You can grab it a little from behind, but this is not necessary. You can also glue on a hat.
New Year's felt gnome is ready:
More master classes on making Christmas tree decorations from felt:
Snowmen
Basics of Craftsmanship
First of all, you need to know the components. It consists of a dome made of durable material, a basket and a burner.
In this tutorial you will learn how to create a launch ball with a diameter of 2 meters. So let's get started:
- First, prepare a template according to the diagram. Make a pattern on it on cardboard;
- the segments themselves are made of paper, preferably tissue paper; if it does not fit the given size, it can be glued together, this will not affect the quality of the idea;
- Having glued the segments, cut out the blanks from cardboard, the template is ready;
- attach the sample to tissue paper and cut out 16 parts from it. Do not forget to leave one centimeter, taking into account further gluing;
- Glue the finished segments together in twos, then connect all the pairs together, but leave one seam;
- turn the shell inside out and seal the last seam;
- Cut two rectangular strips from cardboard and use it to fasten the base. Then, attach two strong thick threads to them, which will allow you to hold the ball when it is heated;
- cut out the circle to the size of the dome and glue to the top to fill the gaps left during gluing;
- heat the blowtorch and use it to straighten the ball;
- take the finished dome by the strings and light a fire under it.
Related article: DIY leather binding
When the air warms up in the balloon, it is ready to launch.
Felt dogs
Master class - a dog in a cap
Works of the competition “New Year's Crafts” - photos
Felt clothespin toys
And more photos of felt Christmas tree decorations :
Even more interesting: Crafts for the New Year
In order not to forget the page address and share with friends, add to your social networks: Do you want to know news about competitions or master classes?
Tags: DIY Christmas tree decorations, New Year's crafts, Felt crafts
Attention! It is better to write urgent questions in the comments on the website (form at the bottom of the page) or, better yet, directly by email. There are no notifications about comments from the VKontakte form! This form is more for feedback. 
Discussion: there is 1 comment
- Olga:
November 11, 2014 at 01:54 pmInteresting idea for a Christmas tree decoration. It's time to start preparing for the new year.
Answer

