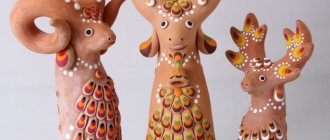
Polymer clay, which appeared in the second half of the last century, is a fertile material for creativity. Flowers and interior toys are sculpted from it, dishes and furniture are decorated. But the most complex products made from polymer clay are dolls. The original works of famous masters cannot even be called handicrafts - these are real works of art. The best ones cost tens of thousands of dollars and are coveted by collectors.
Beautiful dolls made of polymer clay, photo
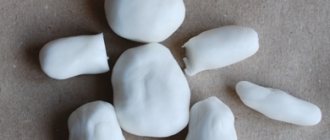
How to make a face for a doll from polymer clay, step by step
Making the cheeks. Take two small identical pieces and place them on the ball. If we are sculpting a baby’s face, we try not to highlight any cheekbones.
We outline the eye sockets in the middle of the face or slightly lower.
Apply a small layer of clay to the forehead to add volume.
We sculpt a nose from a triangular piece and give it the desired shape with a tool.
We take another small piece in the shape of a plate and sculpt the upper lip, drawing out the nasolabial fold. Next comes the lower lip and chin.
We attach lumps on both sides of the head - these are future ears.
We carefully review the resulting parts and bring them to the desired result.
Frame making
The frame in the product plays one of the most important roles. Thanks to him, the finished doll will be durable. Before making dolls from polymer clay, prepare a skein of strong wire and a second skein of thin wire.
In the future, work will be carried out in the following order:
- take a thick wire and give it the shape of the “skeleton” of the future doll;
- use thin wire to wrap the “skeleton” to give it density;
- Seal the resulting frame with foil;
- smooth out all the folds, press and compare the result with the drawing.
The frame preparation stage is over. Let's proceed to the basic steps that will tell you how to make a doll from polymer clay.
How to make eyes for a doll from polymer clay, step by step
Let's take a closer look at the design of the eyes. Before sculpting the eyes, the brow ridges are outlined. Carefully smooth out the unevenness left by the tool with your finger.
The eyes can be sculpted from clay in the form of a circle or simply insert small acrylic half-beads.
We bring the lower and upper eyelids to the desired look.
After all the details of the face are finally sculpted, we will begin painting them. Let's look at how color is given to the eyes.
We cover the whites with white paint and wait for them to dry. Use acrylic paint to paint irises of the desired color. Then we outline the pupil and the rim of the eye, and add white highlights if necessary. After painting, varnish and dry.
How to make lips on a doll from polymer clay, step by step
Lips are the part of the face on which the doll’s expressed emotions depend; they need to be given special attention.
Lip sculpting algorithm:
- Roll up the ball. Use your finger to flatten it.
- Using the tip of your finger, we move along the edge of the resulting figure, creating the shape of a lip.
- We remove what is unnecessary, leaving what will go to the lower lip.
- Holding the edge, we place the lip where it will be located on the face.
- We carefully fasten it, pressing with a finger first on the left, then on the right corner, removing the excess.
- Use an awl to smooth out the transition of the lip to the chin. Then we do the same with the upper lip.
- We give the final shape and smooth, soften the joints.
- The upper lip needs to be curved by pressing the little finger into its center.
Sketch or drawing
Experienced craftsmen take the planning stage very seriously. They carefully think through the design and appearance of the doll, draw diagrams, draw many sketches, images of the head in profile and full face. For some reason, neophytes often treat planning carelessly, and sometimes skip it and immediately get to work. And then they are surprised that nothing worked out.
First, decide what kind of doll will be - static or combined. It is better for beginners not to approach an articulated toy - nothing good will come of it, and the desire to do handicrafts may disappear. Think about what the doll will be like, because the sketch depends on this.
She may be:
- realistic, respecting the proportions of the human body (the head is related to the rest of the body as 1:7);
- a child doll (1:6);
- model (1:8 or 1:9);
- cartoon - with large or small heads or limbs.
For the first experiment, it is not necessary to stock up on an anatomical atlas, but it is better to maintain approximately the proportions, otherwise the doll will look ridiculous.
Masters change the body proportions of stylized dolls.
For example, they lengthen or shorten the neck and limbs, change the size or proportions of the head. A portrait doll, if it is not a cartoon, is made realistic, as close as possible to the prototype. Be sure to draw a clear, life-size sketch of the doll. This is necessary in order to attach parts to the drawing during the manufacturing process, checking the dimensions and proportions. If you will make the face yourself, draw its full face and profile. By the way, you can buy a ready-made mold (full form) or a weiner (one-sided form) of the head. But they are expensive, and the entire doll will have to be adjusted to the size of the blank.
How to make hair for a doll from polymer clay, step by step
There are several options for making a hairstyle. You can simply purchase a ready-made wig.
The only difficulty is guessing the size. Another way is to make the hair yourself; you will need wool for felting.
Just carefully separate it strand by strand and glue it onto your head. To make it more convenient, use an awl.
In advance, we cut a parting on the head (with the same awl or needle) and glue the hair into it.
They can be braided into a beautiful hairstyle or left loose.
Hairstyle for a doll
To make hair you will need an old wig, tresses or yarn, glue, thread and a hook.
Step-by-step creation of a doll's hairstyle:
1) You need to make a hole on the top of the doll’s head and draw a spiral with a simple pencil.
2) Glue the hair along the drawn lines.
3) Then take a bunch of hair, spread it with glue and glue it to the hole in the head...
Related article: How to knit a scarf with knitting needles from a corner with a detailed description and diagrams
4) Then carefully comb your hair and make a hairstyle, for example, a braid or a bun.
How to make a doll's body from polymer clay, step by step
Let's start with the body. The head can already be baked; if something happens, it won’t be possible to fix it. The body is made on the basis of a wire frame.
All convex parts are constructed by felting using padding polyester (you need to felt as tightly as possible).
Cut out a rectangle from flesh-colored knitwear (width = body volume).
From below we will cut the so-called “pants” for the doll’s legs. We put them on the body and make a seam at the back right on the body. To make it fit tighter, you need to tighten it well.
Also, rectangles are cut out for sleeves and sewn to the body.
Tools and materials
Pupae can be made from baked or self-hardening clay. It would be better if it was specifically designed for toys. Usually the name of such clay contains the word doll or a doll or baby is depicted on the pack. In addition to flesh-colored polymer clay, you will need:
- Knives of different shapes and designs.
- Sanding machine or sandpaper.
- Metal wire for the frame. It should be strong and flexible, keep its shape well, and not rust. For mini-dolls, copper is suitable; large products will require something stronger.
- Foil, preferably soft.
- Pliers.
- Glue, primer, paints. It is better to take acrylic colors - they are environmentally friendly and are not afraid of water or sun.
- Pliers.
- Auxiliary tools - brushes, stacks and dots, needles and knitting needles, scalpels, manicure scissors.
- Accessories for dolls. In specialized stores you can buy a variety of eyelashes, eyes, noses, or even blank heads or masks.
- Hair for dolls. You can also buy them in special stores or make them yourself from mohair, silk, an old wig or trimmings left after a haircut. Most often, goat hair is used for hair.
- Fabric and accessories for doll clothes.
How to make hands for a doll from polymer clay, step by step
To make the hands, as well as for the head, you will need foil.
We build a sausage out of it according to the sketch and cover it with clay.
The arm can be made up to the elbow, hand or shoulder - in accordance with the master’s idea. The rest will be clothes. We stick to the body we made.
We start sculpting with the brush, moving higher and reaching the intended length.
You need to carefully iron everything with napkins. We form beautiful hands, make fingers from clay sausages, connecting them and aligning the joints.
Static toy
When starting to make a stationary doll, you need to be patient. To work you will need:
- polymer baked clay white or flesh-colored;
- wire for frame;
- working surface - glass or ceramic, smooth;
- soft foil;
- plastic knife or stationery knife;
- scalpel or other sharp cutting object for fine operations;
- dots or stacks (you can get by with needles, knitting needles, toothpicks);
- sanding machine or sandpaper No. 0;
- alcohol-free wet wipes;
- acrylic eyes of the desired size and color;
- a small bunch of goat hair;
- paints.
Drawing and frame
Start with a schematic drawing of a life-size doll. As you sculpt, you will place body parts against it to check the dimensions. All distortions of body proportions must be carefully planned, otherwise the doll will look awkward. Here are some tips:
- baby dolls or touching cartoon characters have large heads;
- for greater grace, Barbie and models are created with an elongated figure, long legs and neck;
- Foresters, gnomes, and hobbits have short legs with huge feet.
The sketch may have been made by an unskilled hand. The main thing is that its proportions and sizes match those of the future doll.
Static figures require a strong frame - it determines the proportions of the body and holds the entire structure. The basis of large dolls can be large-diameter steel wire; for miniature models, copper wire remains.