Handmade educational cube faces
I'll show you the faces of the cube. Each face actually represents a small task, a small game, one might say. I'll start with something simple...
1 side
development cube -
apple
:
You can take the worm out and put it back:
2nd face
developmental cube –
snail and butterfly
:
There are three different balls sewn inside the snail's shell that you can roll around there.
The butterfly is voluminous, rustling, knitted separately and fastened to the edge with a button:
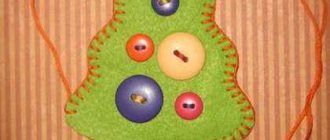
3rd side
development cube –
fly agaric
and
flowers
:
Fleece grass, knitted flowers are fastened with buttons, the zipper on the mushroom is unfastened - there is a ladybug hiding inside:
4th face
development cube -
door
:
All the doors rustle, the fasteners are different everywhere. Various animals are hiding behind the doors - thermal decals:
5 face
development cube - “
finger walker
”. I slightly “paraphrased” the well-known finger exerciser (according to early development sites).
I will write the words of the wandering itself: through the snow, through the forest, through the sand, over hummocks, into a hole in a clearing, across a river, along planks... and they found a treasure!
And now what the elements are made of, in order.
The white bag is made of fleece with a rustling bag. Knitted square with long loops, yellow bag with beads. A bag with sewn buttons, a knitted square with a real knitted hole. Bag with sewn knitted berries, blue ribbon. Caps for felt-tip pens, corduroy pocket:
You can touch all this with your fingers, pick, feel... And the berries can be untied and put in a hole:
6th face
developmental cube -
buttons
on satin
ribbons
: airplane, animals, cars, boat.
All items can be moved along the ribbons and hidden
. An airplane - behind a cloud, cars - into a tunnel, a boat - behind the mountains, animals - behind the trees:
Knitted toy “Educational cube” (master class)
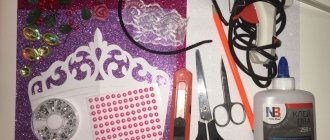
Before you start working, decide on the colors of the yarn from which the knitted toy “Educational Cube” will be created, there should be FIVE of them, but which ones, decide for yourself, of course, they should not be dark.
You also need to prepare 21 BUTTONS, preferably larger and of different colors, and maybe shapes. I poured out all my button supplies in a heap and selected what I liked the most.
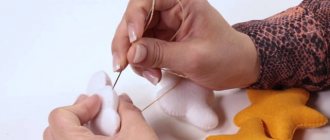
The work is done in garter stitch. Well, now in more detail:
1. On knitting needles No. 4, cast on 22 loops with a double-folded thread of YELLOW color (“yolk”) of “Children’s Novelty” yarn from “Pekhorka”. Next, we knit a square using garter stitch (a centimeter tape should always be at hand for constant measurements), and bind off all the loops.
2. On the braids of one of the sides of the YELLOW square, we cast on 20 loops with a double thread of LIGHT GRAY color (this yarn turned out to be a little thicker, so we constantly need to take measurements so that all the faces of the cube (squares) are the same). We knit a square in the same way, closing off all the loops.
3. On the braids of the second side of the YELLOW square, using a double thread of BLUE color, we cast on the required number of loops. We knit a square, close the loops.
4. Along the braids of one of the sides of the BLUE square, using a double thread of LIGHT LIGHT color, cast on the required number of loops, knit a square and bind off all the loops.
5. Along the braids of the second side of the BLUE square, we cast on the required number of loops with a CORAL thread, knit a square, close the loops.
6. Along the braids of the left side of the LIGHT LIGHT square, we cast on loops with a CORAL thread and knit a striped square, alternating all the colors used when knitting the squares.
7. We lay out the buttons on the surface of the unfolded cube so that each square contains: 1, 2, 3, 4, 5 and 6 buttons. We sew the buttons tighter.
8. Sew the development cube from the inside out along its edges, leaving one edge unsewn. We turn the cube inside out and fill it with padding polyester or holofiber through the remaining slit-like hole and then sew it together.
The master class has come to an end! I don’t know what you’ll get, but my development cube turned out to look like a ball. At first I was a little upset, but then I cheered: there was an exclusive!