Comfort and coziness in a room can be created in various ways, but the simplest and most effective is the use of colors in the design. Properly selected green spaces and their appropriate location in the room will fill it with the missing warmth and create a pleasant atmosphere.
If you have a large number of plants or a small amount of space to place them, you can use a wooden stand, which you can purchase in a store or make yourself.
Donut cup holders
How sweet do these coasters look! acrylic designs inspired by your favorite donuts, these are definitely the perfect addition to your morning cup of coffee. And they are not just for beauty. Made from birch rounds , they will withstand both cold and hot drinks.
Photo tips on how to make a stand
Sources
- https://1PoMebeli.ru/spalnya/podstavka-dlya-smartfona.html
- https://www.mirpodelki.ru/index.php?id=475
- https://1001zagotovka.ru/derevjannie-zagotovki-podstavok-pod-telefon/
- https://www.iphones.ru/iNotes/sobral-podstavku-dlya-smartfona-svoimi-rukami-a-eshche-drakona-iz-dereva-08-26-2021
- https://svoimirykami.guru/podstavka-dlya-telefona-svoimi-rukami/
- https://master4dom.ru/podstavka-dlya-telefona-iz-dereva-svoimi-rukami.html
- https://pilka-nn.ru/izdeliya/derevyannaya-podstavka-dlya-telefona-svoimi-rukami.html
- https://RuslesMarket.ru/produkciya/derevyannaya-podstavka-dlya-telefona-svoimi-rukami.html
- https://kaksdelat.guru/kak-sdelat-podstavku/
[collapse]
Color block felt cup holders
These eye-catching coasters are sure to breathe life into any modern space with their bold shape and vibrant colors. As you work on these coasters, you'll realize just how cool a thing you can make with a simple needle , thread , and straight stitches . Want more? You can make a quilt in a similar way.
Deciding on the dimensions
After choosing an acceptable material in order to make a stand with your own hands
, you need to calculate the most suitable dimensions for your room. In this case, a good solution would be an approximate drawing with calculations, which you will rely on when making the stand.
Note!
- DIY furniture made from pallets (140 photos) - step-by-step master class with diagrams and drawings, design ideas
- DIY coffee table - manufacturing guide with a full description of the steps, choice of materials (120 photo ideas)
- Do-it-yourself laundry basket (130 photo ideas): step-by-step master class for making it yourself, choice of materials, design options
Mark the length, width and height of the product, consider the number of levels and their parameters.
Felt cup holders
This set of cup holders is a minimalist's dream. Hexagons cut from charcoal and lilac felt create a simple, streamlined design that looks great without drawing attention. And it doesn’t require sewing, which is always a plus when you’re short on time.
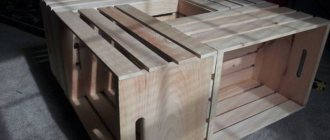
Plywood supply
From plywood you can make an interesting version of a knife stand in the shape of a person. Prepare materials:
- four sheets of plywood: 26 x 34 x 1.5 cm;
- magnet 1.5 x 1.5 cm;
- 10 dowels, 5 mm in diameter.
Tools:
- jigsaw;
- glue;
- sandpaper;
- wood cutter.
In order to start creating a wooden knife stand with your own hands, you need a drawing.
Study it carefully, cut out all the elements indicated in the drawing with a jigsaw. When the blank for the shield is ready, mark how the knives will be positioned. The rectangular holes must exactly follow the thickness and shape of the base of the knife. Clean the parts with sandpaper.
Multifunctional stand - a practical kitchen organizer for knives.
Note! All elements of the stand are duplicated: man - 3 times, shield - 2 times, table stand - 2 times. To tightly fasten the parts together, dowels and glue are needed.
The magnet needs to be built into the helmet; a sharpening stone will be attached to it.
Cover the product with varnish or oil.
Patterned cork cup holders
Here, inexpensive cork coasters from IKEA and transformed into bright, patterned coasters with designs inspired by everyday objects. The patterns are made using office sticky notes, tape and other completely ordinary items. You can call it recycling.
What stands you can buy - a review of popular stands
It is most convenient to store the outboard motor in a vertical position in order to comfortably carry out maintenance and repair work.
Manufacturers offer various types of stands, from which several of the most relevant positions can be identified:
Trem outboard motor rack
A simple, budget-friendly stand for one engine weighing up to 60 kg. The design is folding and compact. Galvanized steel pipes are resistant to moisture.
The weight of the stand itself is 7 kg, the price is 3500 rubles.
Stand for 2 PLMs
Convenient stand for hanging 2 outboard motors. The permissible weight in terms of load is 120 kg. The structure is made of steel, the surfaces of the pipes are powder coated.
The simplest stand costs 5,700 rubles.
Stand for 3 PLMs
Massive design for storing and servicing several outboard motors. Permissible load – 150 kg. The stand is made of powder coated steel. Thanks to this, the base is reliably protected from moisture and temperature changes.
The cost of the device is 5940–6236 rubles.
Mobile stand for 2 PLMs Poseidon
A stand designed for hanging, storing and transporting outboard motors whose total weight does not exceed 120 kg. The structure is made of steel and protected with powder paint. The main feature is the presence of swivel wheels with a stopper for easy movement and fixation.
The price of the stand is on average 8084 rubles.
Mobile stand for 3 PLMs Poseidon
Similar to a stand for two outboard engines, but can support a weight of up to 150 kg. Therefore, it can accommodate three motors. There are swivel wheels with a stopper for moving engines around the workshop or garage.
Price — 8546 rub.
All the racks for outboard motors presented in the list are convenient, but expensive. Is it worth spending money on them if you can make similar stands for PLM with your own hands in a few hours? And it will cost much less, maximum - 500-1000 rubles.
Geometric cup holders
These geometric coasters are gorgeous and the peach color makes them especially eye-catching. They were cut from large pieces of cork material , which can be found, for example, in the form of hot pads at IKEA, or at a hardware store, and they will cost very little.
Types of floor stands
Flower stands can be stationary or mobile. Mobile ones have furniture wheels attached to the base or stands. Low mobile stands are convenient for large flowers. The plant is easier to care for and easier to clean. There are very low ones - for plants above a meter, there are two-tier ones - for those that have not yet grown to a meter. In any case, this type of stand is convenient for large plants. This type is also sometimes called a flower pedestal.
Low floor stand on wheels - for tall or massive plants
There are also tall mobile bookcases or shelves for flowers. The number of wheels is at least four, but five is better. Not because the weight can be heavy, but because when moving a tall structure on five wheels, there is less chance of it turning over. In any model, regardless of height, swivel wheels are more convenient.
Mobile racks are convenient - you don’t have to carry one pot at a time. Everyone rides together
By location
There are also ordinary flower stands that stand against the wall or in the middle of the room. They can also be called straight or wall. They can be flat and wide - more like a bookcase, or they can be a collection of stands for flowerpots, located at different heights. They talked about single-tier ones, but flower shelves can also be located on two, three or more levels.
Corner cabinet allows efficient use of space
There are corner models. They don't have to be in the corner of the room. You can place it near the cabinet, which is located at a distance of 50-60 cm from the doorway. It is difficult to use this place in any other way, but the flower stand becomes good.
Multi-tiered flower stand with emphasis on the floor and ceiling
There are flower stands and spacers. There are two options - for the entire height of the room or for the window. The mounting method is the same - on spacer rods. Only for window options there is usually only one rod, but for those that go the entire height of the room, the base is made of several posts. Shelves or flower stands are attached to these stands with clamps. It is convenient if the shelves under the flowerpots can be moved at your discretion to the desired height. But in this case, you need to make sure that the latch is reliable - if a flower pot falls from a height of two meters, it won’t seem like much. The second point is ease of fastening. It is usually on clamps or screws. Clamps make moving shelves faster, but they are less secure. It takes longer to fiddle with screws and requires a screwdriver. But you can tighten it as required.
Beaded coasters
Remember beaded beads and bracelets? In the 90s, it was difficult to find a child without beaded baubles, keychains or beads, then it was very cool. So creating these simple geometric coasters will give you nostalgic moments. You probably already understand how to make them, and perhaps you already have the material for them.
How to choose a stand design
There are quite a few ways to make a smartphone stand, but wooden options are not only durable, but also beautiful in appearance. In addition, they look much more noble than other materials, since a properly selected wooden accessory will decorate any design, regardless of its style.
Therefore, to make your handmade mobile phone stand beautiful and original, try to choose the right design, size and color. Of course, you should not forget about such parameters as functionality and stability, since if a cell phone falls, it may simply be damaged.
You can make a variety of phone accessories at home and you don’t need to have a special tool to do this. In most cases, with due diligence and patience, you can get by with a simple hacksaw, chisel, sandpaper and a piece of plywood. Then just glue your sample from small parts and at home this will also be easy.
Don’t be afraid to experiment and imagine so that the stand you make is unique and not like everyone else’s. After all, mass production is organized in such a way that anyone can afford to buy beautiful and seemingly varied things. But truly bright individuals prefer unique things in a single copy. Such things are not sold in stores; you can only order them or make them yourself. The second option is much better, not only in terms of savings, but also in terms of expressing individuality.
Even if you do not have experience in making any crafts from wood, do not be upset, as there is nothing complicated about it. It is enough to plan everything carefully, calculate what tools and materials will be needed, and only then begin the work itself. If something doesn’t work out for you, you can try again, rarely does anyone succeed in doing everything correctly the first time, everyone learns and everyone makes mistakes. But this is the only way to gain experience and learn to do everything right.
Cup holders with kiwi
Kiwis don't get nearly enough recognition in the fruit world, so give these wonderful green fruits some recognition by creating a set of coasters dedicated to them. Their design is gorgeous, the color is refreshing, and any drink placed on these coasters will become more festive.
First option
A tall flower stand is a great way to display your favorite potted flower. Make a stand out of wood and place it in the corner of a sunny room.
This beautiful flower stand is perfect for displaying your favorite houseplants. Its simple lines and ceramic tiles on the surface help to focus attention on the flower itself.
Once you paint it, you can place it almost anywhere and showcase your plants. It weighs little and you can easily carry it from place to place. But it is strong enough to easily hold heavy pots.
The bracing structure between the legs provides a solid base, while the ceramic tile inserts on the top give our stand some weight and stability.
They're great for the corner of a sunroom or kitchen, and ceramic tiles make the surface easy to clean and eliminate spills. In addition, ceramic tiles will not collapse or rot due to high humidity and aging. So you can be sure that you will enjoy this original and practical wooden flower stand for many years to come.
Making the top shelf
The stand has two shelves - for flowers and decorative. We will glue ceramic tiles to the shelves. Since the sizes of the tiles will be different for each of you, so measure its dimensions, and based on the measurement data, make the remaining parts.
In our version, the top (G) tile has dimensions of 305x305 mm, and the bottom (H) - 190x190 mm.
Detailed drawing of a floor flower stand
Let's cut out the base for tile G. There should be a gap of approximately 3 mm between the tile and its edging. This gap will subsequently be filled with ceramic tile grout.
Note. We used 19mm thick pine boards and 13mm thick plywood.
- Make the sides of the box (A) - 19x184x203 - 4 pcs., the backing for the top tile (C) - 19x310x184 - 1 pc., and the base (D) - 19x184x184 - 1 pc. Sand with #150 sandpaper.
- The sides are attached in the usual simple way. The corners will be hidden by the legs. To secure them without cracks, you need to pre-drill mounting holes d=3 mm. You can also do a countersink. Using wood glue and self-tapping screws, secure the sides of the drawer.
Assemble the box using a simple butt joint
- Place the base for the top tile on top of the drawer and secure it with 25mm long self-tapping screws. First center the base D and the backing C.
- Attach the resulting tile base to the box through the pre-prepared mounting holes with 35 mm long self-tapping screws.
Installing the legs
- Prepare legs (B) - 19x64x750 mm - 8 pcs.
- Drill mounting holes in the legs and sides. Countersink the holes.
- Attach the legs to the sides using wood glue and 35 mm long self-tapping screws. Note that the leg that attaches to the outer edge of the drawer side must be flush with the adjacent side.
Attach the legs in pairs using glue and screws, covering the visible drawer joints
Note. The distance between the legs in a pair should be 10 millimeters.
Decorative shelf
- Cut out a shelf (E) from plywood - 13x184x184 - 1 pc. and edging for it (I) - 13x25x222 - 4 pcs.
- Since we already have 2 surfaces ready for ceramic tiles, they can already be glued.
Advice. Use tile adhesive and a notched trowel to secure the tiles. Install the tiles exactly in the center so that the distances along the edges are equal.
Apply an even layer of ceramic tile adhesive to the base and attach the tiles
- Nail the edging (I) of the shelf. Use finishing nails 30-35mm long. The top edge of the edging should be flush with the surface of the tile. But you can use another method, for example, first make an edging, and then adjust the height of the tiles with the applied mortar. But this method is more difficult, because it will be difficult to get the tiles out again.
- Attach the shelf to the legs of the floor flower stand. Use decorative nails in the same way as in step 3. But this time their length should be 40 mm. The height from floor to shelf should be 250 mm.
Top shelf
- Saw out the top edging (F) - 13x25x337 - 4 pcs. Cut the ends at a 45° angle.
- Fasten the edging so that the top edge is flush with the tile.
Attention. When driving nails, make sure that the nails hit the wooden base and not the glue or tiles.
Finishing touch
The DIY floor stand for flowers is almost ready. There are just a few last steps left.
- Drill down the heads of all the nails with a hammer. Seal the screw holes with wood putty and give all surfaces a final sanding.
- Prime and paint the stand. Apply two coats of gloss polyurethane varnish and let dry.
- Cover the trim pieces with masking tape. Fill the gaps between the tiles and the wood frame with grout. Use a damp sponge to remove excess cement.
Marble Hexagonal Cup Holders
Marble patterns are definitely on trend right now, from notebook covers to phone cases. Using a twisting motion combine the black and white clay so that the result looks like marble. These coasters will look great in any industrial or minimalist design.
Third option
Here we decided to make a collage of possible manufacturing options for making DIY floor flower stands for the home from scrap materials:
Please write your questions or comments in the comment box. Our experts will answer them.
Painted rope coasters
Looking for an easy project using sewing? Grab some clothesline and some thread and a needle and you'll be on your way to creating these cute coasters. With a bit of a nautical theme and a geometric design, these would be perfect for a nursery, plus they are very easy to make and quite durable.
Sketches and drawings of flower stands
Mobile options
Such multi-tiered stands are perfect for summer residents/gardeners, since the task of growing seedlings is solved simply. These structures are installed in the house as needed. But if you choose high-quality wood and approach the exterior design wisely, then such a stand will easily fit into any interior.
Made from pipes and wood
If the stand is relatively small, for 2 - 3 medium-sized flowerpots, then aluminum or even plastic analogues are often used instead of steel pipes. You just need to choose the right section and wall thickness.
Stands-tables
The structures are more massive, but their advantage is that they can be easily “repurposed”. Therefore, they can be used not only for flowers, but also, for example, for a TV, stereo system, books, and so on.
Other original designs:
Branch stand
A little rustic style never hurts, right? These twig coasters pair well with almost any interior design and can be easily made using twigs from your local park and string. Want more? They can be easily extended to serve as plate and cutlery pads.
Nuances of assembling stands
The strongest wood structures are obtained by “double” joining the parts - with glue and a fastener. The first ones used are compounds for carpentry work (most often PVA, casein), the second ones are self-tapping screws. Fixing the wooden parts of the stand with nails is undesirable. There are several reasons for this.
- The leg of the fastener easily splits dry wood (and other wood is not suitable for stands).
- The maintainability of such structures is extremely low.
- It is quite difficult to direct the nail strictly along the axis. Since the flower shelves are not particularly thick, the tip of the hardware will definitely come out.
When decorating a structure, you should use acrylic or oil-based paints. They have many advantages, one of which is resistance to burnout. For stands manufactured for installation on site, this is an important factor.
You can make any stand with your own hands. Therefore, blindly copying drawings is not the best solution. They are only taken as a basis, and the sizes of individual elements are changed at your own discretion. A self-made stand is preferable to a store-bought one in that it can be placed in a specific (selected) place, organically fitting into the overall design of the room without unnecessary rearrangements of furniture and the like.
A home craftsman who has not forgotten what scaling is is quite capable of developing his own drawing based on the sketch. As an option, choose a photo you like on the Internet, download it, print it at the required magnification, and determine the sizes of the main elements that are acceptable to you. The rest will be completed by imagination and the ability to think “three-dimensionally.” Do-it-yourself is not a template, but an element of creativity. The main thing is to want it, and everything will certainly work out. After all, even the slightest mistake or miscalculation can always be presented as a new direction in art (especially since few people really understand it), exclusive, original style, and so on.
Buy or make it yourself?
Perhaps every housewife asked herself this question. Today, a huge assortment of all kinds of decorative forms, stands, holders and supports is available. The only problem is that truly beautiful accessories are not cheap and not everyone can afford them. And what is affordable is not always pleasing to the eye.
Another advantage of “hand made” products is that they can be made to the desired size. If there is a small corner between the sofa and the armchair left for a flower stand, or a fragment of the wall near the closet is ideal for a shelf, then by carefully measuring the space, you can create a neat and very practical interior detail.
Moreover, today you can purchase various accessories, decorative elements and fasteners, so that the item is beautiful and as functional as possible.
Advantages of a homemade stand
You can make a whole list of factors that testify in favor of hand-made coasters:
- Price. Of course, you will only pay for materials and, possibly, the necessary tools, when the cost of store goods includes a much wider range of services.
- Choice of material. Here you are free to choose the color, shade and texture that you like, and not based on the assortment already offered by the store.
- Variety of shapes. No one limits you in creating your own unique stand. Moreover, you always know how and what it is made of. In addition, you always know what design you need for a particular room.
Knitted coasters
For the stand you need yarn of the selected color and a hook.
Step-by-step manufacturing scheme:
- Knitting begins using the classic method.
- 4 stitches are knitted with loops thrown on, after which 1 control loop is made, the algorithm is performed 9 times.
- The pattern consists of 5 similar pieces and 2 loops. This needs to be repeated 9 times.
- The next circle is 9 patterns of 6 double crochets and 3 loops.
- At each step, the volume of complex and simple loops increases, and the main algorithm is duplicated and repeated.
- Then a rosette with an individual pattern is made.
- At the end, the stand must be thoroughly tied. Every 3-4 circles you need to change the color from light to dark shade.
DIY metal stand
No matter what shape or size you want to make your stand, there are general points that apply to all types of designs.
Manufacturing metal structures is not an easy task in itself and quite labor-intensive.
The sequence of actions is as follows:
- Decide on the appearance and practical use of the stand.
- Draw a drawing, noting all the necessary dimensions.
- Start making parts.
- Start welding the parts to each other according to your drawings.
- Upon completion of work, treat the metal with special anti-corrosion agents. If desired, paint the desired shade.