You can add originality and charm to any hairstyle with the help of jewelry made with your own hands from beads, wire, ribbons, lace, seed beads and other available materials. By decorating hair clips, pins or combs, you can create an exclusive hairstyle for an evening festive event, or diversify your daily hairstyles.
This requires a little free time, a set of necessary materials and a little imagination. A sketch of the desired decoration can be made on paper, or simply in your imagination. As you make the piece, you can try experimenting with different variations of different materials and additions until you get the best result.
Headband made of beads and ribbons
An ordinary plastic or metal hair hoop can “tame” unruly curls of hair or bangs. But it’s not difficult to make it an excellent decoration with your own hands, using satin or silk ribbons, beads and wire for this purpose. You can make flowers from ribbons and weave a decorative braid, and embroider the field of the headband and its edges with beads, or place it in the center.
To decorate the hoop you need:
- satin or silk ribbons;
- quick drying glue;
- wire or fishing line;
- beads of the desired color and size;
- plastic standard rim, wide or narrow (optional).
To begin work, you need to stick small pieces of tape onto the ends of the hoop from the inside. To create the main background of the headband, you can take a ribbon made of guipure, lace or satin, up to 3 cm wide. To make floral decorations, you can take a wider ribbon; the wider the ribbon, the larger the diameter of the flower. The braid will also need a narrow ribbon.
Performance:
- Wrap the hoop tightly with tape at a 45 degree angle, slightly overlapping the edge of the previous strip, leaving 1 cm of tape at the beginning and end of the hoop. Tuck the ends of the tape and sew them to the previously glued pieces of tape on the inside, thus securing the base of the future decor.
- Weave a braid of the required length, secure it along the hoop with glue, tuck the ends inward and glue it.
- Glue or sew beads at equal distances from each other in the center of the ribbon braid. String the beads onto the wire and secure the ends along the edges of the rim.
- Make a flower from ribbon or lace by gathering one side of a similar braid onto a thread and pulling it along the thread until a flower is formed, then sew it through the plane of the base of the workpiece.
- You can sew 1 or more beads into the center of the flower and fix the flower on the hoop in the desired location using glue.
This design of the headband does not require much effort or material costs and will bring a lot of positive emotions.
Interesting video: making an accessory yourself
You will need: a metal base for the headband, scissors, satin ribbon, 4mm thick gamma wire, 12, 8 and 6mm beads, drop-shaped beads of two sizes and small transparent beads at your discretion. Cut 20 cm from a coil of wire, fold it in half and thread the first transparent bead. We pushed it to the middle of the wire and twisted it a little to secure it.
Next, we pass a drop-shaped bead to the transparent bead, immediately through two pieces of wire. Next we thread the bead at 12mm, 8mm and 6mm. The result was the first blank. In exactly the same way we make 6 more blanks. But in each subsequent workpiece, we reduce one bead in the set. At the very end you should get one bead. We will fix the resulting pattern in the center of the rim.
Interesting! If you like beaded accessories, follow this link to see other jewelry options.
We take our first piece, separate the edges of the wire and place it in the middle of the rim. We stretch it so that the beads do not dangle and wrap the rim with the remaining wire, pressing it tightly against each other. Next, take the next piece, step back a little and wind it in the same way. The outermost one comes with one bead. To prevent the wire from sliding along the rim, you can fix it with glue.
We decorate the traces of assembly of the tiara with a satin ribbon. Apply glue to the edge of the tape from the wrong side, secure it at the very beginning of the rim and begin winding. In this way we tightly wrap our entire base. All traces of the wire should be hidden under the ribbon. Wrap it to the end and secure the edge of the tape with glue. The tiara is ready.
Vintage Beaded Wedding Jewelry
A vintage wedding hair decoration with your own hands from beads and wire is not difficult to make at home, spending a little time. Vintage style includes pastel colors of pale pinks, blues and yellows, as well as pearl and white colors. Accessories for such decorations need to be selected in exactly these colors. You can weave a wedding wreath, tiara, crown or twig.
To make a hair wreath you will need:
- silver wire;
- beads made of pearls or glass beads in pale tones;
- colorless, quick-drying glue;
- thin metal rim.
The headband will be the basis for the wreath and you can then attach the veil to it.
For any decoration, it is first better to draw on paper an approximate sample of the future product.
Performance:
- Cut the wire into pieces of 10-15 cm for the branches of the wreath and put several beads on each, of different sizes. Then, rotate each bead around its axis several times, thus creating legs for each individual bead of different lengths.
- Having secured all the beads in this way in the middle of the piece of wire, twist the edges of the wire together in the same way. The result is a small branch with several beads. The more such blanks there are, the more magnificent the wreath will be.
- Attach the blanks with beads to the rim, forming the arrangement and inclination of the branches at different heights and in different directions. It is good to clamp the bases of the legs on the rim and apply a drop of glue to the place where each workpiece is attached.
You can make a wedding boutonniere from the same blanks by tying several branches together with a white satin ribbon in the form of a bow.
Different variants
If the bride has a high hairstyle, then a tiara is best. Tiara - an original decoration suitable for any girl, of any age. How to make a wedding hair decoration in the form of a tiara?
Wire comb with beautiful pearls for a bun
To make it you will need: natural pearls with a diameter of 7mm, glass beads 4mm in different shades, some beads, rhinestones, wire with a diameter of 4mm, round nose pliers, wire cutters.
Cut a 100cm piece of wire and fold it in half. We string a pearl on it and twist it 1.5 - 2 cm. Then we string the second one and also twist it. Closer to the middle, you can add bugles, rhinestones or beads of a different color. In the middle you can make several flowers in the same way. It all depends on your mood and imagination. We attach the finished decoration to the comb using wire, pressing tightly, and can be fixed with glue.
You can decorate the headband in the same way, adding leaves, flowers or satin ribbons according to your imagination.
Dragonfly on stiletto heels
You will need: 1mm thick wire, beads, nail polish, scissors. Cut the wire 30 cm long and twist the dragonfly. We put beads on the ends of the wire and twist the antennae. Using nail polish, we make the body of the dragonfly, stretching the polish with a thin film between the wire. Let it dry.
According to your taste, you can decorate with small beads, gluing them with glue along the rim of the wire. The finished product can be secured to a bobby pin or pin.
Daisies
Wedding hair decorations for the bride can be in the form of beaded daisies. You will need 65 cm long wire and a knitting needle. We wind the wire around the knitting needle, leaving the ends 3 cm long. You should get 55 spirals. Remove from the knitting needle and stretch to 15 cm. We roll the workpiece in the form of a chamomile petal, and twist the ends together. This way we make 8 petals.
Then we take white threads and make a turn from the middle down, then wrap it from the bottom up. Having reached the end, we draw the thread down along the surface and wrap it around the ends of the wire. Thus, we make all the petals.
You can also make a few green leaves. For the middle, we make an 8 cm spiral and wrap it with yellow thread, starting from the middle. Next is a cross.
We collect the finished petals and the center, tightly wrapping them together with threads. We fix the ends of the threads with glue.
Advice! You can attach the finished flower to any hairpin or bobby pin. You can make several of these flowers with different sizes.
Beautiful twig
Wedding hair decorations made of wire are very popular. To create an original decoration you will need: a sheet of paper, a pencil, 5mm thick wire, 5 multi-colored beads. 8mm thick and 28 pcs. pearls from 8 to 12 mm, pliers, wire cutters, round nose pliers. How to make wedding hair decorations - photos and instructions below.
First, we draw a branch of your choice, 26 cm long. To make it beautiful, you need to constantly check the sketch.
We do not cut the wire so that our branch does not fall apart. We take the wire in the spool and begin to string a bead onto it. When they are all put on, we move them 50 cm, this will be our center of the branch. Take the first bead and twist it at a distance of 2 cm until the bead is tightly attracted. At a distance of 1.5 cm, twist the second bead until they come together. We do these movements with all the beads.
At the end of the finished branch, we cut off the rest of the wire and tuck them in with round nose pliers so as not to get scratched. The finished twig can be attached to a comb, to a bobby pin, or worn as a tiara. In all cases, you will look original. You can show your imagination and use beads in the form of leaves and flowers.
Wedding hairpins made of beads
Hairpins for the bride’s hair are decorated using a similar method and from the same materials. The stems of the branches with beads are secured to the bend of the hairpin. You can screw several branches or beads onto 1 hairpin; the legs of the workpieces can be made shorter and the number of beads on a branch can be reduced. You can make a flower from beads by combining different shades and using beads.
This DIY hair decoration made of beads and wire can be worn both on holidays and in everyday life.
Another option for decorating hairpins is to make a flower from braid or narrow ribbon and sew a bead into the center of the flower. Then secure the workpiece to a pin.
Comb with rhinestones for a wedding
A comb is often used to style long wedding hair, with a variety of decorative options. A comb sparkling with stasis, which is attached to a short veil, or in the form of a hairpin in the hair, looks impressive. The rhinestones have 2 through holes for fastening. To decorate the comb with large rhinestones, the wire should be 0.4 mm thick.
Performance:
- Pull the wire through the top row of rhinestone holes, form a pattern, or part of it, then pull the wire through the bottom holes.
- At the same time, secure it to the top of the comb, braiding it over the teeth of the comb.
- Wrap the rhinestones assembled into a pattern with wire along the entire length of the comb and twist the ends of the wire with round pliers, cut off and bend the sharp ends.
The second way to decorate a comb with rhinestones is to sew the decoration onto thick fabric or leather and glue it to the comb, attach it with wire or thread.
Hairpins with flowers made of foamiran
Hair decorations can be made with your own hands not only from beads and wire, including wedding ones, but also from floral elements made from foamiran. One of the accessories will be a hairpin with a lush, white rose, or several smaller flowers.
It is not difficult to make a decoration, since foamiran takes and holds the given shape well, does not lose color when exposed to water, and products made from it are very light.
To create a hairpin you need:
- foamiran of the desired color;
- glue "Second";
- scissors;
- cardboard;
- thin wire;
- several small beads or crystals;
- candle or lighter;
- a hairpin or clip to which the flower will be attached.
Foamiran is needed in two colors - light or white for the flower itself and green for the leaves.
Performance:
- A template for flower petals and leaves must be cut out of cardboard, depending on the size of the desired flower.
- Using a toothpick, draw 8 blanks of 4 petals each on a sheet of material and cut them out, forming a wavy edge.
- Place all the finished petals in a stack, twist them slightly so that they are slightly rounded and easier to assemble into a flower.
- Each petal must be held over a candle or lighter and the heated part should be slightly squeezed out with your fingers, rounded, and the bottom of the petal should be slightly compressed.
- Use beads and wire to make several stamens for each flower, twist the bases of the stamen stems together.
- Gather all the petals around the stamens, overlapping them and moving them slightly in a circle. Each part must be glued at the base, lightly pressing it against the previous one.
- From green foamiran, cut out a cup for a rose with 4-5 leaves, slightly roll the ends onto the outside, pierce it in the center with a toothpick and put it on the base of the flower, after adding a drop of glue.
- Cut out the leaves and also attach them to the stem.
- Secure the flower to the hairpin with glue.
Neck decoration
For beginners, it is recommended to try making such a simple, but no less beautiful and stylish necklace.
For the master class you will need the following materials and tools:
- beads, two colors to start with;
- fishing line, monofilament or simple thin but strong synthetic thread;
- caps, end switches;
- a clasp, which, as a rule, consists of jewelry rings and a carabiner;
- transparent glue that dries quickly;
- pins with heads at the end in the form of a ball or hook;
- scissors;
- pliers for working with a lock;
- beading needle;
- scotch.
We cut twelve pieces of fishing line (or whatever we chose instead) each 75 cm long. Then we string beads, there should be 6 threads for both colors.
Next, we separate and secure the resulting threads, as shown in the photo.
The same image demonstrates how to weave threads.
Next, we work with the ends of the workpiece.
And here you have such a wonderful decoration on your neck.
You can create a necklace like this from beads and beads.
The pattern of its weaving is quite simple.
If you use glass beads together with beads, you will get the following decoration.
- Having familiarized yourself with the diagrams of the stages of its production, even a novice needlewoman will be able to create such beauty
- The technique of knitting strands of beads will require patience and care.
For the first time, you can choose the simplest version in order to, as they say, get better at it, and then find weaving patterns of varying complexity and try them out.
Creating a tourniquet
- Video with a more complex option and a description of how to work according to the schemes.
- Where to get the diagrams themselves and how to create them.
Beaded brooches
They can be either wicker or embroidered on felt. To begin with, we offer a photo master class of the first of those listed.
We fold the thread (monofilament or nylon) in half, collect 9 large beads, alternating with two large beads. We close the workpiece into a ring.
The second option is embroidered. The video will demonstrate it more clearly.
Fashionable bracelets
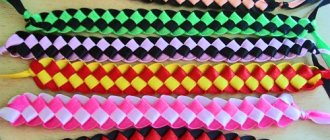
- First of all, these are all kinds of baubles, different in width and color.
- For example, these delicate flowers/daisies.
- If you want a slightly simpler option, then you should choose the next one.
- An openwork decoration will decorate any hand.
- A wide bracelet seems complicated only in appearance, but the diagram shows that the implementation is very simple.
Bracelets are woven not only by hand, but it is also possible to use a homemade machine or a machine purchased at the appropriate store.
This technique helps create dense knitting with various images, patterns, names, etc.
- You can see how to make the machine yourself in the video below.
Beaded rings
In their creation, all the same techniques can be used that are used for the above jewelry.
- Below are several options with diagrams.
Big earrings
To create, in addition to beads, thread or fishing line, you will need fastenings for earrings, the so-called earrings. These can be eyelets, an English lock or carnations.
The first proposed version of the product, which is simple in implementation, consists of threads assembled with beads. However, if you use unusual color combinations, add bugles or beads, you can realize all your most original ideas and end up with a unique decoration.
- Tools and material you will need.
We string 2 glass beads onto a thread so that one end of the thread remains short. We pass through them again, thereby creating a rectangle. Leave one end of the thread and work with a long piece. We string glass beads onto it, go through the previous one and again into the one we just collected.
- And so on for four more bugles.
We put two beads on the needle and pass the thread through the fastening of the second and third bugles. Then we pierce the second of the collected beads again. And thus we attach four more beads, passing each one twice.
This is how four more rows are knitted, each of which has one less bead. Let's form a triangle.
We form a loop for the ear wire. And through the outer bead and side glass bead we move to the opposite side to create a fringe.
The first strand of fringe consists of five beads, bugles and eight more beads. We secure what we have collected by going back through ten beads and glass beads.
We come to the next thread through the second glass bead of the top. The set is almost the same as the first one, however, we add two beads to the initial 5 beads. And so on two more threads with the addition of two beads at the beginning.
- Then the three final threads go in descending order, two beads at a time.
- Video with a similar option.
- These earrings will decorate an evening outfit.
- Monochrome geometric ones are suitable for an everyday look.
As is clear from the article, beaded jewelry is not something unattainable and difficult. Any needlewoman, regardless of age and level of skill, can master making this or that jewelry; she just needs to put in a little effort and patience.
Video on the topic of the article
Source: https://DekorMyHome.ru/rukodelie/bijyteriia-iz-bisera-svoimi-rykami-dlia-nachinaushih-s-foto-i-video.html
Pearl bobby pins
DIY hair decorations made from beads and wire are very easy to make using bobby pins. Pearl bobby pins can be used for daily styling separately or in combination with other hair decorations. You need to take a piece of wire, fasten it at the beginning of the bobby pin, string a bead, twist the wire around the top of the hairpin, tighten it and repeat the operation until the end of the bobby pin.
Then secure the end of the wire, bite it off and you can tuck the end of the wire into the last bead. Silver wire will not be noticeable against the background of pearls. In the same way, you can make beads on legs by twisting each one around its axis several times. The result will be a more voluminous decoration.
Wreath made of red beads
For a beaded wreath, you need to make a ring to fit the circumference from thick soft wire. Cut 25-30 pieces of thin wire, 10-12 cm long. String the beads into pieces of several pieces and prepare from them twigs and flowers on long legs. Then use the prepared branches to braid the rim of the wire like weaving a wreath and secure it.
Carefully wrap the gaps between the legs on the headband with a satin ribbon, which can be tied into a bow, or trimmed and neatly sewn.
Questions and answers
Is it possible to create a tiara from beads?
Yes, but to create such a decoration you will need a base made of hard wire. Accordingly, you need to have the skills to work with it.
What decoration can be created without learning weaving techniques?
Without weaving techniques you can create beautiful beads. Such a product will only require training in the skill of stringing beads onto a thread.
What is the difference between a choker and a neckband?
These are the same product with different names. The first is accepted in Western countries, the second is what such jewelry was traditionally called in Russia.
What does Rope jewelry look like?
A rope is a type of necklace. Its length is over 100 cm.
Handmade beaded jewelry is made by a craftsman without the use of mass-produced machines. Accordingly, there is no standard “look” for such products. It can range from simple and straightforward pendants and bracelets to complex designs that will take hours or days to complete. But such jewelry is united by the fact that when finished, they become unique, one-of-a-kind small works of art.
Dragonfly on stiletto heels
You can beautifully decorate hairpins with beads on a wire, or beads in the shape of a dragonfly. For this you need colored and white beads, a piece of wire about 1 m. Weaving a dragonfly begins with the body of the product, to which 1 or 2 rows of wings are then attached, as desired. For the dragonfly's eyes you need 2 beads of a larger size and dark color.
Performance:
- Large beads for the eyes are put on a 60 cm piece of wire, a small bead and three beads from the body of the future dragonfly are inserted between them.
- Place the beads for the eyes in the center of the segment, and the next 3 at the back, creating the beginning of the body. Pass the second end of the wire through the same 3 beads and tighten.
- In the next row, place 4 beads, also passing both ends of the wire through these beads. Weave the body of the workpiece in this way, reducing the number of beads towards the end of the body.
- Pass a piece of wire through the 3rd row and collect 25 beads from 2 sides to form wings, stretch the ends of the wire through the next row of the body, tighten and secure.
- Make the second pair of wings in the same way.
- Attach the finished product to the pin using wire.
Bead shapes
Beads as a material have different shapes. It is not only round, as many people think. There are square, oval and other options of various shapes.
The beads themselves can be divided into the following forms:
- regular - the most common version of beads of various sizes with holes for stringing;
- cutting - small tubes with holes for stringing;
- Bugle beads are a special version of beads that look like an elongated tube. Holes for stringing are located inside.
Satin ribbon lily on a hairpin
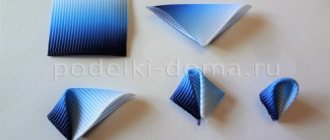
It is not difficult to decorate a hairpin with a hand-made lily flower from a satin ribbon. To do this, a cardboard sample of a flower petal is cut out, ribbon blanks are cut out from it, and the edges of the petals are processed over a candle. To shape the workpiece, you need to hold it over the flame and shape it with your fingers.
Apply longitudinal stripes on the underside of the petal, collect and glue the bases of the petals, and attach the finished stamens. Glue a circle of fabric onto the base of the finished flower and glue it with a hairpin.
Daisies made of ribbons and beads on a rim
A regular headband can be decorated with daisies made from satin ribbons and beads. To do this, you need to wrap the headband with tape and stick the daisies you made. The flower is made from a narrow satin ribbon, cutting the strip into 28 pieces, the length of which is 8 cm. Fold the pieces in half and melt them over a candle flame. For each flower, prepare 3 felt cloth mugs.
Glue 14 petal blanks in a circle onto the felt piece, and glue another row of ribbon petals on top. Glue a felt circle into the center of the workpiece, sew several yellow beads to it, or cover it with yellow beads. Glue the finished flower to the hoop, fix it from the inside with a circle of felt using glue.
Headband with flowers made of ribbons and beads
There are many options for decorating a hoop with flowers made from satin ribbons, which can be made large and small, or combined. Filling the center of the flower with beads allows you to hide where the petals are glued. You can diversify your decorations by adding beaded branches between the flowers, or using glue to glue sparkling beads along the surface of the flowers and leaves.
This decoration creates the effect of dew on the flowers.
All the materials needed to create hair decorations are always available in craft stores. These accessories will be useful for schoolgirls of any age, for older girls and adult women. A DIY wedding accessory made from ribbons, foamiran or beads and wire will remain a pleasant memory of an important event.
What tools are needed for beading?
Beads
Beads come in different sizes and shapes, and the beads themselves are made from plastic, glass, wood and even precious stones. The beads also differ in the degree of transparency and dullness.
Russian stores most often sell beads from Czech, Japanese, Chinese and domestic manufacturers. Czech and Japanese are considered the highest quality beads - the beads are uniform, strong and without defects. Chinese beads are usually cheaper, sometimes there are defective elements in a pack, but nevertheless, they are also suitable for the job, especially at the beginning.
What shapes do beads come in?
Round or rocaille. It resembles a donut, with a smooth round hole in the center.
Chopping. Cylindrical beads, cut off at the edges.
Bugles. This is an elongated glass tube, cut into pieces of a certain length.
Drops. Drop-shaped beads with a narrow hole, which is located closer to one of the edges.
There are also figured beads: from simple geometric shapes to flowers or hearts.
Bead size: how not to get confused in the markings on packs
To begin with, it is better to choose beads of the same size, this will make it easier to master the creation of basic patterns.
Typically, bead sizes are numbered as follows: from 1/0 to 24/0, where the first number is the number of beads that fit into 1 inch (2.54 cm). Measure the diameter while lying down, with the hole facing up. For example, a bead size of 5/0 means that five beads can be placed on one inch. Accordingly, the smaller the first digit in the number, the larger the beads will be, and vice versa. Large beads are very rare (beads and other accessories are suitable instead). Usually stores offer sizes from 6/0.
Some brands of beads indicate sizes using letters:
- SEED-BEADS - small
- PONY-BEADS - medium
- E-BEADS - large
- CROW-BEADS - very large
Threads, wires and fishing lines
To choose a suitable thread, you need to consider how rigid the frame of the desired item should be.
- For jewelry, nylon, lavsan thread or monofilament are well suited.
- To make keychains, fishing line is used, not wire, so that the product retains its shape.
- The wire is suitable for making voluminous and massive figures, such as trees or other figurines.
Beading needles
A special beading needle differs from a regular needle in that it is more flexible and has the same thickness from eye to tip. Putting beads on such a needle is faster and more convenient.
Scissors or wire cutters
It is better not to use manicure or stationery scissors, they may break. You should choose scissors for thin metal or fishing nippers; they will definitely cope with tough fishing lines and wires.
Tray with small cells for each type of beads
The tray can be made at home or replaced with regular small jars or Ziploc bags - small bags with zippers. This will keep your workspace tidy.
