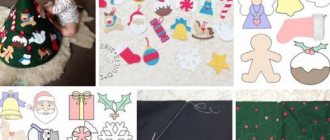
Felt bear patterns
In the gallery below you will find more than 30 felt bear patterns.
Below we have prepared for you the best master classes on sewing wonderful bears from simple materials.
Other options for do-it-yourself felt bears: patterns + tips
There are many different patterns that help you create a felt bear with your own hands. The set of materials and tools for making different toys is almost identical, the only difference is in colors and texture.
Stylized bears are most often used as keychains and phone pendants; such bears can be sewn together using a sewing machine
Using this pattern, you can make a bulky bear from a hard material, which will serve as an element of an educational book; it is advisable to use satin rather than felt ribbon
To make a bear's face, it is advisable to use a material of medium hardness - synthetic or wool mixture
Needlewomen advise not to use patterns with small details if the bear is intended for children's games. Also in this case, it is advisable to use a minimum amount of glue - it is worth firmly stitching all the elements.
Felt bear on the moon
Below you will find a step-by-step master class on sewing a bear on the moon from felt. This teddy bear can be used for a mobile phone or as an interior decoration.
And here is another master class “Bear on the Moon” for a felt mobile. In the gallery below you will find a step-by-step description of the actions and a pattern on 2 sheets.
And some more cute felt bear patterns on the moon. Be careful, some patterns consist of several sheets, so don’t lose some!
Toys that interest children
Beautiful felt toys can attract a child’s attention, make them wonder and give them joy. There is something about them that makes not only a child’s soul, but also an adult, attend the holiday. Let's figure out together what makes them so attractive and what benefits they have:
- A felt toy develops a toddler's development from the first months of life;
- High-quality active play: making toys and playing with them;
- A felt alphabet with animals will introduce letters and the amazing world of nature;
- Bright, colorful, and baby-safe material from which the soft toy is made.
Develop children with unusual dolls
These soft toys for children are simple and cute. They are a real miracle that you want to play with. But at the same time, we can safely say that they are unusual. How? Let's look at this with examples.
A bright flower in which each petal has a different filling.
This felt toy is for newborns. Little ones learn about the world through touching everything. Therefore, such an original idea with different-feeling “fillings” will diversify newborns’ ideas about what surrounds them.
Puzzles.
It will be interesting and useful for children to collect felt pictures, divided into 2 parts. Soft figures with your favorite toys: a felt bear, a ball, a pyramid, a fish or a train. How much joy awaits the children when the picture matches. But at this moment they learn to compare color and shape.
Patterns for puzzles:
Lacing - Hedgehog with a harvest.
A hedgehog runs quickly through the forest, stopping near an apple tree and a pear tree, collecting the fruits of the trees that are hidden in the grass. There was a tree stump in his path, and under it a mushroom. The felt toy suggests that the little ones will be able to help the hedgehog harvest.
Choose clothes for the beast.
A difficult task awaits the kids; various felt animals have “lost” their fur coats. Do our children know what clothes a turtle, zebra, pig or fish wear? What is the fashion of the giraffe and the cow? This remains to be seen.
Fun account.
Who said that learning to count is tedious and uninteresting? We will break the stereotype. With the help of these felt toys, even very young children will delightfully master the now boring numbers. Moreover, they are presented in two healthy versions.
Teddy bear with a set of clothes
Your child will definitely like this toy, because in addition to the bear itself, you can make him several sets of clothes that can be taken off, put on, and even combined with each other. So, the materials you will need:
- Beige felt for the base pattern, black for finishing, bright colors for clothes.
- Threads for sewing to match the main color of felt, black threads.
- 4 buttons of medium diameter.
- Sintepon for filling the base.
- Pattern or drawing of a teddy bear of the desired size.
So, if all the materials are ready, we can start sewing a cute felt bear.
- Trace the prepared pattern onto beige felt. In total, you need to prepare two such bases (for the front and back). Next, carefully cut out the blanks along the contour, trying to keep the parts symmetrical. To do this, you can fold them in half when cutting, and when you have two parts ready, attach them to each other and align them if necessary.
- Next, cut out two small circles from black felt for the eyes and one slightly larger oval for the nose. Sew the eyes parallel to each other and the nose just below with black threads. Then use regular stitches to form a smile on the face.
- Place the buttons as shown in the photo - two approximately in the shoulder area and two just above the base of the legs.
- Now you can sew two beige bases together. To prevent the seam from moving out, you can secure both parts together with clothespins or small stitches. It’s better to start with the ear, and when you sew through the whole body and approach the second ear, fill the body with the prepared filler. Do not stuff too much, but use a long needle or pencil to try to fill all parts of the body. When the whole body is voluminous, you can sew up the head. Your wonderful bear is ready, all that remains is to make clothes for him.
Sewing clothes depends only on your imagination and the wishes of the child. You can take any color as a base, make holes for buttons and then shape any type of clothing. Additionally, you can make various appliqués on clothes - embroidery, pockets, figures, etc.
That's all, your felt bear is not only completely safe, but also a very interesting toy for a child.
Incredibly fabulous and cute felt bear. Master Class
Anastasia
Everyone knows that you won’t see a bear in winter. The brown ones sleep in their dens, and the white ones sleep far at the pole. But miracles happen on New Year's Eve! This baby can be a nice gift for someone, or just decorate your home. And sewing it is not at all difficult.
You will need:
- Soft white felt
- Soft black felt
- Black beads
- Sintepon or cotton wool
- Marker or paint
- red ribbon
- Toothpick
- Eyeshadow or blush
- White and black threads
- Scissors
- Needle
- Glue gun or textile glue
This is what the finished teddy bear looks like
Here's everything you need to get started
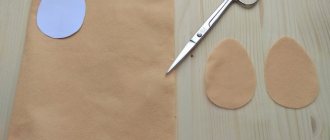
First, cut out all the necessary parts using a paper pattern.
Make sure all parts are symmetrical. To do this, you can use only half of the pattern, applying it twice.
Small details should be symmetrically located on the muzzle.
We begin to sew on the details of the teddy bear. To do this, take a needle with a double thread matching the color of the felt and, having secured a knot from the inside, pierce part of the spout. Carefully place stitches of the same length, ending at the edge of the white part of the nose.
The result is a vertical stitch, directed from the center to the edges.
The tip of the spout can be made from black felt or you can take a ready-made part for toys. It can either be sewn in the same way, or simply glued. Now we embroider eyelashes, eyebrows and mouth with dark thread. If in doubt, make preliminary notes with a marker.
- Glue on the beads that will become the eyes.
- It turns out very cute.
- We continue to sew the head of the toy.
You need to put two parts together, the muzzle and the back, and sew them together with white thread. We need to imitate the semblance of an overlock seam. We pierce with a needle from the wrong side towards the face of the teddy bear, then remove the needle and hook the thread to the back part.
- We pass the needle into the loop and tighten it.
- We complete the entire seam in this way.
- At the place where the ear is attached, place the part between the two halves of the muzzle and sew it on.
- We use the same loop stitch.
- Next, fill the head with cotton wool, padding polyester or wool.
- In the same way we sew handles for the bear.
We sew the body, leaving space for attaching the head. We sew on the handles in the same way as the ears.
- Fill the body tightly and evenly with filler.
The bear cub is almost ready. All that remains is to connect the head and body.
For greater convenience, we make marks in those places where the edges of the body will be attached to the head. We leave the needle and thread there. Now we pass the needle to the edge of the body, as shown in the photo. The result should be a hidden seam.
- In the same way, we fix the thread on the muzzle, connecting the parts.
- We tie a knot at the end of the seam and welcome our little bear!
A small but important detail. Glue a small bright ribbon to the neck, which will serve as a scarf.
Ready! Warm and cozy New Year's bear to decorate your home or as a gift to friends!
- And a few more ideas for toys made of felt, which are created according to the same principle.
- Merry Christmas and Happy New Year!
Source: https://cpykami.ru/kak-sshit-medvezhonka-iz-fetra/
Little soft bear
To make such a wonderful bear you will need a few materials.
- Plush felt in a light shade.
- Threads to match.
- White felt.
- Pink threads.
- Printed
teddy bear. - Sintepon for filling.
So, as mentioned above, to make such a bear you need plush felt, or you can look for plush fabric. The stages of working on a toy are simple:
- Pin the pattern with two layers of felt, pay attention that the fabric needs to be connected with the fleecy side inward.
- Using a machine, sew along the outline of the entire pattern, with the exception of a small section through which you will fill the body.
- If you don’t have a machine, then you need to cut blanks from two layers of fabric at once. Secure the two layers of fabric together with a pin and carefully sew along the edge almost the entire base, leaving a small area for filling with padding polyester.
- Turn the toy with the plush side out.
- Fill through the hole with padding polyester.
- Sew the remaining area.
- Using black thread, embroider eyes, nose and mouth on the face.
- Cut out two small circles from white felt and sew them with pink thread in place of the cheeks.
- To give it an even cuter look, you can cut out a heart from white felt and sew it onto the bear with pink threads.
A toy of incredible beauty is ready to delight its owner.
Master class on how to sew felt souvenirs
Nowadays it has become very fashionable to sew toys for children who have just been born or when they are one year old. Usually they do this in the form of a name and some kind of plot. I suggest you watch this video, just for those who don’t know how to properly sew together the parts of felt toys, this video will help you figure it out, watch all the stages of work:
Well, and of course, if you dream of sewing any fairy-tale hero or cartoon characters, then be sure to use this video instruction, based on it you can subsequently make absolutely any animals or people, the main thing is to find and print the template of the one you plan to sew:
Soft teddy bear for playing and sleeping
This toy is suitable even for the little ones. You can put the bear in bed, take it with you for a walk, etc.
To make it you will need:
- Two sheets of A4 felt.
- Milky and black felt.
- Threads in color.
- Sintepon for filling.
Process of creation:
- Draw a pattern yourself or download the one you like. Trace the outline of the pattern and cut out two parts.
- Prepare three round circles of light felt and three more smaller black round pieces.
- Sew the large circles to the base of the toy first, then the smaller ones. Form the bear's face in this way.
- Sew two large pieces, leaving a small hole for filling with padding polyester.
- Fill the bear with soft stuffing and stitch the rest.
Felt cloud: how to sew it yourself, pattern, master class, photo?
Sew a felt cloud
A felt cloud can be sewn as an independent decoration for a baby crib or as a detail of the overall composition.
To do this, we need the felt itself in the desired colors - choose any delicate color: white, gray, pink, blue, pale green or yellow.
Thick graphite pencil, scissors and thread in color.
Draw and cut out the pattern.
And then we turn on our imagination and create beauty for the little connoisseur. You can make cheeks with wax chalk and embroider eyes and mouth with thread.
Any beginner can handle sewing a cloud from felt - there is nothing difficult about it.
So, we stock up on blue or white felt (well, whichever one you like), thread and needle (or a sewing machine), scissors, pencil, padding polyester.
Stencils, cloud templates:
We transfer it to the fabric and cut it along the contour and sew it together, leaving a little for seam allowances.
Next, we cut out the same part from padding polyester, but a little smaller than from felt:
We insert the padding polyester into the felt cloud blank, sew the “window” and you’re done!
You can decorate it at your discretion with any details:
A felt cloud can be made in literally half an hour, you can take a ready-made pattern, or you can simply draw the clouds by hand on a piece of paper or ask a child to do it, children can make beautiful drawings.
To make a cloud, you need to choose sheets of felt in white, light blue, gray or dark blue.
You will also need padding polyester or batting for stuffing, threads for sewing, scissors for cutting out patterns and cutting felt, as well as a cord if you want to hang a cloud in your child’s nursery near the crib or attach it as decoration to a window, wall or door .
Look at the selection of interesting ideas for crafts with a cloud and patterns for such crafts.
I would also like to say that felt crafts are perfect for interior decor, because they hold their shape and do not require additional frames, and they are easy to care for: they can be washed.
You can add felt clouds with the sun, raindrops, stars and you will get a whole composition.
This answer is a big question specifically for the site. RU
Felt bear
You can make a more detailed toy. To do this you will need some materials and diligence. The sewing process is simple, and the result will definitely please you.
- Print out the pattern details for the body, as well as the muzzle, ears and tummy.
- On the main color of the felt, trace the base of the pattern twice. From a contrasting color, cut out individual parts - ears, muzzle, tummy.
- Attach contrasting pieces to the base. Sew the two parts together, after filling them with padding polyester.
Additionally, you can sew a moon from yellow felt and make a composition of a felt bear on the moon. This toy is perfect both for decorating a nursery and for playing.
How to make your own felt bear
Master class No. 2: Felt bear on a month
A felt bear sleeping during the month can decorate a child's room.
Monthly bear
In addition, such a hanging toy is safe for children. Making it yourself is very simple and anyone can do it, even a novice master. You just need to follow the detailed instructions given below.
To make a felt bear sleeping on the moon, you will need:
- felt (yellow, brown, blue, white);
- printed template for the pattern;
- marker or pencil for fabric;
- scissors;
- threads to match the material and needle;
- filler (sintepon or holofiber);
- satin ribbon.
A step-by-step implementation of the work is proposed below.
From felt, using the bear template suggested below, cut out the parts, having previously outlined them using a fabric marker.
Teddy bear template
Cut the resulting blanks with scissors along the drawn contour.
Felt cutouts
Sew the face of the toy to the front side of the head and embroider the eyes and mouth.
Embroidered bear face
Sew both parts of the paws, body and head at the same time stuffing them with padding polyester.
Toy parts filled with padding polyester
You should not use a large amount of filler, this will only worsen the quality of the toy. It is necessary to distribute a small amount of padding polyester evenly throughout the entire workpiece.
Connect ready-made parts in series with each other.
Bear parts sewn together
Sew the parts of the star and moon together and gradually fill them with filler from the inside.
After making all the parts, you can start assembling. The bear must be secured to the month with a thread, and the stars must be hung on a narrow pastel-colored satin ribbon.
Finished work
A felt carousel mobile with a bear sleeping on a fluffy cloud, made in the same style, will look impressive.
Carousel with a bear sleeping on a cloud
To make it, you can use the template diagram presented in this master class, replacing only the month with a cloud. This toy can be hung above a baby’s crib or used as an original decoration for a child’s room.
For the development of preschool children, you can use a finger theater, which can also be easily made from felt.
Finger Theater
For example, by clearly illustrating the fairy tale “Teremok”, the child will not only play, but also get acquainted with wild animals, develop the skill of mutual assistance and develop fine motor skills, which will have a beneficial effect on his further mental development. Patterns of animals from fairy tales can be easily found on the Internet.
Funny bear with a scarf
A touching and cute bear in a scarf will definitely become your favorite.
- Make two oval patterns for the body, sew the arms separately from the same color.
- To form a muzzle, sew a round piece of a contrasting color onto one base. Using thread, embroider the nose and mouth in a contrasting area. Use black threads to form eyes for the bear. Sew the two parts together, first filling the bear with soft filler.
- For a scarf, take a triangular piece of felt and embroider it as you wish - flowers, butterflies, balls, etc.
- Sew the scarf to the bear.
Mini bear
This teddy bear can be made with children, and it won’t take you much time to complete.
- Prepare patterns as in the photo.
- Sew all the necessary parts - paws, ears - to one base.
- Sew the two bases together, filling them with soft filling.
- Use glue to secure all contrasting parts.
- To create a bed, take contrasting felt and sew any finishing material to it - ribbon, fringe, bow, etc.
Big bear
- To sew such a bear, print out the pattern and use it to cut out the required number of parts from the desired felt.
- Sew small double pieces together. Be sure to fill them with a soft base.
- Place all the sewn parts on the felt base and sew them together. Be sure to fill the main part of the toy before sewing it all the way through.
- Sew the base for the face onto the resulting toy. Then glue eyes, nose, mouth and any additional accessories onto the toy.
If you want to sew a polar bear from felt, then use white as the base and use dark colors for finishing.
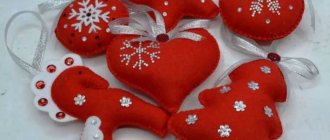
Felt toy Teddy bear on a heart
A bear on a heart can serve as an original Valentine's Day card or just a gift to a loved one. To create it you need to prepare a standard set of materials and tools.
Felt bear stencils
To sew a teddy bear on a felt heart with your own hands, you need to choose the appropriate patterns. He can sit on the heart, lie down or hold it with his hands, as if he is floating in the clouds.
A heart assembled using this template can be an excellent basis for creating a composition - as a pillow on which a teddy bear will sit
This template is universal - it can be “planted” on the heart or the front paws can be attached a little differently
This template is universal - it can be “planted” on the heart or the front paws can be attached a little differently
How to sew a felt bear with a heart
You need to sew a bear with a heart according to the following algorithm:
- First you need to cut and sew the applique elements.
- Sew voluminous parts, filling them with padding polyester as you work.
- Next, glue the parts of the bear together.
- Try on how the bear will be attached to the heart, glue the finished toy to the heart.
In some cases it can be sewn to the bear. This teddy bear can serve as the main element of a playpen mobile for babies.
New Year's bear
You will create a cute and festive bear with the help of this master class.
- From the felt of the main color you need to cut out the parts according to the pattern.
- We form the muzzle - sew on the base, and the nose on top. To prevent the parts from moving, you can fix them a little with glue.
- Sew the ears so that the parts lie symmetrically; you can sew several stitches in the center. Fill the ears with padding polyester.
- Sew the ears to the base of the head.
- Draw a smile on the face, eyes and use black thread to sew along the contour with a regular seam. Add a slight blush using dry pastels or blush.
- To sew the two parts of the head together, use a few large stitches to secure the pieces. When sewing, do not forget to fill the head with padding polyester.
- Sew the red belly to the body. Using white floss, embroider snowflakes onto red felt.
- Sew the two parts of the body with large stitches to secure the parts. Then sew along the edge of the body.
- Sew the head to the body.
- To add a New Year's mood, you can knit a hat or scarf for a toy from red threads.
Felt toys with patterns for beginners (can be printed)
Now that you know how to work with this material, I offer you ready-made patterns. Using them you can easily sew various crafts and souvenirs. Usually, by the way, they sew animals.
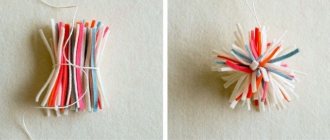
Here is a beautiful and bright star. Just right for beginners.
The kitten is also not difficult. Try it, I'm sure you will succeed.
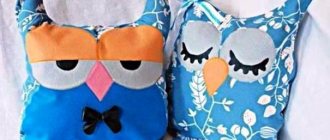
How do you like this owl? I think she's great.
You can also make a horse.
Or a teddy bear.
Also a pink bunny.
Or this teddy bear.
Adorable fawn. Cutie!
Be sure to sew these cute pets. The kids will love it.
And here is a cat from a cartoon.
And here is a funny zebra.
You can even sew a whole doll.
The king of beasts is the lion cub.
This kind of bunny can be made into a module for a crib.
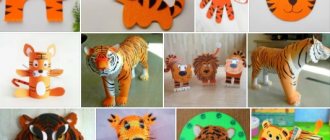
Well, and also animals: tigers, dolphins, fish and elephants.
Teddy bear with moving paws
- Prepare the parts according to the patterns.
- Sew together parts of the future teddy bear.
- Sew buttons to the base of the paws.
- Sew the paws to the body with the buttons facing out. For mobility of the limbs, it is necessary to immediately sew both paws with buttons and the body. The scheme is as follows - you string a button and a paw onto a thread, then pass the needle through the body at the place where the paw is attached and put the second paw and button on the needle on the opposite side and stitch it through again.
The movable felt teddy bear is ready.
Soft felt bear
Prepare patterns of parts for the toy.
Trace the blanks onto the base color of felt and cut them out.
First, let's form the muzzle. Sew a nose onto a circle of light felt. Sew the resulting blank to the head part. Use a regular stitch to highlight the mouth and eyes.
Sew both parts of the head, filling them with padding polyester.
Sew on the ears.
Decorate the contrasting part of the felt that will be sewn onto the tummy. Then sew this part onto the body.
Sew both parts of the body, fill the resulting part with printed material.
Sew the head to the body.
Make a bow from a thin ribbon and attach it to the bear with glue.
White bear
To sew such a bear, you need to use white as a base and a pattern of the desired size.
Trace the pattern and prepare the required number of parts.
Sew the base of the muzzle and nose onto the head piece. Glue the eyes with glue. You can embroider eyelashes, eyebrows, and a smile with black thread.
Next, we sew the parts together, not forgetting about the filler.
Patterns and instructions for making Teddy bears
For all methods, the principle of working with sketches is the same:
- prepare paper parts;
- lay them out on cloths in a mirror-like manner;
- translate the pattern;
- cut out the elements with seam allowances (approximately 0.5 cm).
When cutting out parts, the master uses scissors with sharp tips (manicure scissors are suitable). It is also important to trim the pile where there are allowances. The mirror elements need to be combined, pinned and swept away. Holes intended for stuffing, as well as fastening inserts, are not sewn up. These places on the patterns are indicated by dotted lines.
Simple classic
To sew a bear with your own hands from mohair according to the classical canons, use a “back needle” stitch. In this case, the length of each stitch should be up to 1.5 mm. When sewing ears, paws and other parts of the body, you must first sew up the darts. The finished head is tightly stuffed with wool. Then a disk with a washer and a cotter pin is inserted into the place where the neck is located. The seamstress fixes it in the base area, sweeping it around with a strong thread and pulling it tightly.
Wool is placed in the paws, and before that discs are inserted into them, as when installing fasteners for the head.
When everything is ready, you will need to sew each hole with hidden seams. The next step is to assemble the toy: attach the remaining components to the body. The cotter pins are secured from the inside. Wool is placed in the body, and granules are first added to make the bottom heavier. After this, you can fix the ears and start decorating the face of the Teddy bear: trim the pile near the nose, eyes, mouth. Next, attach the eyes, embroider the nose and mouth. You will also need to pluck the mohair on the feet and the back of the front legs. The final touch is to embroider along the contour of the feet and “palms”, and make a few stitches in the form of bear claws.
German classics
How to sew a bear using German patterns? First, the craftswoman sews each dart and removes excess fibers. Then the side parts of the muzzle are folded so that the fur is inside, both elements are stitched together from the nose to the lower grooves. Afterwards you will need to sew in a wedge. Next, the master sews only along the wedge, starting from the mark on the nose. It is important that everything is smooth and the bend in the nasal area matches. The next step is stitching from the dart located at the top to the bottom. The body is trimmed in the same way. Then they move on to the ears, leaving the bottom unsewn. There should be a long thread left here.
The ears can be turned out and the holes at the bottom can be sewn in a secret way. It is important that the thread does not run out, since it is used to fix the ear. The remaining components are completed in the same way. The sole is sewn in taking into account each mark so that it is smooth and without wrinkles. When everything is prepared, you can start filling.
Retro bear
How to make a bear in retro style? To do this, they follow a similar principle: prepare each foot and other components. Then the cotter pins are threaded from the inside into the hole previously made with scissors. The seamstress stuffs the inside with padding polyester. When everything is done, marks are made on the body with a felt-tip pen to insert each paw here.
Before this, the armpit fibers are cut off with nail scissors near each cotter pin for a better fit.
The bear's head is also fixed with special fasteners. Inside the toys are placed granules, fine raffia and padding polyester. The place for stuffing is carefully sewn together. The place for the eyes is marked with pins. Then they are attached (you can put them on glue). In the process, the thread is pulled tightly and finally secured with a double knot.
English classics
Using the pattern you can make a fabric bear in the English style. First, each undercut is sewn together, the main thing is that the lines are aligned. Then they chop off the marks located on the chin with needles. Baste with small and neat stitches, carefully tighten the thread. Then they proceed to the wedge: they start from the spout. First of all, the marks are cut off: one in the center, two on both sides on the bridge of the nose.
Next, needles are stuck between these marks.
Sewing starts from the bridge of the nose, reaches the middle and aligns the wedge mark and the central seam on the chin. The next step is to make darts on the wedge and head so that they form a line without discrepancies. Then they finish everything that remains to be sewn, pin on more needles, distribute the fabric evenly and smooth it out. The sawdust is sorted out from large and sharp chips and proceeds to filling the bear with your own hands.
According to the drawings of A. N. Izergina (1947)
Such soft bears can be seen in many Soviet cartoons and films. One of the notes on the drawings of the bear: the sharp corner of the wedge looks at the neck, the nose is marked with an asterisk. In general, the progress of the work is similar to the previous step-by-step examples.
To make toy animals look authentic, craftsmen advise using simple natural materials, you can even use antique fabrics.
Wool, cotton wool or shavings are suitable as filler. The bears were dark brown in color. The material could have long fibers, several stripes imitating claws were embroidered on the limbs with black threads, and the eyes were made of black beads. A collar can be tied around the neck, fastened with a large button.
Based on sketches by S.K. Rossinskaya (1930s)
These bears were often depicted on postcards and in silent films. They were made in a minimalist, laconic style, but at the same time they could not be called primitive. All stages are carried out according to the drawings, the same as in the previous versions.
The main thing is to do everything in order and cut out the patterns exactly. This teddy bear has a round head, ears larger than those of standard Western toys, the limbs look plumper, and there is a slight hump and sag on the back. For sewing they used baize and plush. The fabric is brown with short or cropped pile.
Vintage model
How to sew a Teddy bear? It is important to take into account its features. The vintage soft toy had a weakly defined muzzle and a rounded chin. It turned out to be dense, with a thick belly and more massive limbs.
The drawing provides for the use of additional material; the inner side of the ears and feet are shown separately in the sketch. To maintain the retro style, it is recommended to choose fabrics with thick, short fibers in a classic brown shade. The pattern of polar Teddy bears looks cute.
White fat boy
Small toys are sometimes made from fur or felt with your own hands. In addition to the standard set of tools and materials, prepare:
- 2 pairs of mohair socks;
- small felt and knitted sections;
- shavings;
- toy eyes.
The rounded end is cut off from each sock.
Next, using the templates, you need to cut out 2 circles, four limbs. They will need to be sewn, filled with padding polyester, formed into 2 round elements, and closed open sections. Then the center is pulled together with threads on opposite sides and stitched. The ends should be pulled to the middle and sewn. The seamstress places a basting along the edges of the circles and makes a tie so that they look like bags. Now you can fill it out and stitch it. At the central point of the feet and forelimbs, a small colored circle is sewn. The muzzle is made of gray felt, the tongue is made of red. All blanks are connected together. A nose is formed from black knitwear according to the pattern, the eyes are glued on, and the ears are attached.
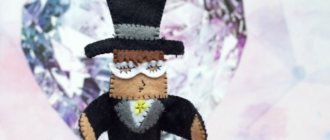
Charming gentleman
When sewing Teddy bear blanks according to a pattern manually, padding polyester padding, cotton wool or holofiber are used. Paired fabric cuttings need to be sewn. Feet of a different color are attached to the lower limbs. When everything is stitched, the blanks are turned out and the filler is laid. The muzzle and mouth are embroidered to the head using overlock stitches, and black beads are attached. Next you need to attach the ears and connect everything.
A felt bear that even a child can sew
A simple, but at the same time so cute teddy bear is sewn simply and quickly.
Trace the template twice and cut them out along the outline.
Prepare two ovals from white material to form the eyes.
Sew two parts of the body with a contrasting thread, fill the toy with padding polyester for softness.
Sew two white ovals and glue eyes on them.
The nose and mouth can be embroidered with black thread.
Keychain "Bear"
A simple and very interesting idea.
Prepare the parts according to the patterns as in the photo.
Sew everything you need onto the head piece.
Sew all the small parts together, lightly filling with padding polyester.
Sew all the small parts together, lightly filling with padding polyester.
Sew the base for the keychain onto the bear's head.
Funny little bear
A simple but very elegant bear can be made using this tutorial.
Prepare the parts according to the template as shown in the photo.
Sew the body and head with ears, do not forget to add filler for volume.
Sew the head to the body.
Sew a nose to the head and form eyes.
Make a bow from a small bright piece of felt and sew it to the bear.
How to make a Teddy bear from felt
Materials for work:
- felt is dark and light gray, a little white and blue;
- beads for eyes (you can buy special ones or cut them from black fabric);
- thin, transparent paper;
- pen, pencil or disappearing marker;
- needle, thimble and thread;
- filler for toys (sintepon, holofiber, cotton wool);
- fabric glue or instant glue;
- if necessary, material for decoration (bow, box);
- sharp scissors.
Popular little bear with skates
Despite the variety of toys in the store, the felt Teddy bear does not lose its popularity. Such a friend is closer than any purchased one, because it is made with your own hands. Involving a child in making a bear will not only allow you to have a good time with adults, but will also contribute to the development of fine motor skills and imagination. In addition, the sewing technique will not cause difficulties even for preschool children.
Work algorithm:
- Print or draw a teddy bear pattern and decorative elements.
- Trace the details according to the template in duplicate. The head, body and paws are outlined on dark gray felt. The heels and muzzle are on light, and blue is for the nose. Small squares as patches are cut out of white or light gray.
Teddy pattern
- Cut out the elements of the toy.
- Before sewing the bear, you will need to prepare the head (sew on the eyes, muzzle, patch and nose), and attach the heels to the paws. For this, a “needle forward” or “needle back” stitch is used. The remaining seams on the head, eyebrows and mustache are drawn with a marker or embroidered. If desired, the muzzles and heels can be carefully glued with glue.
- A second patch is sewn to the body and embroidered or a seam is drawn.
- All parts are sewn together and simultaneously filled with filler for volume. If you decide to make an applique, the toy is left flat and then sewn or glued to the object.
- Additional decorative details are attached: heart, box, bow and more. They can be made of felt or other fabric. If you wish, you can dress up as a bear.
Felt Teddy bear in a hat
Keychain
Such a bear can not only bring joy, but also perform an important function.
Prepare the details according to the pattern. It is important that the key is smaller than the body.
Cut out parts from two colors of felt, decorate the central part with small polka dot paint.
Use stitches of contrasting thread to form claws on the paws.
Sew polka dot felt to the body, as well as the paws.
Form a muzzle as in the photo. When you sew the eyes from the wrong side, make a loop - you will attach a holder for the future key holder to it.
Sew the front and back of the teddy bear and your key holder will be ready.
Patterns of felt toys for mobiles
It is also very popular to use felt to create modules for children. The result is creative products. Take a look for yourself.
They are not as difficult to do as it might seem at first glance. First you need to decide on the topic of the module and find the appropriate patterns. Then sew the toys, but additionally sew in a loop. Next, make the module itself and secure the finished products.
The frame can be made from wooden or plastic hoops; wire and wooden sticks are also suitable.
You can take the templates above, or choose from the following. Children's attention is usually attracted to cute animals.