Rope made from a plastic bottle. Production and Application
- DIY fence plot useful things
- 24.10.2014
- 2
- 37 511
Quite a long time ago we came across a video on the Internet that told how to make a rope from a plastic bottle, or rather, get it by cutting this bottle in a rather original way.
Why such a rope was needed was still unclear, but I was very pleased with the example of recycling plastic bottles, which constantly appear in incredible quantities in every home.
And then the time came when they not only improved the “tool/machine” for cutting rope from a bottle, but also began to come up with ways to use the resulting “product.”
First, about the device that cuts the bottle
on the rope:
The design has already been improved and makes it easy to cut a rope from a bottle - all you need is the design itself (which is small in size and easy to manufacture), a bottle and one free hand. In addition, the new design of the bottle cutter allows you to cut ribbons of different widths (from 1 mm to 1 cm) without rearranging the blades.
What is needed to create such a bottle cutter?
- a piece of corner or channel (a corner with a wall thickness of 2.5 mm), - a blade from a stationery knife, - 2 M5 nuts, - an M5 pin or a piece of wire, - a wooden spacer block. In the cut channel you need to drill a through hole for an M5 bolt like this so that this hole coincides with the mounting hole of the utility knife blade. Then, stepping back from the drilled hole by the width of the nut, make cuts (rather thick) in the corner of different lengths. The depth of the cut will limit the width of the tape.
All that remains is to assemble the bottle cutter. To do this, you need to insert a blade into the channel, and, aligning the holes, thread a pin through them (see video - the pin is bent in the direction of the slots) or wire. And, if you have a channel, open the channel walls with nuts, and if you have a corner, then clamp one of the corner walls with nuts.
To force the other end of the blade, insert a wooden spacer into the bottle cutter. That's all. It doesn’t even have to be fixed in a vice or other support - it’s a manual bottle cutter.
When you pull the tape, try to pull it towards the bottle - otherwise the tape will break within just a few centimeters.
Here are some
ways to use
rope from a plastic bottle that have already been invented: - the thinnest tape (1 mm) can be used on a donk, - to wrap the handles of hammers, axes and other tools, - to create reliable detachable connections, - to fasten/repair parts of garden furniture, - to knit reinforcement for the foundation, - have a lot of shrink rope for various household needs, - weave baskets and bags, - weave lampshades, - etc.
And finally, an idea came to mind that forced us to go shopping to buy parts to create a “structure for cutting a bottle,” since it became obvious why we specifically needed this rope.
FOR PICKUP.
Of course, the fence is temporary, but so necessary during the development of the site and the only possible one for the period of building a house and other more important matters: while there is still time and money to erect a “serious” fence of the site. Often, by the way, there is no need to fence all the available land: a plot near a house is one thing, a large vegetable garden in a village is another. So, let’s return to the fence. What kind of fence is this where you can use a plastic rope from a bottle? Imagine a wicker fence, different types of which we often see in “thematic” villages, parks, and various natural ennobled tourist places. They look beautiful, the material for them is available (branches, sticks), and when living in the village, it’s free (at the same time you will be able to clear the thickets along the now non-existent village street, and clean up the swamp, and the abandoned garden and... in general, there is a lot of material for building a fence you can find a lot without difficulty). There is only one concern left - how to securely fasten these “fence parts” together so that you don’t have to constantly patch it up. This is where a rope from a plastic bottle comes to the rescue. How to apply it and strengthen it (reliably soldered) is also shown in this video.
When heated, the tape thickens and shortens. The author of the video heats it up using a hair dryer. This results in a free, very strong and detachable connection of almost any parts.
All that's left to do is get down to business! And no screws or nails, which would cope with the same task with a much less reliable result.
A loop made of pet tape can withstand monstrous loads, does not rust/rot, it will not move or slip, you don’t mind using it, and it’s easy to get it at any time, and completely free of charge.
And here is the three-minute video itself from the miracle master lawyer Egorov on Youtube
—
Growing green onions on a windowsill is an activity familiar to many from childhood: such an “experiment” was suggested in natural history classes. Someone “completed the task and forgot,” but the thrifty...
Chain-link fences today have won the love of many owners of their own six hundred square meters. In conditions of shortage of funds, mesh has become an indispensable material that allows you to create a lightweight, but...
The podium is an original and convenient solution for small rooms. However, for the “open” spaces of a large room, the podium is a good opportunity for zoning. If you don't want to share...
Please note that if you are not logged in, your comment will be sent for moderation before publication. We recommend that you log in using your username or use authorization via social networks
Source: https://mdomik.ru/house-and-land/notes-on-arrangement/91-verevka-iz-plastikovoy-butylki-proizvodstvo-i-primenenie.html
Action No. 3 Making grooves for the blade
Marking the grooves for the blade
At a distance of 5 mm from the deepest point of the slot, several grooves for the blade are located. The distance between the grooves is also 5 mm.
Marking grooves to depth
The depth of the grooves is chosen so that the blade fits completely into them, so their depth should be 17 mm.
Cutting grooves for the blade
The block is again clamped in a vice and holes are made for the blade using a saw.
Appearance of a block with recesses and grooves
Next, you need to clean all the slots using sandpaper.
Using sandpaper, clean all recesses and grooves.
As a result, the block acquires a better appearance.
The bar acquires a better appearance
Machine for cutting tape from a plastic bottle
One of the global problems of modern society is waste disposal. Proper use of household waste will help you not only make the environment much cleaner, but also solve many problems without much effort and expense. We would like to give you one of these useful tips on how to properly recycle plastic bottles and what can be made from them.
Action No. 2 Making a central recess
In the center of the block it is necessary to make a recess measuring 50 mm.
Cutting a recess in a block
Next, the block is clamped in a vice and a recess is made in it using a saw.
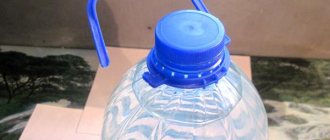
How to make a rope from a plastic bottle
Often on vacation or on a hike you need a rope. But not everyone takes it to the dacha or a short picnic. However, there is a way out of this situation - a rope can be made from improvised means.
Any outing into nature is not complete without plastic containers, and they can be used to create a cord.
If you want to learn how to make rope from a plastic bottle, check out the instructions below.
Manufacturing of the machine
If you often have to make rope from bottles, it is worth creating a special machine for making it. It will allow you to produce a large volume of products in a short time.
Necessary materials
You can buy materials for the machine at any hardware store. However, most of them can be found in any closet or garage. The set of materials for creating a machine for cutting plastic bottles includes:
- duralumin or any metal corner for the base (20-30 cm);
- the blade of a construction or stationery knife - it is best to use a construction knife, it is more durable;
- 2 M6 screws, 2 nuts and a washer of the same size for fastening;
- metal rod with a diameter of 6 mm.
To make the machine you will need a hacksaw for metal and pliers and a drill with drills for metal.
Preparatory stage
In the metal corner you need to make four round holes, two on each side. Their diameter must match the size of the screws. They should fit tightly in the holes. On one side, holes are made slightly smaller than the size of the knife, about 1-1.5 cm. Then, at the same distance, holes of the same size are drilled at the ends of the knife as on the corner.
Meanwhile, on the outer part of the corner, on the fold itself, you need to make a cut with a hacksaw. It is sawed at an angle of 15-20˚, the wider the slot, the thicker the rope will be. The slots are made just below the holes for attaching the knife. It is assumed that the cutting edge will be visible through the holes.
Note! On one corner you can make several holes of different thicknesses and produce products of several sizes.
The other two holes on the opposite side of the corner are needed for fastening the metal rod. Before this, it must be bent into the letter “G”, and the small bent part must be bent again to secure the rod with a nut to the corner at a right angle. The distance of the holes on one side of the angle should correspond to a small part of the bent rod. When assembled, it should “sit” tightly in the base of the machine.
Assembly
After the holes are drilled, you can assemble the machine. The rod is inserted into one of the sides of the corner so that its long part is on the same side as the outer part of the bend. The knife is attached to another part of the corner; its cutting part should “look” at the fold of the corner.
Advice! If you're going camping and don't want to take up space with a machine, take a potato peeler or a cheese knife with you. With their help, you can make a simple rope from a bottle, but such tools are not suitable for long-term work. In addition, they allow you to make a tape of only one thickness.
When the nuts and bolts are secured, the machine is ready for use. It is more convenient to work by securing the lower part of the angle in a vice. But, if you want to make a rope in nature or on a hike, the machine can be secured in the ground or in a hole in a board.
Using bottle rope
Rope made from a plastic bottle is a universal material. It can be used for both technical and creative needs. This material is used for:
- Tying reinforcement during construction. Plastic rope does not oxidize, unlike wire. In addition, special clamps for knitting are not cheap, which cannot be said about rope made from bottles.
- Tool windings. Often wooden handles slip off due to sweat and long work. Wrapping with rope is more reliable than electrical tape.
- Garden furniture repairs. In the garden or garden plot, wicker and plastic furniture is often found in everyday life. It is not very durable and often needs repairing. Transparent rope made from plastic bottles will firmly fasten small cracks and will not spoil the appearance of the products.
- Weaving baskets and handbags. Translucent household containers are practical in everyday life. In addition, they have an original appearance.
In addition to the above methods, decorative interior items and furniture are woven from rope. With sufficient skill, you can create interesting, and most importantly, unique products.
Source: https://bouw.ru/article/verevka-iz-plastikovoy-butilki
Manufacturing instructions
Tools
Further actions will depend on which bottle cutter option is chosen. For the simplest thing, you only need scissors: cut the bottle thinly and neatly in a spiral - you’re done.
For more advanced options, you will need tools: a hacksaw (for wood or metal), a vice or clamp, a knife (regular or stationery), a drill, a ruler, a hammer, a marker or a pencil.
Materials
The set of materials also depends on what model you want to make. You may need: a bottle cap, wooden blocks, nails or screws, a metal angle or channel, bolts and nuts, a long hairpin and other small items.
Bottle cutter drawings
The product of Maxim Egorov, a lawyer-inventor, nature lover and tireless innovator, is very popular. He has already improved his invention several times.
The authors went even further, proposing to attach the bottle cutter permanently and supplement it with a removable rotating drum for winding fishing line. One such option is Samodelki Vitmana.
Manufacturing process
As they say, it is better to see once than to hear 100 times. Therefore, in addition to the drawings, we offer a video. First - the simplest options, then - more complex ones; decide for yourself which one to choose.
- Bottle cutter from the cap.
The method is affordable and easy, but not ideal from the point of view of safety and convenience. From a wooden block and two nails.
Making a multifunctional fishing line-rope from a PET bottle
What distinguishes a survivalist from an ordinary person is not camouflage, supplies and a stash of knives in his pockets. The differences are primarily at the level of thinking. An ordinary person looks at a thing and uses it according to generally accepted stereotypes. And the survivalist looks and thinks, “How can it be useful to me?” And this applies to everything - even ordinary plastic bottles.
The methods of their use are very diverse: water purification, building material, and much more.
But our comrade Fyodor Stepanov (he has already repeatedly shared with us his cunning know-how, for example, making a smokehouse for fish from an army cauldron) discovered another effective application - from PET bottles you can make a particularly strong fishing line-rope . Moreover, he not only figured out how, but also made a video about it. Below are the text and words of the author.
This video is about making a fishing line from a plastic bottle. Not tapes, but ropes. PET tape is good for everyone, but it has a number of restrictions on its use.
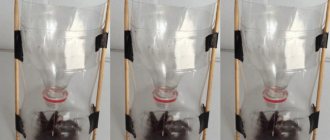
To make such a rope we will need a bottle cutter, a screwdriver and a hair dryer. The bottle cutter deserves special attention, thanks to its inventor, lawyer Egorov (this friend also made a kayak from construction film - we also have such an article. Editor's note), a link to a video on its manufacture is in the description.
First, we cut a ribbon from a regular plastic bottle. The thickness of the fishing line produced depends on the width of the tape being cut; the thicker the fishing line is, the wider the tape you use. Then one end of the cut tape must be fixed, for example, in a vice, and the other must be clamped in a screwdriver chuck.
We stretch the tape and begin to twist it into a rope. The tape must always be kept taut. If you let go, the ribbon will unravel. Now let's take a hair dryer and heat the tape along its entire length.
Due to the tension force, the heated section curls into a neat spiral, and when it cools back it will no longer unravel. One piece of advice - don't overheat. Polyethylene fluorophtholate easily vulcanizes and loses all its beneficial properties.
Please note: to ensure uniform weaving of the rope, the tape must be periodically twisted during the manufacturing process. That's it, the fishing line is ready.
If an urgent need arises, you can do without a hair dryer and a screwdriver. Using, for example, any stick as a crank, and a lighter or torch to heat the PET tape. But, it is better to use a more technologically advanced tool. Empirical observations have shown that a rope can be made from several layers of PET tape; such a rope is more elastic and stronger, but much thicker.
Now a few words about the use of such a fishing line-rope . As you guessed from the name, this line is perfect for trimmer lawn mowers and mulchers. The cost of industrial fishing lines is high, but here you get it almost free of charge and in unlimited quantities. In addition, the store may not have the type of size you need, but using my method you can make any size.
The fishing line is much stronger than PET tape of the same width and can withstand significantly more load. And thanks to the cylindrical geometry and rigidity, it easily fits into eyelets, grooves and sleeves. I'm sure there are a lot of uses for such a rope. From using it as linen to making bow strings and guitar strings from it.
Share your ideas on the use of fishing line-rope in x.
Author: Fedor Stepanov
Actually here it is. A completely ordinary plastic bottle turns into a multifunctional product that can seriously make life easier for our fellow survivor. So take this simple technology into your arsenal - you never know where you will need a strong rope.
Source: https://lastday.club/leska-veryovka-iz-pet-butylki/
Which bottle should I take?
The experience of practitioners has shown that the best results are obtained with smooth bottles . The transverse strips make it difficult to cut the line, but are usable. But longitudinal reliefs slow down the rotation, the tape breaks and breaks.
There is no clear answer regarding the color of the source material. Some fishermen consider colorless plastic to be optimal, while others successfully fish with colored fishing line. Its advantage is that donks are clearly visible from afar, and there is no risk of losing them. For commercial use, color is not particularly important.
With careful work, you can cut more than 30 meters of millimeter fishing line from a 2-liter bottle.
How to make thread from a plastic bottle
The master-host of the channel “Levsha Uralsky” figured out how to make threads so thin that if you collect a strand of them, you will get artificial hair from a plastic bottle. Can you compare them with artificial hair, they are practically no different. Both weight and structure. Where can these threads be used? They are useful in hairdressing for making hair jewelry. For handmade dolls. For making brushes. You can think of other uses. The video shows which bottles produce which threads and hair. Green, blue, acid green, white, brown and turquoise.
The next video is about how to make thread from a bottle.
For this you will need a screwdriver. Ordinary wire. The device is described below. Take the wire and bend it in half. Measure 7 - 8 cm. Bend each side 10 cm. Then up the same amount. You can vary the sizes.
The device clamps the screwdriver. It is important that it rotates more or less correctly. An artificial thread is wound around it.
Craftsmen buy inventions from the best Chinese online store.
Useful lifehack for home use
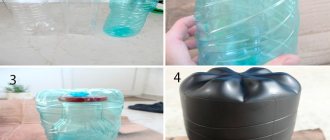
Now it's time to move on to more useful things that can be useful to everyone. Surely everyone knows the problem of finding small objects on the carpet, especially if it has a large pile. And if scattered metal nuts and screws can be found with a magnet, then with plastic and rubber bands it is more difficult. Of course, you can sit for a long time collecting them manually, but it is better to do it differently by making a special attachment for the vacuum cleaner.
The plastic bottle is cut 5-7 cm from the neck - this will be the basis of our nozzle. You can put it aside for a while and work on the filter. We use part of a woman's stocking as it. And my advice to you is to ask your wife for permission to do this. I had the temerity to take this piece of women’s clothing on my own and use it for my own purposes. Believe me, this does not lead to anything good. To this day, my wife reminds me of what a bad person I am and how long she has been looking for exactly these tights.
Be careful, it’s better to ask than to ask for forgiveness after a long time
Let's start making a vacuum cleaner attachment
So, now all the elements are ready, all that remains is to pick up the tape and start making the nozzle. For this work, you can use any adhesive tape, but after several attempts, I came to the conclusion that paper masking tape or stretch (stretch) tape, which promotes greater tightness, is best suited for such purposes.
Part of the plastic bottle is ready, we cut the tights and proceed to the nozzle itself
Taking the cut-off part of a plastic bottle in your hands, we pull a stocking over it, which is fixed to the neck with adhesive tape. It should be wound until the nozzle fits tightly into the vacuum cleaner hose. Most often, this does not require a lot of tape - modern vacuum cleaners are equipped with hoses that are not as wide as their Soviet predecessors were equipped with.
We fix the stocking on the bell using adhesive tape
How it works: an example of using the nozzle
Now let's figure out when such an attachment can come in handy. A common example. In a plastic box from under the buttons, the owner contains small rubber gaskets (the kind used in vapes). There is a need to replace something that has become unusable. The owner opens the box. At this moment she slips out of her hands. As a result, all the pads scatter on the high-pile carpet. The gaskets were taken as an example. It can be anything, even beads for weaving bracelets and other small items for women.
The box slipped out, the gaskets fell apart, will have to be collected
There are no questions, you can sit down and assemble everything manually, but this will take time. In addition, such a number will not work with scattered beads. It is in this situation that a vacuum cleaner attachment made from a plastic bottle and stocking can help out. We stick it into the hose, turn on the home assistant and walk over the area of the carpet where the trouble occurred. If the owner is dissatisfied with the result, not everything has been collected, we simply repeat the action.
This is the result that can be achieved in 5 seconds where manually it would take at least 15 minutes
DIY threads from a plastic bottle
- Materials.—Plastic bottles—Blade from a stationery knife—Plate—Two screws and 5 washers—Nail 120mm
- — Copper or aluminum wire.
- Tools used by the author - Screwdriver
- — Pliers
- - Gas-burner.
- Scissors
The manufacturing process. Still, in this article there will be two homemade products. The first is a bottle cutter that is already very well known to everyone. Its simplest version is presented here; there is no point in considering more complex variations, the task is a little different, but you can’t do without it. Here are the materials Roman used.
First of all, on one side, make a lining from two washers, then press the blade to the board with a self-tapping screw.
On the second side, he makes a clamp for the tip of the blade, again placing two washers and pressing with a self-tapping screw and a third washer.
That's it, the simplest bottle cutter is ready!
Now, having cut off the bottom of the plastic bottle, and pressing its upper part, pulls the ribbon, unraveling the entire bottle. In this case, the washers act as stops.
- This is how the plastic tape turned out.
Roman proceeds to the second homemade product, the actual target one. All tools and materials.
- First, bend the wire in half, then bend it so that you get the letter T with a short base.
- Now bends the edges so as to create a “slingshot” shape.
- Everything is ready, the resulting slingshot is clamped in the screwdriver chuck.
The technological process itself begins. Lights the gas burner. He heats the tip of the nail and wraps a melting strip around it to create a molten drop of plastic at the end.
Touching the tip of the slingshot with the molten drop, he starts the screwdriver. This is how the thread is drawn out; it hardens very quickly in the air due to rotation and low thickness. To obtain the required volume, repeat the procedure several times.
Roman removes the wound threads, trims defective drops and edges with scissors.
These are the threads we got. Yes, their length is small, but they can be used in design; their color will depend on the original color of the bottles. If you place them on the surface and heat them until they melt, you will get interesting patterns. The same method can be used to glue two surfaces with low heat capacity.
Let's block ads! (Why?)
Source: https://soveti-po-remontu.ru/blog/43694870742/Niti-iz-plastikovoy-butyilki-svoimi-rukami
Step #4 Installing the Blade Holders
To prevent the blade from falling out, it is necessary to install clamps. Two nails about 80-100 mm long are ideal as such. They should be hammered 5 mm below the level of the recess and bent upward.
Expanded recess view
After this, it is recommended to expand the recess made at the beginning. This is necessary so that the bottle moves freely when cutting and does not cling to anything. You can make an extension using a saw.
Bottle cutter is ready for use
Operation of the device
To cut a bottle, you need to install a blade in the bottle cutter. It is installed with the cutting side down.
The bottle is installed in the slot
The next step is to install the bottle into the slot.
Cutting by pulling the tape towards you
Cutting is done by simply pulling the tape towards you.
VIDEO: CUTTING RIBBON FROM PLASTIC BOTTLES | How to do it?
CUTTING RIBBON FROM PLASTIC BOTTLES | How to do it?
Device for cutting plastic bottles into tape [Instructions]
Feedback from our readers is very important to us. Leave your rating in the comments with reasons for your choice. Your opinion will be useful to other users.