Ceramic floristry
This direction of applied art is becoming increasingly popular; clay products are in good demand. Plastic roses can be used in different ways: in flower arrangements or handmade decorations, but in any case they will look beautiful. Moreover, there are no two identical flowers made of clay. They may be very similar in appearance, but not a single craftswoman can achieve absolute identity. Yes, there is no need for this - after all, handmade flowers created from plastic, as well as bouquets made from them, delight connoisseurs of this type of art.
Clay flowers are used to effectively decorate various interior objects:
- vases;
- panel;
- wall clock;
- furniture and other items.
In addition to interior objects, plastic roses can be used to decorate gift wrapping, women's jewelry and accessories, jewelry boxes, and even wedding bouquets. By the way, the design of wedding events is now quite a popular area, so the profession of a ceramic floristry master has become popular.
However, different types of clay are used for different purposes. Thus, clay, which requires firing, is used in the manufacture of beads, hairpins and headbands, handbags and brooches. And the one that has the ability to harden on its own is used to create flower arrangements where the petals have a given shape.
Modeling with children
Sculpting with clay is not only interesting, but also useful, because this activity can be one of the great ways to spend time together with children. Moreover, their age is not so important - even a very small child can knead and roll out clay. And even little fidgets will enjoy squeezing plastic out of the extruder. They will watch, as if enchanted, how the parts they create turn into a beautiful flower. It is worth noting that compositions made from such flowers “live” for quite a long time and can be perfectly preserved for many years.
So, we have already found out that even a beginner can try to make flowers from plastic without much difficulty. Master classes for beginners are easiest to find on the Internet; there are also video lessons and step-by-step training. One viewing is enough to create the simplest flower.
Learning to sculpt
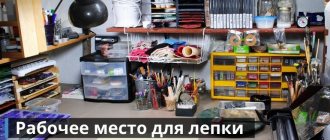
In the process of sculpting, you will need not only hands, desire and material, but also a comfortable workplace, as well as tools . Let's look at them in a little more detail:
- a construction/stationery knife with replaceable blades for conveniently cutting pieces of plastic and cutting out individual elements;
- working surface. It can be plexiglass, tiles or a plastic modeling board;
- molds of different sizes (cutters) for cutting flat shapes from a rolled sheet of clay;
- stacks. Needed for making drawings on clay blanks, as well as for sculpting small parts;
- acrylic rolling pin. It is transparent and is good for rolling out clay;
- extruder or syringe with nozzles. With its help, you can squeeze out sausages of various shapes and thicknesses, forming compositions or some flower elements from them;
- stamps and texture leaves. They are needed to create a realistic pattern on the surface of leaves and petals, so that the resulting flower is practically indistinguishable from a living one.
Making a small rose
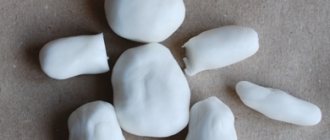
Let's start the creative process by making a small rose. How to sculpt from polymer clay instructions for beginners:
(Step 1)
- We select the material and roll six balls from it. We take one of them in our hands, make one edge thin and the other a little thicker, and twist this blank into a rose petal.
- We put the resulting workpiece aside for a while and perform an identical manipulation with the remaining balls.
(Step 2) - After making, we lay all the petals on one side. We take the middle of the rose and begin to gradually wrap it in petals. It is important that each subsequent petal overlaps the previous one.
(Step 3) - After collecting all the petals, press the edge a little and get a small stem. We take the product by the leg and carefully wrap it with the outer petals. And finally, carefully trim the leg.
So we made a small rose. You now know how to make a rose from polymer clay in the simplest way, and this knowledge will help you make more complex options.
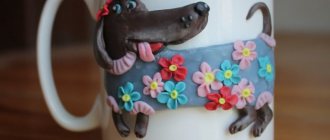
The finished product can become a decoration for a doll, which we previously made from polymer clay
DIY clay
It is not always possible to purchase clay for modeling in a store, and even more so, the desired shade may not always be available. Therefore, there are ways to create plastic surgery at home. To do this, you will need 5-6 drops of baby oil and one teaspoon each of flour, cornstarch and all-purpose white glue. Oil is added to the ingredients mixed to the consistency of clay to eliminate excess stickiness. Acrylic paint can be given the desired shade by dropping it onto a piece of plastic mass and mixing it in your hand.
LiveInternetLiveInternet
In the life of every polymer maker there comes a moment called “I learned how to sculpt roses!” Hurray, comrades! Immediately, earrings are made - 2 pieces, a ring - 1 piece, hairpins and something for girlfriends - an indefinite number of pieces, and the question slowly appears over the horizon: “So what, exactly, is next?” Usually, at the moment of fascination with roses, there is still no great skill in modeling and assembling, but there is a great desire to create. Today I will show you how to make a simple and, in my opinion, spectacular decoration from these very simple roses made of polymer clay. Go?
We will need:
— A block of polymer clay. I chose black as the most effective color, and then it’s up to you what color your roses will be. Why I like black here is because no other color hides the material from which the thing is made. Any. You know it yourself: a black knit top or a black turtleneck that costs mere pennies can look royal in the right environment. And we're going to make an evening decoration, and who cares what it's made of.
— Tools for sculpting: a blade, needles to make holes, I sculpt a rose on a toothpick, this way the petals wrinkle less, but you can do it as you prefer.
— Machine “Gilette”, blue. More precisely, the handle is from him. With its help we will make leaves.
— Varnish for plastic. Here's the thing: I don't varnish the black plastic in this product. I tried it. In no case should it be glossy; it turns out to be cheap Chinese plastic. Matte - well, better than glossy. But without varnish is best. In general, this is the only plastic product that I do not varnish and will stand my ground, and you decide for yourself whether to varnish or not.
- Fishing line, some beads, some beads - whatever you can find, as long as it matches the color, the clasp for the necklace.
Something like this:
It's time to explain the name of the master class. This is what the previous photo and 70% of the MKs made for this actually looked like:
My six-month-old cat, Marusiy, helped me very actively in sculpting and assembling, and I had no strength to get rid of him. Fortunately, my friend is already trained and doesn’t jump onto the table with beads at a run (and it happened, yeah...), but casually walking along the window sills across half the room and, as if by chance, neatly sitting down right in front of the tripod - this is our everything. That's how they worked...
So get the cat out of the room, and we'll sculpt. Let me make a reservation right away: I won’t teach anyone how to sculpt roses. There are a ton of lessons online, and I still can’t tell you any better than there. Sculpt as you know how. The main thing is more, 15-20 pieces, and smaller, smaller! The largest rose in my necklace is approx. 2 cm, the smallest - 1 cm. Stuck on it? Now let's take the needles. The ideal option is gypsy or “half-gypsy”, plump and long, it will be easier to work. And in each rose we make two holes crosswise. Like this:
Does not work? Are the roses wrinkled? Leave them alone for half an hour, or better yet, put them in the refrigerator, just cover them with something, after all, there is food in there and we can eat it later! Everything will work out, just be careful. I cut off the “tail” of the rose; we need a flat back side.
We also need leaves. But I was so carried away with raising the cat that I forgot to film the process. If you haven’t seen this master class yet (it’s been circulating on the Internet for a long time, look it up on Google), I’ll explain it on my fingers: We press a piece of plastic to the surface of the handle of a Gillette machine, female, blue, and we get an imprint, like two drops of water, similar to the veins of a leaf. Then just flatten the tip of the leaf with your fingers - and you’re done. Just don’t forget to wet the handle of the machine so that the plastic doesn’t stick. We need about 9-11 leaves.
Now attention: put the leaf on the table and look at it. We need a hole in it PARALLEL TO THE TABLE. So that the hanging leaf looks at us with its front side and not its side.
Bake. We take out fishing line, beads, all sorts of pretty beads. I have Czech beads, but in this decoration they play a very supporting role, so even ordinary “Chinese”, I think, will be quite suitable. We drive away the cat. Once again we drive the cat away and begin to lay out our beautiful roses and leaves on the table. From largest to smallest. Like this:
Do you see how I have beads and beads in my children’s palette? Very convenient, by the way. Unless the cat is nearby, of course...
There are fewer leaves than roses. That's how it's meant to be. I tried to make leaves until the very end of the decoration, but it turned out to be some kind of prickly hedgehog. So a little bit of good stuff.
Now the fun part begins - assembly. We take two forests, each about a meter long. For convenience, you can put bead needles on the ends, or you can do without them. And we attach the most beautiful leaf to the largest rose. We put the leaf on the fishing line, on each side of it there are 2-3 beads (see here for yourself, the size of the rose will be visible), and we thread the ends of the fishing line into the rose, into the adjacent holes, so that they go crosswise inside. I explained it confusingly, but here I drew it in Paint as best I could, so it’s clearer?
And this is what it looks like in the photo:
Then you need to thread the second line in exactly the same way. Then “their paths will diverge,” but for now we’ll do the same thing. Further. There are two lines coming out of the hole in the side of the rose together, right? On one of them, conventionally the “bottom” one, we put two beads, a leaf and two more beads, and thread it into the second rose. On the second line, conventionally the “upper” one, we simply put three beads on and thread it also into the second rose, but into a different hole, perpendicular to the first line. And on the other two lines coming out from the other side of the central rose, we also put on beads, a leaf and thread them into the rose. Paint almighty, help me explain!
Or like this:
Let's pull and pull the forest, this is what we get:
When you collect, do not be afraid that the roses and beads will not lie tightly next to each other, they will try to move apart along the fishing line. It's OK! In the end everything will tighten and connect.
Then we continue everything exactly the same. We put two beads, a leaf and two more beads on the line that now turns out to be “bottom”, on the “top” line we put three beads and cross both lines in a new rose. We continue this way until the leaves run out.
I hope everyone understands that the size of roses should gradually decrease?
And then like this:
...Hello to you! My assistant came:
I called the children to help, donated the cat, and am collecting further. The leaves are over, we collect only the roses: there are still 3 beads on the “upper” line, and 4 on the bottom line. Without a leaf.
This is an important point. String at least 10 beads, it’s up to you! But I want the beads not to catch the eye, so I attach the roses close to each other. There will be more beads - there will be beaded “bridges” between the roses. If you like it, do it with them. And further! There are always fewer beads on the “top” line, due to this the necklace is smoothly rounded.
Collected all the roses.
We try on the necklace in front of the mirror, estimate how much length is missing before the clasp. We fill in the missing length with beads and beads - just as you like.
We fasten the clasp. I definitely make an extension chain - such decoration in the neckline of the dress should fit perfectly.
Where is the cat at this time? In other photos:
And this is what I got:
Well, not without this, of course:
Here's a necklace. And these are its variations in other colors, burgundy (it went to Holland, by the way), here it was twisted on a girl, but there are no other photos
And sunny - as a gift to a little girl
That's all. Everything is very simple. With photography, checking lessons and the active help of the cat, assembly took me 2 hours, modeling (without the cat) took me a little over an hour. So in a couple of evenings you can easily make yourself such a decoration. In which I wish you good luck!
Your Asenka.
Modeling for beginners
For beginners, polymer clay flowers are the first step into the world of ceramic floristry. One of the first flowers that beginners learn to make is usually a rose from polymer clay. The master class on its creation includes several stages.
Preparation of tools and materials
To create a rose you will need:
- red and green acrylic;
- polymer self-hardening clay;
- floral wire from No. 9 and above;
- stack;
- base for the bud;
- rose petal and leaf mold;
- nail scissors;
- leaf, petal and sepal cutters;
- latex glue or PVA.
As a blank, you can use ready-made foam balls from a craft store, or cut them yourself from polyurethane foam. The second option allows you to use mass for modeling more economically. So, it's time to learn how to make a rose from polymer clay.
Beginning of work
Add a little red paint to the white plastic and mix until the color becomes uniform. Then take a small piece of plastic and roll it into a ball, which must be flattened with your fingers. The clay should be kneaded until it is as thin as possible. Spread the lower edge of the petal with glue and glue it to the workpiece, forming a closed bud.
Formation of a flower
On top of the resulting bud, screw another 4-5 petals with larger and longer edges that could hide the workpiece. The edges of the petals need to be curled outward. When forming large petals, it is better to make veins on them using silicone molds. To do this, a piece of mass for the petal is clamped and squeezed between the molds. Using glue, large petals are glued, starting from the bottom of the foam base. During the process, the petals can and even need to be placed on top of each other - this is how the round flower head is formed. It is important not to forget to curl the edges of all the petals outward in a stack after they are glued.
Final stage
For the final stage it is necessary to complete the sepals and stem. Using the method already described, you should paint a small piece of plastic green. Form the mixture into a droplet with a sharp edge. Using nail scissors, the resulting drop should be cut into about 5 parts to the middle. Using a stack, each “tendril” needs to be flattened as thin as possible and additional cuts of different lengths should be made on each of them. Make imprints on the resulting leaves using a relief mold.
Assembling a heart from roses
All flowers and leaves are molded, dried, let's start assembling.
We will need the following materials and tools:
- oasis base (better for dried flowers, it’s gray, but I haven’t found a heart-shaped base for dried flowers)
- thick wire on which we will plant flowers (I had nine)
- in a good way - wire cutters, but I don’t have them, I use scissors
- tape
- round pliers
- PVA glue
Attaching a flower and leaves to a wire stem
It turned out that each long wire was cut into 5 parts. During the assembly process, it turned out that the wires were a bit long, so I had to trim them a little.
I always prefer to cut the wire with a small margin: cutting off the excess is not difficult, and if the wire turns out to be short, there is no way to fix it.
Use pliers to make a loop at the end of the wire.
Insert the wire into the center of the rose. We try not to damage the central curl:
The loop should hide inside the rose, it will keep the flower from accidentally being shaken off
For some reason, a wire simply coated with glue and stuck into the base of a flower does not always hold the flowers well. That's why I make loops like this. They are sometimes visible in flowers, but I prefer that rather than risk that some flowers will simply fall off due to random movement. This bouquet will not be in my home, it is intended for a gift, and I want to protect the recipient from unpleasant surprises in the form of “the base is separate - the flowers are separate.”
We insert wires with loops into all the roses:
We select several small roses (I got about 10, the rest I left as is). Now we will wrap leaves to them. To do this, tear off or cut off a piece of tape. The length depends on how long the stems are planned to be connected. For me it is 5-6 centimeters. Take a piece of tape and the ends and stretch it to the sides: this will make it sticky.
We wrap two wires with tape.
We do this with all the selected small roses. In principle, you don’t have to wrap the leaves around the flowers, but it’s easier for me to then distribute the remaining leaves more evenly. This ten is like a support grid.
While working, I suddenly realized that I didn’t like the black plastic base of the heart. So I cut a strip of felt and glued it to the plastic edge. (Instead of felt, you could use ribbons, fabric, or roll out a strip of clay, but I wanted to use felt because it is somewhat similar to moss).
Here's what happened:
Roses made of polymer clay
Originally posted 2018-08-29 11:02:47.
Cold porcelain technique
Creating realistic flowers from polymer clay is a popular hobby these days, often called "ceramic floristry", "polymer floristry", "realistic floristry" or "floral sculpture".
This delicate art originated in Japan more than twenty years ago, where the first schools teaching flower sculpting were opened.
To create flowers, two fundamentally different types of clays are used - cellulose-based and starch- and polymer-based. The first type is conventionally called “marshmallow clay”, the second - “cold porcelain”.
Both types of clay harden in air without heat treatment or additional intervention and are therefore also called self-hardening plastics.
The drying speed of such clays depends on the thickness of the rolled layer and the degree of humidity in the room.
The special properties of these materials make it possible to achieve maximum similarity and realism in colors, subtlety and grace in work.
In the process of sculpting flowers from polymer clay and other products, you need to take small pieces of clay from a pack, paint them and wrap them tightly in polyethylene so that the material does not deteriorate.
When sculpting, you need to periodically add a small amount of baby cream (or any fatty cream without fragrance) to the clay - this way you can work with the material longer and not be afraid that it will begin to dry out and crack.
An open pack of cold porcelain must be stored without access to air; it is advisable to wrap it in several layers of polyethylene and place it in an airtight plastic food container.
It is also advisable to wrap marshmallow clays tightly in plastic, then wrap them in a damp cloth and put them in another plastic bag.
This will prevent the clay from hardening and weathering for a long time.
Polymer clay, also called cold porcelain, is denser to the touch than cellulose clay, a little tough to sculpt, and is rolled out into the thinnest layers possible, which allows you to achieve realistic flower details.
As you can see in the photo, flower petals made from cold porcelain after drying become translucent, elastic, flexible, hard and smooth to the touch:
The product hardens completely within several hours, depending on the size and thickness of the parts.
When hardened, the unpainted material gives a yellow or gray tint, slight transparency and takes on the appearance of plastic; to give the petals greater velvety, naturalness and tenderness, a small amount of white oil paint (titanium white) is added to the clay, or cold porcelain is mixed with a piece of white marshmallow clay, which gives it additional softness and whiteness.
Instructions for working with clay
To make the creative process as enjoyable as possible, and to make your products beautiful and neat, when working with polymer clay, follow the following rules.
Safety precautions
- work only with protective gloves;
- do not bake objects made of polymer clay at the same time as cooking;
- do not exceed the temperature range, as when overheated, the material releases toxic substances that can cause poisoning;
- After baking, ventilate the oven and kitchen.
Adviсe
before you start creating clay products, you need to knead the material well with your hands, so it will become warm and pliable, which will simplify working with it; do not allow air bubbles to enter, this may deform the finished product; To avoid drying out, store the bag with polymer clay tightly closed; the sticking of specks to the clay will help prevent talc; do not remove crafts from the oven immediately after baking, as cracks will form with a sharp temperature change; finished polymer clay crafts are fragile and therefore require careful handling.
Today, polymer clay modeling is a popular form of creativity among adults and children. This process is very exciting and once you create your first clay accessory or decorative item yourself, you won’t be able to stop!
From this article you learned what polymer clay is, what tools are needed to work with it, how to prepare clay yourself, how to make flowers, and also received tips on how to properly work with this material.
Come up with and implement your ideas in clay products to decorate your home, as a gift to friends, or for sale.
Success in creative work!
Making flowers
To quickly learn how to sculpt flowers yourself, you need to start with simple work in order to understand the basics of working with such a capricious material.
For beginners, it is best to start learning how to make simple flowers such as callas. To make this flower, you need to take clay of two matching colors, latex gloves, a stationery knife and stacks. Instead of stacks, you can use simple toothpicks.
Roll both pieces of plastic into long sausages and wrap one of them around the other. After this, roll the clay and one ball. Divide it again into 2 balls, and then into 2 sausages. Tear them into 3-5 pieces and roll into 1 ball. This will help you achieve a marbling effect.
Next, carefully cut the ball into 2 equal parts. Form them into 2 pancakes with a slightly elongated edge. Lightly pinch it with your fingers. Fold the bottom edge into a funnel shape and slightly open the flower.
For more complex flowers, the petals must be cut individually with a knife. To give flowers a more natural look, you can give them structure using molds or stacks.
You can also use acrylic paints to tint plastic. Beautiful ideas for flowers and their manufacture can be gleaned from sites dedicated to the manufacture of such products.
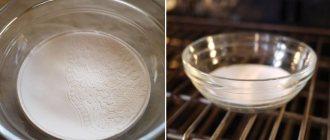
Recipe for making polymer clay at home
If you don’t have ready-made clay, you can make it at home. But do not forget that homemade clay cannot be called a full-fledged analogue of purchased material, since it will only vaguely resemble it, mainly due to its softness and ability to harden. The composition will be completely different.
To create a mass for modeling at home you will need:
- corn or potato starch (with corn starch the mixture will be lighter) – 100 g.
- glue – 100 g.
- lemon juice – 2 tbsp.
- hand cream or Vaseline – 1 tsp.
- mineral oil (for example, baby oil) – 2 tsp.
- heat-resistant container and mixing spatula.
Method of preparation: combine starch, glue and Vaseline, mix everything well until smooth. Add lemon juice and oil. Place a heat-resistant container in a water bath at moderate heat and, stirring constantly, bring to a mushy consistency. Remove from heat and mix the resulting mass thoroughly. Let cool completely. To avoid drying out, store in a cool place, tightly wrapped in film.
If you need to make the material colored, then add pigment during the kneading process. You can also paint finished work. It is advisable to use acrylic paints and fix the result with polymer varnish.
How to make a keychain with your own hands - many master classes and creative photo ideas
Do-it-yourself foam crafts - features of work, master classes, photo examples