Smeshariki, like many other modern cartoon figures, can be easily molded from plasticine, on a sheet of cardboard (flat figures), in the form of three-dimensional figures and using additional objects, if you use the step-by-step instructions offered in the master classes.
The modeling process is quite monotonous, and to make it interesting for the child, teachers choose stories or characters that are familiar and loved by the children whom they see almost every day.
Despite the simplicity of the event, in order for sculpting with children to be successful, you need not only to organize the process correctly, but also to prepare all the necessary materials and tools in advance. This will help you not to be distracted while working and do everything in the best possible way.
Is it difficult to make smeshariki?
This is an important question.
But he has a simple answer: you need to apply a little patience and imagination, and then everything will work out! Those who have already made Smeshariki think that making such dolls is fun, amusing and, most importantly, useful! You can make them for both children and adults. For example, some Smesharik will be a wonderful decoration for a car window.
Or you can decorate your home, your room, a children's corner, even your pediatrician's office with it! The doctor will definitely appreciate such a gift from a little patient and will be very grateful to him.
Description of crafts for a 3 year old child
Smeshariki is a children's animated film that has already become a kind of classic. Invented in Russia, it was so warmly received by children that it is popular all over the world. When you arrive somewhere abroad and turn on the TV, or simply find a video on the Internet, you can find them in a foreign language. This popularity is not accidental. Little heroes solve the problems that arise before them with childish seriousness. Even if not in the same way as adults, but in a language that children understand.
The simple, understandable form of the characters also gives special emotional power to such popularity. Therefore, a craft for 3-year-old children will not be difficult. The round body of the heroes can be made from any vegetable or fruit. This will help not only save on materials, but also give the work the effect of novelty. In the future, the child himself can sort out the fruits in the refrigerator, or on the window, say what it is, and what it is called. It’s just that learning itself at this age is tiring and from the child’s point of view does not make any sense. When this is wrapped in a kind of game, the baby, without knowing it, will strive to learn something new and absorb information like a sponge.
You don’t have to worry about the final result, since our specialists have prepared a job that has no level of complexity. Depending on your child’s abilities, you can independently bring something new and your own into it.
How to make smeshariki?
Crafts can be made from disks; you can make a Smeshariki craft from plasticine. Smeshariki made from threads are also interesting! In any case, Smeshariki’s children’s crafts will be of interest to parents, friends, and the child himself.
Templates for Smeshariki crafts are available on the Internet, they can be different.
Photos of the Smeshariki craft are needed in order to know what products should approximately be the result. You can use them as a guide when preparing Krosh, Nyusha or another character.
Smesharik Hedgehog their plasticine
This lesson shows how to make Smesharik from plasticine Hedgehog - the most melancholic and reasonable character. It doesn’t matter that the Hedgehog always gets upset over trifles. He has friends whom you can also mold using the master classes presented below.
To sculpt Smesharik, prepare:
- plasticine in pink, purple, lilac shades;
- stack.
How to make Smesharik the Hedgehog step by step
- To work, you will need plasticine in a pink and purple color scheme, since the Hedgehog itself is bright pink, its spines are purple. You will also need to mold some additional details.
- Knead the selected plasticine bars step by step to make it easier to soften and knead small pieces.
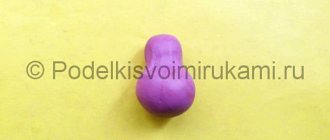
- Make a central ball from bright pink plasticine - the head and torso of the future character. And then you will need to reproduce the appearance of the Hedgehog.
- To make the glasses, create 2 white cakes of the same size. Cover them with thin purple sausages. Add the pupils and make thin sausages for the arms.
- Glue 2 small round ears onto the ball. Attach the eyes in the glasses in the center, bringing them together. And move the arms that you made from the frame up towards the ears.
- Also make the spines in the form of small cones, that is, droplets of approximately the same size. Use dark purple plasticine for this.
- From the same bright pink plasticine, fashion 4 paws. Glue them on the sides and bottom. Press down on the figure from above to make it stable.
- All that remains is to glue on a small nose and cut through the mouth with a stack. This will make it more accurate.
- It turns out to be a wonderful Hedgehog. He looks a lot like his plasticine character. And you and your child can even act out the plot of a plasticine cartoon, because it’s very nice to create cartoon characters with your own hands.
How to make Nyusha with your own hands?
The process of creating children's crafts takes place in several stages:
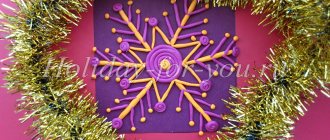
- On sheets of colored paper we make blanks for the eyes, heels and mouth of the animal. Carefully cut out the resulting parts. To make the blanks ideally shaped, you can use templates downloaded from the Internet.
- Now in the middle of the through hole we place the character’s snout and eyes. We glue these parts using PVA glue. Another option for creating crafts involves gluing the disk on both sides with pink colored paper.
- Decorating the pig's head. For this we will need white paper blanks in the shape of daisies. Carefully glue the flower arrangement.
- Cut out legs and arms for a cartoon character from red paper. We fix the parts with glue.
- The photo of Nyusha’s craft shows the finished product.
This composition can be used to decorate the interior space in a nursery or hang over a child’s work area. You can fix the craft on a vertical plane using double-sided tape.
Volumetric figures of Smeshariki made of plasticine
You can make Smeshariki from plasticine step by step not only by making flat pictures on cardboard, but also by making three-dimensional figures. The sculpting of such figures is no less interesting and freer in the choice of sizes. The development of spatial thinking is another advantage that comes from such work.
Hedgehog
- The sculpting of the Hedgehog begins by rolling out a large ball of plasticine, which will be the body. Arms and legs are made from appropriately sized pieces of plasticine and glued into place.
Sculpting of the Hedgehog's head, arms and legs (Fig. 11).
- Cone-shaped Hedgehog needles of the appropriate size and in the required quantity are sculpted from blue plasticine. Glue the needles evenly into place.
Hedgehog needles (Fig. 12).
- The next step is to make additional parts: two red triangles for the nose and the tip of the tail, the tail itself in the form of a flat rectangle. Make two small balls and two small sausages of the same color as the body for the ears and eyebrows, two small white circles for the eyes.
Two black small balls will represent the pupils of the eyes. Two short blue sausages are the arms of the glasses, and two long rolls are bent into rings to create the lenses of these glasses.
- Gluing the tail. Additional details (Figure 13).
Before gluing additional parts, draw a mouth on the Hedgehog using a stack or a toothpick.
The finished Hedgehog looks exactly like in the cartoon (Fig. 14).
Making the Hedgehog is finished.
Kopatych
The Smeshariki figurine of Kopatych is made according to the same pattern as the Hedgehog figure: a large ball for the body is rolled out, and Kopatych’s arms and legs, made from 4 sausages, are attached to it. Kopatych's head is covered with a hat made of two flat round pieces. The thinner and wider circle represents the brim of the hat, and the thicker but smaller in diameter represents the hat itself.
Start of assembly of Kopatych (Fig. 15).
After gluing the hat, roll up a medium-sized ball and glue it in place of Kopatych’s tail. Four more balls of this color are made - two large ones for the cheeks, and two small ones for the ears.
Tail and other additional parts (Fig. 16).
Two white round balls are made for the eyes, small black balls are made for the pupils. Two small black sausages are Kopatych’s eyebrows, and a brown potato-shaped sausage is his nose.
Ready Kopatych (Fig. 17).
At the end of the work, just like Hedgehog, Kopatych’s mouth is drawn with a stack. The outline of Kopatych’s mouth should not be overly joyful, because, as you know, this hero is usually dissatisfied with something or misunderstands something.
Losyash
The technique for creating Losyash from plasticine is the same as that of Hedgehog and Kopatych. Roll out a large ball of plasticine of the chosen color - the body of Losyash.
- Having molded two medium-sized balls of white plasticine, they are slightly flattened and stuck to the body to create eyes. A triangular sausage in the shape of a nose is made from the brown mass and stuck in place.
Body, eyes and nose of Elk (Fig. 18).
- Having rolled out two small balls of black plasticine, make pupils by sticking the black balls closer to the nose onto the eyes. Having made two thin sausages from plasticine of the same color as Losyash’s body, glue them, straightening them with a stack, above the eyes - you get eyebrows. The nostrils are made in a stack.
Making pupils and eyebrows (Fig. 19).
- Brown plasticine is selected for making horns. They are formed in the form of 4 sausages of the required size, which are then glued together in the form of the letter “Ш”. The finished horns are glued to the head, turned in opposite directions, with the same sausage that represents the “tail” of the letter.
- From plasticine of the main color, they make figures of legs in the form of hearts, and handles in the form of even short sausages. Each sausage-handle has a stacked dent on one side of it, representing a Moose’s hoof. A mouth is made from a small sausage of the same color as the nose.
Horns, legs and arms of Losyash (Fig. 20).
- Having glued all the parts into their places, the final result is obtained - the Losyash figure is ready.
Ready Losyash (Fig. 21).
Nyusha
The process of making a Nyusha figurine is a little more complicated, but the technique is the same.
- The first step will be to roll out a large ball for Nyusha's body, two white round balls for the eyes, and a pink, slightly flattened ball for her nickel. The creation of the nickel is completed by pressing two dents, representing the nostrils, with a stack.
Head, eyes and nose (Fig. 22).
- Small balls of black plasticine are used to make the pupils. Eyebrows are made from uneven sausages (the middle of the sausage is thicker, the edges are thinner). Using a stack, thin sausages representing eyelashes are attached.
Creating Nyusha's face (Fig. 23).
- Having rolled out 2 round pancakes from the plasticine chosen for making the hairstyle, glue them symmetrically on the head. 4 balls of suitable sizes are made from the same color, and the size of each next ball should be slightly larger than the previous one.
To create a braid, slightly flatten the two largest balls, collect them into one piece with the rest and stick them in the place where the round hairstyle touches.
Hairstyle (Fig. 24).
- A small round piece is made from white plasticine, on which a stack is made to divide into 4 equal parts - this is Nyusha’s bow. Having made several thin sausages, they are molded with one edge into a single whole. Stick the resulting tail to the main braid and complete its creation by attaching a bow.
Bow and pigtail (Fig. 25).
- Make 4 uniform short sausages and complement them with hooves made of plasticine of a different color.
Nyusha's arms and legs (Fig. 26).
- Having attached the arms and legs in place, they add a mouth, gluing a sausage representing it. The figure is ready.
Ready Nyusha should smile naively, as always