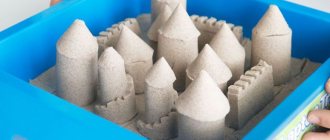
Cake making master class
For dolls and toys, you can not only sew or create household items, but also sculpt various delicacies from plasticine. For example, cake. What can you use to make a cake?
For sculpting you will need to prepare:
| Tool, material | Description |
| Plasticine | It is necessary to prepare plasticine of different colors. Brown will play the role of the base, and blue and pink shades can be used to make a berry layer. |
| Smooth horizontal surface | The surface is needed to level the edge of the cake. |
| Special knife | It is required to remove excess parts and cut the finished product. |
| Toothpick | It will help give the dough porosity. |
How to make the base?
The base of the plasticine cake will be pieces of different colors.
It is made as follows:
- Roll the pieces of plasticine into balls, then flatten each of them. As a result, analogues of cake layers are formed from brown ones, and a berry layer is formed from other colors. For 1 cake, it is enough to make 4 pancakes - 2 brown and 2 other colors - blue and pink. To ensure their edges are even, you need to roll them out on a horizontal surface.
- Combine the resulting cakes: between the 2 brown flowers there should be a layer of a different color.
- The craft should be rolled out again on a flat surface.
- Cover the resulting multilayer product with fondant. It can be made, for example, from blue plasticine. To do this, roll out a piece very thinly and carefully wrap the cake with it.
- Remove any excess parts of the top coating that have formed on the product using a knife, and then firmly press the layers with your fingers. The base of the cake is ready.
How to decorate a finished cake?
To make the product complete and believable, you will need to work on it.
Food made from plasticine. Cake step by step.
For this:
- Take a small brown piece of plasticine and roll it into a thin thread, and then braid it. This will be an analogue of cream on the surface of the confectionery product.
- Place the resulting braid on top along the perimeter and around the bottom of the cake.
- Using a knife, cut the cake into pieces and give a porous structure to the molded cakes using many holes in the brown layer. To do this, use a toothpick.
If the cake doesn't look appetizing enough, you can top it with roses, pieces of fruit, or another layer of cream.
What else are doll food made from?
Various treats can not only be molded, but also made from other available materials. For example, weave food for dolls from rubber bands or glue it from paper.
Fruits, sweets and gum drinks
Most likely, every girl has such small multi-colored elastic bands for braids. They can be bought very inexpensively in any color. How to weave food for dolls step by step, it is better to watch videos with master classes. You can make strawberries, lemons, cherries, pears, melons, watermelon slices, cupcakes, and even soda bottles this way.
Paper dishes and food
Many things for dolls are made from paper. They take ready-made printouts and glue all kinds of objects from them. There is also food for paper dolls. These are basically miniature boxes of different products: sugar, salt, tea and coffee, juice, corn flakes, crackers, chips, sweet bars and much more. You can print a plasticine pizza box or glue a paper pizza together.
Lack of plastic dollware won't be a problem. Plates and spoons can be simply printed and cut out. Miniature food, utensils and kitchen labels can be found online in large quantities.
You will quickly learn how to prepare food for dolls with your own hands. Try making pineapple, grilled kebabs, fried chicken, pies, cheesecakes and other dishes of your choice.
Originally posted 2018-03-19 09:21:24.
Pie
You can make any food from plasticine; it makes especially good baked goods, because the texture of the material is similar to dough. For example, to work on creating a pie you will need a plastic knife and 2 multi-colored pieces of plasticine. One of them will play the role of dough, the other - filling. Its color depends on what taste the child wants to give to his pie.
For example, for:
- the strawberry filling uses a bright red color;
- apricot - yellow;
- chocolate – brown;
- plum – blue;
- currant - purple.
The dough should be made from a beige or light brown piece of plasticine.
When everything is ready, you need to:
- Roll a ball from a piece that is the color of the dough.
- Press down the ball and make a cake out of it.
- Start working with the filling: divide the colored piece into many small parts, and make a berry from each.
- Place the finished berries on a layer of dough.
- To create the top layer of the pie, pull dough-colored plasticine into thin threads. Use a knife to cut threads.
- Place several finished threads parallel to each other on top of the filling, and then place a few more threads perpendicularly. As a result, a mesh is formed.
- To make the pie more beautiful, wrap it in a braid of dough.
Form
Is your hand-drawn sketch ready? It's time to create the blank. How to make a doll? Before we begin to answer this question, we need to consider how to create a frame blank for a future product. It is best made from wire. Draw a sketch in the natural size of the product, and then, right on paper, bend a wire frame that will act as the basis of the product.
Remember that the wire will add virtually no thickness to the product. She can only make the doll more plastic. And in order to save material, cardboard should be wound on the wire. You should not use plasticine of colors you do not need as linings. If you need to modify the shape, you will not be able to separate one plasticine from another with the same ease with which you separate cardboard from plasticine.
Ice cream
To make ice cream, you will need multi-colored pieces of plasticine and a knife. The colors can be any, depending on the type of ice cream. For example, white is used for cream, and brown is used for chocolate.
The ice cream itself will be in a waffle container, which should be sculpted from yellow plasticine:
- Taking a piece of a suitable size, begin to knead it until it becomes soft and pliable.
- Make a cone from crushed plasticine.
- Take a white piece to make a creamy layer or a brown piece for a chocolate layer.
- Take red plasticine and make strawberry fudge.
- Decorate the finished product with small elements, sticking small multi-colored pieces on top.
To make the waffle cup look like a real one, you can decorate it with a diamond-shaped pattern using a toothpick.
Pizza
Food from plasticine (you can mold not only sweets and baked goods, but also hot snacks) in the form of pizza has many cooking options. The main element will be the cake, the rest depends on the imagination of the child and the adult helping him.
The cake itself can be made from an orange or yellow piece of plasticine. The remaining ingredients can be cheese, tomatoes, sausage, pepper. Having decided which of them and in what quantities will be used, you should prepare the appropriate colors.
The pizza making process takes place in 4 stages:
| Stage | Sequence description |
| 1. Make a flatbread | 1. Roll out an orange or yellow piece of plasticine into a thin layer. 2. Make a thin thread from 1 more piece of the same color. 3. Place the thread on the cake around the perimeter |
| 2. Coat the pizza with sauce | 1. Make a thin cake from red plasticine, the size corresponding to the base. It will be ketchup. 2. Add white to red, which will be similar to mayonnaise. 3. Place the resulting thin cake on top of the base |
| 3. Lay out the ingredients | 1. Place small pieces of red plasticine tomato on top of the sauce and onion rings from white plasticine. 2. If you need to add sausages, make it from pink plasticine. 3. Sprinkle the pizza with olives - small balls made of black plasticine |
| 4. Decorate the pizza with cheese | 1. Divide the yellow piece of plasticine into several small strips. 2. Make holes characteristic of cheese in the resulting pieces. 3. Sprinkle cheese on the pizza and it’s ready. |
Fast food modeling for dolls
Let's prepare tiny products from the world-famous McDonald's. We will analyze master classes with plasticine, but you can use polymer clay instead.
A sausage sandwich
- Form a cake from light brown plasticine. Cut a square out of it.
- Now make a slice of doctor's sausage. To get a light pink shade, mix red and white clay. Cut out a square slightly smaller than the bread from the resulting material.
- Combine bread and a piece of sausage.
- To decorate the snack with herbs, sprinkle the craft with green plasticine crumbs.
Hot Dog
- Make a cake from the brown base.
- Roll a sausage out of pink plasticine.
- Wrap the sausage in a flatbread.
- Add ketchup and mustard. To do this, make strings of red and yellow flowers. Combine them and decorate the hot dog.
loaf
Making a loaf of bread from plasticine is easy. It is enough to take a beige piece and give it the shape of a voluminous oval, and then use a toothpick or other tool to mark diagonal notches on the surface of the workpiece. Wheat bread is ready.
If you plan to make sandwiches from this loaf, then you need to cover it with a thin layer of darker plasticine. It will act as a crispy crust.
Tea party cake
Girls often play tea party with dolls, but what tea party would be complete without a delicious pie. We mold him from plasticine. Modeling the cake:
- start working by making a base for future baking; you can use an orange color or one that best matches the natural shade;
- We place purple and red berries on the workpiece;
- twist a thin and long stick to form a rim;
- We decorate the edges of our pie with a rim;
- We cut thin strips of white color and lay them on the surface of the workpiece, and they should be a mesh.
That's it, everything is ready for tea. These plasticine crafts for children are the easiest, even a small child can handle them. It is advisable to supervise the child during the sculpting process, because in most recipes there are small parts that the baby can pull into his mouth.
We also recommend that you read the material on how to make a paper doll
Hamburger
Plasticine food, which can be molded in various shades, visually resembles the real thing. For example, a hamburger consisting of several ingredients of different colors will require several pieces of plasticine of different colors for modeling. The upper and lower parts are made of brown plasticine. A cutlet is made from a piece of the same color, which is the middle part of a multi-layer dish.
To prepare, you will need a large piece of brown plasticine, smaller pieces - yellow, green, black, white. These will serve as ingredients. In addition to the plasticine itself, you will need a special plastic knife, which will simplify the work of giving the pieces a certain shape.
The work of making a hamburger from plasticine takes place in 5 stages:
- Take a brown piece and mix it with yellow. The result should be a light shade that matches the color of the buns. It needs to be rolled into a ball, pressed down slightly and cut into 2 halves. Makes 2 buns.
- Make cutlets. To do this, mix brown with black. Roll the resulting piece into a ball and press. In order for the cutlet to look believable, it needs to be roughened. To do this, use a knife.
- Shape the lettuce leaf. You need to roll a piece of green plasticine into a thin layer. For one hamburger you will need 2 lettuce leaves.
- Make the cheese. Make 2 cakes from the yellow piece. Make several holes on them using a knife.
- Combine all the molded parts of the hamburger into a single composition. First, place one of the buns with the convex side down, put the cheese on it, then the lettuce leaf. Do the same with the 2nd bun. The result was the same top and bottom of the hamburger. Place the cutlet on one of the lettuce leaves and connect both parts. After joining, press lightly so that the dish does not crumble.
The hamburger looks no less appetizing than the real thing, but to make it even more realistic, you can decorate the top with sesame seeds. To do this, take a piece of beige or white plasticine. Small seeds similar to sesame are made from it. All that remains is to fix them on the surface.
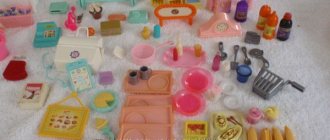
What do I use to make food for my dolls?
Today, for the first time at Bebiki, I was asked a question about what and how I make food for dolls... I wanted to answer personally, but I thought that the question might be repeated someday. And that’s why I decided to make my first publication on Bebiki. Perhaps it will be of interest to those who like to create something for their dolls themselves or those who simply want to expand their horizons in the field of doll art and doll miniatures in particular.
I would like to warn you right away that with my topic I am not trying to advertise brands of materials, but simply talking about what I work with. The list of materials and their characteristics can certainly be supplemented, opinions about them may be different... I am simply describing my experience and answering the question posed to me.
So, about 1.5 years ago, a piece of baked polymer clay from Artefact came into my hands by chance. It was so hard and unyielding that at first I couldn’t mold it into anything, I couldn’t even knead it. But the hand did not rise to throw him away. And then I resorted to the “omniscient” Internet in order to find out details about working with this material. It turned out that there was so much information, master classes and examples of work that I was stuck with this process of self-education for several days. And having accumulated a little knowledge and written down the main points in a notebook, I began to knead that reinforced concrete piece of plastic again... And, lo and behold, after 20 minutes of futile effort, it began to give in and warm up. Attempts to paint the plastic with dry pastels available on the farm were successful. And after 2 hours, my first polymer clay craft was ready - half a lemon.
And literally right after the lemon there was a set for tea drinking
Now I see how crooked and “uncertain” everything is, but then the process captured me so much that I wanted to sculpt more and more. But there was no more plastic surgery. I had to look. I couldn’t find the material in my city, so I turned to online stores. The choice of material was great! Of course, I started with cheaper options - with Russian plastic from manufacturers from St. Petersburg: Sonnet, Artifact, Craft Clay. I even ordered from the Chinese on Aliexpress once. By the way, I liked the quality of the Chinese material. I sculpted everything that I could “raise my hand on” and with experience the skill began to appear.
Sonnet
— kneads well, has high and medium softness, is good as a thinner for any hard clay, does not give off a smell when baked, the product after baking has good strength, is slightly fragile to break with force in thin parts of the product, most suitable for working with thick elements from 2 mm and thicker;
Artifact
- very similar to Sonnet in many ways, but a little more solid in operation;
Craft Clay
- has medium hardness in operation, otherwise it is similar to the two previous clays, gives quite good quality products, the only drawback is that it smells when baked, even if the temperature is maintained, so I gradually abandoned it for personal safety reasons;
Sculpey
- has different series with different degrees of softness in work and different quality after baking, I use only clay from the Sculpey Premo series in my work, it is excellent for products with large thickness of elements and for thin colors;
the downsides for me are that it’s a little soft, I like harder material, and it’s expensive, products made from it turn out to be “golden” at cost; Fimo
- also has different series with varying degrees of softness in operation, it seemed to me that it is the most flexible and durable after baking even in very thin elements of products, I use mainly the Fimo Professional series for any products and sometimes Fimo Soft as a thinner for hard clays;
Cernit
has been my favorite material for a year now... it has high hardness in work, but holds its shape better than many, is very good for sculpting thin products, does not smell when baked, gives high hardness, flexibility, durability of products, another plus is a reasonable price combined with very high quality;
but there is also a minus - among the clays of this brand, overdried pieces that have too high hardness are most often found; I have learned to easily cope with this using a special kneading technique or simply mixing it with a small amount of soft clay of other brands, without losing quality... I also use Fimo-gel
.
It is suitable as a bonding material and for creating liquid or cream-like surfaces. Sometimes I use it as a matte varnish to fix paints on plastic. Most of my works, especially culinary miniatures, are varnished at the end. You don’t have to cover it; plastic itself doesn’t require it. But if there is surface coloring or it is necessary to add shine to the elements of the product, then varnish is necessary. I tried a lot of varnishes... Eh... Varnish
is something that can ruin any of the most beautiful work when you no longer expect it!
Sometimes it bubbles, sometimes it lays down unevenly, sometimes it doesn’t dry completely, sometimes it starts to stick after a couple of months... Therefore, after all my experiments with varnishes, I settled on a special baked varnish for plastics from Cernit
. Oh good in all respects and so far beats all other specialty polishes for me. But there are also disadvantages: 1) after applying it, the product needs to be re-baked; a little over-baking will immediately darken the varnish; 2) when baking, the product can be baked with the varnish coating on the baking sheet so that you have to peel it off with the “meat”... at the first stage I ruined several large products this way... I advise you to bake products with this varnish only on metal surfaces (not glass, not wood, not paper! ); although this minus can be used as a plus))): if you need to very tightly connect the base with a plastic coating, but there is no gel, then cover the base with Cernit baked varnish, apply the plastic and bake... it will hold on better than the gel! )))
The issue of coloring plastic while working is something I have gone through and left in the past... At first I tried to paint plastic with different dry and liquid dyes. In the end, I concluded that it is not much more expensive, but it is much easier to immediately buy plastic of the desired color or paint existing plastic in the desired color with another colored plastic, simply mixing clays of different colors. I sculpt directly with colored plastics and almost never paint the finished products on top. Only sometimes I tint a little with pastels or acrylic paints (for example, the crust of bread or flower petals). Personally, it’s easier for me to sculpt in different colors at once than to paint the baked base later with paints.
If you decide to make your own food from baked plastic for your dolls, then you should take the issue of baking the finished product very seriously. For me, this was once the most difficult moment. I ruined a lot of products by choosing the right temperature in my oven. I advise you not to “tread on the same rake” and just immediately buy a special thermometer for the oven. It solves all problems with finding the right temperature and controlling it. Although I still make sure to check both the thermometer readings and the condition of the products several times during the baking process, since any unpredictable changes are possible in my oven)).
So, I hope my experience will be interesting and useful to someone. I will be very glad if you can master a new creative process and please your dolls!)))
Meat on the grill
To make a toy kebab, you need to take:
- plasticine;
- several matches;
- small cardboard box.
The sculpting process takes place in 6 stages:
- Take the box and cut off the unnecessary closing elements. Make indentations in which the skewers will be located.
- To decorate the box, use thin plates molded from plasticine. It is important not to forget to make indentations for the skewers.
- Make the legs of the barbecue from matches wrapped in plasticine. A total of 4 pieces are required.
- Make meat from brown plasticine. Matches will act as skewers. In addition to meat, there should be onions on the skewers: they should be made from white plasticine. To do this, take several small pieces and roll them into circles.
- Shape the coals. To do this, use red and black plasticine: the 1st will symbolize smoldering embers, and the 2nd will symbolize extinct ones. Cut both of them into small pieces and place in the grill.
- Place the skewers on the grill.
Fruits made from ball plasticine: pears
Ball plasticine is a unique mass that is not at all similar to ordinary wax plasticine. Firstly, it contains small foam balls, which make the products very light, and secondly, the crafts harden very quickly in air and become quite durable. It’s pleasant to knead the bright pieces in your hands, only sometimes small balls can fall out. You need to work quickly with ball plasticine. This process is fascinating. This tutorial shows how to make doll food - pear shaped fruits. The bright colors are very diverse, and you will definitely find in the set those shades that are suitable for modeling. You can even mix two or three colors together.
What you need to prepare for sculpting:
- ball plasticine;
- stack.
How to make pears from plasticine step by step
For this work, you can use yellow or peach-colored mass, as well as green material for sculpting leaves.
Here's how to make 3 fruits in yellow, peach and a two-color version.
To make a two-color blank, simply connect 2 small pieces without kneading them. They will stick together well. From each prepared blank, fashion a part that resembles a light bulb in shape.
Make holes in the narrow part of the pears using a stack.
Insert thin green sticks into the resulting holes. These will be the ponytails. Additionally, make oblong leaves from green portions of plasticine.
Glue the leaves to the top stick-tails. Appetizing ripe plasticine pears are ready.
After just a few hours, the plasticine will harden and the pears will become strong, reminiscent of plastic toys.
Candies
One of children's favorite treats is candy, especially chocolate. To prepare them you will need 2 pieces of plasticine. One of them is brown, it will become an analogue of chocolate, the second is white, it will be fudge.
Children like it when there is a lot of candy, so it is better to immediately divide a piece of brown plasticine into several servings. Mash each portion and then shape it into one or another candy, for example, a round elongated bar, a hemisphere or a truncated pyramid. For variety, you can make several types at once.
Notches are made on the surface of the candy using a knife, and white plasticine, acting as nougat, is placed on top in strips. You can wrap the candy in candy wrappers, then it will be impossible to distinguish them from the real thing.
Donuts
Donuts should be golden brown and glazed, so you should use orange, yellow and brown pieces to model them from plasticine.
Their production is as follows:
- Mix yellow and brown plasticine. The result should be a mass similar in color to fried dough.
- To make 2 donuts of different shapes, divide the mass into 2 equal parts: the 1st part is rolled into a ball, and the 2nd into a sausage.
- Press down the ball so that it flattens a little.
- Take yellow plasticine and attach it on top of the donuts: for a round one, make a round cake, for an elongated one, an elongated one.
- Pull the sausage into a ring and spread the plasticine in the place where the parts are connected.
- Make a hole in the round product. To do this, you can use a fountain pen or felt-tip pen.
For decoration, the chocolate glaze can be replaced with a thin string of brown plasticine, and small pieces of brightly colored plasticine will play the role of marmalades well.
How to make food for dolls from plasticine
Many parents have already become convinced that modeling with plasticine is a fun activity for children. Today we will focus on girls. Girls love a variety of dolls; to make the game fun, you can have a tea party. Of course, you can buy food, but we suggest getting creative and making it out of plasticine.
Let's start sculpting
If you have already made animals, for example, a hedgehog, then it’s time to get interesting food-shaped products for your favorite dolls. To sculpt products, you can use absolutely any plasticine. But if you want the food to retain its shape, it is better to use special masses for modeling, which are poured into certain shapes and harden. But let us immediately note that such an activity is not entirely exciting compared to modeling from ordinary plasticine.
Many girls play with their favorite dolls, but there are not enough attributes for the game. Therefore, we will tell you how to make food for dolls from plasticine.
Bananas
Plasticine food, which can be molded in such a way that it is difficult to distinguish from the real thing, differs only in size.
For example, a toy bunch of bananas from plasticine can be made as follows:
- Take yellow plasticine and a little brown for the base.
- Using a special knife, cut the yellow piece into small portions, each of which will later become a banana.
- Mash each yellow piece and roll into a ball.
- Roll each resulting ball into a sausage. Taper the parts at both ends.
- Collect all bananas in 1 bunch.
- Make several small balls from brown plasticine, the number of which should be equal to the number of bananas in the bunch.
- Each ball, molded from pieces of brown plasticine, is attached to the tip of a banana opposite from the general attachment.
- To form a bundle, squeeze the product at the base. Also add brown in the form of a stripe here.
The resulting bananas will be an excellent treat for toy monkeys and elephants.
Vegetables made from ball plasticine: carrots
For bunnies, bunnies, mice, bears and favorite dolls, children can easily make carrots. An appetizing and healthy vegetable should always be on the table. For modeling, it is better to use a special ball mass, which hardens in air after a short time. In this case, the resulting doll food will become durable and you can play with it for a long time. Carrot sculpting is a very simple job.
Materials for modeling
- gel ball mass of orange and green colors;
- stack.
We sculpt a carrot from plasticine step by step.
Prepare a mixture of a suitable color. Usually the shades presented are very bright, alluring, and the small inclusions are crushed weightless foam. Due to this filling, the finished products are very light.
Prepare small portions of the two indicated shades.
Make cones from the orange balls, divide the green ones and pull them out into leaves.
Press the wide part of each root vegetable with the sharp part of the stacks. Collect 3 leaves in bunches. Insert the ends of the bunches into the holes in the vegetables.
Prepare the puppet vegetables. Carrots can grow on a toy farm or show off on homemade topiaries; you will find a use for such miniatures.
Colorful lollipops
Lollipops can be round, oval, or have an intricate shape. You can make, for example, a cockerel on a stick. The simplest option is a round candy. It will take the least amount of time to make. To make plasticine candy, take white and several other colors. It is advisable to have 2 contrasting shades.
Preparation:
- Roll out the white and brightest pieces into thin threads.
- Weave these 2 strands into a braid.
- Twist the resulting structure into a spiral.
- Attach a stick to the finished candy. Its role can be played by an ordinary match.
Another option for making bright candy is as follows:
- Take 2 pieces of plasticine, one of which is white.
- Just as in the case described above, roll out the pieces into threads.
- The resulting 2 threads are tightly connected to each other so that there are no gaps between them.
- Twist the product into a spiral and attach a stick.
To make caramel, you need to take larger pieces and make 2 thick rolls from them. Here you won’t need white; it’s better to choose the brightest shades. Both pieces are rolled into sausages, then they are rolled, and the candy is ready.
Cupcakes
Cupcakes can be different: the brighter the colors, the better. First, a biscuit base is created, and then everything is decorated with cream on top. In addition to the plasticine itself, you can use beads or rhinestones. They will also act as decorations.
Preparation consists of the following steps:
- To create a biscuit base, take a piece of yellow or orange plasticine, for cream - pink or purple.
- Make cups from yellow balls. To do this, just press them with your fingers on all sides. Apply longitudinal notches to the surface of these cups, giving the structure of the cake ribs.
- Roll pieces of bright flowers into thin threads.
- Twist the resulting threads into a spiral so that they are shaped like hats. For one cupcake you can use not one, but several multi-colored threads. This way the product will turn out beautiful and appetizing.
- Combine a bright hat with a yellow base. The cupcakes are ready.
If you wish, you can decorate the product with beads or rhinestones.
Macarons
A popular sweet called macaroons looks delicious and makes you want to enjoy this wonderful confectionery product. To make macaroons from plasticine, you will need several multi-colored pieces, as well as a toothpick.
In this example the following colors are used:
- pink;
- yellow;
- white;
- blue;
- violet.
Manufacturing stages:
- Roll into balls and press into flat cakes. Make 2 equal-sized cakes from each color. White, pink and yellow will become creamy layers.
- Connect 2 flat cakes of the same color, place cream layers between them.
- Treat the top and bottom sides with a toothpick.
- At the junction of the upper main cakes with the layer, press the plasticine several times. If necessary, you can press down on top with your palm.
Modeling food from plasticine is an excellent activity for developing a child’s fine motor skills and creative thinking, as well as introducing him to work and aesthetic perception.