Homemade screen
Authorization on the site
My first electric screen was not entirely successful. However, the second, modified, began to meet all the planned requirements. Manufacturing required neither scarce materials nor highly qualified performers.
The structure consists of a base, racks, a frame with an electric motor, supports and ties. The dimensions shown in the drawings are indicative and may vary according to local needs and capabilities.
The base consists of two hollow bars, each of them is made of two boards connected through spacers. Holes with a diameter of 14 mm are drilled in the base bars.
To give the design oscillatory movements, I abandoned the gearbox with a ratchet due to the complexity of manufacturing and the strong noise it produces. Vibration is created by unbalancing the motor shaft. The eccentric is made from an ordinary wooden block. By selecting its shape and weight, the required frequency and amplitude of vibrations are achieved.
Pursuing further upgrades, I installed a device on the screen that automatically turns the engine on or off depending on the load on the frame. This allows you to eliminate idle operation, save energy and increase the service life of the structure as a whole.
Fig.3. Electrical circuit of the screen.
The automation works as follows. When loading, the frame lowers down and presses the S1 button. Its contacts close the electric motor circuit. It begins to rotate and shake the frame. At the first “failure” of the frame from vibration, she presses the S2 button. That, in turn, closes the power circuit of the electromagnetic relay, which is self-blocking with contacts K1, and with contacts K2 turns off the excitation (starting) winding of the engine. Thanks to the self-locking relay, the starting winding remains disconnected for the entire operating time. After sifting the material, the load is removed from the frame. It is pulled up by springs and opens button S1. The circuit returns to its original state.
The screen is stored disassembled in a room protected from moisture and snow.
Based on the experience of using my screen for two years, I would like to give some recommendations to those who want to make such a device. Firstly, it is advisable to pass the power wires from the circuit breaker mounted on the rack to the electric motor and mounted on the frame through the lower edge of the frame. Secondly, you should not make the frame too short. It is advisable to choose the spring attachment point as far as possible from the engine, which allows you to increase the amplitude of oscillations. And the last piece of advice: to avoid electric shock during operation, you must ground the motor frame or use an isolation transformer.
MK 07 1992 P. Sherstobitov, Perm
Source
Assembly order
It is necessary to start the assembly with wooden bars of the supporting frame, and to make the wooden structure more durable, you need to use metal fasteners in the form of corners/plates.
Then it is necessary to fasten the rails at the base of the frame from its inside. This must be done for support when the rollers move. The guide angles must be secured to each other to create an overall structure based on wooden blocks that are installed transversely. To be able to reduce the vibration level during operation, six to eight shock absorbers must be secured between the corners.
To secure an electric drive, which can be an electric drill/jigsaw/saw, it is necessary to calculate a certain area equal to the diameter of the drive, which should be located in the upper part of the support frame.
After installing the support frame, you need to secure the gutter, which can be made of plywood or metal. The sifted substance enters the collection compartment using an installed chute. Plywood guttering is easier to install, while metal guttering is more durable.
two-box sifting design
fastening furniture casters
DIY caviar screen
Salmon caviar is a special delicacy that will decorate any holiday table. If you are lucky enough to catch or buy a salmon with a pot-bellied belly full of valuable eggs, you can make the appetizer yourself. Of course, you will have to tinker a little with separating the caviar from the films, but there is a little secret. A simple device called a screen will help to select the eggs and preserve most of them as a whole. We will now tell you how to do this and how to pickle salmon caviar.
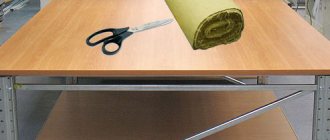
The screen is a mesh stretched over a base. You can make it yourself, or you can use improvised means, for example, a net from a badminton racket.
Pre-treatment of caviar
Before you begin separating the eggs, you need to get rid of excess moisture and blood. To do this, salmon caviar (as well as any other caviar) must be filled with salt water and allowed to stand. Firstly, salt will draw out all the blood, secondly, it will remove excess water in the caviar, and thirdly, caviar treated with salt will be easier to separate from the films. After soaking, the bag of caviar should be rinsed thoroughly.
To allow all the water to drain, it is better to place the caviar on a sieve or colander.
Salting in water
Caviar can be salted in water. Make a saturated salt solution: dissolve 0.5 cups of coarse salt without iodine per liter of water and bring to a boil. The density of the solution can be checked using a raw potato: if it floats in the solution, it means there is enough salt; if it sinks, add more salt. Cool the solution, add 1-2 teaspoons of sugar and place the caviar in the liquid so that it is completely hidden by water.
You can use a half-filled bag of water as oppression. It will not crush the eggs and will not allow them to float. After an hour, you need to put the spark on a sieve, drop a little oil and put it in jars.
The salt solution for salting caviar is called brine
When eating salted trout caviar yourself, do not neglect its meat. Trout is rich in polyunsaturated acids, which enhance mental activity, and omega-3 acids, which have been proven to relieve depression, remove toxins, stabilize hormonal levels, blood cholesterol levels, etc.
You will read about the recipe for making seafood salad in the next article.
How to separate the eggs from the film so that they do not burst?
Most often, the caviar is separated from the film bag simply by hand. Of course, in extreme cases, this method will do, but this can literally ruin most eggs. Even if all manipulations are carried out in water, the eggs are still crushed in the process. Thus, they are no longer suitable for pickling, and the amount of product immediately noticeably decreases.
But if you grind the caviar through a screen, losses can be reduced to a minimum. The eggs are easily separated, pass through the holes in the mesh and remain intact. Of course, you can’t do without losses at all, because some eggs will burst when rubbed anyway. In any case, there will be much less of them than if you select them by hand in the water, and it will also be easier to separate the garbage.
The screen method works best with unripe caviar.
Selecting the eggs is not difficult: holding a sieve in one hand over a wide bowl, the other hand should be able to easily rub the eggs against the mesh. It is better to do this starting from the thin end and moving from bottom to top. Then rinse the resulting eggs well with cold water and remove the debris (remnants of films). Rinse again and leave for a quarter of an hour in the sieve.
If the water turns white like milk, it's okay. It is the bursting eggs that release an emulsion that colors the water and makes it sticky.
Lightly salted salmon caviar: how to salt it?
So, the caviar has been sorted and washed, all that remains is to salt it. To do this, you will need to make a special marinade of very strong concentration called brine. It is prepared as follows:
And the last step: pour the cooled brine over the salmon eggs. For lightly salted caviar, the holding time ranges from 30 to 60 seconds. To obtain medium salting, the caviar is kept for up to 8 minutes, then washed under running water. All that remains is to spread the eggs on a paper towel to dry. The lightly salted delicacy is stored in glass jars under a lid in the refrigerator for no more than 2 days.
Salting salmon roe - video
Video KNOCKLESS SCREENER FOR CUTTING RED CAVIAR, Fisherman DV channel. 27 RUS
Source
Necessary materials
To make a vibrating sieve you will need the following materials:
- Wood blocks measuring 60 x 70 mm.
- Plywood, the thickness of which is 20 mm.
- Six shock absorbers (spring/rubber).
- Furniture casters, including a four-piece fastening system.
- Piano hinge, the length of which should be from 500 mm.
- Metal corners (designed for installing guide rails).
- Metal fasteners for fixing parts of the device.
- Self-tapping screws/bolts/nuts.
Particular attention is needed to the piano hinge and its strength, since during operation of the structure high pressure is exerted on the hinge.
The easiest way
This method is suitable for those who do not want to bother with making a special design for casting. You can limit yourself to a few bricks or metal supports, a tin can and a container of water. Making fractions this way is quite simple. A small amount of lead is poured into the jar. Then it needs to be placed over the fire. A steel mesh is placed on the bricks, and a can is placed on top of it. It can also be hung using wire. The master decides what to do based on his capabilities. A small hole is made at the very edge of the jar through which the lead will pour out. The container with water is covered with flannel.
Protecting the electric drive from dust
During work, especially with materials such as cement and dry glue, dust is generated that gets onto the electric drive. Therefore, it is recommended to cover the installed electric motor with a protective casing, the design of which should not block the ventilation holes of the tool. Such a casing can be made from a 2-liter plastic bottle.
The finished assembled vibrating sieve and its operation can be seen in the video below.
Source
Using a frying pan
For those who are interested in how to make fractions, we can recommend another method of casting using improvised means. Judging by the reviews, the end result is pretty good pellets of the fifth number. How to make a shotgun with your own hands? What will you need for this? Before casting shot, the home craftsman needs to prepare an old unnecessary frying pan, basin or other similar container, a magnet, tap water and lead from a cable or battery. Before you begin, a hole is drilled at the bottom of the frying pan, at the very edge. Its diameter should be 0.7 mm. Next, you need to insert a temporary plug into this hole.
You can use a nail or steel wire of the appropriate diameter. Only after completing these steps do they begin directly casting lead.
Device for sifting sand
Materials and tools used by the author:
List of materials:
— 12V motor (from the car heater or windshield wipers); - Bulgarian; - metal sieve; - Sheet steel; - square pipes or rods; — radial bearing; — 4 springs; - small wooden blocks; - paint and more.
Homemade manufacturing process:
Step one. Sieve
First of all, we will make a sieve through which we will sift the sand. You can buy a ready-made sieve with holes of the required diameter, or you can make it yourself. Just take a sheet of metal, mark and drill holes. You can also not drill holes, but simply punch them with a nail if the metal is soft enough.
Next, the author made an edging for the sieve from wooden blocks; we nail the sieve to the blocks with small nails. Finally, the author cut four pieces of round pipe as supports, and welded washers to the pipe pieces. We screw such supports into the corners of the screen with self-tapping screws; these will be supports for the springs.
Step two. Frame
We weld a frame for homemade work; the material can be very varied, but to minimize vibrations it is better to use something heavier. The author found square steel rods and welded a frame from them.
The author places a simple eccentric on the motor shaft, which is made from a radial bearing; this eccentric imitates the operation of the crankshaft. As for the “connecting rod,” the author bent it from a steel plate. We attach the connecting rod to the sieve, and install the motor itself on the frame; the author made a bracket for it from a steel plate.
Step five. Propeller
To make a homemade product, you will need a fairly powerful propeller that will blow away lighter particles. Of course, it would be nice to make such a propeller from a 12V motor, but the author decided to adapt his grinder for this. You need to make a simple propeller for the angle grinder shaft; the author cut it out of thin sheet steel with metal scissors.
How to make a fraction?
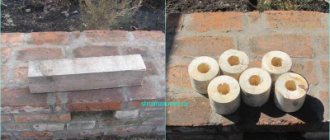
The “filling” for hunting ammunition is prepared as follows. First, put the frying pan on gas and put pieces of lead in it. It is advisable that their total weight does not exceed 3 kg.
Then the prepared basin is filled with water. The container itself is placed below, under the frying pan, a couple of centimeters away. Next, a groove is attached to the basin using a magnet, which is first covered with silk or flannel and thoroughly soaked. When the lead melts, the plug should be removed. Thus, the metal will take the appropriate shape. Then it will flow from the hole in the frying pan along the groove into the water and cool there.
About the size of pellets
In addition to the question of how to make a fraction, beginners are interested in what the magnitude of the charge may depend on. First of all, the size of the pellet is affected by the diameter of the hole through which molten lead flows. In addition, the heating intensity is of great importance.
For example, if a master wants to make large shots, but does not plan to widen the hole in the frying pan, then he just needs to reduce the heat a little. As a result, the lead will flow out more slowly, which will result in a larger shot.
About making in a bucket
This method is suitable for those craftsmen who do not have a gas stove or blowtorch. The whole process will take place in a bucket. Also, to kindle lead, you will need a tin can, which must first be equipped with a 1.5 mm hole. According to experts, such a diameter at the output will give a fraction of the seventh number. If necessary, the hole can be easily expanded using a regular drill or sewing needle. First, the bucket must be filled halfway with cold water. Next, a container with lead (a pan or a jar) is placed in it. Installation is carried out using metal rods. It is important that a distance of no more than 5 cm is maintained from the bottom of the jar to the surface of the water.
Having completed all the necessary measurements, this container is removed and the bucket is filled with diesel fuel (within 3-4 liters). Experts recommend melting battery and pure lead in a 50:50 ratio. It is advisable to add it to the container gradually. If you overdo it, a lot of pressure will form in the jar, causing tails to appear in the pellets. After the can is installed, the contents of the bucket are set on fire. To do this, moisten a rag with flammable material, carefully set it on fire and throw it into diesel fuel. After some time, you need to lightly tap the container with lead. This is necessary so that it begins to flow out of the hole. Having overcome the layer of burning diesel fuel, the already formed pellet falls into the water, where it finally cools down.
Dimensions of main structural elements
Before assembling the structure of the vibrating sieve, it is necessary to make a schematic drawing of the housing structure, since a visual diagram will simplify the work process and help not to get confused in the structure of homemade equipment.
The recommended dimensions for the base of the structure are as follows:
- length – 140 centimeters.
- width – 60 centimeters.
- height – 85 centimeters.
The length of the outer box is half the length of the supporting frame, and the width should be ten centimeters less than the width of the base, the depth should be twelve centimeters or more. This dimension suggests the possibility of separating the screened part from the internal frame to extract the resulting screenings. Two drawers are secured on one side using a piano hinge. This design allows the inside of the housing to be lifted and tilted.
Alternative way
It may be that a home craftsman does not have the opportunity to make a shotgun with his own hands. In this case, he will have to use dry reeds. It is desirable that its thickness corresponds to the thickness of the required pellets. The reed itself is carefully cut in half. First, the lead is melted in a container. Next, they fill the halves of the reeds. After cooling, the pellets are cut from the resulting lead strip. How to make fractions if there is no reed at hand? In this case, we can recommend cutting several grooves in the wooden surface with a knife. The master decides what depth they will have based on the size of the shot he wants to get. Pieces of lead, as in the first case, are first melted, and then the metal is poured into these grooves. You should get lead wire from which the shot will be cut.
Rudolf-Kavchik › Blog › How to make a gateway for gold mining with your own hands
How to make a gateway for gold mining with your own hands
This article was born in connection with the increased interest in gold mining. I often get asked questions about how to get gold from streams and rivers? How to make a gateway for gold mining with your own hands? Where and what kind of gateway should I buy? How to make a passage with your own hands?
In this article I will tell you how to make a gateway with your own hands. The equipment is so simple that anyone can make it in a couple of hours at home and in many respects it will be better than a purchased American aluminum gateway, the cost of which in Russia reaches 17,000 rubles.
I’ll tell you how to properly make a gold-catching sluice, a mini device for gold mining, popularly called a prodnushka. This is what the prospectors of Siberia and the Urals call it, the name that came to us from our grandfathers and great-grandfathers is prodnushka.
A passage (sluice) is a box made of three boards, at the bottom of which a mat is laid and a stencil (riffle) is placed. A walk-through made of wood is not only simpler and cheaper than one made of aluminum, but most importantly, if something happens, you won’t mind throwing it away. If you use dry and not thick wood, then the weight will be no more than that of an aluminum analogue, and with a skillful approach, even less. In addition, wooden boards in your car or backpack will not raise questions from strangers; no one will ask what kind of boards they are or ask unnecessary questions. You never know what purpose you need these boards for in the forest.
To make a passage (sluice) for gold mining, the main thing is to follow the basic simple rules in its manufacture, and you will be a more successful gold miner than other prospectors with short purchased sluices.
The longer the hole, the more gold you will catch. Foreign aluminum sluices have a maximum length of 1.5 meters; this is not enough to catch fine gold and disintegrate poorly washed sands or loams. The length of foreign locks is 1.5 meters due to legislation that limits the length of the lock, so that amateur tourists do not wash out all the gold on the stream and leave it to others. For example, in America, Australia, and New Zealand, gold mining is a hobby, like picking mushrooms or fishing in our country.
The width of the sluice depends on the amount of rock supplied; for bucket feeding, a width of 20-25 cm is sufficient.
To make a long and easy-to-carry passage, use a cascade of gateways, for example, install two gateways of 1.5 meters in series, for a total of 3 meters. This is sufficient to trap fine gold and disintegrate the rock.
If the soil is clayey and does not have time to be washed through the passage, you need to use other equipment called butara. I will talk about it in the following articles or videos on my channel www.youtube.com/user/RudolfKavchik
Installation of riffles or as they are also called stencils.
The stencil is the most important part of the pass-through. Behind them, a turbulence of the water flow and its rarefaction occurs. This creates conditions for the accumulation of the heavy fraction behind the riffle plates and the demolition of light unnecessary material. The angle of inclination of the riffle plates depends on the amount of water supplied to the passage and can be from 45 to 78 degrees. The greater the depth of the flow and the speed of the flow of water supplied to the sluice, the greater the angle of inclination of the riffles. The distance between the riffles is 5-7 cm. The shape of the riffles can be straight or with slightly curved edges in the direction of flow.
If the water flow is weak, then riffles are not used. The rock is sifted through a sieve before being fed to the mini device. See the chapter on material screening below.
The next chapter is about a gold catching mat and what to make a gold catching mat from. How to install a passage, sieve and screen for gold-bearing rock. From the history of gold mining - is there a need for a mat on the sluice?
Author Rudolf Kavchik, Irkutsk Photo Rudolf Kavchik
PS
Video about the use of a passageway (sluice for gold washing). And also, some geological terms are explained, what is a raft, peat, sand or formation.
Source
External speed control unit
Since the electric hacksaw blade moves too quickly, we install a separate speed control unit (with a built-in switch and automatic fuse), which will help you choose the optimal mode of forward movement of the vibrating screen and adapt its operation for different bulk materials. In this case, the power saw switch is locked in the “on” position. You can dispense with a separate adjustment unit if you use a fairly “low-speed” electric saw as an electric motor.
It is better to cover the electric saw itself with a protective cover to prevent the ingress of cement, sand or other dust (easy to make from a plastic bottle of a suitable size). With fairly simple changes in the design of the frame, you can use an electric drill (preferably with a built-in rotation regulator) as the main engine, installing a pin with a reciprocating eccentric attached to it instead of a drill.
The video shows another simple design of a vibrating sieve, using an electric jigsaw as a motor:
How to make hunting shot at home
In our article we will touch on the most common questions about it, which arise not only among beginners, but sometimes also among experienced hunters. We will focus on the following aspects in detail:
Since lead itself is too soft, in its manufacture they use admixtures of tin, antimony, arsenic, etc. This is hardened shot. Sometimes a lead ball is additionally coated with a layer of cupronickel or nickel. This is considered a more expensive type of material, which is called clad.
How to determine whether a material is of good quality or not? Its shape should be as close as possible to a sphere, there should be no cavities inside and there should be alignment. Please note that the size and composition of hunting shot must comply with GOST 7837-76.
What types and sizes are there?
In our country, hunting shot is classified by size and divided into 16 positions. The minimum one produced today has a size of 1.25 mm. It can be easily found in specialized stores under No. 12. With each increase in diameter by 0.25 mm, the number decreases by one.
Based on size, it is divided into the following types:
large: with a diameter from 4.25 mm to 5 mm, respectively No. 0, 00, 000, 0000 medium: with a diameter from 3 mm to 4 mm, respectively No. 5, 4, 3, 2, 1 small: with a diameter from 1.75 mm to 2 .75 mm respectively No. 10, 9, 8, 7, 6 On forums and blogs, large shot for hunting shotguns is sometimes called half-buckshot.
Which one to choose for different types of game?
During preparatory activities, it is worth considering that the choice of shot will depend both on the conditions in which the hunt is planned and on the type of game. So let's start with the most commonly used sizes. Hunters prefer to use 12.16 or 20 gauge for game birds. For hunting small birds, for example, quails, snipes, great snipes and others, you should choose size No. 8 - 10. Size No. 11-12 is used extremely rarely.
If you decide to go after a wolf or a roe deer, then you should give preference to buckshot. It is manufactured in 0.5 mm increments. The most popular buckshot is 5.25 mm - 6.75 mm. However, in some cases, buckshot up to 8 mm is used. Wild boar hunting involves the use of large 9 mm buckshot.
It is important to understand that it is more effective to hit a target with several small pellets than with one or two large ones. This is why you should stop using the largest shot sizes.
Another dependence of the size of the fraction on the season is that in the spring they always use a smaller number, and in the fall a larger one. This is due to the fact that the game has already managed to get stronger. You can choose it depending on the expected shooting distance. The smaller the distance, the smaller the fraction you can choose.
How to make it yourself?
Currently, specialized stores offer an incredibly wide range of products that are available for purchase in any season at any convenient time. Store goods are manufactured by casting or stamping. However, many hunters, in order to save money or gain aesthetic pleasure from the process, make their own. Of course, homemade products are not ideal compared to store-bought ones, but for most purposes they are quite suitable.
At home, shot is made by casting. In fact, craftsmen have come up with quite a lot of methods, however, we will present exactly the one that allows you to get the highest quality product possible.
At the first stage, you need to make a so-called shotgun die. It consists of two metal bars on a hinge. For convenience, handles are attached. You need to drill holes in the metal that will match the caliber. Everything here, of course, depends on what you want to get in the end. This can be the minimum size of the shot, or buckshot. The hemispherical holes are connected by grooves, which in turn open into a groove.
Next, lead is poured into the gutter. After the pouring process is completed, the resulting “web” is cut off with special metal scissors. It is allowed to use 1/3 battery and 2/3 regular lead.
The resulting shot can already be used, however, some hunters prefer to roll it on a shot roller. This makes the lead harder and gives it a perfect round shape.
how to sift sand. How to sift sand
Don't forget to like and subscribe.
I show you how to make a sand sieve with your own hands at home, how to sift sand! EARN...
In this video I show how to get out of a situation if you need to sift sand but don’t have an assistant.
Hi all! I made a sieve, as they say, from what I had. Dimensions and materials taken from the head any coincidence...
Here is a seeder made by Vasily Aleksandrovich Grafov. Basic information regarding the design…
Thanks to two authors from YouTube for the idea, otherwise I had prepared an engine, I wanted to make a vibration table for the corners, and then I came in...
The quality of construction sand is what you should pay attention to when buying sand, if there is a lot of clay in the sand...
Sand sieve without vibration from Sarmat-tornado LLC www.sarmat-tornado.ru.
A very simple device. 4 boards, mesh and old el. engine (operates from 220V). Useful at a construction site...
501 from 02/10/2010 #Galileo What is sand and how is it formed? How sand is mined and processed in the Moscow region...
tel: 89184420772 89529882803-Alexey.
In this way, you can sow sand for the finishing layer of plaster and for laying stoves and fireplaces. I wish you success…
In this video I will show you where I get excellent dry sand for my sandblasting gun.
How to make a Sand sifter yourself with your own hands from scrap materials.
This sorting complex is assembled entirely on gasoline drives. Cost - $16,200 Production time...
how to sift sand
I show you how to make a sand sieve with your own hands at home, how to sift sand! EARN...
Here is a seeder made by Vasily Aleksandrovich Grafov. Basic information regarding the design…
Don't forget to like and subscribe.
Hi all! I made a sieve, as they say, from what I had. Dimensions and materials taken from the head any coincidence...
In this video I show how to get out of a situation if you need to sift sand but don’t have an assistant.
video about the properties of sand, that river sand is suitable for concrete and masonry. Gully sand is suitable for…
Thanks to two authors from YouTube for the idea, otherwise I had prepared an engine, I wanted to make a vibration table for the corners, and then I came in...
A very simple device. 4 boards, mesh and old el. engine (operates from 220V). Useful at a construction site...
A sand seeder made of boards and mesh, which can be bought on the market, I also took a galvanized sheet for mortar...