A common situation: everyone in the family loves to use a computer. Some family members need it for study, others for work, and others for entertainment.
But, if the apartment is small and there is a computer desk in only one room, there is practically a queue for it.
Alternatively, you can use a laptop. But using it at home, sitting on the sofa and placing the device on your lap is inconvenient. The table may be occupied, and the stool is too small.
The conclusion suggests itself. Need a compact laptop table. It’s not difficult to make it yourself, and in various forms.
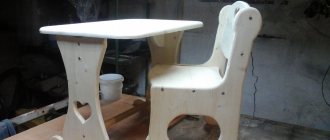
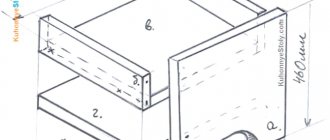
The simplest classic option, a table with rigid fastening of parts. It cannot be folded, but can be moved by attaching wheels to the legs.
Interested in how to make a laptop table yourself, many will be pleased to know that making such a table is no more difficult than a kitchen shelf.
Benefits of DIY
Ready-made designs of tables for laptops are durable and reliable. The devices are easy to use and have a long service life. However, there is one drawback - the high price. Quality products are too expensive.
A rational solution would be to make your own laptop table using a ready-made diagram. Several advantages of this approach should be highlighted:
- Budget savings. Thanks to the competent selection of inexpensive materials, you can significantly save on the design and assembly of the table.
- Exclusivity of design. Each laptop owner can choose the type and design of the product.
- Ideal size ratio. Having the drawings, you can choose the optimal size of the structure, which will be convenient to use in any conditions.
- Ease of execution. Despite the presence of elementary mechanisms and specific structure, any type of laptop table can be built in a short period of time. Even an unprepared person can handle the installation.
The only condition is attention to detail. You should correctly calculate the dimensions of the product and adhere to the exact dimensions.
Ease of execution
Budget savings
Exclusivity of design
What to remember
If you decide to make a laptop table that will allow you to work peacefully in bed, then you should remember the following points:
- After cutting the tabletop, you need to carefully process its edges. Otherwise, their gradual destruction will be observed and there will be a threat of getting a splinter;
- if, to make a table from wood or chipboard, it is best to cover the surface with several layers of varnish, which will prevent the destructive effects of external factors on the table;
- to decorate a table, it is better to use paints, which are then covered with a layer of varnish;
- It is best to correct the use of vinyl stickers with varnish. Then they will be able to retain their original appearance.
Here we consider several design options for laptop tables. But with the proper imagination, you can significantly expand their number. The uniqueness of the table will be given by the original stand, the materials used, as well as decorative elements.
Thus, having made a table, you will have the opportunity to continue working in bed in comfort.
Possible modifications
Most tables have an identical type of construction, which consists of 4 support posts and a table top. Upon detailed analysis, several main varieties can be distinguished:
- classic monolithic tables;
- with rising part;
- folding transformers;
- designs on wheels.
Each of the samples is designed for a specific load and the presence of additional elements. You should select the type of design that is ideally suited to your individual needs.
DIY monolithic laptop tables are a durable design. The base is often made of beech or other strong materials. The main requirement for wood is resistance to mechanical stress. The optimal material thickness is at least 20 mm.
4 legs are mounted to the shield (future tabletop). Installation is carried out using special corners and screws. The simplicity of the design allows you to make a laptop table into your bed quickly and economically. The finished product can be used not only for a PC, but also for eating, reading books and newspapers.
Devices with a rising part have a number of features. The main thing is the installation of special devices that allow you to hold part of the tabletop in an inclined state.
The structure is divided into 2 parts. The smaller part remains stationary and is used as a base under the armpit. The second part is equipped with two hinges and thrust plates. Adjustable tabletop makes it possible to install it in different positions.
Making a folding transforming table with your own hands is a little more difficult. This design contains several basic elements at once:
- cup holder;
- armrests;
- folding legs.
To arrange such a table, you will need to use a large tabletop, in which you will have to make special cutouts for the arms. The most suitable shape of cutouts is in the form of a boomerang. It will allow you to use a folding laptop table without excessive strain on your hands.
Cup holders are optional. A distinctive feature of the transformer is the wide variety of components that can be added or removed from the package.
A laptop table on wheels is practically no different in structure from a regular device. The device also includes a table top, legs, partitions and fastening elements. The model differs only in the presence of small wheels. These parts are sold in any specialized store.
The table is convenient because it can be moved throughout the room and used for various needs. Most often, the device is used as a bedside table for a laptop.
Most PC owners prefer rounded edges of the table top and legs. However, a rectilinear design will also be convenient. The main thing during the installation process is to carefully treat the wooden surface so as not to drive splinters or get scratched during use.
Classic
On wheels
With rising part
Transformer
Recommendations for the design of ready-made tables
To ensure that your creation is not only functional and reliable, but also attractive, you can follow some tips. They will help to put a stamp of individuality and style on your table:
After cutting the tabletop, it is recommended to process it on all sides. If you lose sight of this detail, the edges may lose their original appearance after some time.
If you adhere to minimalism in design decisions, then simply coat the table with varnish to ensure the shine and smoothness of the tabletop. At the same time, you will protect the product from negative external influences.
Combine models, bring in your ideas, add details - your imagination will allow you to create the perfect table! Your hands are capable of creating masterpieces!
Dimensions and drawing
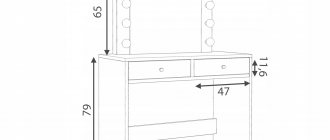
An important aspect of creating a reliable device for working at a computer is preparing a drawing. Before this, you need to decide on the dimensions of the workpiece. It takes into account what dimensions the table will have - standard or individual.
The most common option is a device with dimensions of 30 x 60 cm. These are the initial data for a standard product. It is better to adjust the sizes to your own preferences. If you need to make a laptop table with armrests with your own hands, then the only option is to increase the size.
Many drawings involve making straight legs. However, such products are not reliable. Installing supports in a Z shape will help achieve greater stability.
Stages of work
If a person decides not to buy a table for a laptop, but to make it with his own hands, then, first of all, it is necessary to understand in what order this work should be done. Everything is very simple here:
- You should start by assembling the supporting structure;
- Next, start making the base, that is, the tabletop;
- After we start, we plan out the legs, then assemble them and attach them to a wooden base;
- Well, at the end, carry out the final installation of the rest of the structure.
After all the work is done, you can start decorating the item. To do this, the table should be varnished, painted, or a high-quality image applied (for example, a laptop model).
Manufacturing materials
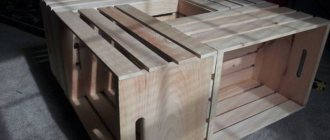
Among the possible types of material, one of the reliable ones is pine. A wooden table made from this species is strong and durable. At the same time, the material is lightweight, which is an undeniable advantage for home owners. To save on materials, you can use chipboard, MDF, chipboard or plywood to make the countertop. These options are lightweight and inexpensive compared to solid wood.
Plastic is practically not used to create such a device. However, if you have a sheet of thick plastic or plexiglass at your disposal, these materials are also suitable for building a table for your laptop yourself.
For work you should prepare the following tools:
- saw;
- plane;
- grinding machine;
- drill;
- drill;
- hammer;
- screwdriver;
- screws;
- corners.
If you do not have a special grinding device at your disposal, you can use sandpaper. It is most effective to use several types of this material of different dispersion.
What you need to create a laptop table with your own hands
To make a tabletop, available materials are suitable: plywood sheets, chipboard, scraps of natural wood boards. Particle boards are lighter than solid boards. But natural wood looks more beautiful. It is easier to make a shaped tabletop or make holes from a softwood board. Hard wood and shavings crack and break.
It is best to find a furniture board or panel made of pine to make a tabletop.
Additional details:
- oak or pine bars;
- furniture dowels;
- loops.
Rounded cylindrical tenons or dowels strengthen the structure. A particularly durable material for them is beech.
A frame is made from the bars, onto which a furniture panel or chipboard is attached on top. Hinges are needed for a table top that can be raised and adjusted in height. To make the design simpler, they do without them - nail the lid or secure it with self-tapping screws.
Leg materials to choose from:
- scraps of furniture boards;
- bars;
- metal frames;
- telescopic structures.
The legs are reinforced with slats and supports to increase stability. To adjust the height, a plastic window clamp is installed under the tabletop.
The set of tools is selected according to the manufacturing technology. For a simple table, a saw and a hammer are enough. In the manufacture of more artistic and functional models they use:
- jigsaw - for cutting, shaped cuts and holes, rounding corners;
- screwdriver - for screwing in self-tapping screws and securing hinges, hinges, and fittings;
- grinding device - a drill with a polishing attachment is used to level and prepare the surface for varnishing;
- milling machine - for rounding the edges of the product;
- tape measure, centimeter - for marking.
Rough or previously painted boards can be sanded with coarse and fine sandpaper. To secure the slats and legs you will need screws and nuts.
Step-by-step algorithm for creating from wood
If device owners do not know how to make a laptop table, then step-by-step instructions will save time. It is important to observe safety precautions when working with tools.
- The first thing you need is a drawing. Ready-made or compiled independently - it doesn’t matter. The diagram must contain exact dimensions and sequential steps for processing materials. The best option would be to print the drawing on large sheets of paper.
- The next stage is creating forms. To do this, the required shape of parts is cut out of wooden blanks. An electric jigsaw is used, but you can also use hand tools, such as a wood saw.
- The further process of preparing folding tables for laptops involves sanding all surfaces without exception. You can use a grinder, a grinder with a special attachment, or regular sandpaper.
- Painting is done quickly; if a water-based composition is chosen, conventional paints will dry in about 24 hours. At the end comes the crucial moment - varnishing the surface of the table. This makes it possible to protect the wood from moisture and sunlight, as well as give the workpiece a unique shine.
- The last step towards creating a reliable table is assembly, the guideline for which is an accurate sketch.
Wooden components are often treated with adhesives that can hold different types of wood together.
Drawing
Creating Forms
Sanding all surfaces
Painting
Assembly
Ready product
Necessary materials and tools for work.
Everything you need for work can be found right at home or go to a flea market and find everything there.
For creative activities you will need a sheet of plywood, several wooden planks, nails, glue and bolts for attaching the legs.
If you want to make a folding table, you must carefully study the installation instructions. Here you will need several additional parts, the installation of which will make the table prefabricated.
The supports (legs) will fold, and the horizontal surface will be lowered and returned to its original position.
Metal strips with holes for bolts will come in handy. To get the effect of folding in half, use regular door hinges.
DIY furniture from pallets - how to make beautiful and stylish furniture with your own hands from scrap materials (115 photos)Door decoration ideas - how to create a modern design for interior and exterior doors (100 photos)
- New furniture design: photos of beautiful design and combination in the interior
For folding at one angle, a hinged fastening bracket is used.
Check out several photos of a laptop table offered on the Internet along with a detailed description of the work.
How to make a cooling system
For most modern technology, it is necessary to purchase additional equipment. For example, laptops often require an auxiliary cooling system. This is especially true for digital equipment that is used quite often.
To build cooling yourself, you will need an old computer or a couple of coolers from the system unit. Based on old units, you can build an effective cooling system that will run from a USB cable.
The cooler can also be installed in the table itself. Installation is carried out from the reverse side of the tabletop. Air will flow to the bottom of the laptop case through a specially prepared hole of a certain diameter. This design can be used both on the bed and in any other place.
To do this you will need to make markings for the cooler. The hole should be aligned with the laptop's ventilation grille. If you use 2 coolers, you should visually divide the tabletop into 2 sections and cut out one hole in each. The cut areas are carefully sanded and also treated with a protective compound. To install the cooler, you can use small self-tapping screws.
Laptop stands made of plastic pipes
Cuttings of water and sewer pipes after repair or construction work can be useful for making an original stand.
It will take very little time to make a laptop stand with your own hands from PVC plastic pipes. First, the pieces are cut according to the size of the laptop, and then they are connected using corners when heated, as shown in the video. The finished product is coated with spray paint. The color is chosen to match the interior or personal preference.
The result is a neat and convenient stand at a very low cost.
No less practical is the following version of the table, which is convenient to use while sitting on the sofa or bed.
The advantage of this option is that such a table-stand can be moved close to the sofa and take up minimal space, and its height allows you to work comfortably in a sitting position.

