Pouf table with legs
Another lightweight design option that is not very suitable as a durable seat, but will serve as an excellent side table or footstool, is a pouf with legs made from plastic bottles.
Photo: foter.com
- Furniture
How to fit a banquette and ottoman into the interior: 7 ideas for different rooms
Bottle chair
An ottoman is a miniature product with which you should start making furniture from bottles. A more complex design is a chair, but if desired, you can quickly build it with your own hands.
You must first prepare a large number of bottles; it is better if there are a supply of them. Otherwise, you will need all the same materials as in the previous case.
You can easily assemble even a large chair from bottles
Step-by-step instruction
Step 1. First you need to cut the plastic bottle, after which the upper part will need to be turned over and placed in the lower one. Then a whole bottle is inserted there and closed with a lid, and the top is closed with the lower part of another container. The result is a very strong and stable structure, which is what is required in the case of a chair. Using the same principle, a fairly large number of preparations should be made, so all family members can be involved in such work. If you wish and have a lot of bottles, you can even build a small sofa.
The process of connecting bottles is shown in a detailed diagram
Step 2. You need to connect the resulting modules in four pieces using tape. As in the previous case, it is better to use more of it, especially when creating massive structures. Next, the modules from the bottles must be connected again, wrapping them with tape on all sides.
Connecting the bottles together
Step 3. Using the same principle, constantly wrapping new layers of tape, you should make the back and armrests of the chair. By the way, instead of adhesive tape, cling film in rolls is perfect for such purposes - you can find it in any supermarket. The advantage of the film is that it connects the modules more tightly than any adhesive tape, and it is much easier to work with.
Assembling the back and armrests
Step 4. In this case, you should also make a soft base from foam rubber or padding polyester - then the product will be more comfortable. The parts are cut out to the shape of the chair and sewn together. Next, you just need to make a cover for the chair and you can use it for its intended purpose.
We cover the chair with a fabric cover
Basic Rules
If a person wants to make a pouf from plastic bottles with his own hands, he needs to determine for himself the features of its design. That is, you need to know what size and shape the product will have. The most popular is the cylinder shape.
If a pouf is made for children, then the structure must be stable and durable. After all, children move a lot and can simply break a homemade pouf. To ensure structural stability, bottles must be prepared accordingly. In order for such “furniture” to be durable, you need to add bottles to the structure more than one at a time: first, two or three pieces are connected, then this mini-structure is attached to the base.
To make the pouf more durable, it should be wrapped in either a layer of foam rubber or a layer of thick cardboard. Then it can be covered with a made cover. You can use any fabric for this. The main thing is that it is dense, non-marking and definitely stylish. Many people use already unnecessary jeans or ordinary furniture upholstery, which can be purchased at any furniture store. Modern people like homemade poufs for many reasons.
- First of all, it is light weight. It can be easily transported from one place to another.
- Each person will be able to develop their own design, because you can’t always find what you want in the store.
- A pouf made by yourself will cost very little money. It is enough just to purchase fabric for upholstery and some elements for decoration.
- Making this design is easy and simple, the main thing is to follow certain rules.
- Caring for the pouf is also easy. After all, if you make the cover removable, you can simply wash it in a washing machine.
Among the disadvantages, it is only worth noting that the manufacture of such a design will require too much time and effort.
Preparatory stage
Bottles of dense plastic of the same size are selected, which are thoroughly washed, cleaned and dried to avoid the appearance of unpleasant odors during use.
To increase their strength, cleaned containers are placed in the refrigerator or on a winter balcony overnight, after which they are tightly closed with lids and left at room temperature for several hours, while the heated air inside the bottle expands, making it strong and even.
Then the shape, size and height of the ottoman are selected, which can be:
- in shape: round, rectangular, square, non-standard, etc.;
- in height: in 1, 2 or more rows;
- in diameter - small single-seaters or larger ones that can accommodate a small company.
You can make the product larger and more stable in the following ways:
- filling each bottle 1/3 with sand;
- creating “cylinders”: the top of one bottle is cut off and the second bottle is tightly inserted into the resulting “vase” with the lid down.
As a rule, a small pouf “in 1 row” takes 15-18 bottles with a volume of 1.5-2 liters (or twice as much when creating “cylinders”).
Necessary materials
What else is needed to create an ottoman? To understand the process, watch the video:
So, to start the master class, prepare:
- 14 bottles of the same size (colors may vary);
- marker;
- jigsaw;
- Double-sided tape;
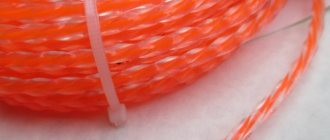
- strong threads;
- thick needle;
- stationery knife;
- foam rubber for upholstery (it is better to take at least three cm thick);
- two scraps of plywood or other durable material;
- fabric for the cover;
- ruler.
That's it, the materials are prepared, you can start working. The result will be something like in the photo:
What else is needed to make an ottoman?
In addition to plastic containers, the following materials will be required to make an ottoman:
- adhesive tape and masking (paper) tape;
- thick cardboard in several layers, corresponding to the shape of the future seat;
- sheet of foam rubber, thickness from 50 mm;
- old fabric (a sheet or unwanted T-shirts will do);
- pencil, paper, scissors, strong thread and gypsy needle;
- fabric or yarn for a decorative cover;
- stationery knife, furniture stapler.
Having prepared everything you need, choose your workplace. An important condition is the presence of a flat surface to maintain the level of bonding of the bottles.
Step-by-step algorithm
I made my own ottoman from chipboard strictly in stages. This makes it possible not to make mistakes with details and not waste consumables. I suggest you familiarize yourself with the steps that I followed in the process of making a piece of furniture.
Step one: preparing the drawing and details
First of all, I made a sketch of the future pouf. It should have turned out rectangular. The approximate size is 40x40 cm. I wrote down every detail here, including the front and back walls, end partitions, bottom, and lid. Above each element I wrote the dimensions of the sides.
All parts were cut out according to preliminary marks in accordance with the dimensions indicated on the drawing. Sanded the end parts with sandpaper. You don't have to do this as the cut can go perfectly smooth. In my case, roughness remained, which would later cause snags on the padding polyester.
At this stage I also prepared small bars; from one solid one with a section of 40x40 mm I made four identical small parts. Then I took a piece of foam rubber and cut it according to the size of the lid. You can take several layers of material if it is thin. It all depends on how soft the seat you want to get.
Step two: frame assembly
Once I was sure that all the parts for the next step were fully prepared, I began assembling the frame. This process consisted of several steps for me:
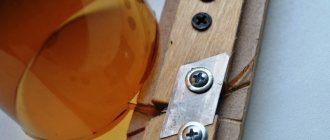
- In accordance with the markings on the drawings, I began to fasten the frame parts together. To do this, I took the vertical parts that serve as the sides of the future ottoman and fastened them together using metal furniture corners.
- On the inside, I glued four identical 40x40 mm beams using furniture glue into each corner and fixed them 3-4 cm apart with self-tapping screws for additional secure fastening on the outside of the product.
- I carefully coated the outer part of the frame with glue and wrapped it around it using a thin layer of padding polyester. I did this in order to protect the upholstery material from deformation when rubbing against the sharp corners of the ottoman box.
- The next step was to secure the bottom of the piece of furniture. For this purpose, I waited until the glued padding polyester had set and turned the frame on its side. I coated the bottom part around the perimeter with glue and attached the bottom partition. I screwed in self-tapping screws along the edges at the ends to prevent the bottom from peeling off under load.
- I waited until the glue dried, then secured the furniture casters to the corners of the product using screws. They need to be screwed into the beams that are used to fasten the heads installed inside the frame.
Now you need to let the prepared structure stand for a while, the wooden material should get used to it, and the glue should fix more reliably.
Step three: frame upholstery
At this stage it is important to make the pattern correctly. What is a pattern and sharp scissors or a painting knife used for?
- Having marked the material by size and cut it out, I laid the workpiece on its side and began to apply leatherette to it.
- I folded the edges of the material a little and then fixed it to the chipboard using a furniture stapler.
- The places where the upholstery material meets were steamed with an iron. To prevent the leatherette from melting, I did this through a terry towel folded in one layer.
There is no need to cover the bottom with material, since it is not visible during operation.
Step four: making the lid seat
The cut out part of the lid from chipboard should be 10 mm larger in width and length, then it will look beautiful and will not be pressed inward during use. I performed the folding part of the structure as follows:
- I took a chipboard blank, coated its surface with glue, and then wrapped the outer part with a thin layer of padding polyester. Exactly the same as I did for the frame.
- Next, using furniture glue, I glued the foam rubber and covered it with synthetic leather on top. To attach the latter, I also used the same fastening technique as on the frame.
- Now I attached two furniture hinges to the inside on one of the selected edges at the same distance, and we fix the second part of this hinge directly to the upper edge of the frame.
The internal space can be used for your personal purposes. To improve functionality and make cleaning easier, you can put a special box inside the pouf according to the dimensions.
I personally recommend making decorative upholstery on the seat. To do this, using special furniture nails with beautiful caps, you can easily create an interesting pattern or ornament. It is advisable to maintain softness so that the surface remains comfortable.
This video explains in detail what rules to follow when assembling an ottoman from chipboard material.
Alternative option (method number 2)
There is another way to create a stable pouf with your own hands. The difference lies in the preliminary preparation of the plastic. The method requires twice as many containers. This type of product will be more stable and durable.
Work order:
- We cut off half of the existing bottles at the neck, cutting off the part where the container becomes thinner. What remains is a wide cylinder with the bottom of the bottle.
- You need to insert a whole container with the lid screwed on with the neck down as firmly as possible into the workpiece to get a cylindrical workpiece, where the bottom of the bottle is on both sides. Secure the joint with tape.
- We work with the entire volume of material.
- Using double-sided tape we connect the elements, forming a strong, homogeneous base.
- We cover the product with foam rubber.
If you do not want to cut the material, you can arrange the bottles like this: place the main container with the lid up. Around it we glue the containers to the top with the bottom. We alternate the installation of elements to get a stable chair. The cladding is carried out according to the standard type.
Square and rectangular structures are made by attaching four bottles to form a block. The number of blocks depends on the dimensions of the required seat. After compiling the required volume of quadruple elements, they are connected to each other using tape. Using this method, you can make not only a pouf, but also a bench-type seat or a sofa.
The cover can be plain, made of thin simple fabric. It will act as a protective element of foam rubber and padding polyester. You can wear a more beautiful, elegant item on it.