Rules for purchasing gypsum
Beginning craftsmen often wonder: where to buy plaster for crafts? There are several options:
- Pharmacy.
- Hardware store.
- Construction goods store.
- Decorative art supply stores.
When purchasing a base powder, you should pay attention to the tightness of the packaging (after all, violating the integrity of the package will lead to the powder getting wet) and the expiration date.
After the shelf life expires or the rules for storing gypsum are violated, the material loses its basic properties, which affects the quality of the crafts.
Painting of products
Complete aesthetic satisfaction from a craft can only be experienced by painting it. Unpainted products sometimes make a negative impression. A layer of paint also protects crafts from contamination. Practice shows that adding a coloring composition to a gypsum solution does not always lead to the desired result.
Professionals are also of the opinion that sculptures should be painted after the plaster has hardened. Any type of paint can be used in this process. In particular, to obtain a bronze tint, several layers of ocher are applied. A primer is required before painting. Traditionally, varnish, wood glue or an emulsion of polyvinyl acetate in water (PVA) are used for this.
Due to its porosity, gypsum absorbs paint, and a product painted without a primer takes on a less than aesthetic appearance.
The purpose of priming plaster products is to close the pores of the plaster and allow a layer of paint to evenly cover the surface without soaking into the base. After the paint has dried, it is coated with varnish for durability and visual effect.
Basics of working with plaster
On store shelves, gypsum is presented in the form of a dry powder. Before you start, you should learn how to properly dilute plaster for crafts:
- First of all, you should prepare an old sealed container of sufficient volume.
- It is necessary to pour the proper amount of dry powder into the container.
- Water is added to the center of the gypsum mound.
- Water is poured in portions, alternating this process with stirring the solution.
For a high-quality base for creating crafts, it is necessary to obtain a thick consistency of gypsum without large lumps.
Making a gypsum mushroom for your garden
Tip: involve children in the process. Such activities have a beneficial effect on the development of creative thinking and finger motor skills.
You should start by preparing all the necessary tools and materials:
Required accessories
Everything you need while working
Tools:
| Name | Purpose |
| Brushes | Applying paint |
| Compass | Creating straight circles |
| Pencil | Marking |
| Stationery knife | Carrying out cutting of plastic and fine processing of gypsum |
Materials:
| Name | Purpose |
| Gypsum | The main material of the sculpture itself |
| PVA glue | Fixing individual fragments of a composition |
| Varnish and acrylic paints | Adding color |
| Cellophane cling film | Simplifies the removal of plaster blanks from cups |
| Plastic bottle | Is a mold for making a mushroom stem |
| Cups, 2 pcs. | Using the first, the base is poured, using the second, the mushroom cap. |
| Decorative elements in the form of leaves, flowers, beads and other figures | Decorating the appearance of the object of your creativity |
| Sunflower oil | Simplify the separation of the gypsum blank from the plastic walls of the bottle |
| Soap | |
| Water |
Additional materials for work
To create figures from plaster, the master will need special forms:
We recommend reading:
Crafts from plasticine: the best master class for children at school or kindergarten. 90 photos of the best ideas for creating plasticine figures- Felt crafts - the best patterns and templates. Step-by-step instructions and master class for beginners (130 photo ideas)
DIY crafts from egg trays - the best step-by-step master class, with description. TOP 100 photos of original ideas for crafts
- Silicone molds.
- Homemade frames made of wood or metal.
- Natural materials: large shells, boulders or even unusually shaped leaves.
Also during the work you may need decorating materials: paint, acrylic varnish, brushes, beads, rhinestones. Photos of finished plaster crafts will help you choose a model to work with.
Working with plaster should be carried out in compliance with safety precautions: when diluting the powder, be sure to use a mask and goggles, and when creating figures, wear gloves.
Simple caterpillar
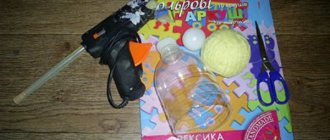
We will need:
- Gypsum;
- The glue is waterproof;
- Dye;
- Priming;
- Clear varnish;
- Brush.
Let's get to work. It is necessary to mold several flattened balls of various sizes and shapes (about 10 pieces). Next we make 2 balls for the eyes. They can be small or, on the contrary, large - as you like. We wait until all the elements dry. Using glue, we attach all parts of the caterpillar, making any shape for the body of our figure. We glue the eyes on the head.
We cover our craft with soil and give it time to dry (about 2 hours). We paint the caterpillar with bright colors and dry it.
Using waterproof varnish, we cover our craft with it and leave it to dry. A bright, lively and slightly fabulous figurine for the garden is ready.
Step-by-step making of crafts
To make plaster crafts with your own hands correctly and without errors, you can use educational video tutorials.
On various web resources on landscape design (garden figurines) and practical creativity (interior souvenirs) you can find a large assortment of models for the master’s work.
Step-by-step master classes on plaster crafts contain the following steps:
- Preparing the form.
- Dilution of gypsum.
- Filling the mold with gypsum mortar.
- Drying the product.
We recommend reading:
- DIY crafts from Kinder surprise eggs - 125 photos of exclusive options with step-by-step instructions, master class and video
- Crafts made from twine - an overview of original design solutions. More than 100 photos of new products + step-by-step instructions for creating crafts with your own hands
- DIY crafts from candy wrappers: 150 photos of the best ideas from craftswomen. Simple instructions, master class, diagrams and video tutorials on creating crafts from candy wrappers
The final stage is decorating the finished craft. For decorative finishing, acrylic paints and clear varnish are used.
Several layers of paint and varnish are applied to the finished, well-dried product. This condition must be especially observed when making garden figurines, which are supposed to be installed outdoors.
Paint and varnish provide additional protection from moisture, dirt and mechanical damage.
This scheme is universal, regardless of the chosen model: plaster crafts for kindergarten, New Year's toys or souvenir figurines for home decoration.
Features of caring for garden plaster decorations
If the manufacturing and processing technology is followed, plaster figurines will last for many years, but proper care is integral to preserving the appearance of the products. Therefore, you should consider:
- when cold weather sets in and the air temperature drops to below zero, as well as during prolonged rains, you need to remove garden figurines from the garden for storage in a warm and dry room;
- It is best to place the figures on a base made of natural stone or concrete, which will prevent insects from being exposed to moisture near the base;
- The varnish on the figures should be renewed every 2 or 3 years, which will protect the color of the products.
Proper care is the key to maintaining the bright color of plaster figures
Crafts for the garden plot
Plaster figures are great for garden decoration: you can place a beautiful craft on a children's playground, on a summer terrace or along a driveway.
If the craftsman desires, you can find molds of any size, and for the manufacture of absolutely any product: full-length animal figures, turrets for a toy castle, and the castle itself (for a playground).
We recommend reading:
Crafts flowers - 125 photos of the best ideas from craftswomen. Instructions on how to make it yourself from A to Z. Simple and complex options for crafts + video tutorial- DIY crafts: TOP-200 photos of the best ideas. Schemes, master classes, modern design, new products, instructions with descriptions
Crafts from nuts - 120 photos of the best ideas for beautiful crafts. Original design options + step-by-step instructions for beginners
Complex figures with a frame
It’s more fun to decorate your country house with sculptures of animals and mythical characters. Such creations involve the preliminary production of a durable frame and layer-by-layer application of cement mortar.
Interesting flowerpots can be made using buckets from construction mixtures. At the first stage, a container of suitable size is wrapped with a plaster mesh and covered with a thick layer of cement. At the second stage, until complete hardening, decorative adjustments are made, making an imitation of an old stump with natural wrinkles on the bark.
A monolithic figure of a hippopotamus would look appropriate near artificial reservoirs. The place for it must be determined immediately and carefully aligned, since in the future the figure will be stationary.
Two elongated plastic basins, which must be fastened with wire, are suitable as a frame. Another option is also possible: a thick cement solution is covered on top of a pile of broken bricks or crushed stone.
The figure itself does not contain complex elements and is easy to perform. After hardening, the product is treated with fixing impregnation and dry pigment for concrete, rubbing the powder with a hard sponge.
More complex sculptures are made in several stages: 1) making a frame from wire and foam plastic or containers; 2) covering the workpiece with a plaster mesh; 3) applying the mixture in several layers; 4) formation of small details (facial features, special texture, folds of clothing, etc.); 5) priming and painting the finished work.
Flowerpots in the shape of swans will become an elegant decoration of the garden. The body frame is an old plastic basin, the neck is woven wire. The head, wings and imitation plumage will have to be made from a cement mixture, showing the skills of a sculptor.
Monolithic figures have a significant weight, so as an alternative there is a way to create lightweight large objects. You can decorate your garden with boulders of different sizes.
To make them, any unnecessary and lightweight material (cuts of polyurethane foam, plastic bottles, polystyrene foam) is tied into a tight lump with wire.
The resulting base is wrapped in a plaster mesh and covered with thick cement mortar. The more irregularities and protrusions there are, the more natural the “stone” will look.
Small garden figurines are made from a mixture of cement with the addition of gypsum or Portland cement.
Here you can use the manufacturing methods described above, as well as any basics: old toys, items of clothing, household utensils.
Plaster shoe for flowers
To work, the craftsman needs to find a cut-out boot shape (to get two halves of a boot for a hollow figure). After diluting the plaster, the mold is greased from the inside with vegetable oil and the solution is carefully poured inside.
After the material has hardened, the mold is removed and the product is left to dry in a warm place with good air circulation. After drying, the blanks can be glued together to obtain a solid or hollow figure.
The craft is decorated at the request of the craftsman or the owner of the site. Holes are made along the bottom surface to drain moisture, and a drainage layer and fertile soil are poured inside.
How to make gypsum mortar
- The easiest way is to dilute plaster with water in a ratio of 7 to 10.
- An important point: first, water is poured into the container, and only then gypsum powder is added.
- In this way, the entry of gypsum dust into the respiratory tract is minimized.
- The strength and ductility of the solution can be varied using PVA glue or slaked lime.
- Before pouring the solution, you need to lubricate the mold so that you can easily remove the craft later.
There are many lubricant options:
- Silicone,
- Wax,
- Stearic.
Also use soap solution or kerosene. For small crafts, vegetable oil is often sufficient.
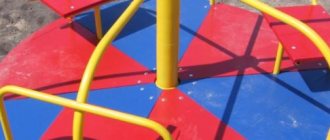
Garden figurine for the playground
To decorate children's playgrounds you will need crafts in the form of animals or fairy-tale characters. For example, in the form of three little pigs or a family of hedgehogs.
Bright acrylic paints will become not only a decorative, but also a protective coating. The coating layer will prevent moisture and dirt from entering, and will also significantly extend the service life of the product.
Giraffe made of wood
One of the most affordable and natural materials for making figurines is wood. It will appeal especially to those who prefer garden decorations made from environmentally friendly materials. You can create whatever wooden figurines you want with your own hands. The material used is logs , driftwood, etc.
All this can be found in large quantities in the nearest forest, and someone has a lot of such stuff on their property. You can make wooden sculptures with your own hands in the form of a couple in love, funny people, fairy-tale characters. You can arrange a whole zoo of domestic or wild animals. Or, for example, build a scene from some cartoon that you loved as a child or that your children (grandchildren) love now.
You can make anything from wood, even an exotic giraffe.
Materials and tools:
- curved driftwood;
- empty canister;
- plastic bottle;
- Oil paint;
- brush;
- cement mortar;
- a pair of wooden blocks;
- set of tools for woodworking.
In order for the figure to be stable, you need to make a foundation . It is necessary to dig a small hole and pour cement solution into it. Immerse future giraffe legs in it and leave to harden.
The next stage is making the head. It is made from a canister. If the canister has a handle, then it needs to be cut off. Two holes are cut at the proposed crown. Branches are inserted into them - these will be the giraffe's horns. You need to make slits on the sides for the ears. Ears are cut out of a plastic bottle. The snag will serve as the body.
To hold the torso and head together, a hole is cut in the canister that acts as the head. Now the head is put on the body.
Next, all that remains is to give the giraffe its natural color and draw the eyes. You can add a cute smile to your animal and tie a fashionable bright scarf around its neck.
Crafts for home
You can also make crafts from plaster to decorate your home. Miniature figurines on a book shelf, sets of fairy-tale or cartoon characters for children will complement the interior of the living room.
For lovers of indoor flowers, you can make original pots for small sedums, decorative dracaenas or a bright Christmas star.
LiveInternetLiveInternet
On New Year's Eve, we invite you to make this soulful ball that imitates an old toy. It will be a wonderful decoration for your holiday tree.
We will need:
- plasticine
- plaster (alabaster)
- acrylic paints of different colors
- PVA glue (dispersion)
- two-color paper or paper wallpaper
- flour glue (you will find its detailed recipe below in the description of the process) or wallpaper (this is what is usually used in theater workshops)
- sponge
- brushes
- unnecessary box (approximately 25x25 cm)
- petrolatum
Let's get to work!
We model a ball from pieces of plasticine. Using stacks, we give it a more rounded shape and finally smooth the surface with hands dipped in water. To ensure that the shape is not distorted during the sculpting process, we recommend laying it on a sponge.
We model a mount from a separate piece of plasticine and attach it to the ball. Lubricate the surface of the figurine with Vaseline.
Pour cold water into the prepared bowl (no more than half) and pour in plaster until a mound appears. Now vigorously stir the gypsum until it reaches the consistency of liquid sour cream. Pour plaster into the prepared box, filling it halfway. We wait until the bubbles disappear and immerse the plasticine figurine in the plaster mass, also exactly halfway (we pre-lubricate the immersed figurine with Vaseline so that it does not stick to the plaster mold and is easy to remove).
Important: add plaster gradually, controlling its density, because it is no longer possible to dilute an excessively thick mass with water - the plaster will not set.
After the plaster has completely hardened, be sure to lubricate its surface with Vaseline so that the second plaster layer does not stick to the first. Again, pour cold water into the prepared bowl (no more than half) and pour in plaster until a mound appears. Stir the plaster vigorously again until it reaches the consistency of sour cream. The height of the layer above the plasticine figurine at its upper points should be at least three centimeters.
The plaster begins to heat up and finally hardens when it becomes cold (about 30 minutes). After this, the plaster mold can be removed from the box. The plasticine blank and the entire poured mold are heated together with the plaster and therefore are easily removed. If you waste time, the plasticine inside the plaster mold will cool and harden, making it very difficult to remove.
Using a knife, cut off the protruding crumbling edges of the resulting brick.
Using a knife, we divide the resulting plaster “brick” into two halves. Carefully take out the figurine and cut off the crumbling edges. As a result, we should have two neat, smooth halves.
Now that the forms are dry enough, we begin to glue them using the papier-mâché technique. We grease the first layer of paper with flour glue on one side only and apply the paper pieces to the mold with the non-glued side. The glue recipe is very simple: add three tablespoons of wheat flour to a third of a glass of cold water and stir thoroughly until a homogeneous mass is obtained. Now add boiling water to the glass, resulting in a glass of wonderful papier-mâché glue.
It is advisable to glue five to seven layers, alternating paper of different colors for convenience (this way, the un-glued areas are clearly visible, since they will differ in color). After the papier-mâché blank has dried, carefully remove it using a knife. If the plaster mold is damaged in the process, the potholes can easily be repaired using plasticine. We cut off the protruding edges of the paper parts with scissors.
We sand the cut edges with sandpaper. Now we begin to make the fastener: we tie a loop from a decorative cord, make a slot in one of the parts of the ball and secure the loop in it using several layers of paper coated with PVA glue.
We grease both parts of the paper form around the perimeter with PVA glue, connect them and secure them with sewing threads for better gluing. After ten minutes we remove the threads. We cut off the edges protruding in the places of gluing with a stationery knife.
We glue the mold along the connection line with several layers of paper, and secure the first layer with PVA glue, and all subsequent layers with flour. Where unwanted holes have formed during connection, feel free to use paper and glue! Let the mold dry, then sand its surface with sandpaper.
Lubricate the sanded form with a thin layer of flour glue and begin painting. Using a dry brush with a small amount of white acrylic paint applied, lightly prime the surface. Now, using paints of various colors, we paint the ball “in a checkered pattern.” In each sector it is important to achieve a “picturesque” effect, for which we mix the paints directly on the ball. After the entire surface is divided into picturesque cells, we will enhance their contours with bright orange paint. The line should not be clear, so it is necessary to “smudge” its edges.
Our ball is ready! All that's left to do is hang it on the Christmas tree!
The Christmas tree decoration was made by Lyudmila Skitovich.
Crafts for the New Year
New Year's crafts made from plaster will help you decorate your home in an interesting way on the eve of the holiday. These can be beautiful stars, balls or snow houses, painted in a variety of shades.
Working together with a child will please everyone: both children and parents. And the bright colors and shine of the New Year's toy will lift your spirits.
Original do-it-yourself flower beds.
Are you not a sculptor at all? But believe me, you can make these creative flower containers.
We need a plastic container, foam plastic, reinforcing mesh. We make a cement solution by adding a spoonful of gypsum directly into the palm with the solution and thus form our “sculpture”
But not all of us are fans of modern abstract art. But you can easily make garden crafts in a classic style.
But, because You are not a sculptor yet, you need a template - it could very well be an old doll.
Because If this is not just a decorative garden figurine, but a flower bed in the shape of a girl’s head, then the top part needs to be cut off.
Then the head is painted. To add texture, the template is first painted with dark gray paint. Allow to dry and apply a layer of lighter paint. After drying, apply a layer of even lighter paint with light strokes.
This is a very simple process, and all the examples of this style that you see in the article were made by teenagers in a craft class.
Photos of plaster crafts
Did you like the article?
3+
Shape the ball into a bowl
Make a small cavity in the middle of the clay ball with your thumbs, then gently pinch the sides of the clay between your fingertips, turning the ball slightly in your hands after each dent you make. Continue doing this until you have something that looks like a rough bowl. The walls should be as smooth as you can make them.
Tip: to prevent the clay from sticking to your fingers and tearing into pieces, constantly wet your hands with a damp sponge.
Turn the cup into a bell
Once you have the bowl shape, turn it over onto a flat surface and with damp fingers or a sponge, smooth the surface of the upside down piece to complete the bell shape. Then use the needle tool to scratch small hatch marks on top of the clay bell, right in the center.
Lost weight: what Sofia Tarasova sacrificed for the sake of “VIA Gra” (new photos)
"Dad is offended." Agata Muceniece about her relationship with Priluchny after the divorce
Women's jeans: before you buy them, you need to pay attention to one detail
Take a small piece of clay that you set aside in advance, roll it out and roll it into a long thin arc, and then make a ring - this will be a loop from which you can hang your bell.
Again use the needle tool to make scratches on the underside of the hinge, wet the scratched area and press it gently but firmly against the scratches on the bell. Smooth the clay around, turning the bell and loop into one piece. Thanks to water and scratches, they will dry tightly to each other.