When you prepare cookies, you will probably want to make molds for baking this very dessert. In this case, you can quickly and easily make your own molds rather than buying them from the store. It only takes a few household items to meet your needs. For more traditional, reusable ramekins, you can use an empty soda can. If you want to cut out unusual shapes from the dough, it is best to use durable photo paper and make your own cookie stencil from it.
Preparing the Tin Can
First you need to prepare a tin can. How to do it? Very easy. It needs to be cleaned with detergent and water. The water must be hot. Do not force-dry the jar; it is better to let it dry on its own. Place the jar, hole side down, to dry for at least two or three hours before starting to make the cookie cutter.
If you don't have bottle cleaner, you can roll up a paper towel to clean the inside of the jar. However, be careful in the area around the hole as the edges may be sharp.
Making metal molds
To make metal cookie cutters with your own hands, which can then be used to cut out dough products, you will need the following materials and tools:
- Aluminum molds for oven use.
- Metal scissors.
- Clothespins.
- Pencil, marker and ruler.
- Thick gloves.
- Super glue.
- Pliers.
- Paper.
- A rectangular template made of any material for strips 4 cm wide.
Important! When making aluminum molds, you only need to wear gloves, otherwise you can seriously cut yourself from the sharp, raw edges.
First you need to prepare the material for work as follows:
- Remove the side edges from the mold and, using a marker template, draw stripes 4 cm wide on the metal.
- Draw another line right in the middle of the resulting strip with a marker. Thanks to this line, it will be easier to form a metal blank.
- Now you need to cut off part of the workpiece along the main line.
- Fold the cut piece in half along the line.
- We unfold the workpiece, on the left side we fold it in half along the length directly along the fold line.
- We do the same actions with the right side.
- We fold the workpiece inward with sharp edges.
- Using the handle of the scissors, smooth the edges.
- As a result, we get a durable and flexible tape.
Now let’s look step by step at how to make cookie cutters with your own hands:
- Draw a sketch of the required shape on paper. There is no need to use too complex bends to make the shape easier.
- Form an aluminum strip around the design according to the sketch. The tape must be bent using any available tool - a bottle, a rectangular or round glass, a pipe or a rolling pin.
- When you get the desired shape, you need to leave a few centimeters for fastening, and cut off the remaining piece.
- The ends should be glued together with superglue, secured on top with clothespins and left to dry completely.
So we have a durable baking pan.
Cutting off unnecessary parts
Cut off the top and bottom of the tin using sharp scissors or a knife, whichever works best for you. Press one of the blades of the scissors into the jar about two millimeters from the lip on the top of the jar, and then work the jar around the blade to remove the top. Then do the same with the bottom of the can so that you have an aluminum cylinder that is open at the top and bottom.
If your scissors are not sharp enough to cut into the can, try using a knife to pierce the metal and then finish cutting with scissors.
If you don't have a tin can, use a sheet of tin if you have one.
Warning: The edges of the can can be very sharp once you start cutting them. It's best to wear a pair of thick rubber gloves or work gloves while you're cutting and processing metal.
Cake stencils that can be printed on paper (0 to 9)
Each template below is printed on one standard sheet of A4 office paper. Just click on the number you need, save it on a flash drive, and then print it on a printer. Carefully cut out the print along the outline.
0 (zero)
1 (one)
2 (two)
3 (three)
4 (four)
5 (five)
6 (six)
7 (seven)
8 (eight)
9 (nine)
Place the stencil tightly on the raw dough, rolled out into a thin layer to the size of the template. Use a knife to cut off any excess pieces. If the crust is too sticky, sprinkle the surface with a little flour. Otherwise, the paper blank will be difficult to peel off and the layer may be damaged.
Cut the jar into strips
Use scissors to cut strips from the remaining can. Cut along the straight side of the cylinder so that the aluminum can lie on the table like a sheet. Then carefully cut strips at least five millimeters wide. You can use a marker to start by drawing neat stripes and then cut them off. But if you can do a similar procedure by eye, then go for it.
Lost weight: what Sofia Tarasova sacrificed for the sake of “VIA Gra” (new photos)
A Brazilian travels 36 km by bike every day to take his loved one home.
Why French children behave well: eight ways to raise them
For larger cookie cutters, cut the strips horizontally on the aluminum sheet so they are as long as possible. For small cookie cutters, trim the strips vertically to make them shorter.
Avoiding small details
Now it’s worth giving one simple but useful piece of advice that you shouldn’t forget about when making your own gingerbread molds. When choosing a template, try to avoid designs with long and thin parts that protrude far beyond the main body. Otherwise, you will have to face a number of small but unpleasant surprises.
They will begin during the process of creating the workpiece - moving a piece of still raw dough with thin and long elements will be very problematic - they will tear and fall off. During baking, such areas dry out the fastest and then begin to burn - such cookies will not be baked evenly.
Finally, when removed from paper, thin parts often crumble. As a result, having spent a lot of time and effort on making a complex shape, you still won’t be able to get a suitable cookie. Therefore, it is better to immediately abandon such an idea.
Bend the strips into shapes
Bend the strips into the shapes you like. Carefully take the strips into your hands and shape them into the desired shape. Remember that they don't have to be perfect, as you will be able to bend them slightly as needed if they don't produce the results you want.
If you have a more complex shape, such as a mustache, try drawing the template on a piece of cardboard. Then cut out a shape from cardboard and bend the aluminum around the perimeter to make a cookie cutter.
For some simple shapes you can make, try wrapping strips around a cup to make a circle. You can bend different parts of the circle to make a heart or cloud shape. You can also easily make a triangle, square or crescent.
DIY cookie cutters: 4 cool ideas
Making cookies with kids is fun, but most cookies require cookie cutters. You can use glasses instead, although with them you will only get regular round cookies. If the mood to make cookies suddenly appears, you don’t have time to go to the store for molds, but you want to make interesting cookies, you can make them yourself.
Also, stores don’t always have a large selection of molds, but you can make unusual ones, in the shape of different animals, for example. Here are four options for homemade molds.
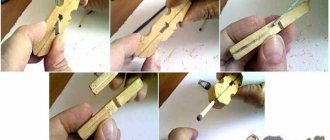
From an aluminum can
You will need a regular soda can. The easiest and most enjoyable step: drink soda. After this, wash and dry the jar.
Cut off the bottom and top with scissors. Cut the can lengthwise to create a sheet of aluminum.
Cut it into strips about one centimeter wide.
Now comes the creative part: bend the strips and give them the desired shape.
The easiest way is to make hearts and flowers, but if you practice, you will be able to make a mold for a gingerbread man. Just in case, wear thick gloves to avoid cutting yourself.
The edges of the molds can be secured with a stapler or glue.
If at the very beginning you don’t cut the can lengthwise, but immediately cut it into rings, then you won’t have to fasten anything. But it won’t be possible to make complex shapes from rings.
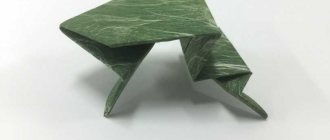
From foil
These molds are easier to make with a child, because there is no risk that he will cut himself on the foil.
Take a sheet of baking foil about 30 centimeters long.
Fold the edge of the sheet about one centimeter wide. Continue folding until you have a long, thick strip of foil.
Now you can make the mold itself. If you can’t get the shape into shape, draw it on paper, attach a strip of foil to the drawing and bend it along the lines.
From cardboard
For this method you will need cardboard, choose a thicker one.
Cut the sheet into strips one centimeter wide and bend them as you wish. Cardboard will not make complex molds, but it is convenient to make stars, hearts and even a Christmas tree from it.
The edges of the molds can also be secured with a stapler, glue or masking tape.
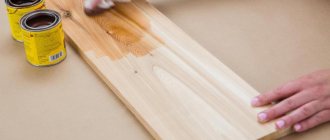
Made of wood
This is a more advanced version of homemade cookie cutters. But there is more room for creativity here; you can come up with more complex forms.
You will need a small block of wood and a chisel.
Draw the desired shape on a piece of wood and cut out a recess along the contour of the drawing with a chisel.
Sand the workpiece, wash with soap and wipe with vegetable oil.
To make the cookies, simply take a ball of dough and press it into the cookie cutter, trim the edges and remove the cookies.
Read more on the topic
Does your child like to eat snow? Make him one of these desserts!
From Oreos to Gummy Bears: How to Make Homemade Versions of Store-Bought Sweets
From maamul to pavlova: 6 recipes for New Year's baking from different countries
CHIPS JOURNAL on VK
Subscribe to us on all social networks!
Glue the ends together
Glue the ends of the cookies together using edible glue. Once the mold is ready, cut off the excess aluminum and fasten the two ends of the strip together. Seal them with a food-safe adhesive such as Permabond or Hot Melt and let the adhesive dry for at least 6 hours before using the cookie cutters.
The money tree pleases with lush flowering: my secret is in caring for the leaves
A student at the Vietnam Police Academy shared how she takes care of her facial skin.
It’s good to wash often: myths about shampoo and hair care that only harm
If you don't have edible glue, you can use regular tape to secure the edges. If you use tape, the cookie cutters will be more delicate, so be careful when using them.
After you use the cookie cutters, you can wash them by hand with dish gel and water to reuse them. Be sure to let them dry completely before storing them to prevent rust.
The simplest lock
Perhaps the simplest lock is a groove lock. For this you will have to leave a small amount of tape on each side - about one centimeter. After this, carefully bend the tape so that the end almost touches the rest of the surface. Moreover, on one side you need to bend it inward, and on the other, outward.
After this, insert one lock into the other, making sure that they fit evenly into each other. All that remains is to clamp them tightly with pliers - now they can only be separated by applying very great force.
This lock has only one drawback – its considerable thickness. However, this will not create any problems during further work. Except that the aesthetic side of the form itself will suffer a little. But this can hardly be called a serious minus.
Making a stencil for cookies. Printing a figure on a sheet of photo paper
Print the shape you like on a piece of photo paper. This method is ideal for unusual shapes such as logos, animals or even silhouettes. Find a simple picture with a clear, easy-to-understand outline and choose durable photo paper that is at least 8.5 millimeters thick. Once the image is printed, allow the ink to dry for 2-3 minutes before handling the paper.
If you don't have photo paper, you can print the image on regular paper and then trace the outline of the shape onto a piece of cardstock.
“We are still friends”: Derevianko commented on the breakup with his wife
Rare shot: Viktoria Isakova showed her grown-up daughter from Yuri Moroz (new photo)
If there is little snow, there will be no harvest: December 16 is Ivan the Silent Day
How to make molds from a plastic bottle?
Many may be surprised, but you can even make your own cookie cutters from plastic bottles.
Important! You can use finished products to work not only with dough, but also with mastic.
They have undeniable advantages:
- We get them completely free of charge, the process of making them only takes a few minutes.
- The quality of the molds and the features of their application will depend on the selected material.
- You get the necessary equipment and dispose of the bottle.
- These molds are made of food-grade plastic, making them completely safe and harmless.
- Making them yourself is quite simple.
To get them, you need to draw sketches of future shapes on paper, then cut the bottle, attach them to the base, and cut them clearly along the contour. At the end you will need to secure their ends with a bracket.
Cutting the shape
Carefully trim the pan to remove any excess paper. Use a pair of sharp scissors to cut out the shape from the paper. Make sure you get as close to the outline of the image as possible. If you're having trouble with a complex shape, try working on small sections at a time to make sure you get the shape as accurate as possible.
If you are making an alphabet cookie cutter, use a sharp tool, such as a knife, to carefully cut out any inner shapes.
Video material
As we can see from the above master classes, you can make cookie cutters with your own hands from plastic bottles, foil, metal and even old tin cans. This way, you will not only get the elements you need for baking, but also use items that have been lying around on the shelves for a long time, and will certainly delight your loved ones with delicious, original cookies of an unusual shape.
Place the mold on top of the dough
Place the pan on top of the rolled out dough on the baking sheet. Once you have made the stencil, roll out a sheet of chilled dough and place the stencil on top of the dough. Try to position the stencil so that you can make as many cookies as possible from the sheet of dough.
If you plan to bake the cookies immediately, place the dough on top of a sheet of parchment paper on a baking sheet to prevent them from sticking to the metal.
Tip: If you've just made the dough, store it in the refrigerator or freezer while you make the stencil so it stays chilled when you're ready to cut out the shapes.
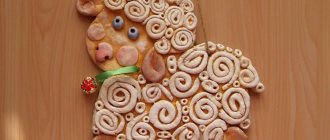
Digit Cake - a recipe made from honey cakes for a girl’s birthday
A cake made from honey dough turns out delicious. The layers are well soaked in the mousse cream and become very tender and soft. And the berry confit adds a pleasant cherry sourness. It can be made from any other berries or fruits you like.
Despite all the apparent complexity of decorating a dessert, it is actually not that difficult. But it will take patience and time. But the appearance of the cake is very presentable and impressive.
The weight of the finished product is about 1 kg. Size: width 16 cm, length 26 cm.
Source -
Ingredients
Cakes (3 pcs. 26x16 cm):
- 200 g wheat flour
- 1 egg
- 80 g sugar
- 35 grams of honey
- 40 g butter
- 0.5 tsp soda
- 1 pinch of salt
Creamy mousse:
- 55 grams of high-quality condensed milk
- 400 g Mascarpone cheese
- 1 tbsp. powdered sugar (heaped)
- 130 g cream 35% fat
Cherry confit:
- 20 g sugar
- 75 g cherry puree
- 2 g gelatin
- 10 ml cold water
- 5 g corn starch
Other:
- Stencil-number 16 cm high, 12 cm wide.
- Cookie cutters (flowers, stars)
- Pastry bag
- Mixer
Dough
1. In a thick-bottomed saucepan, combine sugar, a piece of butter, and honey. Place on low heat and heat until sugar is completely dissolved. There is no need to boil the mixture for a long time so that it does not start to caramelize.
2. Remove the pan from the heat, add salt and soda to the hot mixture. Stir vigorously until the baking soda reacts with a hissing sound. Transfer the mixture to a plate to cool.
3. Beat the egg into the cooled mixture and beat well with a whisk. Add 160 grams of sifted flour. Stir until smooth so that there are no lumps. Then transfer the mass to the table surface, sprinkled with the remaining amount of flour (40 g), knead the dough.
It will be very soft and unyielding, but there is no need to add flour. Wrap it in cling film, then refrigerate for 4 hours.
4. Remove the chilled dough, unwrap it and cut it in half.
5. Roll each half into a thin layer 2-3 mm thick according to the size of the number. Attach the stencil and carefully cut out the shape with a knife. Roll out a small thin layer from the excess dough, cut out 3-4 small figures with a cookie cutter - stars and flowers. They will be needed for registration.
6. Pierce the entire surface with a fork, bake together with the figures at 170° for 7-8 minutes. There should be 3 number cakes in total.
Cherry confit
1. Fill the gelatin with cold water and leave it to swell.
2. Mix sugar with starch, pour into berry puree. Mix thoroughly with a whisk, breaking up all lumps. Over low heat, bring the mixture to thicken, stirring constantly.
3. Remove the mass from the heat, pour in the swollen gelatin. Stir until it is completely dissolved. Then pour the cherry mixture into a piping bag and place in the refrigerator until completely cool.
Cream mousse
1. Combine the cream with condensed milk, beat them a little with a mixer.
2. Also stir the mascarpone lightly at low speed.
3. Combine both masses into a lush cream. Mix with a mixer at low speed for 15-20 seconds. Add a little powdered sugar at the end.
4. Place the finished mousse into a pastry bag with a round tip.
Assembly and decoration
1. Place the bottom layer on the table. Pipe equal balls of cream, filling first and then the middle.
2. Fill the space between the balls with drops of confit.
3. Cover the top with the second cake layer and press it slightly onto the cream. Fill it exactly the same way as the first one.
4. Then decorate the top third layer with cream. Place the cake in the refrigerator for 1 hour to thicken the mousse.
Decorate the top of the dessert with pieces of dark chocolate, halves of honey cookies, confit balls, colored dragees, and marshmallows.
Separate excess dough from the molds
Remove excess dough to reveal the shapes you have made. Once you have cut out as many shapes as possible on the sheet, pull out the excess dough and set it aside. If you have internal cutouts, use a knife or your fingers to carefully pull them out of the mold. Place cookies on sheet as needed before baking.
Remember that you can reuse the dough you scrape off the sheet. Simply form it into a ball and roll the dough again to form a smaller sheet of dough.
Once you have prepared the cookies for baking, you can throw away your stencil as it is made of paper and will not be reusable. If you even try to clean your stencil, you will only ruin it. It cannot be cleaned, so it is better to make a new stencil before you decide to pamper your family and friends with homemade cookies again.
Found a violation? Report content
Where can I get the template?
One of the most important stages in making gingerbread molds is selecting a suitable template. After all, you want to please your children, which means you need to pay special attention to this moment. For example, bake gingerbread cookies in the shape of some cartoon or fairy tale character.
The most obvious and simple way to cope with the task is to use a coloring book as a template. This is a really good decision. Usually in coloring books the characters are presented in the simplest possible poses. In addition, the boundaries – contours – are clearly drawn here. In ordinary pictures they do not look so contrasting and noticeable.
You can find a suitable coloring book on the Internet in a matter of minutes - any search engine will help here. Finding the desired drawing will not be difficult. As a last resort, if you have artistic skills, you can always arm yourself with a pencil or marker and draw a suitable design yourself - the form will only benefit from this, as it will turn out completely unique.
And when the template is found, you can safely begin making a mold with which you will get gingerbread cookies that can impress any child.
Use not only for New Year
DIY stencils will be useful not only during the New Year holidays. We have one of the main holidays in Russia, which is, of course, EASTER! Neutral molds in the form of stars, balls, angels, men, and candies are perfect. But you can make additional ones on the theme of Easter:
- in the form of Easter, painted eggs;
- small copies of Easter cakes, houses;
- bunnies, geese and ducks.
After cooking, these gingerbreads and cookies can be beautifully placed on sticks and stuck into the Easter cake. The festive table will be the most beautiful.
Important! One of the distinguishing features of Easter gingerbread is that they necessarily contain honey and various aromatic spices.
A simple recipe for Easter
Here is a simple recipe for gingerbread for Easter:
- In a bowl, beat 2 eggs, three tablespoons of honey, two tablespoons of granulated sugar and 150 gr. softened butter;
- add sifted flour (1 cup) and spices: a teaspoon of ginger, a teaspoon of cinnamon, soda on the tip of a knife;
- mix everything and cool;
- The dough is rolled out and shaped into gingerbread molds, then baked in the oven at 20 degrees for 10-15 minutes.
Tip: gingerbread cookies are usually covered with glaze. It's easy to prepare.
Positive little things
By making stencils with her own hands, the housewife receives additional advantages for herself in preparing confectionery:
- The confectionery industry adds preservatives to its products, this is no secret. And with the help of stencils, it becomes possible to prepare wonderful sweet treats at home without unnecessary additives. In addition to this, you have the opportunity to improve recipes according to your taste preferences.
- When molding gingerbread cookies, you can make small holes on each of them so that you can then thread strings or multi-colored ribbons into the finished sweets and hang them on the Christmas tree. Or you can make beautiful garlands from several pieces at once. A gift in the form of a gingerbread with a ribbon bow for Christmas and New Year is also very effective.
- The most common and popular figurines of gingerbread and cookies on New Year's themes are stars, snowflakes, Christmas trees, deer, men, snowmen and Santa Clauses with Snow Maidens, candies, sleighs, mittens, angels and bells.