When the toy is already dry...
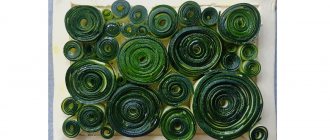
The fact that the toy has dried will be clear from the color - the clay will become light. Now the toy can be sent to the stove or oven, where it will be fired. After this, the toy is whitewashed (simple waterproof paint that does not contain varnish will do). The whitewash must be applied in two layers, and after that, begin painting with tempera paint. The ornaments of the Dymkovo toy are circles, diamonds, rings, multi-colored stripes. By the way, the ornaments of ladies and young ladies are different: city dwellers often paint themselves with circles, while peasant women’s aprons and skirts are decorated in a more formal checkered or striped pattern.
Progress of the lesson:
Parents and children enter, the teacher invites them to sit on chairs placed in a circle in the center of the group.
Educator: Hello, our dear children! Hello, our dear parents! I am very glad to see you in our group! Today we have an exciting activity ahead of us. Very interesting and equally useful.
But first, listen to my story.
– From the high bank of the Vyatka River, on which the city of Vyatka stands, you can see the village of Dymkovo. Why is it called that? In the old days - both in winter, when the stoves were lit, and in summer, when there was fog, this village seemed to be shrouded in haze, everything was in smoke. Here, in ancient times, a toy was born, which was called “Dymkovo”. (Slide show)
.
In the beginning there were whistles. All winter, the women of Dymkovo sculpted them for the fair. From a small clay ball with holes, the whistle turned into a duck, then into a cockerel, then into a skate. And now on the trays and counters of the crowded spring fair they sell cheerful goods. Adults and children willingly take it apart. The people's festivities are noisy, but the loudest sound is the loud whistle. That is why this spring holiday got its name - “Whistling”. A new winter comes, and again in Dymkovo they get down to business. And so on for many, many years. Grandmothers teach their granddaughters, and granddaughters teach their granddaughters.
And in our time, in Vyatka, which is now called Kirov, there are workshops of the famous Dymkovo toys. If we go into these workshops, we will immediately see piles and bags of clay, boxes of paints, boxes of eggs. All this is needed to create a miracle. Fairy-tale horses, turkeys that look like firebirds, sheep in pants, ladies and gentlemen, carousels, all this is a real miracle.
- And now we will imagine that we have turned into real Dymkovo craftswomen! And who we will sculpt, you tell me yourself.
The teacher reads the story “The Horse” by K. D. Ushinsky
The horse snores, curls his ears, moves his eyes, gnaws at the bit, bends his neck like a swan, digs the ground with his hoof. The mane is in a wave around the neck, the tail is a pipe at the back, there are bangs between the ears, and a brush on the legs; the wool shines silver. There is a bit in the mouth, a saddle on the back, golden stirrups, steel horseshoes.
- Sit down and go! To distant lands, to the thirtieth kingdom! The horse runs, the ground trembles, foam comes out of the mouth, steam comes out of the nostrils.
- Now you and I will sculpt horses so that they are just as beautiful: “the neck is bent like swans, the tail is like a pipe, the mane is like a wave along the neck.” The teacher invites the children to look again at the Dymkovo horse toy and determine the best way to make it. He clarifies the answers and advises trying to sculpt a horse the way folk craftsmen do.
— First you need to create the initial cylinder shape. We cut one end of the roller about a third of the length with a stack, pull off the resulting parts and make a neck with a head from one part, and legs from the other. We lift the neck up, bend it a little to form a head. We make the legs from another part: we cut the stack into two equal parts, each of which is pulled back and rounded. We stretch the other end of the roller slightly so that the hind legs are the same length as the front ones.
The teacher invites children and parents to complete the figurine so that it turns out to be a beautiful horse.
- Let's decorate the sculpted figurine so that it becomes a beautiful horse. We look at it from all sides and smooth it out. The mane and tail are slightly pulled back and pinched. You can complicate the details by sculpting them separately; roll up flagella and rollers and weave a tail and mane out of them.
-And at home you will decorate the horse with beautiful patterns.
How to make a salt dough horse
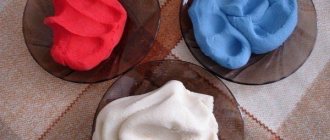
To make plastic salt dough you need to take flour, salt and water in weight proportions of 200:200:125. But it should be taken into account that salt is twice as dense as flour, so if you measure by volume, the proportion will be 200:100:125. Water should be taken cold and poured in parts into the mixture of flour and salt. When kneading, it is best to use a mixer. Then the dough is kneaded by hand in the same way as for baking.
If you decide to sculpt a horse figurine, then you can do this in three steps, starting with sculpting the body. It is best to temporarily place the rest of the mass in a plastic bag so that it does not become covered with a hard crust.
Having sculpted the head and neck, this part is fastened to the body. For stickiness, you can lightly moisten the place of fastening, and carefully smooth out the “seam” itself, hiding it.
At the very end we form the mare's tail. You can make it all the way to the ground - this will increase the figure’s support by one more point.
The finished product must be thoroughly dried. You can use the oven and “bake” the sculpture at 80 degrees. Or you can use a microwave - it’s safer and faster. Only in a microwave oven it is better to first use the defrost mode and leave the figure for a minute. Then you need to check whether cracks have appeared or whether the product has lost its shape. In case of surface damage, you can “make small repairs” with the dough, first dipping it into water. This way it is easy to hide unevenness and cracks that may appear. Then you can switch to the warm-up mode. The figurine should be removed periodically and checked for strength. When it becomes hard and dry, you can begin the last step of making the figurine toy.
This will be coloring. You can use any paint: from acrylic and oil to food and watercolor. Some may even leave the figure pure white, while others will limit themselves to just coloring the mane and tail. Or you can joke a little and remember the famous colorful Dymkovo toys.
Can you now say that the horse is made from salt dough? More likely, she galloped from a fairy tale or cartoon...
This is how easy it is to become a real sculptor, sculptor, artist - in a word, a creator.
Therefore, quickly take flour and salt and get to work, gentlemen! Create your masterpieces!
The most cozy style of Christmas tree outfit
In modern times, the handmade style in decorating a holiday tree is becoming increasingly popular. This is not surprising, because the New Year is a family holiday, which should bring peace and comfort to the house, unite families together, and such an important detail as a Christmas tree greatly contributes to creating the right atmosphere in the house.
In addition, pre-New Year preparations are a great opportunity to spend time with your family and children, captivate them with the process of creating New Year's toys with your own hands and then decorating the tree together. How to decorate a Christmas tree for the New Year in 2022 by making decorations with your own hands?
There can be a huge number of ideas for this. Perhaps you have a hobby that will help you make interesting handmade Christmas tree decorations. Sewing and knitting are the most common ways to make toys, but other unusual methods can also be used.
Do-it-yourself edible decorations will be one of the most enjoyable ways to decorate a holiday tree for a child, because it is not only entertaining and beautiful, but also delicious.
Small gingerbread cookies of various shapes, covered with brightly colored confectionery glaze, candies in shiny wrappers, chocolate - all this will help you decorate the tree in an unusual way, just do not forget that chocolate, additionally heated by New Year's garlands, tends to melt quickly. Therefore, a tree decorated in this way is unlikely to stay with you throughout the holidays.
Gifts of nature
You can start preparing for the holiday in advance, from the beginning of the year, by collecting any items with which you will later decorate the tree. These can be dried fruits, shells, pine cones, flowers from the herbarium, which need to be coated with varnish and glitter before the holiday.
You can make very beautiful and unusual New Year's toys with your own hands from natural materials.
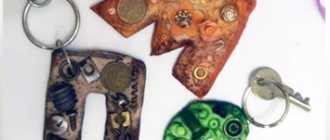
Your hobby
Collecting is another hobby that can help you create an unusual outfit for a coniferous beauty. If you collect any items - stamps, coins, badges, then you can use them in decorating your holiday interior.
Popular articles Book boxDymkovo toy - painted horse
We will need the usual materials for modeling:
- clay;
- oilcloth;
- wet cloth;
- stacks;
- paints.
Set of tools
So, let's start sculpting our craft - “Clay Horse”.
Step 1. Roll out a small thick sausage 6-7 cm long. Flatten it slightly onto the oilcloth. We make cuts on both sides with a stack, as shown in the figure.
Making a blank for the body
Step 2. Take the sausage and bend it into an arc. We separate the ends of the sausage - after cutting there are two of them on each side of the sausage - and put the sausage on its “legs”. We shape them a little and align them. This will be the body of the horse. In general, the Dymkovo horse was made from separate parts, but we have children's creativity and therefore we simplify the shape of the toy.
Forming the body of the figure
Step 3. Roll out the sausage to approximately the same length as in Step 1, only one and a half times thinner. There is no need to pinch it. Bend one end of it perpendicular to the main part of the sausage, forming the horse's head.
Making the neck and head
Step 4. We show the child a sculpting technique - “pinching”: with our fingers we flatten one side of the sausage, forming the horse’s mane.
“Pinch” the horse’s mane
Step 5. We glue the resulting upper part of the horse to the body. To prevent it from falling off after drying, dip your fingers in water and “smear” the joints of the parts of the craft.
We sculpt the head to the body
Step 6. In the same way, only without bending one end of the sausage, we make the horse’s tail.
Making the tail with pinches
Step 7. “Apply” the tail to the horse. Here's what we got:
Horse figurine
Step 8. Prime the horse with white paint. The real Dymkovo toy was painted white with a special mixture of milk and chalk powder, but in the children's modeling workshop we will do this using ordinary gouache. We wait for the toy to dry and paint it together with the baby. Show him the techniques of Dymkovo painting - dotted spots, straight lines, etc. By coming up with a coloring scheme for a Dymkovo toy, your child develops creatively, expanding the color boundaries of his worldview. This is the kind of horse you will get:
horse
Making toys for children with your own hands is a real pleasure! Do you agree? The clay horse can be accompanied by these easy-to-make dolls and woolen toys, children's New Year's crafts, and figurines made from salt dough. Using the same principle, you can create a fairy-tale goat for a lamp in a nursery.
Create with your children and develop the talents that kids have had since childhood. This will allow them to look at the world more broadly and make it a little more beautiful.
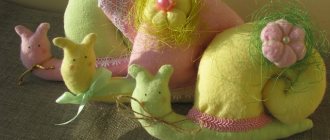
Dymkovo clay toys
If you are interested in this craft from a practical point of view, do not be afraid to start creating, so that your hand becomes bolder, make several simple clay toys step by step. A DIY Dymkovo clay toy is both a pleasant creative experience and an excellent present for both a child and an adult.
Cockerel
The folk souvenir was approximately the size of a palm; these dimensions can still be used as a guide today. Take the clay and read the instructions for how to use it. Dilute the clay with water and knead until comfortable.
Dymkovo cockerel step by step:
- Divide the clay into 3 parts, the larger one for the body of the bird, and the two small ones for decorations and the tail of the rooster. The torso, neck and head must be sculpted from a single piece; this is a prerequisite for Dymkovo sculpting. Don’t worry if everything doesn’t work out right away: your hands should feel the clay and get used to it, so to speak.
2. From the second piece of clay you need to mold a flat circle and press it on one side. This will become the cockerel's tail.
3. Now you need to attach the legs to the body of the cockerel, and do not forget about the stand, otherwise the figurine will not be stable.
4. The tail should be attached to the body. All parts attached to the body should be moistened with water. After this, you need to smooth out the joints, otherwise cracks will appear.
5. From the third piece of clay you need to make two flat circles that will become wings. But don’t use all the clay - leave a little for jewelry, beard and comb.
6. Stick the wings on the sides of the body, decorate the bird’s tail with small flat balls. Sculpt the beard and comb.
7. After sculpting, many craftsmen leave the product to dry naturally for another 3 days. And on the third day they send it to dry in the oven. The rooster can dry there for 2 hours, gradually raising the temperature to 250 degrees.
8. A completely dried bird can be painted. But first it will have to be whitewashed. What exactly - choose for yourself, white acrylic is quite suitable.
9. After the base has dried, you can begin painting. This is the most interesting and creative stage. Inspired by pictures of Dymkovo cockerels, you will choose your own version of the painting. Write it down step by step, don't rush. Work on the large details first, then the small ones.
The finished cockerel will decorate your home, and maybe become a good gift for a loved one!
Young lady
Such figures are made from a plastic bottle and plasticine, but this will be nothing more than an imitation of the Dymkovo lady. Alternatively, you can use salt dough instead of clay.
Dymkovo toy - sculpting a young lady in stages:
- Roll out a pancake from clay and make a bell skirt out of it. This is a simplified action. In principle, the plastic basis for all female images was a mortar-bell, a base with a fluffy skirt.
- Make sausages for the heroine's arms, attach them to the sculpted body, and the body to the bell skirt.
- Roll up a ball head, attach a kokoshnik to it, attach the head with the kokoshnik to the body.
- All parts are carefully connected, the fastening points are smoothed.
- The figure should be decorated with thick braids and frills on the dress.
- We leave the young lady to dry. When the clay brightens, we send the toy to be fired in the oven (for a couple of hours).
- We whiten the figurine with white acrylic, and after it dries, we paint it according to the pattern we like.
This video clearly shows all the stages of making a Dymkovo young lady.
We pay attention to typical, canonical examples of painting - the face is deliberately primitively painted, the facial features are conventional.
Useful tips for beginners
If you want to learn the technique, then when creating a figurine you should have before your eyes the photograph of such a Dymkovo toy. Such a model is especially important for a child: you need to remember that the baby does not have much life experience. If you want to decorate the finished toy with beautiful details and paintings, you must first do them on paper.
By combining circles and stripes, you can achieve a wide variety of interesting colors. The main thing is to choose the right color. Blue, yellow, red, green and orange are the main colors that were traditionally used when coloring Dymkovo toys. If desired, during painting you can also use pink or orange paint, and highlight individual elements with gold. You also need to remember that you don’t need to carefully draw the face, just outline it a little.
In Dymkovo toys it is customary to use special symbols that characterize beauty, healthy life and sincerity. All patterns in traditional toys were symbolic, associated with nature, as well as various amulets. For example, a ring is a talisman, a circle with intersecting stripes are solar signs.
Dots inside the circle or alternating dots and circles are signs of embryos and seeds, one stripe is a road or river, black dots are traces of a person
It is very important to know the meaning of the color of the toy. The color green is popularly associated with the concept of long life and symbolizes arable land, earth and nature.
White color has always been a symbol of truth, goodness and moral purity. The color red is not only a characteristic sign of fire, but also of beauty, glory, good health and strength. Blue is the sky.
The Dymkovo toy will be a truly unique and amazing handmade gift. This fake will bring a lot of pleasure not only to you, but also to your children.
Originally posted 2018-03-19 08:48:31.
Materials for creativity at home
Making Dymkovo toys at home is a good idea for children to create together with their parents. Plasticine is considered the most accessible and cheapest material. To create figures according to the traditions of the village of Dymkovo, it would be more logical to use white material. But since plasticine is usually sold in whole sets, which include a large number of colors, you can mix them together and sculpt beautiful figures from them.
The finished figure is usually coated with a primer; only after it has dried can you begin painting. In the traditional method of creation, the toy is not varnished, but is left with a matte structure. If you use unstable paints when creating, it makes sense to secure them additionally.
Preparing material and tools for creativity
The sculpting process is always manual labor, and it is impossible to sculpt two identical cockerels or young ladies. Every time you get a truly exclusive souvenir. But to make it according to Dymkovo traditions, you need to prepare tools and, of course, material.
After kiln firing, the workpiece will be red-brown. Previously, a chalk-milk solution was used for whitewashing: the master dipped the entire toy into it. On the surface, the milk soured, causing a bright film of casein glue to form on the souvenir.
The ancient method of painting is also somewhat different from the modern one. Craftsmen ground dry paints with eggs, adding vinegar or peroxided kvass to the composition. In the 20th century, works were painted mainly with gouache, which was also painted on eggs. Today, craftsmen prefer to use durable acrylic paints.
Let's sculpt a horse
Another common Dymkovo figurine (perhaps no less common than the Dymkovo young lady) is a horse. First of all, from the material chosen for work, we sculpt the torso, then the cones of the legs, as well as the head with a mane and a small tail.
All parts are combined into a single whole and glued together. The toy is sent to dry, which will also be followed by baking in the oven, whitewashing and painting.
Modeling is one of the types of artistic creativity. In kindergarten, school, art clubs, and just for fun, children and adults engage in modeling in their free time. The easiest way to sculpt is from plasticine.
The material is available in all stores, it is soft and plastic, it is easy to fashion an object of any shape from it. You can always take an old work and fashion a new artistic creation from a used piece.
The horse is a beautiful animal with a proudly arched neck, flowing mane, large body and thin strong legs. It is difficult to sculpt a horse in all its glory. More often they sculpt a stylized horse, reminiscent of folk toys.
The master class is intended for teaching sculpting to children in the preparatory group or in grades 1-2 at school. It will be useful for kindergarten teachers.
This activity continues to teach children how to sculpt animals, develops in children a sense of beauty, artistic taste, imaginative thinking, and trains fingers and fine motor skills. It also fosters a love for animals, teaches you to analyze: what a horse looks like, what parts a horse figurine consists of, how to sculpt a horse step by step.
Popular articles Beautiful congratulations on the first Day of Spring
During the lesson, we repeat counting and geometric shapes with the children and correlate them with the shape of individual parts of the horse’s figure.
For sculpting you need the following materials:
- plasticine;
- modeling board;
- stack.
Before the start of the lesson, the leader reviews photos and drawings of horses
, while clarifying that the horse consists of an oblong body, a long curved neck with a small oval head. The horse's legs are long and cone-shaped. Long thick mane and tail.
To make it easier for children to work with plasticine, it should be kept in a warm room before class.
How to sculpt a horse:
A beautiful horse made of plasticine. Together with the children we admire the results of their work.
Using white, orange and black plasticine, you can make a plasticine horse that looks like the horse with apples from the cartoon.
Prepare for work
plasticine of the desired color, stacks, board for work.
How to make a horse:
Sculpting a unicorn and a zebra
White plasticine horses
They look beautiful and elegant, especially with decorations made of colored plasticine. You can mold a colored blanket, harness, or saddle onto a horse.
Using white plasticine, using the above master class, you can make a unicorn or zebra.
According to legend, the unicorn has a multi-colored tail and mane, and a long multi-colored sharp horn on its face. To make a unicorn
, you need to take a large piece of white plasticine and a little of different colors.
We sculpt a figure from white plasticine as for a white horse: we also make ears, eyes, nostrils, and a mouth. From colored plasticine we roll out many thin sausages for the mane and tail. You can adapt a garlic press and use it to make sausages. We beautifully decorate the lush, long multi-colored mane and tail.
Unicorn horn
You can make it in the form of a cone from multi-colored plasticine, attach a star made of foil to the tip, or make the entire horn from shiny foil.
zebra
easy to mold from white plasticine with black stripes. Make it like a horse, stick strips of black sausages on a white back. The short mane and tail are also black. On the face there is a black nose, and the legs end in black hooves.
How to make a Dymkovo horse from plasticine
Dymkovo horses
They are made from clay and painted with various patterns: dots, circles, mesh.
You can make a horse from white and colored plasticine, the same as the Dymkovo horse:
The plasticine horse is ready, it can be painted with water-based paints in the style of Dymkovo patterns.
In the old days, every city and large village on the territory of our homeland had its own craft, and in some cases even several. Having come up with an unusual method for producing a high-quality product in large quantities, the artisans continued to keep their secrets secret and passed them on to their children. Some ancient crafts continue to exist in our time.
Salt dough horse. Master class with step-by-step photos
Master class on handicraft “testoplasty”. Chess piece "Knight" made of salt dough
Master class on handicraft “testoplasty”
Master class on making a three-dimensional figure from salt dough.
This master class is intended for additional education teachers, children of primary and secondary school age.
Purpose: Chess piece. Usage: For game. While playing chess, a child learns to think logically, make decisions independently, and draw conclusions. Goal: To develop the creative abilities of additional education teachers and children, to consolidate the ability to sculpt a three-dimensional figure from dough. Objectives: - Increase sensory sensitivity (the ability to finely perceive shape, texture, color, weight, plasticity, proportion); — Develop general skill, fine motor skills, as well as spatial thinking and imagination; — To develop the ability to plan work to implement a plan, anticipate the result and achieve it, making adjustments to the original plan if necessary. For work you will need: - salt dough (salt, flour, water, starch, PVA glue) - frame for the base * - foil - toothpicks - stacks - brushes - gouache - yacht varnish
________________________________ * For the frame, I used a mold from an old chandelier, but you can make it yourself from foil - tightly stuffing it into a glass or beaker. Step-by-step process for making crafts: Salt dough: 1 tbsp. salt (ground in a coffee grinder), not a full glass of cold water (about 7/8), 2 tbsp. flour, 2 tbsp. starch, 2 tbsp. PVA glue. Knead a thick dough, wrap in a plastic bag and put in the refrigerator for 20 minutes. Then you can start sculpting.
Cover the frame of the base of the figure with a small layer of dough. Insert a toothpick into the middle of the top. Let the dough dry. We form the shape of the future figure from foil and put it on a toothpick. Cover the mold with dough. The horse's legs will be at the same point, so at this stage we make them together as one cylinder. We cut the cylinder on four sides and smooth the edges with a stack and a wet brush, forming the round legs of our horse.
We leave our feet to dry and proceed to the pedestal. Place small balls of “pebbles” in a circle
three rows. We lay out the top layer with small “pebbles” and two rings.
While the pedestal dries, we will work on the head. We build up the horse's muzzle. Cut out the mouth. And with a wet brush we smooth the edges of the dough cut.
Use a toothpick to make nostrils. We fashion triangular ears and glue them (with water) to the head. Next we make the hooves. Cut a thin strip 1 cm wide and wrap it around the bottom of the horse’s leg.
We mark the hooves for each leg.
We make cloven hooves on the front legs.
To make the tail stronger, we make a flat frame of dough for it. Let the craft dry.
Now let's grow the tail.
We roll thin long “flagella” and lay them out from the bottom of the tail to the top. Make eyes and cheeks by smoothing the dough with wet fingers.
We stick a tongue into the mouth. To make the wet dough stick to the dry dough, moisten the dry dough with a wet brush.
Making the mane. We place thin small sausages along the neck in different directions.
in two rows.
Place bangs between the ears. Also in two rows, like the mane.
Our horse is almost ready, all that remains is to dress it up. Cut out a strip of 0.5-0.7 cm and glue it to the neck.
Along the edges we squeeze out two parallel strips in a stack, and between them with the blunt tip of a brush we make small holes into which we insert small balls - “precious stones”. We wrap the center ball with a thin ring. We'll put a blanket on the horse's back. Cut out a rectangle about 3 cm wide, cut off the corners a little and glue (with water) to the back.
Just like on the collar, we make two parallel stripes, decorate the middle with a pattern and make indentations
We insert small balls into them.
We make grass on the pedestal on three sides. Our horse is ready. We dry it well in the open air - in the room on the table. You can near the battery, but not on it. It is better not to dry such a craft in the oven, it may swell. This craft is a chess piece, and for our fairytale chess “Goldfish” you need two identical knights. The height of the finished figure is 10-12 cm. After drying, you can start painting. I use gouache because it is not only paint, but also a kind of primer that the oils of the varnish do not pass through. After painting the horses, we varnish them. I use Yacht Varnish. Its advantages are that it dries completely in 6-10 hours, the smell disappears in two to three days. When the varnish has dried well, you can glue the bottom of thick paper or cardboard to the bottom of the craft with “Master” glue.
Our horses are ready for battle and are waiting for players on the chessboard.
We recommend watching:
Christmas angel made from salt dough. Master class Master class. Painting made from salt dough Box Mushroom made from salt dough with your own hands. Master class with step-by-step photos Eagle made from salt dough. Master Class
Similar articles:
Do-it-yourself amulets. Spatula
DIY Christmas angel made from salt dough
DIY salt dough photo frame
Crafts from salt dough for beginners step by step with photos
Crafts from salt dough for children 5-7 years old step by step with photos
The history of the origin of the Dymkovo toy
Clay is a special material that is distinguished by its plasticity in its raw form, and it also acquires high strength after firing. Due to these characteristics of the material, clay products have been widely popular from ancient times to the present day. In ancient times, dishes and clay figurines were created in almost every region of our homeland.
Moreover, each locality had its own figure shapes, author’s traditions of decorating and painting the resulting toys. The village of Dymkovo (Kirov region) became known throughout the country for its skilled craftsmen who created small, bright toys that made different sounds. It is curious that the traditional toy was made not to entertain children, but to protect one’s home from evil spirits.
In the old days they thought that evil spirits were very afraid of loud sounds. It is for this reason that in those days all toys could whistle, rattle and make sounds. They were traditionally created for the festival of Pandemonium, during which people drove out evil spirits and had fun with the whole village.
Features of toys from masters
Today, in the village of Dymkovo itself, you can find not only rattles and whistles, but also simple toys in the form of figurines that cannot make any loud sounds. The main feature of this product is its relatively small size. Craftsmen who remain faithful to ancient traditions most often make figurines of birds (turkeys), animals (deer), young ladies, and in some cases, men.
However, you can also find products that are more complex in shape: women holding a loaf of bread in their hand, or good fellows riding a beautiful horse. A simple pattern and a small number of colors when painting the structure are what distinguishes the toy for the most part.
You can create a horse from plasticine with your own hands in the style of such a folk craft. This is done quite easily: the shape of the figurine should be distinguished by its simplicity in execution, and simple dots and lines are used to paint the finished product. It is worth noting that in traditional creation the background must be white, but today you can very often find toys that are painted in different colors.
We sculpt a lady using the Dymkovo technique
Craftsmen from the village of Dymkovo have been making figurines of women since ancient times. Among them there are real ladies in kokoshniks, and simple peasant women with children in their arms or buckets on rocker arms. Despite the variety of decorative options, all female figures have a fairly simple shape, thanks to which you can immediately understand that this is a Dymkovo toy. How to make a lady from plasticine? For a full skirt you will need a frame - it is convenient to take the cut off neck of a plastic bottle. Cover it with a thin layer of plasticine, maintaining its shape. Then, based on the bottle cap, form a body and attach a ball-head to it. Next, you can give free rein to your imagination - sculpt your hands, hair and headdress. You can add some other decor, give the young lady something in her hands. Cover the finished figurine with primer and paint.
If the topic of your creative activity today is a Dymkovo plasticine toy, a photo of the finished figurine or even the figurine itself as a sample should always be before your eyes
It is especially important to have a role model for children; do not forget that children do not have much life experience. If you want to decorate the finished toy with complex patterns, be sure to try making them on paper
In fact, by combining circles and stripes you can achieve various and interesting effects, the main thing is to choose the right colors. Red, yellow, blue, green, orange - all these are the colors in which the Dymkovo toy is traditionally painted. You already know how to make such a figurine from plasticine at home. If desired, you can also use orange or pink paint during the painting process, and highlight individual elements with gilding. Don’t forget that you don’t need to carefully draw the face; just outline it schematically.
Popular articles Tree of happiness from roses
The Dymkovo young lady amazes with the brightness of her colors, amazing ornaments, and the feeling of the fullness of real Russian life. It may seem that a modern person, a resident of a big city, is unlikely to be able to make one with his own hands. But that's not true. It can be molded from clay - in accordance with the traditions of the Vyatka town of Dymkovo (where the craft originated), or from salt dough, which, of course, is much easier in a city apartment. After all, a clay toy must not only be molded, but then carefully fired - preferably in a special oven, although a kitchen oven will do.
For sculpting, red clay purchased in a specialized store, or mined with your own hands from a garden plot, is suitable.
It is important to prepare the workplace well. You will need:
- oilcloth on the table at which the modeling will take place;
- a glass of water that can be moistened when gluing parts of a future figurine made of clay or dough;
- rags to wipe your hands with;
- wooden spatula, in order to trim the resulting figures.
Choosing the character you want to create is an individual matter. But in the Dymkovo toy, as in any craft with traditions, the set of heroes has long been quite strictly defined: the Dymkovo toy lady, a rider on a horse and just a Dymkovo toy horse, a turkey with a huge tail, a plump pig, “a deer with golden horns,” a cockerel , as well as all kinds of whistles.
How we sculpted from salt dough
On May 11, the second master class was held at the Smartville Art Studio . This time we turned to the topic of Russian clay toys. Our land is very rich in folk crafts and I could not ignore this topic. We sculpted a horse with the children based on the image of the Dymkovo horse. As it turned out, modern children are not at all familiar with this direction and had to educate them with a short but very interesting story:
From the history:
Making clay toys is a special Russian folk craft. Toymakers most often depict female figures: a breadwinner, a water-bearer, a bird-maid, as well as animals: a horse, a goat, a ram. There are horse riders and hussars. The most famous are: Dymkovo, Filimonov and Kargopol toys.
Dymkovo toy
The Dymkovo toy is an original clay craft that originated and was preserved exclusively on the territory of the Vyatka Territory (Kirov Region), in the settlement of Dymkovo, where stove makers and potters have long settled. In the past, making Dymkovo toys was a family craft. In the summer months, they prepared clay, pounded it by hand or ground lump chalk in paint grinders, the rest of the time they sculpted, dried, fired the products, whitewashed them with chalk diluted in skimmed cow's milk, painted them with egg paints, and decorated them with diamonds of golden leaf. And in the spring, they brought the Dymkovo toy to the city on boats for a holiday, delighting children and adults with their art.
The toy is sculpted from local red clay in sections (unlike other toys, which are sculpted from a single piece of clay). Before firing, the toys are dried and only then fired. Previously, toys were fired in a real Russian kiln, now they are fired in muffle kilns.
Halftones and imperceptible transitions are alien to the Dymkovo toy. Undiluted bright colors create a feeling of joy in life. The patterns have simple geometric shapes: circles, checks, waves. In general, up to 10 colors can be used in each toy. To this day, Dymkovo toys are made by hand, each toy is a unique work of art. As before, the main motifs of Dymkovo toys are horses, ladies, turkeys, rams, roosters, deer, as well as group compositions.
Filimonovskaya toy
These toys were born in the village of Filimonovo, Tula region. This craft arose because these places are rich in clay: white, red, pink, black. Unlike the Vyatsky ones, they have more elongated proportions. Most often these were whistles: animals, birds, ladies, soldiers. The craftsmen of all the toys stretched their necks greatly, so that the cows and bears looked more like giraffes. After firing, all the figures were painted with multi-colored stripes: red, yellow and green. The painting was done not with a brush, but with a quill pen, which made it much more convenient and accurate.
Kargopol toy (Arkhangelsk region)
The Kargopol toy has a recognizable style, types and painting. The Kargopol toy can be called truly folk, because its execution is quite free. Masters created unique female figurines, animal figurines, as well as genre scenes of village life “Men Fishing”, “Girl Doing Laundry”, “Troika” and so on. Modern masters can come up with their own stories, however, the general features of the Kargopol toy are preserved, new forms fit perfectly into the tradition. Most of the Kargopol toys from pre-revolutionary times have not survived - after all, for a very long time the masters simply did not realize the scale of their talent and gave their creations to children for fun.
It is known that in the 19th century. Most of the Kargopol toy masters lived in the village of Pechnikovo. However, even before the revolution, this artistic craft began to gradually disappear. In the 30s One of the few masters of Kargopol toys was the hereditary potter Ivan Druzhinin, whose works are still considered “classical”. In the 50s The Kargopol toy was sculpted by only Ulyana Babkina. It was thanks to her that the Union of Artists of the RSFSR finally became interested in Kargopol clay figurines.
The traditional painting of a Kargopol toy is a whitewashed figurine, painted in different colors, but without unnecessary details, without any “gloss”. The paints, despite the presence of different, including bright, colors, look rather muted. The face painting is very conventional, as if “flat”.
Initially, the toys were very fragile, the paint was immediately washed off, as these toys were painted with rust and soot. The pattern was very simple: dashes, crosses, dots, lines, circles. But, despite the simplicity, the patterns carried a semantic load: The cross is the sun, the sprouts are plants, the wave is the river, etc.
On May 10, I seriously prepared for this master class. I sculpted, burned and painted several toys. Here is a photo report of how it happened:
According to the recipe: 2 cups flour + 1 cup fine salt + 2/3 cup water knead the dough
I pinched off a small lump and the first thing I wanted to do was make a turkey
I inserted a flat circle of foil into the tail so that it was light and held its shape.
Next came the design of the tail, head and sculpting of the wings:
After my turkey dried in the oven (it took about 2.5 hours at 100 degrees), I painted it with acrylic paints:
But making a turkey is quite difficult for children. For starters, a horse is more suitable:
The photo shows that I inserted a “foil skeleton” inside. this way the horse will retain its shape better
When decorating toys, you can use stacks and wooden sticks, which leave beautiful imprints.
To make the horse stand better, you can use foil or bend the cardboard into a triangle.
Of course, the horse was painted in the tradition of the Dymkovo toy
In the end, when everything dried and came together into a single composition, the result was beauty:
The children really wanted to start working with the dough as soon as possible. It turned out that this was not an easy task at all; many were disheartened because the dough seemed to float down. In our work we used a “skeleton” made of foil. Without it, it is almost impossible to make a whole figurine from salt dough. The hardest part was getting the horse to stand on its feet. For girls, they floated down, bent and completely fell off the body. At the end of the lesson, we still managed to get the work to the required level. Now they are being dried and after it we will all paint our toys together.
Someone was so worried... it was noticeable even in their eyes. Yes... three-dimensional modeling from salt dough is quite a difficult task..
I will definitely post photos of children’s work, but a little later, when the little authors work their magic brushes on the dried figures.
Dymkovo horse - molded from plasticine
Hello, fellow blog readers!
Today we are making a Dymkovo horse from plasticine. We have already sculpted a realistic horse, and we have also learned how to sculpt a plastic horse from life. But in our country we also have a rich tradition of making toys from clay. In the near future we will write about the folk craft itself - making Dymkovo toys. And to warm up, let's start with the horse. It is quite simple and we can easily make a figurine about the size of a palm (that is, about the same size as the prototype clay toys).
However, we will use plasticine as the material, so our craft can only be called “Dymkovo” only conditionally. The main thing for us in this case: formal similarity, which will give us the formal right to call the horse Dymkovo.
What is the form in accordance with the traditions of Dymkovo folk craft? Look at the image. The INTEGRITY of this image is pleasantly surprising. The shapes of these toys are alien to any geometricism; you will not see a single frankly straight line, not a single angle! The torso smoothly transitions into the limbs and head. I personally have an association with, say, ceramic dishes: the same smoothness and roundness. Although the stability of this horse also has something of a table or chair! The body, we note, is relatively short, the legs are thick, long and the front and back pairs are similar. (Remember that in a real horse, the front and rear pairs of legs are anatomically significantly different). The toy's croup is slightly lower than the withers, but everything is very smooth. The neck is powerful and long and, together with the head, resembles...a felt boot with ears. The tail and mane are made from plasticine strands twisted in half. Now you have captured the very essence of the Dymkovo toy, let's get down to business.
How will we sculpt?
I choose the method of drawing from one piece because the horse figurine looks very solid and monolithic.
But don’t forget to leave a little plasticine for the ears, tail and mane.
When the horse is ready, we will smooth its surface and give its muzzle a simple-minded expression (draw eyes and designate the nose), attach conical ears, a mane and a tail.
Here she is, a cute plasticine horse, standing on our table. Of course, it would be necessary to paint it with Dymkovo patterns, but plasticine will not work. We’ll decorate the coloring book with patterns - next time Subscribe to blog updates Handykids.ru - “Art” and “manual labor” for children by mail]
Read more about the image of horses
Horse mask
Paper horse model
Cut out the silhouette of a horse
Tags: sculpting a toy, sculpting from a whole piece
Working with a template
To continue working with the craft, take a drawing that depicts a horse; you can draw it yourself, cut it out from a children’s coloring book or from the Internet. You will also need a stationery knife, a thin brush, paints or gouache, a toothpick, super glue or PVA, a board for working with plasticine or cardboard wrapped in foil; if you don’t mind, you can use regular kitchen foil. Since this method of making crafts will be carried out using salt dough, you can add a magnet, so you should get a horse on a magnet.
It is necessary to cut out a horse template from paper, preferably it has a streamlined shape. Next, you need to attach the cut out image to the rolled out dough, carefully cut along the contour with a stationery knife, then remove the excess strips of dough and leave the figure on the board.
Using a toothpick, you can apply a relief pattern to make the figure more expressive. Carefully draw grooves with a toothpick, highlighting the mane, tail, hooves, eyes, nostrils, ears, and so on. Leave the product to dry on the windowsill for 15 hours. After this, you need to grease the figure on one side with PVA glue, and then wait until it dries completely. The same must be done on the other side, leaving the horse for another 5 days for perfect drying.
You can speed up the technological process by sending the figurine to the oven, heated to 80 degrees, and leaving it for an hour and a half. After the horse is completely dry, you can paint it with paints and glue a magnet. With the help of such simple manipulations you can get a beautiful and exclusive craft.
Let's make it from dough. A salt dough horse, the master class of which was provided by a master of modern hande-made works, is made in the style of a Dymkovo toy. Maybe that’s why this craft is so beautiful and attractive to the eye.
It turns out that feeling like a real creative sculptor is not so difficult at all! And you don’t need marble, granite, bronze, or even clay. After all, you can make a sculpture... out of dough! Of course, this should not be ordinary dough, but a special one - salty. Then it will not crack when drying and will acquire sufficient strength comparable to clay. Pancake flour is not suitable for creating a plastic mass, as it will definitely rise, forming cracks and deforming the figure.