Today the idea of competent organization of space is very popular. On the Internet we read a lot of useful tips for those who want to find a place to store small items. And when you look at how many different boxes you need to buy, you realize that your budget won’t support it.
But you don’t have to leave huge sums of money in stores - you can make an organizer for accessories and important things yourself. It won't take much time and won't require any special skills. Shall we check?
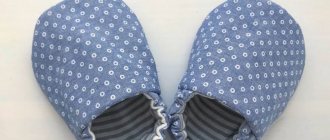
For the office
If, in search of a pen, you turn the whole house upside down, then a master class in making organizers with your own hands is your option. Let's try to make a convenient device for storing pens, pencils and other small things that may suddenly be needed.
To do this you need to take:
- cardboard;
- pencil;
- ruler;
- tourniquet;
- paint (in a can);
- scissors and glue;
- paper;
- tin cans (at least 2)
Lubricate the jar with glue and cover it with paper. We wrap the jars with a tourniquet, then paint and leave to dry. It is better to take an even number of cans to create convenient organizers. We place them in pairs and insert a handle in the middle.
Wrap it with a tourniquet. Ready! Now in organizers you can separately store accessories according to the types and purposes of work.
Convenient solutions for the kitchen
There are always a lot of things in the kitchen. To simplify access to them and at the same time avoid clutter, you can see how to make an organizer with your own hands.
For this you will need:
- thread and needle;
- cutting boards;
- stapler;
- braid and fabric.
You need to make patterns for a rectangular organizer, equal to the boards. We trim them with ribbon. We attach it to the boards using a stapler. Convenient storage containers are ready! You can now store appliances or other small items in them.
Bags for storing packages
Bags or napkins are often needed around the house. If you keep them in sight, it looks sloppy. You can see how to sew an organizer for them and not worry that such little things will ruin the aesthetics.
The organizer requires the following things:
- needle and thread;
- scraps of any fabric;
- a sleeve from a former item (or you can sew a new one);
- elastic or braid;
- scissors.
We make 2 round patterns from fabric and cut holes in them. We wrap the edges and sew them together. Insert an elastic band or braid into the opening that appears.
We sew the patterns to the sleeve on both sides and make a loop on the right side at the top. The result is a bag that can be filled with small items and hung on a hook. It definitely won't be conspicuous.
What else should you take with you along with your emergency suitcase?
- Rescue blanket. It will warm you well and protect you from the sun.
- Trekking poles will make walking off-road easier and even become a means of self-defense.
- A carimat or a travel rug will delight you at night when you are not sleeping on the bare ground. And it’s much warmer to lie on it. By the way, it weighs quite a bit.
- A sleeping bag and a small tent will also be very useful, but do not forget that this is an extra load that will slow down your movement.
I would like to believe in a bright and joyful future, but do not forget that everything passes. Therefore, you need to be prepared for any adversity and trials of fate.
And remember the popular wisdom: “An optimist learns English, a pessimist learns Chinese, and a realist learns a Kalashnikov assault rifle!”
Folding organizer for household items
There are things in every home that are a pity to throw away, but there is no way to store them separately. A special organizer is perfect for this.
DIY polymer clay jewelry: master classes with photosDIY decorative candles: master classes with photos
Decorating a vase: ideas and master classes on how to make a vase with your own hands (80+ photos)
To work you need the following things:
- thread and needle;
- a piece of any dense fabric and several scraps;
- pins;
- buttons.
Lay the fabric horizontally and fold over about 1/3 of its length. Use pins to mark where the pockets will be. We sew the workpiece according to the markings and attach 2 buttons to each side of the pocket. From the flaps we make valves that will close the pockets. We cut holes. We attach the valves to the pockets.
It turned out to be a great thing for storing small items. It can be folded into several parts and placed in a table or closet. You can get what you need at any time.
You can even use a terry towel as a basis for the organizer. Then you can fold the item and even take it with you on a trip - everything will be preserved perfectly!
A little imagination and free time is all you need to properly organize the space in your home. Organizers will definitely help with this!
Craft box decor
A box is a unique item for storing various things at home. Such as shoes, stationery. Someone keeps letters, postcards, you never know.
As a rule, the box is made of cardboard and is easily decorated. The main thing is an idea and a little imagination. So, let's make a box for needlework, or rather for ribbons, lace, threads and other cute women's things.
Materials and tools for decorating the box:
- Cardboard box for tiles
- Scissors
- Ruler and pencil
- Flat brushes
- PVA construction adhesive universal and PVA for carpentry
- Acrylic paints
- Three-layer paper napkin, background
- Single-layer textile napkins, 41*41 – 3 pieces
- Acrylic varnish
- Braid
- Button
- Glue gun
The tile box consists of a main part and a removable lid (Photo 1), and I have an idea to make a box for needlework. Then the box should close like a suitcase.
To do this, I drew a line around the perimeter of the box on three sides (Photo 2), noting the depth of the lid and cut it off (Photo 3).
I left one side and glued it to the base (Photo 4).
I coated the entire surface of the box with glue so that the paint would adhere better and reduce its consumption (Photo 5) and dried well.
I covered the entire box with white paint (Photo 6,7).
For decoration, I took single-layer large napkins, very reminiscent of fabric ones. They behave well when glued (Photo 8).
I glued the first napkin: first I determined the location of the napkin (Photo 9), so that it completely covered the box lid from the front, and so that the edge of the napkin went under the lid, coated the surface of the box, laid the napkin and glued it, smearing it on top of the napkin as well (Photo 10). Dried it out.
I glued it to the side of the lid in the same way, as much as the size of the napkin allowed (Photo 11).
The rest of the part was glued to the back wall of the box (Photo 12). Dried it out. This type of napkin takes longer to dry than a paper one.
I glued the second napkin to the bottom of the box, and first coated the surface of the bottom of the box with glue (Photo 13, 14).
Dried it out. I folded the rest of the napkin inward (Photo 15).
The procedure takes a long time, since each plane was thoroughly dried and only then moved on to the next side.
I divided the next napkin into sides and glued it with the fold inward, helping with clamps (Photo 16). I left part of the napkin for the inside of the lid.
I covered the bottom of the box with a paper napkin to match the leaves, covering it with glue from the center to the edges (Photo 17).
And I glued the last fragment onto the inside of the lid (Photo 18).
Once the entire box was dry, I varnished the entire box (Photo 19).
I glued the tape along the edge of the box lid using wood glue (Photo 20).
Inside the box, at the junction of different napkins, I closed the seam by gluing tape (Photo 21).
I painted the button to match the colors (Photo 22) and left it to dry. While the button was drying, I made a loop from the braid, twisting the edges into a snail shape (Photo 23).
I glued the loop to the lid of the box with a glue gun (Photo 24, 25).
I glued a button in the same way, and threaded a thin cord through the holes (Photo 26).
The craft box is ready (Photo 27).
You can put any little things for your hobby in this box.
In order not to forget the page address and share with friends, add to your social networks: