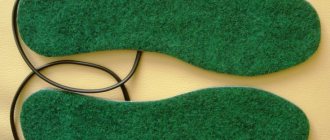
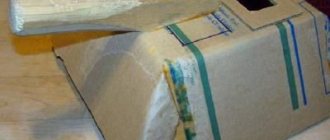
Don’t rush to throw away your old jeans – you can use them to make many useful things, as well as cool slippers. A sewing machine will certainly make the work easier, but, unfortunately, not all machines can sew thick fabrics or a “sandwich” of leather and foam rubber. So we will sew our first jeans slippers by hand. If you want to sew a gift into shoes, you will find slipper patterns of different sizes useful.
Booties for babies up to 1 year old - master class and pattern
Sew beautiful slippers - moxas for kids from scraps of fabric. In this master class, booties are made of cotton: denim and striped cotton fabric. If you turn these booties inside out, you will get slippers of a different color. An elastic band threaded into the back drawstring will help the slippers not fall off the feet of your baby or toddler.
On the pattern we see 2 options for soles (up to 0.6 months) and - from 0.6 months. up to 1 year, oval top and long back.
To work we need:
- Pieces of fabric (denim and stripes).
- A piece of padding polyester or batting.
- 25 cm of linen elastic 6-7 cm wide.
- Scissors, ruler, pencil, sheet of paper or cardboard.
- Threads.
- Sewing machine (you can also sew by hand - with a “needle forward” stitch).
- Tailor's pins.
In MK, a larger sole (2) was selected, as well as a top (1) and a heel (3). We transfer all the data onto paper or cardboard and make templates. You will need 3 templates. Cut out templates from paper. If sw. The machine does not sew a “sandwich” of such thickness - we sew the sole manually.
We apply the templates first to striped fabric, then to denim and padding polyester. Trace with a pencil, adding 0.5-0.7 cm seam allowance.
We must cut out: from striped fabric - 6 parts (2 soles, 2 tops and 2 backs), from denim - 6 parts, similar to the previous cut, from padding polyester - 6 parts.
Then, we need backdrop parts: 2 pieces. from jeans, 2 children with stripes, and 2 children. from padding polyester.
We take a padding polyester, put denim fabric on it, and put the fabric on top (face to face). striped. We make a line (stitch) 3 children. along the long side, departing 0.7 cm from the cut. Repeat the same for the second sneaker.
We unfolded 2 sewn parts, ironed them with an iron - 2 parts are ready. backdrop We attached the elastic (we need a drawstring for the elastic) to the seam, added another 0.3 cm and sewed a line at a distance of 1 cm from the seam. We take a pin and insert it into the resulting drawstring - our elastic band.
We fasten (sew) the end of the elastic (on the left in the photo), then stretch the elastic itself, leaving 11.5 - 12 cm. We fix the second (right) corner manually or using a machine. We repeat the same with the second backdrop.
Next, we take 3 children. top (sintepon, denim, and striped). On 2 striped parts, use a ruler and a pencil to mark the division into 3 segments. That is, if this side of the top = 13.5 cm, then mark it like this: 4.5; 4.5; 4.5 cm.
Then we take the synthetic padding of the top, put the denim on it, and on top in the same way as in the photo, the finished backdrop, front to front. We pin the top.
Next step: place striped detail on top of the resulting workpiece. the top with the cut that we divided into 3 parts. Facing each other
Please note: the backdrop reaches the 1st mark (see photo)
We pin it with pins. We are a little short of the 2nd mark. We sew this section on a machine with a seam 0.7 cm from the edge, or if you sew by hand, we sew to the 2nd mark.
So: we sewed the first side of the backdrop. We press the other side of the backdrop to the same side of the top. We pin it with pins and put the striped fabric on top again. We combine the last pencil mark with the cut of the backdrop. We sew (now to the end) at a distance of 0.7 cm from the edge.
This is the preparation we got. There should be 2 such blanks. All that remains is to sew on the sole.
We take the padding polyester, place the denim sole blank on top, face up, and at the end we place the finished blank so that the strip is on the outside. Secure with pins.
Next, sew the pinned parts together, departing 0.7 cm from the edge. Work in the way that is most convenient for you: either sew on the padding polyester, or on the top of the slipper. The line is not continuous - you need to leave a 4 cm section unsewn in order to later turn the slippers inside out.
Turn the slippers right side out and sew up the hole with a hidden seam.
In the video - how to sew moxa booties for children under 1 year old:
How to sew double-sided moxa booties for babies under one year old (master class and pattern)
Watch this video on YouTube
DIY bunny slippers
Bunny slippers are a classic, but do they all have to look the same? Why not take a common model as a basis, but make something of your own as a result?
For example, here are these cute house boots with applique:
During the work you will need:
- Old wool sweater
- Patterns (finished samples can be found here)
- White and pink felt
- Thick, non-slip fabric for hemming sneakers at the bottom
- Thread, needle and other basic sewing supplies
At the link above you will find samples of patterns for cutting out applique details. They can be proportionally increased or decreased if necessary, just do not forget to leave seam allowances (approximately 1 cm on all sides of the part).
The sweater should first be washed in hot water and then dried in the dryer (or directly in the washing machine) so that it shrinks and feels as much as possible. If after drying you still see loops under the pile, repeat the entire procedure again.
Step-by-step instruction
Place the slipper patterns on the pre-smoothed fabric and cut out the parts for each leg one by one (there should be 4 of them in total, since each slipper will be sewn from two halves).
Then cut out the bunny's tail from white felt. Place one half of the slipper face up on the table and place the tail on top of it, as shown in the photo:
Place the other half of the slipper on top, face down.
Secure the back and top of the slipper with sewing pins and stitch. Let the bottom edge remain unstitched for now.
Do the same with the second slipper.
Then cut out the hare's face and ears from felt (the outer side is white, the inner side is pink).
Sew the ears by placing the pink piece on top of the white piece, both right sides facing up, and making just one stitch down the middle. The unstitched edges of the pink felt will puff up slightly, but the overall appearance of the applique will only benefit from this.
Then fold the bases of the ears along the line of the central seam and intercept them with thread - when you attach them to the slippers, the density of the folded fabric will not allow the parts to sag. A total of 4 ears are needed (2 for each application).
Now cut out the pink nose and sew it to the muzzle along the edge. Instead of eyes, you can sew two black buttons, embroider them with satin stitch or draw them.
You will need 2 of these muzzles - one for each slipper.
Turn the prepared top part inside out and sew the muzzles and ears to it as follows:
As you can see, the ears are inserted under the hare's muzzle, and are sewn with the same line as it. Sew around the entire perimeter of the applique to make it easier for you to sew on the bottom. You should end up with something like this for each slipper:
Turn it inside out and set it aside for now. You have already done the lion's share of the work, all that remains is to cut out and sew on the sole.
To do this, first cut out two insoles from the sweater. There is only one pattern for them, you just need to turn it over so that the curve matches the curve of the foot, i.e. was facing right or left.
Then do the same using the thick fabric you chose for the sole. Place the insoles and soles in pairs. The insole should lie with the front side up, the sole - vice versa. Sew the folded parts around the perimeter, stitching almost along the very edge.
All that remains is to sew the upper part of the slippers and the soles.
Pin the center heel side of the sole to the heel seam of the sneaker, then do the same with the toe and front of the sole. To find the center, simply fold the sole in half lengthwise so that the side edges match each other.
It is better to insert pins from the top, this will make it easier for you to sew the parts together.
As a result, the slipper should look something like this (remember that you are working from the inside out, and the applique remains on the inside):
Sew it around the perimeter of the sole.
The edges can be overlocked to make them look neater.
Having done this procedure with both sneakers, you can turn them right side out and straighten the seams.
To make cuffs, cut off the bottom edge of the sweater (“elastic band”) and press it along the side seams. Then fold each half in half and sew the edges together to create a ring. That's all, all that remains is to sew these rings to the tops of the slippers, from the inside, and then turn them out.
If you did everything correctly, congratulations, you have become the owner of a pair of these fun cute slippers!
How to sew simple children's slippers with your own hands
Creating a pattern, transferring it to fabric, cutting, etc. - a complete step-by-step description of the process of creating beautiful and comfortable children's slippers.
Photo 1. Children's slippers can be made from any fabric. In this case, felt house shoes are presented.
Pattern in 5 minutes
It’s easy to make a pattern for children’s slippers at home. First, let's draw a pattern for the sole. The easiest way to avoid making a mistake with the size is to circle the child’s foot on paper.
Important! You need to trace your foot while standing. The leg in this position is slightly wider
This will make it easier to guess the size, and there will be no problem that the slippers will be small.
It is better to outline the leg with a margin, because... house shoes should not be tight. It's good if there is a small opportunity for leg growth. But the margin should not exceed 1.5 cm. This does not take into account seam allowances.
Once the mark on paper is received, it needs to be finalized. To do this, make a straighter line along the outer edge. On the inside, on the contrary, we leave a bend. It will help you navigate the distinction between left and right slippers.
Photo 2. You can use this pattern by changing the dimensions to suit you. Or find another one on the Internet.
If the slippers are made for a child who is not yet walking, you don’t have to leave any bends. The sole in this case will resemble an oval. In addition, it is necessary to round the toe at the sole pattern. We make the line smoother.
Now we need to create a pattern for the top of the slippers. It will consist of two parts. The first one will have the shape of a semicircle. Its diameter should be greater than the width of the sole at the toe. The second part will be put on the heel. It is a strip into which we insert an elastic band. Its width is about 5 cm. We find out the length as follows. Let's put our semicircle to the toe of the sole, make marks on the edges of the semicircle. Then use a measuring tape to measure the remaining distance along the edge of the sole. This is the length of the tape under the heel of the slippers.
Transferring the diagram onto the fabric, cutting out parts for the base and sole
We will cut the parts from different materials. Two parts of the sole, observing the left-right ratio, are cut from denser fabric or leather. We will make the same details from soft fabric for the inside of the slippers.
We will cut out a semicircle in four copies. Strip for the heel part - in two. To cut paired parts, fold the fabric in half with the right side inward. We secure the patterns with pins. We will cut, leaving seam allowances of 1-1.5 cm.
Sewing the upper part of the slippers
First we start sewing the upper part of the slippers. To do this, fold the heel strips in half lengthwise, inside out. We sew each of them so that we get 2 thin tubes.
Then we connect 2 semicircle parts together, inside out. We sew first along the diameter, from the front side.
Then we turn the part inside out, iron it with an iron heated to a temperature suitable for the fleece, and sweep it from the front side along the perimeter of the semicircle. We insert an elastic band into the heel tube. It should be shorter than the tube itself. This is necessary so that the slippers do not fly off the heel.
We sew the tube to the diameter of the semicircle, along the edges on the side that will be facing inward. In this case, it is necessary to grab both the tube fabric and the elastic band with a needle. We do the same with the second slipper.
Sole
For the sole you will need to sew together 2 identical parts cut from different fabrics. The lower part of the sole is made of dense material, the upper part is made of softer material. For convenience, you can insert a layer of padding polyester or thin foam rubber between the two surfaces. We will sew from the front side with a buttonhole stitch.
Shutdown
Now all that remains is to sew the top of the slippers to the sole. Attach a semicircle to the toe of the sole. We will sew from the front part so that no internal seams press on the child’s leg. For stitching we use the same loop stitch.
When sewing, it is advisable to fall into the same holes already existing in the sole. After that, all that remains is to try on the slippers.
Preparatory stage: steam boots at the seams
So let's get down to business. First you need to get rid of the unusable sole. Then rip everything apart at the seams. For ease of work, use a wallpaper knife. If the top of the boots in the foot area has a seam in the middle, then leave it in place.
Cut off the side surfaces if they are integral with the foot. Cut off the shoe strap, but do not throw it away. It will make a heel backdrop.
Detach the insole from the top. After all the manipulations with the old boots, you should get something like this.
Now you need to cut off the nose in the boot blank in a semicircle. The boots are too hard. Wearing such shoes at home is not very comfortable, although some may like the closed-toe option. Do not overdo it, otherwise you will cut off more than necessary, and your fingers will stick out forward and slow down on the floor.
The result was a blank for the top of the slippers.
The inner insole with all layers will be a platform.
Important! If the base is made of different materials, different according to the pattern, then the upper part of the flip-flops will have to be adjusted according to the pattern. If the sole is from the original boot insole, then the slipper pattern is as is.
Material selection
The way you feel when wearing shoes is largely influenced by the material from which they are made. In addition to the convenience and presentation of products, it is necessary to take into account such criteria as hygiene, thermal conductivity and strength.
In order to sew warm house slippers with your own hands, you can use the following blanks:
- An old sheepskin coat or sheepskin coat. Sheepskin has high thermal insulation properties, softness and stretchability. It is better to make slippers from a sheepskin coat from sleeves or floors, since the back and chest parts can later be used to make a vest.
- Tops of winter leather boots. Natural material has high strength and wear resistance. The downside is that it has too thin a layer of fur, which is not enough to provide reliable protection from the cold.
- Artificial fur. Synthetic products look good, are not afraid of dampness, and can be machine washed without problems. It’s not difficult to sew slippers, but the prospects for such work are questionable - synthetics do not absorb moisture and cause a lot of steam on your feet. There is a high probability of developing fungus and allergic reactions.
After choosing the material, you need to decide on the model of slippers. Depending on individual preferences, the pair of shoes produced may have an open or closed toe, heel counter or cuff.
Old sheepskin coatFaux fur
Tops of old winter boots
Features of denim
Like most fabrics, denim has 2 types of threads in its structure:
- Warp thread. They are responsible for how durable the fabric will be. It is painted white and is visible only on the reverse side.
- Weft thread. It is the basis of the fabric. Painted blue.
Denim gets its sky color thanks to indigo dye.
Denim items may shrink a lot after washing. For this reason, new products must be washed very carefully; do not wring them out.
Now you can find both familiar denim products and absolutely unimaginable ones: jeans, Panama hats, boots, jewelry and much more.
What to sew from and how to decorate boots?
House shoes are made from different materials: fleece, velor, knitwear, felt, corduroy and drape. The fabric for sewing can be sheepskin coats and sweaters. Depending on what material you choose, the product will turn out to be shape-holding or soft.
Self-sewn boots can be complemented with various elements: applique, embroidery, lace, bows. Boots with the image of an animal's face look great: a bunny, dog or kitten. In addition to embroidery, the resemblance to the animal will be conveyed by separately cut ears, a tail and antennae. For lovers of glamor, the ideal finish is rhinestones or sequins. If you plan to give shoes as a gift, then, using your imagination, you can make something with meaning, that is, take into account the interests of the recipient. For example, decorate it in a football style, with biker elements, in the form of Minions - whatever you like! Such a gift can be made for a birthday or for another occasion, and it will be doubly pleasant.
https://youtube.com/watch?v=3mVg3DNPWmo
Types, models, preparation
Hand-sewn home clothes and shoes are not only original work, but also an opportunity to significantly save your budget. In addition, you don’t have to limit your imagination and use things that are outdated, out of fashion or have become small. You can also give unique slippers, accessories and other crafts to loved ones, friends, and colleagues for the holidays.
Before starting work, you need to decide on the model of house shoes. This will be the first stage. Easy to make with your own hands
- classic flip-flops;
- slippers in the form of boots with low tops;
- light moccasins;
- UGG boots;
- "bunnies".
Experienced craftswomen knit and knit slippers from sheep or goat wool. This is labor-intensive and complex work. For your first experience, it is better to choose a simple option.
The second stage is preparing everything necessary for work. The “kit” will include the main fabric, sole, adhesive pad (if the main material does not hold its shape well), threads (preferably nylon) and a needle, scissors, a sewing tape measure, a pencil and thick paper for creating a pattern, an awl, and fabric glue.
We make the pattern according to individual sizes. The number of elements depends on the selected model. For classic slippers without heels, these are two parts, for UGG boots – 3.
Pattern: DIY boots for home use
Sometimes do-it-yourself slippers boots patterns
they don’t require it, but all simply because some skilled craftswomen have adapted to doing them quickly and without unnecessary fuss. They simply put hard polyethylene on the foot, fasten it in the right places with tape, so that a kind of plastic boot is formed. Next, this boot is removed, sheathed with the fabric that is at hand, and in the end you get a completely finished and beautiful product. Another thing is a question of a decorative nature. Many girls are wondering how to decorate their favorite slippers so that they look beautiful and cozy at the same time. So in this matter, everything that you have lying around at home will be useful to you. These can be old soft toys, unnecessary women's jewelry such as beads or bracelets, straps and hair clips, as well as scraps of different fabric, fur or even padding polyester. If you want to make original winter boots-slippers, you just need to sew a white padding polyester to the upper edge of the stocking, which will remind you that it is winter and cold outside, and your feet in the house are warm and cozy. It will also be great for children to create the appearance of a soft toy on their leg. Old toys are ideal for this; you can borrow eyes, noses, and even ears from them. For a more glamorous look, use sequins, beads or sew-on decorative elements to enhance your finished product. If you have old fur coats lying around in your bins, you can also borrow some fur from them, which will make your slippers not only even warmer, but also more pleasant to the touch. Absolutely any dense material is suitable for manufacturing: from jeans to coat fabric. Many people use old terry towels or robes, leather jackets that are no longer needed, or other items of clothing that have gone out of fashion. For example, a photo of the finished product, which is made from an old blanket or two colored bath towels. Just remember that not everything needs to be thrown away, because old things can give life to new ones, you just need to be able to see the necessary potential in them. We wish you good luck in your difficult hand-made work!
This article provides a pattern and explains how to sew slippers and boots. These indoor slippers can be made from terry cloth, velosof or fleece. The pattern of one boot consists of only 2 parts that need to be printed. For two boots you should have only 12 pieces cut out, since they will be double. These are women's slippers and boots.
When patterning a freebie for a boot, the fabric needs to be folded face to face for one boot; and a face with a face for another boot, so that the details for each boot are symmetrical. Thus, you should have 8 parts for freebies of two boots. And four more parts are the soles for two boots.
Before cutting, be sure to check whether the given boot size is suitable for you. If you need more, add, if less, remove from the patterns. The pattern of slippers and boots given below will help you connect the patterns after you have printed them. You can sew these slippers and boots with your own hands; you will find the patterns in the article. This pattern of house slippers and boots is in a reduced form.
What can be made from old jeans - ideas
What needlewomen do from old jeans is simply enviable of their skill and rich imagination.