Necessary materials and accessories for work
Creating a lotus from napkins with your own hands is quite simple; it requires a minimum of available materials. Thanks to this, you can decorate the table not only at home, but also in a restaurant or at a picnic.
To create an unusual figure you will need:
- Thick paper or fabric napkins for leaves - 12 pcs.
- Napkins for petals – from 36 to 96 pcs.
- Knife and regular scissors.
- Thick needle.
- Thick thread or silk floss.
In addition to napkins, you will need scissors and other materials and tools.
It’s better to try your hand at creating such original decorations using thick paper napkins. Then you can move on to creating fabric models. It is more convenient to work with starched fabric.
Advice. If you take material of different shades, you can create picturesque leaves and a flower. Additionally, you can make stamens from paper napkins of a different color and install them inside.
Additionally, you can make stamens from another material.
Creation of the Gulistan lotus
You can make a beautiful and festive lotus yourself from napkins. To work, you will need huge napkins. In total, you need to take 108 pieces. will help you make a lotus from napkins :
- The first layer will be created from 12 petals arranged in a certain way.
- First, all 12 parts are stitched with threads matching the color of the material. In order for the needle to fit normally and the visual appearance of the flower not to be damaged, you need to create holes with an awl at the base. First, everything is stitched on one side, then the craft is turned over, and everything is stitched on the other side. The base should stand perfectly, without falling or sagging.
- The remaining parts are created according to the same scheme as the base. When everything is done, the craft can be assembled. After completing this step, you should be more careful - if the parts at the base are turned down, then the lotus petals should be facing up!
- The petal can be tucked into the base and compacted firmly with a spoon or knife. Next, you need to assemble the entire first row of the craft. When everything is done, you can move on to row 3. The petals should again be tucked into the previous row with the “boat” facing up.
- Each new row should be closer to the central part. You need to press the leaves very tightly, because if the middle turns out to be weak, the lotus will quickly fall apart when transferred.
- There should be 9 rows in total. The flower itself should be dense and strong so that if you drop it, it should not break.
Many people think about how to make a napkin holder from napkins and how to make a pineapple from paper, everything is done in the same way, you just need to find a detailed master class and get to work. You can also make various crafts using the origami technique using modules. But remember that this is very difficult.
Originally posted 2018-04-18 13:51:59.
Making a lotus from napkins
After all the materials have been selected, you can begin folding the lotus. Step-by-step instruction:
Creating a base stand
- First you need to create the base of the product. It will consist of leaves. Green napkins will look the most picturesque, but you can use materials of a different color. A total of 12 elements need to be created.
- Fold the napkin diagonally.
- Fold the sides from the top corner to the center, as is usually done when folding an airplane.
- Turn the structure over and fold the small ears up.
- Fold the triangle along the center line. One part is ready to make 11 more of these.
- Gather all the elements in a circle using thread from the wide side. Tighten the thread and straighten the leaves picturesquely. The stand is ready.
The process of creating a bud step by step
- Now you need to collect the flower itself. To do this, you need to prepare the petals. They are created in the same way as leaves.
- The petals need to be straightened from one edge to make them more vibrant.
- Using the ears, which are small triangles with a wide edge, the petals need to be tucked into the slits of the leaves by hand. For convenience, you need to use a regular knife. It is more convenient to work with a table knife, as it is safer and does not injure thin napkins.
- The petals are tucked into the leaves in a checkerboard pattern. That is, the corners of one petal are tucked into the slots of two adjacent leaves.
- The first row will have 12 elements.
- In this way, it is necessary to perform another 3 to 8 rows. A 3 row lotus will look quite simple and flat. It takes a long time to assemble an 8-row lotus, but this decoration is worth it. This product will look like a lush ball.
Advice. To begin with, it is better to collect 36 petals, then assemble a flower from them. You need to try on the figure to see how it will look on the table. After this, you can collect the required number of elements. Collecting all the elements at once may seem like a boring task. And the beautiful view of the flower on the table will inspire the craftsman to assemble the following parts.
You should not make more than 8 rows, as the flower will turn out too bulky and will crumble. After the structure is completely assembled, it is necessary to straighten all the petals and slightly bend them upward. Option for straightening the petals: bend the first row down and the rest up. This will make the flower more vibrant. The table decoration is ready.
Don't make too many petals, otherwise the flower will fall apart.
Modules for flowers
All fold lines should be pressed well with your fingers so that the figure does not fold out, but retains its shape. Step-by-step instructions for creating petal modules:
The napkin is folded diagonally.- Now the resulting triangle is folded in half and unfolded to its previous state.
- The two sides of the triangle, which come out from the same vertex as the fold, are reduced to the fold line obtained in the middle. It turns out to be a rhombus.
- The two protruding triangular tails formed in the previous step are folded to the opposite side (the rhombus is folded along a smaller diagonal).
- The resulting triangle is folded in half with the tails inward.
The petal is ready.
What can be used for decoration
Although a lotus made from napkins is an independent table decoration, it can be brightened with the help of additional decorations. DIY lotus decor options from napkins:
- A napkin core in the center. To do this, create a ball of paper. The paper napkin is straightened into one layer and folded like an accordion. The accordion needs to be tied with thread in the middle. Then cut the paper along the folds and ruffle it. You will get a fluffy ball. It must be placed in the center of the lotus, where it will symbolize the stamens.
- The core is made from napkin tubes. Another technique for creating a core from napkins is to make small tubes out of them and insert them into the center. To do this, the napkin is cut into 4 parts, from each you need to twist a tight tube. After this, all parts are inserted into the core of the product.
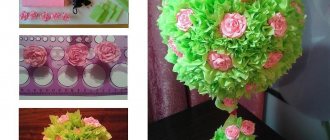
- Decoration with beads or rhinestones. These elements will look colorful on a flat flower with few rows. It is enough to collect 1-3 rows of petals. After this, beads are laid out in the center of the petals of the last row, as in the photo. The color of the parts should contrast with the color. Mother-of-pearl or metallized beads or large sparkling rhinestones look most striking.
- Lotus decoration with shells. For each flower you need to select 1-2 medium-sized shells, which are placed in the center of the petals. Shells can be combined with beads. Such natural material will make the products more lively and romantic.
- Sisal decoration for flowers. You can cut a romantic lace lotus stand from sisal. From this material, cut into small strips, you can also create the core of a flower. To do this, the sisal needs to be cut, crumpled and placed in the center of the product.
Pineapple on a plastic plate
To decorate the holiday table, you can also make a pineapple out of paper. In the master class for this purpose, modules are formed from 11 green napkins according to the scheme from the description above. They are fastened together in a circle with a stapler or sewn together with thread. In this case, the pockets of the modules are placed towards the center. The resulting base is placed on a plastic plate, with the convex part facing up.
Features of location in the interior
Lotus napkins can be used not only as a general napkin holder. You can find many more interesting uses for it:
Individual plate decor
Small flowers on each plate will delight guests and make the table setting bright.
You can decorate plates with lotus.
Additional decor for bread products
Buns decorated in this way look interesting and appetizing. To do this, you need to assemble a variant from 1 row of leaves and 1 row of petals. Place the bun in the center and fold the petals over. This decoration method is well suited for a picnic, as it keeps the bread fresh and protects it from street dust.
Coffee cup decor
The lotus can also be placed on a cup of coffee. This way it will maintain the temperature of the drink and the aroma. Drinking this coffee is doubly pleasant.
Lotus candlestick
A fabric figurine can also be used to decorate a glass candlestick. The product is assembled in the usual way, and a glass glass for a tablet candle is inserted into the center.
You can decorate a candlestick with a lotus figurine.
Important! Under no circumstances should a tablet candle be inserted into a product without a glass candlestick, as this will inevitably lead to a fire.
Surprises for a children's party
Some of the dishes on the children's table can be replaced with fabric figurines, where candies, fruits, and cookies can be placed. You will get a real Thumbelina table. Children will have fun taking sweets out of the figures.
You can put sweets for children on a flower made from a fabric napkin.
Gift decoration
If you plan to present a small gift at the table, then the surprise can be hidden in a flower. A box with an engagement ring will look especially romantic in this packaging.
You can put a small gift inside the voluminous flower.
How to do:
- Let's make blanks for our craft. Provided that we want to make 3 water lilies, we need to cut out 12 petals from napkins for each color; 3 sheets of green paper water lilies.
- Apply a small amount of glue to the bottom and sides of the bottle cap. Glue the petals to the bottom.
2. Now pour some glue into the inside of the bottle cap and glue another layer of petals to the inside.
3. Apply a small amount of glue to the bottom of the bottle cap and attach it to the green leaf.
4. Now we will make the core of the water lily: cut the yellow paper into small strips. Pour some glue into the middle of the lid and attach the resulting strips there.
We have already made flowers from paper napkins. And now we will have a three-dimensional applique - a pond with water lilies made from paper napkins.
What you need for the craft: paper napkins of two colors - yellow and white (but you can also have a different color, like water lilies), white or yellow threads with a needle, scissors and colored paper in blue and green.
One flower requires 7-10 pieces of white napkins and 2-3 yellow ones.
Carefully stack the napkins so that the yellow ones are on top. We sew a thread through the stack of napkins, securing the knot.
Fold the napkins in a stack and stitch them in the center with thread
We cut the topmost yellow napkin in the shape of a circle, and then cut this circle into strips, from the edge to the center of the circle.
Cutting yellow strips
Then we slightly crush the strips with our fingers - this will be the center of the flower with pistils. We do the same with the next yellow napkin.
We crumple the yellow stripes
Then we cut the white napkins into a semicircle and cut out large petals.
Cut out white petals
The petals must be cut so that the next petals are not under the previous petals, but between them. This will make the flower more magnificent.
Make sure that the next white petals are between the previous ones
But if the child cuts out all the petals in the same way, that’s also okay.
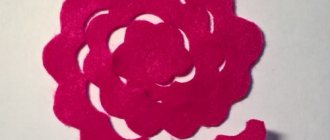
You should get something like this flower.
Cut out water lily leaves from green paper. Fold each leaf in half. To add volume to the application, you can glue the leaf with only one half.
You can make as many of these flowers as you like and in any size. The main thing is that there is enough blue paper for the pond. With a little imagination, you can make an oval-shaped pond, and plant some more grass on the sides from green double-sided colored paper. You can even plant a frog princess made of plasticine on a water lily leaf. But we made do with just flowers.
As you can see, such a volumetric applique is not difficult to make. And it turns out quite cute.
Did you like our water lilies in the pond?
Try making these flowers with your children.
© Galina Shefer, site “Grafomanim for two”, 2014. Copying text and photos is possible only with the written permission of the author. All rights reserved.
Related posts:
I would be very grateful if you share the link to this post with your friends on social networks!
This is the kind of water lily we will get. It's not difficult to do. A teacher taught us how to do it at school, a long time ago. I remembered and now I pass on the experience to others in case they need it.))
Here's what we need: • Paper (regular office paper) • Scissors • Glue (a pencil is better, it holds the glued petals more tightly, see photo 12) • Compasses
Using a compass we draw two circles. One is larger, the second is slightly smaller. The main thing is that they do not have too different sizes.
Ready to become flowers.
Let's take a big circle. Fold in half.
Now we fold the finished half (photo 6) into a quarter.
Once again in half (sorry about the finger))
Now we cut along the fold lines without reaching (!) the middle
Now we move on to the most difficult stage - creating the petals. We take one petal and do this: (Sorry for the terrible quality) wrap it like this and apply glue to the tip (corner) of half the petal. I marked the tip.
We take the second half of the petal and, maintaining the volume of the petal, glue tip to tip. If you don't succeed the first time, don't despair! Here you need to get used to it and get used to it. Now, if you use liquid glue, the petals will corrode and it will be very difficult to make a petal.
We make a second, a third after one petal.
Most of it is ready! But that's not all. We also need a second layer of petals. Although if you like it, leave it that way. Just glue the yellow center and a sheet of green paper or cardboard at the bottom, like a water lily leaf.
This is what it looks like from below.
We make a small circle in the same way.
Everything is ready for assembly.
Glue the big one to the sheet. not completely, but only the middle.
Let's try it on. We place the petals in a checkerboard pattern.
Ready! Only the middle remains.
That's it now! We decorate if necessary.
Here it is, my collection! From the largest to the smallest. PS I gave away another half for the holidays.
The smallest one is closer. Approximately palm size.
I hope I didn’t tire Rada too much, if it’s useful
At first glance, it’s a fairly simple master class, but still, such a craft requires effort on the part of little children’s fingers, but it develops fine motor skills extremely effectively, and, as you know, you can’t do without it. When a child gets the hang of gluing petals, he will really like this process and will not want to stop, therefore, dear educators, teachers and parents, prepare a lot of colored paper and glue, and a good mood will come with this craft. Moreover, using this technique you can make not only a water lily, but also a pincushion lily for your mother on March 8, and entire bouquets of flowers.
Ideas for ready-made products
In addition to the classic two-color lotus model, you can create many more options in different colors.
Lotus can be made in completely different colors and shades.
An option of layers of different colors in pastel shades will create a rainbow mood.
For a romantic dinner, you can make a flower from napkins in burgundy, red and pink tones. The bottom layer is made from the darkest tone, and the top layer is made from the lightest tone. You can put a cute gift or engagement ring in this flower.
The boiling white model will emphasize the cleanliness and freshness of the table decoration. It is perfect for the summer.
A white lotus will highlight the beauty of a summer table.
Whatever material is used, a do-it-yourself lotus made from napkins looks soulful, warm and cute. In any case, it will delight guests and owners.
Equipment for work
The instructions will tell you how to make flowers from napkins.
To make this craft you will need the following tools and items:
- cellulose of different structure, size and color shades;
- adhesive for paper, it can be a stationery “pencil” or PVA;
- colored narrow tape used in floristry;
- thin wire, preferably brown or green, ordinary material must be additionally decorated;
- scissors;
- stapler;
- thick needle;
- small pliers or forceps;
- compass;
- thin ribbons;
- ruler;
- thick cardboard;
- various decor;
- strong thread;
- pencil.
DIY flowers from sweets and napkins: master class on creating bouquets
Do you want to create an original gift yourself and please not only the hero of the occasion, but also the guests? Then we will tell you how to make flowers from napkins and sweets, which will create an unusual, creative bouquet.
For the master class you will need:
- Chocolates 5 pieces. It’s better, of course, to choose expensive ones
- Paper napkins in green and pink (other colors are possible)
- Toothpicks
- Glue, tape
- Cling film
- Scissors
- Satin ribbon
- A plastic cup
And now the creative process:
- Wrap each candy with a piece of cling film to make it look like a ball. When folding, there should be a small “tail” of the film left.
- Place a toothpick on each “tail” and secure it with tape
- Fold the napkin in half 4 times and cut into 6 pieces. The end result should be rectangles
- Twist each rectangle twice in the middle and fold it in half. This will be a petal
- Make several of these petals and attach them to the candy using tape. It will turn out to be a kind of “chupa chups”
- Now take a green napkin and fold it 4 times, cut it in half and take one of the halves and make long cuts from the “blind” edge
- Twist the resulting ends
- Wrap around Chupa Chups
- Make 4 more flowers
- Cover a plastic cup with napkins of any color
- Place foam or crumpled paper inside. Place flowers inside the glass, securing with toothpicks
- To prevent the inside of the glass from showing through, cover it with a green napkin.
- The bouquet is ready
The history of the flower
In Japan, this flower is a sacred plant. The lotus represents innocence, peace, beauty and the desire to be closer to the sun and spiritual harmony. The flower is also considered a symbol of the growth of the soul. No matter what place, good or bad, a person is, he must always maintain his purity of soul.
The lotus begins its life at the bottom of the pond. It gradually stretches upward, closer to the water, and constantly moves towards the light. As soon as the flower hits the surface of the water, it begins to bloom and turns into an elegant plant.