A beautiful solution for your dining table will be a rotating center, assembled by yourself, of the diameter and color you need.
The prefabricated spinning center parts are suitable for tables ranging in size from 120 cm to 2 meters or more. The diameter of the rotating center can be from 60 cm to 140 cm, if it is not attached to the table surface, but is simply placed on top. If the rotating center is rigidly fixed to the table surface, the maximum diameter can be about 150 - 180 cm.
If you are looking for something else, look at alternative options.
Stocking up on materials
How to make a turntable? To begin, prepare all the necessary materials. You will need two bearings, which can be purchased at auto parts stores.
Please note that there are double, pressed bearings. The second option is preferable because you will have to tinker less.
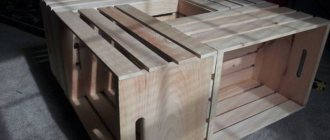
The rotating table also needs a wooden slab. You can stock up on a door from a kitchen unit. In addition, you will need hard nails, self-tapping screws, plastic tubes, a metal circle, thin plastic, and plywood.
Photo
By choosing different materials and being creative, you can get very different tables.
Do you want to make an original candlestick for your or your children's room? All in your hands! The uniqueness of the candlestick is that it begins to rotate from the burning air and the heat generated by the candles. You can make such a wonderful item yourself without spending a lot of time and money. Detailed step-by-step instructions will help you with this.
Materials
To make a rotating candlestick with your own hands, prepare:
- empty glass jar;
- candle;
- wire;
- foil (in this case a disposable plate);
- a thick sheet of A4 paper;
- electric lighter;
- pliers;
- scissors;
- stationery knife;
- compass;
- pencil;
- masking tape;
- ruler;
- eraser.
Step 1
. Take measurements from the jar you have. You will need its height and radius.
Step 2
. The rotating element must be made slightly larger than the diameter of the can. The formula will help you make the correct calculations: required circle = 2 x pi x radius.
Transfer the resulting circle onto paper. It should differ by 1 - 3 cm from the diameter of the jar. Leaving the compass at the same point, draw a second circle on paper with a radius 5 mm smaller and another small one with a radius of only 5 mm.
Step 3
. Divide the inner circle into 8 parts and draw the cut locations. Draw the teeth in a circle. They will be useful for fastening.
Step 4
. Cut out a circle along the center line.
Step 5
. Cut a slightly larger circle from foil. Fold the foil on the back side of the paper circle, securing the entire structure with pieces of tape.
Step 6
. Make cuts along the previously drawn dotted lines and bend the resulting blades.
Step 7
. Cut a circle with a radius of 5 mm from foil. Glue it to the central part of the rotating mechanism blank.
Step 8
. Glue the rotating mechanism to the remaining part of the workpiece drawn on paper.
Step 9
. Cut a strip of paper that matches the height of the measurements taken from the jar. The length of the rectangle should be the circumference of the jar and another half-centimeter of margin for gluing.
Step 10
. Draw a suitable design on paper. In this case, these are stars of different sizes.
Step 11
. Cut out the rotating mechanism with teeth and sprockets.
Step 12
. Glue the entire structure.
Step 13
. In order for the mechanism to rotate, it must be lifted above the can. For this you will need wire. First, bend it around the can, then point the end of the wire towards the center of the circle. Make a few turns and lift it up.
A do-it-yourself cake turntable is needed not only by seasoned pastry chefs. This is a necessary item for those who cook for pleasure. Housewives who bake cakes coated with mastic cannot do without such a design. The main purpose of the rotating table is to facilitate the process of decorating the cake. That is, you don’t have to beat around the bush with the finished product; it will be enough to simply decorate the rotating cake. The baked goods spin around their axis, and you just need to have time to decorate them.
How to make a turntable? To begin, prepare all the necessary materials. You will need two bearings, which can be purchased at auto parts stores.
Please note that there are double, pressed bearings. The second option is preferable because you will have to tinker less.
The rotating table also needs a wooden slab. You can stock up on a door from a kitchen unit. In addition, you will need hard nails, self-tapping screws, plastic tubes, a metal circle, thin plastic, and plywood.
Assembling a folding transforming table
Sand the end parts of all cut parts using sandpaper (sandpaper) and cover them with melamine edges matching the color of the chipboard.
Fig.5 Assembly of the transformer table base
If you were careful and precise when marking the parts and sawing them, then assembling the table will not take much time and effort.
As shown in Fig. 3 and 5, first, using confirmations, we connect the bottom and sides of the box for the mechanism (in detail b of Figure No. 5 they are marked with crosses).
Using the same confirmations, at the required height from the floor, we fasten the magazine shelf to the end parts of the table - 2-3 fasteners per side.
We attach the box to the end legs using furniture corners; for greater reliability, we screw another 1-2 confirmats into the middle of the line of contact between the bottom of the box and the end plate of the table.
- Using card loops we assemble the tabletop;
- We attach a transformation mechanism to the desk drawer.
We attach the tabletop to the mechanism platforms:
If the mechanism is single, then we attach the lower part of the tabletop to one pair, and fasten the second pair together with a connecting panel (on the underside of the platforms).
If the mechanism is double, then we attach the tabletop to the large arms of the mechanism, and the supporting tabletop to the smaller ones.
Simple wooden table model
What's most important on the table? A durable, smooth tabletop and a reliable base that can support its weight and all the objects placed on it. Although other characteristics also matter, for example, the quality of the coating. It must be resistant to abrasion, scratching, moisture and temperature, etc. The proposed round table model is designed taking into account all the necessary requirements.
About tools and materials
To create a wooden table we will use the following tools:
- electric jigsaw;
- screwdriver or drill;
- a grinding machine (or a grinding attachment for a drill);
- wood screws and confirmations;
- multi-stage drill for holes for confirmations;
- edge tape if you are using chipboard;
- tinting for wood to match the color of chipboard;
- varnish for finishing coating of wooden parts.
We will make a round table from:
- sheet of laminated chipboard or birch plywood 150x150 cm - tabletop;
- sheet of laminated chipboard or birch plywood 128x128 cm - binding disk;
- 4 bars 12x5x75 cm, 2 planks measuring 111x12x2.5 - legs.
Without special mechanisms and experience, it is difficult to independently cut a tabletop and a disk for connection with a table leg from sheets of solid material. Therefore, it is better to contact a professional, providing him with the required measurements and drawings. The diameter of the large tabletop circle is 128 cm, and the diameter of the undertable circle is 104 cm.
Article on the topic: Do-it-yourself multi-touch table
Description of the work progress
- Prepare the table blanks for work. Use a sander to make the parts smooth. Soften sharp corners.
- Using a jigsaw, you should cut grooves in the planks that will help make a cross-shaped connection.
- Lubricate the joints with glue, then install the planks into the groove.
- Using Euroscrews, connect the legs to the strips one by one, as shown in the diagram below.
- We fix the legs connected in pairs to the connecting ring, also using the connection with confirmations and glue. Installing an additional underframe helps to securely fasten the legs without fear of the ends of the screws being visible on the surface. At the same time, the weight of the tabletop is distributed more evenly.
- Using 35-40 mm self-tapping screws and glue, we attach the tabletop to the underframe.
- Let's start finishing the round table. Once again we examine the product for roughness, unevenness and burrs. If necessary, we use additional sanding. If necessary, we coat the piece of furniture with varnish or paint. The table is ready.
Tools
Having decided to make a rotating cake table with your own hands, prepare the following tools and materials :
two bearings (they can be purchased at any auto store);
Important: bearings are double and pressed. The second option is preferable when assembling a rotating cake stand, as they are more convenient to install.
Manufacturing options
The milling machine rotary table is sold in a variety of designs to help meet the unique requirements of manufacturers. The base and bearings of expensive products can withstand a weight of several tens of tons. The elements are made from high-strength material - special steel.
For rotating workpieces, a special balanced CNC rotary table for a milling machine is used. This design uses angular contact bearings that are preloaded. Single-axis and multi-axis versions are available.
A cake turntable will make decorating your baked goods easier
Baking cakes is not only interesting, but also responsible. The quality of decoration determines the aesthetic appeal of the confectionery product and the ability to arouse appetite among consumers. Therefore, you cannot do without a special rotating round table designed for decorating sweets.
The stand consists of several parts. Using step-by-step instructions, you can make a cake turntable yourself.
Round table options
We will not list all the variations of the round table, because there are countless of them. However, there are several classic variations that are always relevant:
- A small round table with one massive leg in the middle.
- Classic table with 4 legs.
- A table with 4 legs that has several “floors” for storing books and magazines.
Article on the topic: Do-it-yourself shower cabin installation
However, tables are not limited to legs alone. Furniture stores in our country offer models with hidden recesses and folding shelves.
Labor costs and cost of making a table with a rotating center with your own hands
After finishing the work, I was interested in calculating how much it cost to install the rotating table. Money was spent:
- Fiberboard (0.5 m2) – 50 rubles;
- Chipboard (0.5 m2) – 100 rubles;
- liquid nails “Montazh” (tube 185 g) – 160 rubles;
- articulated leg for a chair - 70 rubles;
- sheet of whatman paper (1 sheet) - 20 rubles.
I bought sheet material from a furniture workshop as cutting waste. I took a piece of timber, hardware, and adhesive furniture tape from my supplies.
As for labor costs, the work took me no more than 8 hours.
DIY rotating table
DIY round table with a rotating center
After making my own turntable, I came across plans for an easier turntable project. You can use a hinged support with a vertical axis instead of a platform. This should be done as follows:
- a hole is drilled in the center of the round table,
- insert an axle with a plastic insert into it.
The table is assembled and attached to the rotating support in the same way as described above. What is attractive about this method of creating a round table with a rotating middle with your own hands? Because the table can be removed at any time, and the hole in the center of the table can be closed with a plastic plug.
Round table with rotating center
I have had a large round table in my living room for many years. Friends and relatives often gather for a festive feast. During the meal, requests arise to pass on this or that dish. This causes unnecessary fuss and certain inconveniences. After looking at a lot of information on the Internet about different models of furniture, I decided to make a rotating table with my own hands, the drawings of which I made myself. Having assembled a simple design, I immediately got rid of the above-mentioned problems. In this article I will tell you how to make a round table with a rotating center with your own hands.
How to make a rotating table: design and design choices, plus simple assembly instructions
Thanks to the centrally located rotating tray, each banquet participant can get any dish
Rotating tables are furniture that is in demand in various fields, from advertising to metalworking. But this time you will learn how to make an easy-to-use turntable for home use. I bring to your attention simple assembly instructions, plus recommendations for choosing a suitable design.
Selecting material for work
The tabletop itself and the support legs can be made from the following materials:
- Solid wood.
- Chipboard and MDF panels.
Natural wood undoubtedly has a number of advantages over pressed wood chips. Solid timber is more durable, has a larger cross-section, and the service life of a wooden table is quite long.
However, chipboard and MDF panels are affordable and also serve as an excellent basis for subsequent surface decoration.
A table with a wooden base coated with a layer of epoxy resin has a very original and advantageous design. In such cases, the master has the opportunity to decorate the tabletop at his own discretion.
Materials
A rotating table can be made from any available materials :
- Fiberboard;
- MDF;
- plywood;
- tree.
Each individual option has its own advantages. Wood is environmentally friendly, safe, and has a texture that is pleasant to the touch . MDF and plywood are easy to process. In addition, this material has a low cost.
But chipboard is inexpensive, looks attractive, and is a pleasure to work with.
Tip : in order to save consumables, you can use a door from an old kitchen set to make a countertop.
What can a table be made from?
There are many materials for making a round table, ranging from a variety of wooden coverings to durable metal fittings.
Craftsmen most often use the following materials in their work:
- Chipboard.
- MDF and plywood sheets.
- Stones.
- Glass.
- Metal elements.
- Durable plastic.
With these materials, desire and a little imagination, even a beginner can create a truly beautiful and practical table.
We would like to note that handmade furniture is most valued, because it is one of a kind and made with love.
Features of the rotating table
If you want the cake to be accessible to you from all sides at the same time, and at the same time you do not have to run around it, be sure to consider having a rotating stand.
What is a rotary design for cakes? This is a product consisting of:
- round work surface;
- legs-bases;
- rollers, rubber bands.
Thanks to its design, the table easily rotates around its axis and provides convenient access to the confectionery product . With such a supply, you can create elegant and original decors in the most convenient way and create decorations of any complexity. At the same time, you don’t have to worry at all that your masterpiece will move, get damaged, or fall to the floor.
You can either purchase a turntable for cakes ready-made or make it yourself. A homemade design has many advantages. Firstly, you will be able to make a product that will fully meet your requirements and preferences . Secondly, you yourself will be able to create a thoughtful drawing of the product, select materials for its manufacture and think over the most optimal dimensions. In addition, a homemade design will be much cheaper than a purchased one.
Why do you need a turntable?
A rotating cake table is a great find for those who are interested in baking complex confectionery products.
The device has the following advantages:
- significantly facilitates the final processing of the cake, rotating around its axis;
- the pastry chef can decorate the product without moving, which greatly speeds up the cooking process;
- Often there are special markings on the table surface that allow you to create smooth and neat elements.
The rotating stand will help professional confectioners and ordinary housewives create culinary masterpieces.
DIY dining table. Kitchen table. Photo
To make a dining table with your own hands, you will need a little skill and a lot of time and patience. If carpentry skills are well developed, and you have a full set of tools at home (from a circular saw to a milling machine), then such work will be completely simple. In this case, you can choose an option for making a table that corresponds not only to your skills, but also to your financial capabilities.
Choice of materials and size of the future table
The dining table is the center of the kitchen or dining room, even if it is located under the wall. Its size should be selected depending on the size of the room and the number of people who often dine together. The comfortable area for one person at the table is 60 cm. In total, for a family of 4 people, a tabletop measuring 80x60 cm will be sufficient. But sometimes you have to receive guests, so it is better to increase the size of the table to the maximum suitable for the dimensions of the room.
If the kitchen is small, you can choose a table with a sliding or folding tabletop.
This way it will take up minimal space, but if necessary, the usable area will double. At the same time, it is better not to make the table attached to one wall, because sometimes you may need to move it to another room.
Interesting ideas
Now we will give you some interesting ideas on how to make a round table with your own hands.
Despite the rapid development of modern technologies, elements of antiquity are still in demand. For example, if you are the owner of a dacha or a nice country house, then why don’t you make a knight’s table from the times of Medieval Europe? Let’s say right away that it will take a lot of solid wood to make it, but the result will be worth it.
Article on the topic: How to clean light-colored upholstered furniture at home
To make a knight's table, take a look at several thematic sites where craftsmen share their knowledge and give useful advice. Don't worry, because 50% of the work is identical to making a regular round table.
Another interesting solution will undoubtedly be a loft-style table. Its lid will be made of stone, and the legs and other structures can be made of wooden and metal elements.
Several reasons to make a folding table with your own hands
Today, the market offers many different designs of folding tables, but there is nothing difficult in making them yourself. In addition, in some cases, making a folding table with your own hands is much more profitable and, again, more rational:
- the dimensions of the table can be varied based on the size of a particular room;
- The design of the table can be chosen depending on ease of use, according to your desire;
- The design of the table is chosen in accordance with the interior of the room, so it does not “stand out” from the general style of the room.
An important factor is the exclusivity of hand-made furniture.
A folding table in the kitchen is the best option in small apartments, when all family members can sit at it (folded). When unfolded, it is a full-fledged banquet table, which can accommodate twice (or even three times) as many people.
To make a folding dining table, you don’t have to take a cabinet-making course: you can just use our tips, dream a little (in terms of design, of course), and think a little more about the drawings of the folding table you need.
Project development
Regardless of the chosen model or design solution, the instructions on how to properly make a round table on your own remain the same. It looks like this:
- it is important to decide what tasks this product should solve, how many people will sit at it, where it will be located;
- calculate its dimensions and select materials according to your budget;
- make accurate drawings of the proposed design;
- prepare the necessary tools.
Article on the topic: DIY laminate table
If you responsibly approach the implementation of the above points and do everything correctly, the work itself will not be difficult at all.
How to find out the diameter of the spinning center for your table?
The swivel center is easy to use, within easy reach of your hand, and at the same time there is enough space to arrange plates, glasses and cutlery. A square table gives you a little more space to arrange items than a round table due to the corners.
On a round table, provide approximately 30 cm of space around the rotating center on each side, and on a square table, 25-30 cm. If the table has the shape of an elongated rectangle, then you can place two or three rotating centers to make it comfortable for all guests.
Table for selecting the diameter of the rotating center for your table
Rotating base BZ
For tables larger than 2 meters, we cannot yet offer you reliable options. If you have a small table measuring from 90 to 150 cm, check out the Lazy Susan ready-made spinning centers
You can install a rotating center with a smaller diameter. In this case, treats are placed only along its edges so that it is easy for guests to reach with their hands.
Parts for self-assembly of a rotating table center
Rotating table center to suit your taste, in your interior
A beautiful solution for your dining table will be a rotating center, assembled by yourself, of the diameter and color you need.
The parts of the prefabricated spinning center are suitable for tables measuring from 120 to 200 cm. The diameter of the spinning center will be from 60 cm to 140 cm. What parts does the spinning center consist of?
If you have a small table measuring from 90 to 150 cm , pay attention to the serial rotating table centers with a diameter from 40 to 80 cm, which do not require assembly and are supplied ready-made. If you want to assemble a removable Lazy Susan spinning center with a diameter of 35 to 70 cm without attachment to the table surface, the ML rotating mechanisms are suitable for you, and for circles from 100 to 160 cm, use the MX rotating mechanisms
If you are planning to install a rotating center with a diameter of 35 to 120 cm with a rigid mount to the table , and you only need a rotating mechanism, use the MT rotating mechanisms. Rigid mounting will ensure reliable operation of a circle with a diameter of up to 1 meter.
If you want to place a turntable made of glass or stone with a diameter of 35 to 60 cm in the center of the table, use the MK rotation mechanisms
How to Make a Rotating Cake Decorating Stand
You can buy a stand in a store, or you can make it yourself. First you need to decide on the appearance, size, shape and material. Looking at your sketch, you can easily assemble a rotating cake stand. You will need two bearings, a wooden plate or sheet of plywood, a plastic or metal tube 14-16 cm, a metal circle 30-40 cm, nails, screws.
Before making, decide on the shape of the cake, match it with the appropriate diameter.
Once you have decided on the initial data, start making the tabletop. To do this, you need to draw a diagram. Next, you need to prepare the bearing, assemble one from 2. You need to cut two circles of the same diameter of 15-20 cm from wood. Cut a hole for the bearing in one circle and hammer it into it. Secure the circles together with nails.
The optimal diameter of wooden structures is at least 34 cm.
Install a pipe of the required height of 14-16 cm into the bearing. The pipe must stand firmly and rotate due to the mechanism. The metal circle must be welded to the tube using conventional or cold welding. Cold welding is similar to plasticine; it is convenient to work with without experience. Secure a wooden circle on top of the metal circle. The top can be decorated with self-adhesive film of the appropriate color. The rotating cake tray is ready!
As the film wears out, it can be replaced.
DIY rotating stand
Making a turntable yourself is not that difficult.
1. You will need two bearings (or one double), a base, a connecting tube and the top of the table. Bearings can be purchased at an auto parts store. The base for self-production is made of wood. This could be plywood, a sheet of chipboard, or you could even cut a circle of the desired diameter from suitable old furniture. The connecting tube may be metal. The top can also be carved from wood.
2. Cut out two circles of the desired diameter. A hole is made in one of them in the middle and a bearing is inserted. It can be double, or you can take one larger and the other smaller and connect them. Then the two circles should be connected using liquid nails and self-tapping screws. This will be the stand that ensures the rotation of the stand.
3. Using a metal tube, connect the top and double bottom to the bearings. It is important that the tube fits tightly into the bearing. The top is attached to the tube using cold welding if it is made of metal. If it is double, from two glued circles of plywood or chipboard, then make a hole in the bottom equal to the diameter of the tube and insert it.
4. To give the entire structure an aesthetic appearance, the top and bottom can be finished with adhesive wallpaper. This will make maintenance easier and extend the life of the turntable.
Work process
Making a turntable with your own hands is quite simple. First of all, you will need to draw a high-quality drawing. After this, we begin to work according to the following scheme. If you have two bearings, and not one pressed one, then we hammer the element of the smaller diameter into the larger one using nails. It is necessary to cut two circles with a diameter of 20 cm in a wooden slab. A hole is cut in the middle of one of the circles into which the bearing is driven. In this case, the two parts are twisted and secured with self-tapping screws. A bearing is placed in the center.
The DIY table is equipped with plastic tubes. The tube should connect the upper and lower parts. Keep this point in mind when making a drawing for the turntable. In this case, the tube must fit exactly into the bearing. The ideal length is 15 cm. Such a tube will not be too short or long, so you will not have to bend over while decorating the product.
The top is made of metal. In order for it to spin, pay special attention to its diameter. On average, the diameter of a metal circle should range from 30 to 40 cm. If you have the opportunity to weld the elements, that will be great. For those who are deprived of this opportunity, cold welding was invented, which looks like plasticine. The cake turntable also requires circles cut from plywood. The rotating part is installed on the pipe, and the elements are fastened with self-tapping screws.
The table can be made of wood:
OK it's all over Now. The cake turntable is ready. In order to give it an aesthetic appearance, you can cover the product with thin plastic. Another option is to purchase self-adhesive film. It is sold in wallpaper or supplies stores. This film is easy to apply and washes well.
DIY cake turntable: materials and assembly process
It is very convenient for confectioners who make cakes to use various types of devices that facilitate the process of decorating the finished product. Fortunately, today stores offer a wide range of such equipment. One such device is a turntable. True, the cost of such a table is quite considerable, and it is often easier and more profitable to try to make a turntable for a cake with your own hands.
How is it convenient?
This table will be useful not only for professional pastry chefs. It will be very useful both for those who like to cook for pleasure, and for cooks taking their first steps. This table will come in very handy for housewives who decorate cakes with fondant. It looks like a circle-pedestal on a leg that rotates around its axis. The main goal is to make the pastry chef’s work as ergonomic and convenient as possible, and to simplify the task of decorating the finished cake. The cake is placed on a stand, and by rotating it, you can easily cover it with fondant, decorate it with figures, inscriptions and other decor. In this case, there is no need to walk around it, the confectionery product will rotate on the stand, and the hostess will have access to any place on the cake.
What you need
In order to make a cake turntable with your own hands, you will need:
- Bearings - 2 pcs. It is better to use double pressed bearings.
- Wooden blank for a circle. This could be a door from old furniture or any chipboard material available.
- Nails.
- Self-tapping screws.
- Tube (plastic or iron).
- Circle made of iron (metal).
- Plywood sheet.
- Plastic or decorative self-adhesive film.
How to make a turntable with your own hands
This process is not too complicated, but requires male participation. First, you should draw a drawing of the future stand and prepare all the necessary elements.
If the bearing is not double, then two will be required, and one must fit into the other.
- We push the smaller bearing into the larger one using nails.
- Using a jigsaw, we cut out two circles with a diameter of 20 cm from a chipboard blank (or an old door).
- In one of them, a hole should be made in the center into which the bearing is placed. It is this technique that will ensure the rotation of the entire mechanism.
- We attach the second circle with self-tapping screws (you can use liquid nails) to the first.
- The bottom circle, which does not have a hole, will stand directly on the table.
- Then a plastic tube is inserted into the bearing (an iron tube can be used, if available). It will connect the base and the top - the pedestal for the cake. The tube must fit very accurately into the bearing so that it does not dangle, otherwise it will be difficult to use the turntable. The optimal length of the connecting tube is 15-18 cm. In this case, it will not be too short or too long, and it will be as convenient to use the device as possible.
- The top (the stand itself on which the cake is placed) is best made of metal. You will need a metal circle with a diameter of 30-40 centimeters. It is attached to the top of the tube (metal or plastic) by welding. Of course, not everyone has a welding machine at home and a person who knows how to do it. In this case, you can use cold welding, reminiscent of plasticine.
- Plywood or chipboard, equal in diameter to the metal circle, is attached to the top of the metal circle using liquid nails or self-tapping screws.
Now the DIY cake turntable is almost ready. All that remains is to add aesthetics to it. To do this, the top is covered with wallpaper film or a plastic round base. This will give the device a finished look and make it easier to maintain.
As you can see, if you want, making a turntable for a cake with your own hands is not so difficult. A set of materials for its assembly can be found in almost any home, and the work process itself is not that complicated.
How can I replace a cake turntable?
What is the solution for those who do not have a turntable? A very simple and affordable solution can also be found in almost any home. You can use a rotating plate from the microwave. Almost all models are designed in such a way that they have a glass plate and a round stand at the bottom. You need to remove the plate and the circle underneath it from the microwave. If the table surface is too smooth, you can place paper (a paper towel) underneath to reduce slipping. This way you can decorate the cake by smoothly rotating it around its axis. Also, a glass plate will not spoil the view when serving the finished decorated product.
do-it-yourself round extendable table transformer drawings
Do It Yourself Turntable For 360 Degree Product Photography
ROTARY TABLE FROM WHEEL RIM
Rotating base on a ring bearing for mounting a round tabletop
The rotating base consists of three parts : 1) The lower support circle ensures the stability of the entire structure on the table. 2) The turntable is designed for attaching a tabletop to it (for this there are holes for self-tapping screws).
3) The rotation mechanism is a metal ring ball bearing.
Rotating base, side view:
The rotating base is a product completely ready for installation. To assemble the rotating center, you will additionally need: a round tabletop, a screwdriver, a ruler, a pencil and self-tapping screws of the appropriate length (usually 3.5x20 or 3.5x25 mm).
Rotating base BZ for installing a rotating circle-tabletop
BZ Rotating Base with Ring Mechanism
Rotating base BZ Light with low noise mechanism
The rotating base consists of three main parts:
1) The lower support circle ensures the stability of the entire structure on the table.
Article on the topic: DIY Provence style bathroom
2) The turntable is designed for installing a round rotating tabletop on it. There are holes for fastening with self-tapping screws. Can be glued with double-sided tape. You can put a glass circle on top. The glass is not attached to the turntable, but is placed on soft non-slip dampers.
3) Rotation mechanism - metal ball bearing for rotary tables.
Rotating base, side view:
An additional service is possible: painting the BZ Light rotating base in a specific color (white, black, brown) - as agreed with you.
To assemble the rotating center of the table, in addition to the rotating base, you only need a tabletop circle of the appropriate diameter and self-tapping screws (or tape).
Assembly:
Installation on the table:
The round table top is not included with the rotating base, you have many options to choose from:
You can order a tabletop from suppliers of furniture parts or purchase a circle tabletop made by us.
If rotating bases are not suitable for you, look at alternative options
You can assemble a spinning center with a round glass top. No additional assembly is required, just a good quality durable glass circle. It is better from dark (tinted) and tempered glass. The diameter of the glass can be equal to the size of the turntable, or be slightly larger (for example, 30-40%).
A simple way: the glass is simply placed on top of soft silicone dampers. Due to its weight, the glass lies on the dampers, does not move to the side, and only rotates together with the platform.
Rotating base with round glass top, top view:
Rotating base with round glass top, side view:
If you plan to place a glass circle on the rotating base, please inform us in advance. We will add glass dampers to the product set.
A more reliable way: attach the glass with adhesive tape. To do this, it is better to use transparent double-sided acrylic foam tape. The tape can be applied along the edge of the turntable, then remove the protective film from the tape, align the glass with the center of rotation, and press the glass against the turntable to allow the tape to adhere.
If such rotating bases are not suitable for you, look at alternative options
Need some advice? We will answer your questions:
Reinforced version: BZ Plus rotating base with additional support rollers and quiet mechanism. Rollers protect the low-noise mechanism from excessive load when accidentally pressing the edge of the turntable.
Article on the topic: How to make a poker table with your own hands
The mechanism will not fail; the load will fall on the rollers. We can recommend this solution for rotating centers with a diameter of more than 1 meter with a quiet mechanism.
BZ Plus base can be attached to the table with self-tapping screws through the holes in the table top.
Rotating base BZ Plus with additional rollers, bottom view:
Rotating base BZ Plus, fastening with screws to the table:
Complete the rotating base with a round tabletop of the desired diameter.
Example video from our client of a rotating base BZ-60 Plus with a 130 cm circle installed:
Step-by-step instructions for assembling a rotating table with your own hands
I outline all my actions in points in the following order.
- I determine the size of the rotating plane to be 600 mm. Since the diameter of the main table is 1300 mm, the table will not interfere with the plates around it.
- I fasten a sheet of whatman paper to the board with push pins.
- Using drawing tools, I draw a 600 mm circle on paper. I carefully cut out the table layout with scissors.
- Having attached whatman paper to a sheet of fiberboard, I trace it with a pencil. I use a jigsaw to cut out the lining for the tabletop.
- I perform the same actions with a piece of chipboard.
- Using pliers and a screwdriver, I remove the plastic roller from the metal hinge.
Rotational support for chair with fasteners
- In the middle of the block I make side cutouts for a tight installation of the support.
- Having installed the hinge strictly in the center of the beam, I drill a hole from the side through the openings in the metal.
Installing the hinge on the beam
- I apply the hinge area to the center of the fiberboard and mark the attachment points with a pencil. The hinged support will allow the table to rotate and turn in the desired direction at any time.
- In the fiberboard, following the markings, I drill 4 6 mm holes with a drill.
- I thread the screws through the holes in the sheet and support. I put washers on the side of the platform and tighten the nuts.
Attaching the support to the fiberboard circle
- I coat the screw heads with machine oil.
- I apply a circle of chipboard so that the outer boundaries of the two circles coincide.
- Using the marks obtained, I use a drill to make small indentations in the chipboard. They will allow the screw heads to not interfere with the tight fit of the two parts of the rotating tabletop.
- I apply a layer of liquid nails to the surface of the chipboard and connect both parts of the table. Having separated them, I wait 3 minutes. Then I finally connect the parts, loading the top with heavy objects at hand.
- I sand the side edges of the circles with sandpaper.
- I place the support beam in the center of the round table. I make marks at a distance of 30 mm from the edges of the plank.
- I drill through the marks through the timber and the tabletop.
- I thread two bolts. At the bottom of the tabletop I secure the bolts with nuts and washers.
- I put a hinge with the table top on the fixed support beam. I thread a bolt through a pre-drilled horizontal hole and tighten it with a nut and washer.
- I glue the tape along the end of the circle using an iron. I cut off the protruding part of the edge with a knife. The table is ready.
This instruction makes it possible to understand how to make a table with a rotating center with your own hands without much hassle and at minimal cost.
Basic option
The basic option includes a single-tier cake stand. It’s easy to make it yourself; this work will take no more than 15 minutes. To do this, you need to take a piece of polystyrene foam, which you can purchase at a hardware store.
Expanded polystyrene of the desired shape is combined with a special food substrate, which is a thin cardboard with a foil coating on one side. Such a substrate should have a round shape. Its diameter should correspond to the size of the confectionery product that will be created. Connect the substrate to polystyrene foam using double-sided tape.
If you can’t buy a store-bought backing, you can make it yourself. To do this you will need thick cardboard and scissors.
To make a round substrate:
- cut out of cardboard the most perfectly even circle;
- connect with polystyrene foam as indicated above;
- Using a sharp knife, carefully trim the polystyrene foam that extends beyond the edges of the backing.
After all the manipulations, you get a round cake stand. To prevent the edges from being rough, it is better to trim them with sandpaper and then tie them with a satin ribbon. Double-sided tape is used to secure the tape.
When using a homemade cardboard base, the surface in contact with the food must be covered. A hot tablecloth or adhesive glossy paper that can be washed may be suitable for this purpose.
Thanks to the materials used to create this stand, the product does not deform, since it is quite solid and will reliably hold even a heavy cake.
How to make a rotating table?
Making a turntable is quite easy and simple. First you need to make a well-thought-out sketch. In this drawing, indicate the design of the product, its exact dimensions and materials of manufacture. Having such a diagram at hand, you can easily assemble the table the first time and without errors.
The manufacturing process of the rotary table is carried out in the following sequence:
According to the drawing, we cut out a round tabletop from plywood.- Take the bearing (if you chose a double bearing rather than a pressed one, then use nails to hammer the smaller element into the larger one).
- two circles with a diameter of 20 cm in a wooden slab .
- We insert a bearing into one of the pre-made circles .
- Next, we twist the two parts together using self-tapping screws and place the bearing in the center.
- The turntable is equipped with plastic pipes . They will connect the top and bottom of the product. The tube must fit into the bearing with millimeter accuracy. It is best to make it 15 cm long. This will simplify the process of decorating cakes. Since you won't have to constantly bend over your masterpiece.
- The top of the table is made of metal . Particular attention is paid to its diameter. It is best if the diameter of the metal surface varies within 30-40 cm.
- Next, we weld the elements together . If you do not know how to use a welding machine, you can use cold welding.
- We install the rotating part on the pipe and fasten the elements with self-tapping screws.
That's the whole simple process of manufacturing a rotating structure.
Tip: to give the product a decorative appearance, it can be covered with thin plastic.
The product can also be decorated with self-adhesive film. It simply sticks on and is easy to clean.
Tip: An extendable table, a coffee table or a good quality kitchen table can also come in handy in the kitchen.
Features of choice
In order not to make a mistake when choosing a good table, it should be assessed according to several criteria.
Rotation mechanism
The most important part of the model, without which the table simply will not spin, is the rotation mechanism. It is a metal bearing located under the table top, ensuring it rotates evenly around its axis.
It is recommended to choose a reliable turning mechanism to ensure uniform and non-stop rotation while cooking the cake.
Diameter
The most common tabletop diameter is from 26 to 30 centimeters. A standard size cake of up to four kilograms has these parameters.
But for convenience, it is better to choose a larger diameter so that you can rest your hand with the palette on the tabletop while working. This will help achieve a more accurate result.
Silicone feet
A necessary part designed to fix the structure in one place. This prevents the confectionery product from sliding on the surface of the countertop, thereby eliminating possible defects and damage to the cake during processing.
Such legs are quite inexpensive, around a few hundred rubles, but thanks to them the product will turn out perfectly smooth and without damage.
Marking
On the round surface of the tabletop there are special divisions that divide it into equal segments. This is markings that help create decorative parts that are completely even and identical in size. Plus, the pieces of the cake will be positioned at the right angles, which is sure to ensure a quality end result.
If there are no markings, you can apply them yourself using a ruler and compass.