In the process of life, we acquire unnecessary and old things. There are things that can already be thrown away. But some things can be reused. What can be done from old and unnecessary magazines? DIY crafts from magazines. Ideas for what to make from magazines. Today we will use them to create interesting and beautiful things.
I recommend articles:
What can be made from vinyl records?
What can be done from old tiles. 16 ideas
How to use video tapes that are not needed.
A soft rug made from old magazines.
Prepare:
- Magazines
- Glue
- Threads with scissors
- Scotch
- Wooden sticks
Let's start making the rug. We wrap the magazine sheets on wooden sticks to make tubes. We fix the tubes with glue and tie them into one sheet using threads.
For additional fixation of the tubes, we glue the entire structure with tape on the back side of the mat. The protruding parts are cut to fit the size of the rug.
Vase
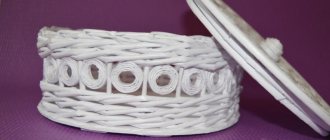
To make an interesting craft from newspaper tubes, you do not need to master the art of weaving. Interesting, bright and unusual crafts are made from paper sticks flattened and twisted in a spiral. For such crafts, there is no need to paint the tubes if you make them from bright pages of glossy magazines.
Materials:
- paper straws;
- glue.
Step-by-step instruction:
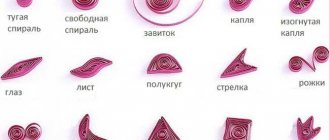
- We flatten the tubes of their magazine sheets and twist them in a spiral. To make the bottom of the vase, you need to glue several sticks together into one large spiral.
- When the bottom is ready, you can start gluing small spirals upward until the vase is the desired height.
Using the same principle, you can make coasters for cups or a teapot.
Curtains from old magazines
And finally, the curtains. You've probably seen such curtains on elderly relatives or friends. The technique is very simple. We will need:
- Fishing line
- Scissors
- Ball pen
- Varnish
- Ruler and needle
We cut the magazine sheets into squares and roll them into tubes. We fix everything with glue. To make beads, cut out elongated triangles from a magazine. Roll it into a bead on a needle and glue the tip. We coat the finished beads and tubes with varnish.
We form the future curtain from ready-made tubes and beads, stringing them on a fishing line. We attach our garlands of beads and tubes to the rail. We attach the rail to the doorway. The curtain is ready.
Straw to straw
When considering ideas and instructions for making crafts from newspapers, we most often come across products made from tubes. The principle of working with them is weaving, where you can use many methods and cleverly woven patterns.
Making straws is not at all difficult. To do this, you need to cut sheets of paper into strips from 3 to 10 centimeters. Then we take a knitting needle, a wooden skewer or an ampoule and apply it to the strip lying on the table. And from the upper left edge we begin to wrap it.
The direction of wrapping should be diagonal. Glue the edge of the twisted strip of paper to the resulting tube and remove the knitting needle (skewer, ampoule).
You need to make quite a lot of such windings, the number depends on the size of the intended product.
Plates from a magazine
We will use the forgotten papier-mâché technique. Prepare:
- Petrolatum
- Tassels
- White napkin
- Plate and paints
- Paper glue
We coat the plate with Vaseline and stick small pieces of napkin on it. Then glue the pieces of the magazine, generously lubricating it with glue.
We make 5-6 layers to strengthen the plate. We make the final layer from a white napkin. Let it dry for a couple of days and remove it from the plate.
Make your own personal diary, what to write
- Personal experiences. Vulnerable, impressionable people are more prone to keeping personal diaries. For them, he becomes a friend who will always listen and not betray.
- In your personal diary, you can write about your dreams, set goals, make plans and talk about their implementation.
- Bright life moments. In an attempt to stop time, not only photos, but also descriptions of events will be useful. A change of image, tasting a new dish, impressions of music or films, a pleasant trip - all this and much more can be captured on the pages of a personal diary.
We create a picture from the colored strips of a magazine
To implement our idea you will need:
- Frames for a future painting
- Rug
- Sharp knife
- Black or brown paper
- Glue
Cut the magazine into colored strips. We take out the cardboard backing from the picture and stick on our multi-colored stripes, and trim the edges with a knife. Then the black paper is cut to the size of the painting. Using a template, the contours of any images are cut into black paper: houses, trees, people, etc.
All that remains is to assemble the picture into a single whole. Dark paper with the outlines of the images is placed on the base with glued stripes and tucked into the frame. The picture is ready.
Limitless possibilities
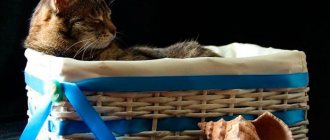
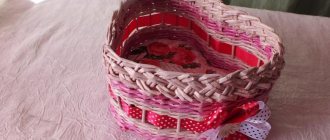
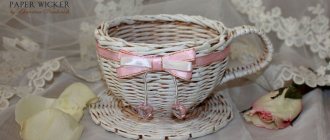
It would seem, what can you make from newspapers with your own hands? And a lot! These include baskets of different formats woven from tubes, buckets, bread bins, vases, barrels, and pencil holders.
You can even make decorative pieces of furniture. They decorate the interior with newspapers, pasting them on the ceiling, walls and the furniture itself - as a creative person sees it, so his design idea flies.
Some fashion designers managed to make wonderful designer clothes from old newspapers. It looks, of course, unique, but, of course, it is not intended to be worn.
Photo frames and entire sculptures, three-dimensional figurines, and elements of New Year's decorations are made from paper. Outlandish flowers and even bags are made from this material.
How to make a personal diary with your own hands
How to make a glued personal diary from paper
Required:
- A4 size paper.
- A4 sheet of cardboard.
- Stationery knife.
- Scissors.
- Binders-paper clips.
- Transparent glue.
- Ruler.
- A simple pencil.
- A piece of leather, jeans or other thick fabric.
- Decoration supplies.
Manufacturing:
- The paper for future diary pages is folded exactly in half. The folds are carefully worked out; this is conveniently done using a metal ruler, after which the paper is cut along the fold line with a stationery knife.
- Using a pencil and ruler, draw a line dividing the sheet of cardboard in half. Along this line, the sheet is carefully cut with a stationery knife.
- Future paper pages are placed on one half of the cardboard sheet, which are covered with the other half of the cardboard sheet.
- The resulting stack is leveled and fastened with two binders on each side.
- The side on which the book block will be glued is additionally fastened in the middle with another binder (this is done so that during gluing the adhesive does not leak into the notebook), after which the spine of the book block along the entire length is generously smeared with glue.
- After complete drying, the area under the additional binder is coated with glue.
- A rectangle is cut out of leather or thick fabric with a height slightly greater than the height of the diary. The resulting piece of material is glued to the diary so that the perpendicular passing through the center of the rectangle coincides with the middle of the book block. The excess is carefully trimmed off.
- A flyleaf is created from a sheet of A4 paper folded in half by gluing it to the inside of the top cover and the first sheet of the book block. Nakhzatz is done in a similar way.
- The diary is decorated based on the wishes of the owner.
- The notepad is placed under the press. A day after gluing, the diary can be used.
How to make a personal diary, photo of the finished diary from scratch.
How to make a personal diary out of paper without sizing
Required:
- A4 size paper.
- A sheet of thicker A4 paper or cardboard.
- Staples.
- Needle or thin awl.
- Pencil.
- Elastic band.
- Stationery knife.
- Transparent glue.
- Decoration supplies.
Manufacturing:
- Sheets of paper are folded in half, the folds are carefully worked out.
- A similar manipulation is carried out with a sheet of cardboard or thicker paper.
- Sheets of paper are placed one inside the other. The resulting stack is placed in a future cardboard cover.
- In the middle of the notebook blank, on the fold line, places for fastening with staples are marked.
- The marked points are carefully pierced with an awl or needle. The staples are inserted into the resulting holes from the outside and fixed in the center of the diary.
- The cover is decorated based on the wishes of the owner.
- You can provide the diary with an elastic fastener. To do this, a hole is made on the back side of the cover, the size of which is determined by the width and thickness of the braid. The diary is wrapped with tape, the edges of the elastic tape are passed through the hole and glued to the inside of the back cover.
- After a day, you can use the diary.
How to make a soft cover for a personal diary from a notebook
Required:
- General notebook (cardboard cover, with staples).
- Microfiber towel.
- A cleaning cloth or a piece of thin felt.
- Pieces of felt in white, red and yellow colors.
- Transparent glue.
- Glue gun and sticks for it.
- Rhinestone, preferably in the shape of a triangle or heart.
- Thick threads for embroidery.
- Sewing threads.
- Needle.
- Black nail polish or acrylic paint.
- Scissors.
- Paper.
- Multi-colored narrow ribbon or flat cord.
Manufacturing:
- A rectangle 50 cm long and 22 cm wide is cut out of a towel, which is used to wrap a notebook in the manner of a cover.
- A template of a hare's ear in the form of a semi-oval is drawn on a sheet of paper. The template is cut out with scissors and transferred in 4 copies onto the remainder of the microfiber. The parts are cut out and stitched in pairs, leaving the flat side of the semi-oval untouched. Then they are turned inside out with the seams.
- 2 smaller half-ovals are cut out of yellow felt, coated with clear glue and pressed onto the microfiber ears. For reliability, the edges of the felt parts are sewn with a “forward needle” seam.
- The ears are stuffed with cotton wool and glued to the top cover using transparent glue. The left ear is glued to the upper left corner. The right ear is located in the upper right corner.
- Using transparent glue, the cover flaps are formed.
- The animal's face is created. Two white circles are cut out of felt - future eyes. The pupil is drawn on them with black varnish or paint. The eyes are glued at a distance of about 7 cm from the top edge of the cover. Two circles are cut out of red felt - cheeks, which are glued a few centimeters below the eyes. All felt parts are also stitched around the perimeter. The role of the nose will be played by a rhinestone glued to hot glue. Eyelashes, mouth and mustache are embroidered using thick yarn.
- The cover is decorated. A small heart is cut out of yellow felt, which is glued to the bottom of the cover and additionally secured by stitching along the perimeter with a “forward needle” seam. Also, a rectangle 4-5 cm wide is cut out of yellow felt. The length of the rectangle should be such that when the part is wrapped around the handle body, you get a cylinder with an overlap of 1-1.5 cm. The overlap area is smeared with transparent glue on both sides and the cylinder-handle holder is glued to felt heart A narrow ribbon or cord is used to make a bow, which is glued to the upper right part of the cover.
- A rectangle 34 cm long and 21.5 cm wide is cut out of a napkin or felt. The part is glued to the inside of the cover and additionally secured with a “forward needle” seam.
- The soft cover for your personal diary is ready.
How to make a personal diary from a notebook using scratch paper technique (engraving)
Required:
- General spiral notebook.
- Glue stick.
- Acrylic paint black.
- Medium to large art brush.
- Liquid dishwashing detergent.
- Stationery tape.
- Felt pens, highlighters, gel pens in neon colors.
- Toothpick.
Manufacturing:
- The top cover of the notebook is removed.
- A new cover is formed from the first three notebook sheets glued together.
- The diary cover is completely filled with one or more bright colors.
- The cover is laminated using tape.
- Black acrylic paint is mixed in equal proportions with dishwashing detergent. The cover is completely painted over with the resulting composition. If there are bald spots left, then after the first layer has dried, a second layer of black composition is applied to the cover.
- By scratching the black layer with a toothpick, the cover is decorated with designs. It is more convenient to do this shortly before the mixture has completely dried. The scratch paper diary is ready to be filled out.
