Whatever you make with your own hands: home furniture, decorative crafts made of wood and metal, photo frames or simple handles for tools - all this requires finishing. Namely, grinding.
Therefore, any home workshop must have a grinding machine.
These devices vary in design and size. There are universal and highly specialized designs. As practice shows, it is cheaper and easier to make them yourself.
In this article we will look at several budget options for homemade disc and drum grinding machines.
To make homemade devices, you can use both purchased and used materials - it’s up to you.
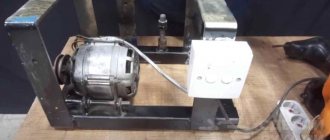
An electric motor is usually used as a drive (for example, from a washing machine). You can also use alternative options - install an electric drill or grinder.
Types of grinding machines
Wood sanding machines are divided into the following types:
- design features;
- the nature of the tasks being solved;
- processing accuracy;
- permissible geometric dimensions of processed parts;
- power of installed engines;
- manufacturer ratings;
- cost with a set of attached equipment.
Modern manufacturers present three types of design of such machines: disk, belt, cylinder. Each of these species has its own highly specific subspecies. For example, belt sanding machines are available in the following versions:
- narrow-belt (allow grinding of wooden structures with complex geometric shapes);
- units equipped with a fixed table (capable of processing only wooden workpieces with flat rectangular surfaces);
- machines equipped with a freely moving table (they are used for grinding large-sized wooden structures - doors, panels, door slopes).
Belt Sanding Machine
The nature of the tasks to be solved determines the classes of this equipment. The main classes (sometimes called models) are:
- belt grinding machines;
- vibrating tools such as delta grinders;
- disc-type grinding machines (orbital and eccentric);
- specialized angle grinders;
- combined type grinding systems.
Despite such a variety of ready-made factory tools, home craftsmen prefer to develop and assemble a wood grinding machine with their own hands to carry out simple grinding operations.
Ready-made machines from the store
Grinder "Lefty"
Characteristics: motor – 1.5 kW, belt length – 1250 mm (up to 1600 mm); The model is interesting for its additional equipment (wheel, contour), which is included in the kit.
Appearance of the “Lefty” grinder
Grinder-sharpener “Kraton” BG 14-05
Characteristics: the device is used for sharpening metal tools and wooden parts; power consumption – 2 kW, movement of the sanding cloth – 14 m/s; disc diameter – 150 mm; tape width – 50 mm. Features: rigid cast base, adjustable stops and protective screen.
Model cost from 6,000 rubles Grinder-sharpener “Kraton” BG 14-05
Grinding machine BISON ZShS-330
Characteristics: machine type - disc-and-belt; circle – 125 mm; speed – 2950 rpm; tape size 762 mm × 25 mm; power - 330 W; belt speed – 810 m/min. Cost – 5490 rubles.
Grinding machine BISON ZShS-330Grinding machine BISON ZShS-330
Sharpener METABO DS 125
Characteristics: sharpener type - with sanding belt; circle - 125 mm × 20 mm × 20 mm; circle diameter - 125 mm; circle thickness - 20 mm; landing diameter – 20 mm; speed – 2980 rpm; power - 200 W. The cost of the model is 7679 rubles.
Sharpener METABO DS 125Sharpener METABO DS 125
Sources
- https://lesoteka.com/instrument-i-oborudovanie/shlifovalnyj-stanok-svoimi-rukami
- https://m-strana.ru/articles/chto-takoe-grinder-i-dlya-chego-on-nuzhen/
- https://homius.ru/grinder-svoimi-rukami-chertezhi.html
- https://tehno-gid.net/sad/shlifovalnyj-stanok-po-derevu-svoimi-rukami.html
- https://svoimirykami.guru/grinder-svoimi-rukami/
- https://HouseChief.ru/kak-sdelat-grinder-svoimi-rukami-chertezhi-s-razmerami.html
- https://vopros-remont.ru/elektrika/grinder/
- https://WikiMetall.ru/oborudovanie/grinder-svoimi-rukami.html
- https://SdelaySam-SvoimiRukami.ru/5627-samyj-prostoj-grinder-bez-svarki-i-tokarki-iz-dvigatelja-stiralki.html
Principle of operation
The operation of a belt-type grinding machine is based on the principle of counter-movement of an abrasive belt located on two rotating drums and the processed wooden part. Both drums are located at a certain distance from the desktop surface. To ensure the required grinding quality, the following parameters must be correctly taken into account:
- size (number) of abrasive applied to the tape;
- the tension force of the belt on the rotating drums;
- the speed of its movement;
- the force of pressure on a moving wooden part.
Working with a belt sander
Incorrect selection of these parameters significantly degrades the quality of grinding. For example, if the pressure on the workpiece is insufficient or the rotation speed of the drive drum is too high, some places on the workpiece will remain unprocessed, that is, they will not be polished. On the contrary, if there is excessive pressure from the belt on the surface and insufficient speed of the belt, burns and changes in the color of the wood are possible. Therefore, when assembling a grinding machine with your own hands, it is necessary to provide for the possibility of adjusting these parameters.
Assembly technology
Our belt sanding machine was designed for DIY production, so ready-made drawings and instructions for its installation simply do not exist. There is only a hand-drawn sketch with notes on which the main dimensions are indicated. Therefore, the exact position of some components and the holes for their fastening will have to be clarified during the assembly process (the design of our homemade grinder allows this).
The assembly procedure for a tape machine with a three-roller kinematic diagram:
1. Place the support on a flat surface and attach the stand to it with countersunk screws (hereinafter, use screw washers for threaded connections).
2. Install a grinder into the hole in the bottom of the stand. Make a backing from wood or plywood to rigidly fasten its body to the surface of the machine support, and then drill two holes in place: for an M8 screw (screwed into the threaded hole for the handle of the grinder) and under an M8 through screw to fasten the backing to the support. Attach the plastic body of the angle grinder to the lining with a clamp.
3. Check and adjust the horizontality of the angle grinder spindle, and then secure the drive pulley to it with a long nut.
4. Attach the tension roller to the rocker arm. Align the rocker arm to make sure its axes are parallel and the planes of rotation of all three elements coincide, and then secure it to the base and connect it with a bar to the stand. Weld the handle and install the tension spring.
5. Determine the exact installation location of the driven roller based on the length of the sanding belt 1210 mm (the tension roller should be closer to the front position). Drill a hole for the driven roller shaft, install it and check that the plane of rotation coincides with the drive pulley.
6. Attach the support of the band frame to the installation site and check it for turning on, off and adjusting the speed.
7. Place the suspended sanding belt on the top roller and drive pulley, and then tighten it using the tension roller.
8. Check the machine first at idle, and then at different speeds when processing wood and metal.
Attaching the stand and tension arm to the machine support can (and is probably better) done by welding. Screw connections are provided to allow for complete disassembly.
Recommendations, errors
When making a belt sander on your own, you can choose different workspace layouts and kinematic configurations. To make such a machine, you do not need to develop working drawings (a sketch with dimensions is enough), and no instructions are required to operate it. However, some design and operational features of the machines are common to all models, so it is necessary to dwell on them in more detail.
The design of the belt grinding machine should provide for the parallelism of the axes of the rotating elements and maximum vertical coincidence of their working planes during the assembly process. Significant deviations in these parameters can cause the sanding belt to come off under load. It is also important to observe the recommended grinding speeds for individual materials (wood, metals, plastics), which are determined by the diameter of the drive roller and depend on the drive speed. Other points to pay attention to are the quality of fit of the driven roller bearings and the need to maintain the shape of the tension roller.
Probably the most common mistake when designing a homemade tape machine (besides non-parallel axes and mismatched planes of rotation) is insufficient travel of the pressure roller. The fact is that sanding belts can stretch by 10-15% during operation, which must be taken into account when designing the tension mechanism.
Application areas of the machine
Each of the manufactured machines performs a predetermined list of technological operations.
The drum-type system produces high-quality sanding of flat wood pieces. Processing of chipboard, OSB or MDF, including those covered with veneer, is allowed.
Application of Drum Sanding Machine
Processing of large, long, non-standard wooden wood products (for example, molded structures) is carried out using profile grinding equipment. Finished workpieces are fed to the grinding unit via a conveyor chain.
To grind the surface of wooden products that have a complex geometric shape (decorative frames, artistic products), belt sanding machines equipped with a freely moving table are used.
Materials you will need:
- nut M12 extended;
- a piece of wood, a block of thickness corresponding to the width of the tape;
- two-component epoxy adhesive;
- wide metal strip with a thickness of 5 mm;
- steel corner 50 x 50 mm;
- M6 bolts;
- M10 bolts;
- M10 nuts;
- bearings 3-4 pcs;
- spring.
The following photo shows the process of making a homemade grinder.
First, you need to make a drive roller to rotate the belt. It can be drilled with a crown with a diameter of 40-50 mm from a block or board.
Please note that the width of the roller must be equal to or greater than the width of the tape. On one side, its central hole needs to be drilled out and pressed into it with epoxy glue and an elongated M14 nut.
When the glue hardens, the roller is installed on the angle grinder shaft. Next, you need to turn on the angle grinder and grind the roller, pressing it against the sandpaper. You need to give it a barrel shape, slightly pressing the edges and leaving the central diameter. In this case, the tape will then fly off.
The grinder frame is cut out of a strip or steel plate. Its dimensions will depend on the length of the selected sanding belt standard.
In the frame, drill a hole with a diameter of 40-45 mm. The grinder gearbox will be inserted into it and the shaft will be removed.
4 mounting holes and 2 grooves on the side are made in the frame so that when docking it does not interfere with the screws that press the gearbox to the angle grinder body.
The stand can be made from two corners. You need to make holes in the corners at the bottom of the stand to screw the machine to the table. Having secured the frame, you can try on the angle grinder, but the standard screws on its gearbox need to be replaced with elongated ones.
Let's make a lever for tensioning the tape. In the center, the lever is attached to the frame with an M10 bolt and nut.
A second M10 bolt is placed at the end of the lever, pressing 3-4 bearings. It is necessary that the width of the bearing group corresponds to the width of the tape. They will perform the function of a driven tension roller.
We install the spring for the sanding belt tension mechanism.
An adjustable stop plate is cut from the corner, as in the photo. It should have a groove to allow it to change position when clamped.
Also, a working platform is made from a steel plate and a small corner. You also need to make a groove in its corner to be able to adjust the position.
The stop and working platform are screwed to the frame with M6 bolts. After tensioning the sanding belt, the machine can be used for its intended purpose. It can perform absolutely the same tasks as a factory grinder. When not needed, the machine can be disassembled and folded compactly. The angle grinder used with it is not subject to design changes, so it can still be used for its main purpose.
The manufacturing process of the grinding machine is also shown in this video:
DIY grinding machine
The desire to make wooden structures yourself is always faced with the need to equip your workshop with sawing and grinding machines. Modern manufacturers produce them in a wide range. Such machines have good performance and high reliability. The most important and quite significant drawback is their high cost.
Therefore, many craftsmen try to assemble a grinding machine from existing components. The most experienced ones try not to limit themselves to a machine capable of performing only one function; they immediately try to assemble a universal machine capable of performing several functions: cutting wooden blanks, grinding followed by polishing, removing old coatings and preparing surfaces for renovation.
Homemade grinding machine
This is possible because the basis of any home-made machine is a frame on which are mounted: an engine, drive and driven drums, a set of additional equipment (saws, cutters, grinding wheels, and so on).
Tools
Anyone who was involved in construction work, repairs, restoration of old doors, windows, window sills, etc., was certainly faced with the need for the working surface to be flat, smooth and sliding. Previously, we took sandpaper in our hands, if the surface was large, then we strengthened the sandpaper on a wooden trowel and, stocking up with great patience, began the monotonous, monotonous work of sanding. Now, a lot of devices, so-called grinding machines and machines, have been created to help professionals and amateurs. Using them for certain grinding operations, we make the process of manual labor easier for ourselves by transferring some of the simple functions to the machine. Today we will talk about grinding machines that are used for processing wooden products.
Table of contents:
Purpose, classification and areas of application of grinding machines
Grinding machines are used to reduce the surface roughness of workpieces, as well as to obtain accurate dimensions. Typically, grinding is the final stage of processing pre-prepared parts.
When working on grinding machines, grinding materials and tools are used.
Sanding materials – special powders, pastes, sanding cloths.
Grinding tools include cutting, polishing and grinding tools, wheels, bars and segments.
Depending on their purpose, machines are divided into several types:
— specialized grinding machines.
The classification of machines is based on the following characteristics:
-type of surface to be ground (internal or external, cylindrical or flat);
- type of parts that this machine can process (cylinders, shafts, rollers, racks, etc.);
— design features of machines (centerless, planetary, two-column);
— features of the elements of the processed parts (slots, threads, profiles, etc.).
The area in which grinding machines are used is very wide. Recent advances in machine tool construction, as well as the production of parts by casting, stamping, rolling, turning and carpentry, make it possible to use grinding machines instead of turning and milling machines (horizontal boring machines). Nowadays grinding machines can perform the following operations:
— cutting and peeling of workpieces;
— precise processing of various planes, wheel teeth, rotational surfaces, etc.;
Drum grinding machine: purpose and main elements
The drum grinding machine belongs to the surface grinding machine in type, and to the calibration grinding machine by class. The main tool of the machine is the grinding wheel, which is made in the shape of a cylinder (drum). Typically this machine is used for woodworking. Using it, it is very convenient to sand and calibrate boards, slats and other flat and long wooden parts, such as panel surfaces made of chipboard, MDF, solid wood, veneer, etc.
The main elements of a drum grinding machine are:
— a bed on which all components and parts of the machine are mounted;
— a motor that ensures rotation of the grinding and feeding drums;
- a mechanism that ensures a change in the rotation speed of the feed drum
— device for dust removal;
— mechanism for changing the height of the grinding drum.
You can see how a drum sanding machine works in the video.
Some models of drum-type grinding machines presented on the Russian market
Today, on the Russian market of grinding equipment, the drum grinding machines section presents products from various manufacturers. The leading place here is occupied by products under the JET brand. The American company JET, part of the Swiss holding WMH Tool Group AG, today presents the following industrial and household drum grinding machines:
Calculation of grinding machine power
Before you begin assembling the machine, you must calculate its power. To correctly make such an assessment, it is necessary to determine the following parameters:
- power consumed by the electric motor;
- rotation speed of the selected engine;
- the area of contact of the entire surface of the part with the moving abrasive belt;
- grinding ratio;
- coefficient of friction between the back side of the belt used and the surface of the drums.
Based on data on these parameters, the power of the future unit can be determined.
Making a grinder from a drill
To turn an ordinary household electric drill into a grinding machine, you need to equip it with a special attachment - a working drum or a special support plate, depending on the task at hand.
The support or sanding pad is a plastic or rubber base with sandpaper glued on and a shank for clamping into the drill chuck. Discs with a flexible shaft are suitable for working with a loose drill, while those with a rigid shaft are best used only for a well-secured drill.
Sanding drums for a household drill are structurally a regular cylinder, a shank and sandpaper glued to the cylinder. When using drums, the working surface of the grinder is parallel to the axis of rotation.
How to make a belt sander
The basis of the machine is a powerful frame that can withstand the weight of all equipment and perform the function of damping the resulting vibration. The frame of the bed is best fastened by welding. A plate is attached to the top. Chipboard with a thickness of at least 22 mm is chosen as such a plate.
An electric motor is mounted on the frame. The engine power must be no lower than the calculated one. The number of revolutions must be at least 1500 rpm. A gearbox is attached to the anchor to transmit rotation to the drive drum. The required diameter directly depends on the engine speed. It determines the speed of the belt at the moment of friction against the surface of the part.
The following relationships can be given as an example. When the belt speed is 20 m/sec, the diameter should be 20 cm. To prevent the slipping effect, rubber covers are placed on the drums. It is more expedient to make the platform for installing the drums at a slight slope. This will create smooth contact of the tape with the surface being treated while moving.
If you plan to process parts made of different types of wood, it is advisable to provide the possibility of changing the rotation speed of the drum. The above technique shows that it is quite easy to assemble a grinding machine with your own hands.
What to make the bed out of
The frame to which all other elements of the machine are attached is a powerful bed. It must have a large margin of safety and have good weight and size characteristics. It is made from sheet steel more than 5 mm thick.
The most acceptable dimensions of a homemade frame are considered to be the following dimensions: 500x180x20 millimeters. For a bed of this size, the optimal dimensions of the working platform are 180x160x10 millimeters.
For the convenience of further work, it is necessary to mark the work site. Three holes are made for its fastening. Then it is secured to the frame with three bolts.
Selecting and installing a motor for the machine
Calculations and operating experience of this type of units show that the engine must have a power of at least 2.5 kW. The shaft rotation speed must be 1500 rpm or more. The speed of movement of the abrasive belt largely depends on the engine rotation speed. This seriously affects the quality of processing. In turn, the speed of the belt affects the diameter of the drums.
Motor for grinding machine
As a finished device, you can use the motor that is installed on washing machines. You can also select an engine from other household units, for example, a powerful pump or other device suitable in terms of power and speed.
Master and slave drums
The drive drum is firmly fixed to the electric motor pulley. The driven drum is fixed on a separate axis. To ensure its free rotation, bearings are attached between the shaft and the drum.
DIY sanding belt
Abrasive belts for such machines have a fabric base. Calico or a fabric of similar density is used as a base. Abrasive chips are applied to the surface of the material on one side using special glue. Depending on the grain size of this crumb, it is divided into large, medium, small and zero.
In principle, such a tape can be made independently. Select the required fabric and apply abrasive powder of the required fraction to it. By applying glue to the surface of the material and sprinkling it with this powder, you can obtain a sanding belt of the required size. However, it should be recognized that modern industry produces such a wide range of such consumables that it is better to use the factory one.
Advantages of a homemade machine
A belt grinder can be purchased at any hardware store, but a hand-assembled machine has many advantages for the owner:
- Minimum costs for labor and materials.
- The ability to independently prepare a drawing (or use a ready-made project) with the proper dimensions, type of design and principle of operation.
- Most consumables are available in every craftsman's household; you just have to search in your own barn, pantry, or garage.
- The missing elements and accessories can be purchased at a construction supply store (fastening clips, guide and drive rollers, sanding belt). You can also make rollers for the grinder yourself.
- A large collection of videos on assembling a grinder with your own hands from scrap materials.
Masters are always presented with web portals with a large number of step-by-step instructions on how to make a grinder with your own hands, diagrams and ready-made drawings, and practical advice.
Sanding machine from a hand sander
Very often, to carry out simple grinding operations, homemade wood grinding machines are made using ready-made grinding machines.
A mounting system for a grinding machine is being manufactured. It is mounted on a pre-prepared frame. Grinding wheels intended for processing wooden workpieces are attached to its shaft. Instead of such a machine, you can use an ordinary electric drill. This design allows sanding of simple wooden parts of limited size.
Making a grinder from a computer hard drive + (Video)
Any old hard drive can be converted into a miniature grinding machine. To do this you need to follow these steps:
- completely disassemble the hard drive and remove from the case everything that is located to the left of the magnetic disks;
- cut out a working circle from sandpaper, make a hole in the center of the circle for the spindle;
- stick several strips of double-sided tape onto the rotating disk of the hard drive and secure it with sandpaper;
- make a protective screen to protect the eyes from the possible ejection of the manufactured sanding disc;
- connect the finished design to the power supply from the computer and use it.
Of course, this design does not have high power, but it is quite possible to sharpen a small knife or scissors.
Often there is a need to perform various types of finishing work on wood surfaces.
The use of such a unique tool as a wood grinder helps to significantly speed up the execution of this kind of work, as well as improve their quality.
It is in quite high demand among buyers. That is why I would like to dwell in more detail on the features of this instrument, as well as its varieties.
The popularity of such equipment is due to its fairly wide area. By using a sanding machine for woodworking, you can perform the following types of work:
- Polishing a curved plane
- Leveling a flat surface that is located on a stationary work table or by manually moving it mechanically
- Processing the edges of various parts or their ends
- Preparing a wooden surface for painting, etc.
All these and other types of work often have to be performed in a country or private residential building.
In addition, a wood sander is simply an indispensable tool for craftsmen who work with wooden surfaces and workpieces.
In addition, when choosing equipment, you need to pay attention to such an indicator as the grain size of the abrasive belt. In order to be able to perform different types of work, experts recommend that when buying a machine, take several types of tape with different grain sizes at once.
Vibrating
The design of this type of equipment consists of a body and an abrasive element, which is secured using durable clamps.
Grinding occurs as a result of frequent oscillatory movement of the working tool.
The master can set the amplitude of movement independently in manual mode.
This indicator ranges from 1 to 5 mm.
The smaller the amplitude, the more accurate and finer the working surface will be processed.
Delta sander
A distinctive feature of this is the presence in its design of a working sole, the shape of which resembles an iron. Using this equipment, the master has the opportunity to work with all types of surfaces.
Different machine models have different operating speeds. The popularity of such a tool among buyers is significantly increased by the fact that its working surface can be rotated in different directions as needed, as well as different attachments can be replaced. Thanks to this, the use of equipment increases several times.
Eccentric
The main difference between this type of tool and others is that it is intended for performing jewelry processing of the working surface. The abrasive surface has a round shape.
The master can independently choose the degree of surface grain. The subtlety of the work performed depends on this indicator. The sole of the equipment is equipped with small holes through which dust is removed.
Thanks to this, working with such a tool ensures the safety of the master. It is also of great importance that the master can choose the speed at which the sole of the machine with the abrasive surface attached to it will rotate.
