Flower pots made from clothespins
Such a pot can be made from scrap materials with a minimum of effort. The finished product will fit perfectly into the Scandinavian or eco-style, since the decor for it is made of natural wood.
Tools and materials
To make a flower pot you will need:
- Wooden clothespins.
- Tin can.
- Thick colored cardboard or paper.
- Plant.
Step-by-step instruction
- We distribute clothespins along the walls of the jar. For strength, they can be secured with hot or all-purpose glue.
- The result should be a pot like this:
- We plant the flower inside: some plants will need a jar, while others will need an additional pot.
- We decorate the craft with a heart cut out of cardboard. You can also decorate the pot with cord or ribbon.
In the photo, another option for using the craft is to use it as a candlestick.
Topiary for March 8th from napkins for beginners
Many people mistakenly believe that in order to make a beautiful topiary, you must buy expensive materials. In fact, you can get by with completely improvised means - for example, such as ordinary napkins. Let's see what beauty can be made from a seemingly ordinary thing.
We will need:
- Stapler;
- The basis for the topiary is a foam ball;
- Wooden stick;
- Napkins (any color);
- Pot;
- Beads for decoration;
- Wire;
- Glue gun;
- Scissors.
Subsequence:
Take a napkin and fold it to make a square. Pierce it in the middle with a stapler.
After this, use scissors to cut a circle out of the napkin. We will make it multi-layered.
Each circle needs to be slightly crumpled so that you get a voluminous flower. If you look at the photo, you will understand how this is done. You will need several such blanks to cover the entire surface of the base.
Instead of a foam ball, you can make a ball from papier-mâché or using another technology.
The main thing is that it is strong enough and has a round shape.
Using a glue gun, we plant our flowers on the base. We can fill the gaps between them with leaves made from green napkins using the same principle.
Finally, we add beads for decoration - they imitate drops of dew on delicate flower petals.
Thus, just by choosing the color of the napkins, you can make many variations of the same tree. We plant the resulting craft in a pot. If you wish, you can attach it to a wooden stick. Or you can leave it like that.
Let's see what else can be made from ordinary napkins. How do you like this option?
Very gentle, don't you agree?
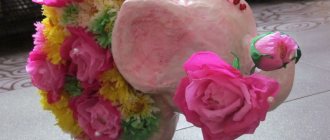
Topiary, by the way, does not necessarily have to have a stem. The main thing is the foundation. You can simply plant it in a pot, as, for example, the author of this work did:
This is also a very nice tree.
As you can see, everyone makes flowers differently. You can come up with your own completely new way.
Concrete flower pots
Laying around yogurt cups, plastic buckets and bottles can make excellent molds for homemade concrete pots. Such products will be an original addition to an interior in a loft or minimalist style.
The photo shows flower arrangements made of concrete, made by yourself.
Tools and materials
To work you will need:
- Regular or low-dust concrete mix from a hardware store.
- Molds of different sizes (two for each pot).
- Bucket.
- Stirring stick.
- Thick tape and any weighting materials.
Step-by-step instruction
Let's start creating flower pots with our own hands:
- Mix the concrete mixture in a bucket according to the instructions until it reaches the consistency of sour cream.
- If there are holes at the bottom of the mold, we get rid of them using tape.
- Take a large form and fill it with concrete solution about halfway.
- We fix the small mold in the middle, after deepening it so that the solution fills the distance between the containers. We monitor the thickness of the bottom and walls. To prevent the internal form from becoming crooked, fill it with coins or sand and secure it with tape.
- When the concrete has hardened (after about 3 days), remove the finished pot from the mold.
- To get rid of defects, sand the surface with sandpaper. Homemade flower pot is ready!
- The product can be decorated by adding various objects - shells and pebbles, or painted with acrylic paints.
The photo shows an original example of decorating handmade flower pots.
Ice containers
An unnecessary tray (mold) for ice can become an excellent container for growing seedlings before picking and serve in this role for more than one year. Make a drainage hole in each cell (if the plastic is durable, use a drill), take a suitable tray and place the container in it.
Next, fill the cells with soil and sow the seeds. After some time, plant the seedlings in a larger container. Just as in the case of eggshells, it is better to grow plants with a small root system in such a container, since they may become cramped in small cells.
Flower pot made of tiles and bottles
If you have a few old tiles lying around your house, left over from renovations, you can use them to make an unusual flower pot for house plants.
The photo shows gorgeous flower pots made with your own hands from Moroccan tiles.
Tools and materials
To work you will need:
- Ceramic tiles with a pattern.
- Super glue.
- Empty plastic bottle.
- Scissors.
Step-by-step instruction
Making a flower pot will take no more than 15 minutes:
- We inspect the selected tiles: they must be free of chips. Lubricate one of the edges of the product with glue.
- Glue the second tile at a right angle. Press the elements tightly against each other and hold for at least a minute.
- We repeat the same with the remaining tiles.
- The result will be a smooth cube, open on both sides.
- We cut the bottom of the plastic bottle so that it is just below the tile.
- We place the workpiece inside the ceramic cube. The bottle should fit snugly against the walls of the pot. If desired, it can be glued.
- We plant house plants in a bottle. The flower pot is ready!
The photo shows a flowerpot made of square black and white tiles with ornaments.
Master class on how to make topiary from banknotes
Topiaries are often made not only to attract happiness or luck into the house, but also money. The materials used to make such trees are appropriate - coins and artificial banknotes. Let's see what this looks like in practice.
To make flowers we will need souvenir 100 dollar bills.
We again skip the process of creating a base for wood, since here you can use the options proposed in the ones we discussed earlier in the article.
Such wood is usually painted gold and green, like banknotes.
In order to make a flower, take a square of paper (consider an example on a regular piece of paper) and fold it in half diagonally.
Raise one end of it to the upper (obtuse) corner.
And so does the second one.
We unfold our workpiece and bend each of the corners again along the resulting line.
We straighten out what we got and make these diamonds:
They fold easily along the resulting fold lines.
And we bend the corners extending beyond the edge of the workpiece.
And now we fold the resulting triangles on the sides towards the inside.
We fold the resulting blank in half and secure it with glue. The first petal is ready.
Each flower requires five of these petals. Now we do the same thing, only from banknotes.
We combine every 5 petals into a flower and then plant it on our base using a glue gun.
We do this until we fill the entire ball. Glue a coin into the center of each flower.
The tree is ready. The dollar at the trunk can be made from wire wrapped with masking tape and twine on top. Everything is covered in gold paint.
Well, as always, we can’t do without examples of what else can be done.
A bit similar to our version.
Well, I already showed you something like this.
And such a tree, by the way, can be made if you want to give someone real money.
Suitable instead of bills and coins.
Tools and materials
To work you will need:
- Any plastic or glass jar that is suitable in size.
- T-shirts from which you need to weave a thread.
- Scissors.
- Hot glue gun.
Step-by-step instruction
The most difficult thing when making a flower pot with your own hands is learning how to make a patchwork thread, but once you understand the principle of weaving, you can easily cope with this task. A thread made from scraps is suitable not only for decoration, but also for creating a rug with your own hands. Let's get started:
- We cut unnecessary T-shirts into strips about 2 cm wide. We tie two shreds together.
- Place the strips in your left hand. We rotate the top strip away from ourselves, and then wind it onto the bottom strip, but twisting it towards ourselves.
- When the shreds are twisted, put a new strip inside the old one and wrap it in the same way.
- Over time, weaving from scraps will turn into a pleasant, meditative activity.
- Drill drainage holes in a plastic container. After that, we start decorating. Glue the end of the thread to the top edge and begin to wind it around the can.
- We secure the thread with glue at equal intervals. Continue until the entire container is covered.
- Now you can plant plants in the finished flower pot. Instead of thread, you can use any rope.
The photo shows flower pots in eco-style, decorated with jute rope and paints.
Tree in the form of a topiary made of satin ribbons
In the next tutorial, as you may have guessed from the title, we will make topiary from satin ribbons. We experiment with materials. The result, as always, will be very delicate and beautiful.
Necessary materials:
- Water;
- Gypsum;
- Glue gun;
- Tube or branch for the trunk;
- Penoplex;
- Raspberry, white and pink satin ribbons. Optimal width – 2.5 cm;
- Satin ribbon 1 cm wide;
- Newspaper sheets;
- Decor (beads, sisal, etc. to your liking);
- Flower pot.
Subsequence:
The first stage is the longest and most boring. We will need to make about 50 roses from satin ribbons, which will then form the basis of our topiary.
To make one rose you need a ribbon 50 cm long.
We twist the ribbon around the small curl at its end, bending it away from us every 2 cm.
It is necessary that all the roses are almost identical.
We make all the preparations in this way.
Now you can do the base. We roll up a ball from newspaper sheets and wrap it with threads for strength. The shape of the base should be close to spherical.
Remove the bark from the branch (if you are using a branch) and prepare the rest of the items.
We attach our ball to the future trunk, having previously made a small hole in it.
Wrap the barrel with tape.
Cut a piece of polystyrene foam and place it inside the pot.
Stick the barrel into it.
Now fill it with gypsum solution and wait until it hardens completely.
Let's start decorating our tree with roses. To do this, apply a drop of glue to each workpiece.
Cover the entire surface of the ball with flowers.
In order to cover all areas, roses may have to be glued in several layers.
It’s still not possible to get rid of all the gaps. Therefore, we resort to a trick: we cover them with beads, which we place on glue.
It turns out a little unevenly, but that's not a big deal.
We decorate the base of the tree: we make grass from sisal. We plant a couple of flowers on the pot. The author of the master class even found a small ladybug - it’s wonderful if you have one too.
You can also decorate the trunk.
Topiary made from satin ribbons is ready!
You can also make a lot of interesting things out of satin ribbons. Don't underestimate this material!
Look how tender it is!
A very original option. Is not it? Does the crown match the color of the mug or vice versa?
Here is a very cute baby tree. Would you do this?
Let's just enjoy the beauty.
As you can see, there are just a lot of options!
Floral arrangement from a vintage suitcase
An item that has served its useful life easily becomes stylish and useful when it falls into the caring hands of a craftsman. We'll talk about how to turn a suitcase into a pot in the next master class.
The photo shows a transformed suitcase, which has become the highlight of the interior.
Tools and materials
To work you will need:
- Old suitcase.
- Primer, acrylic paints, brushes and varnish.
- Film.
- Scissors.
- Furniture stapler.
- Expanded clay, earth and plants.
The photo shows tools and materials for creating a composition. The film can be found at a hardware store. The number of plants depends on the size of the suitcase.
Step-by-step instruction
Let's get started:
- We wipe the suitcase with an alcohol solution. If necessary, remove the cover. We cover the surface with primer in two layers, and after drying, paint it in any color. To make the item last longer, it should be protected with parquet varnish.
- To prevent water from ruining the suitcase, we line its bottom with thick film. We fix it with a furniture stapler along the top edge.
- We fill the bottom of the suitcase with expanded clay and soil and plant the plants. To make the composition look harmonious, we place taller flowers in the background and lower ones in the foreground.
- Plants should be unpretentious and easily get along with each other.
- The garden in a suitcase is ready!
The photo shows a duet that always looks picturesque and harmonious.
Why make your own pots?
Given the availability of a wide variety of containers for flowers in stores, a reasonable question arises - why bother making them yourself if you can buy them? It's simple. Reasons for making homemade pots:
- desire to save money;
- love for handicrafts;
- the desire to give old things new life;
- selection of unique interior items;
- a special style of room for which it is impossible to find a suitable pot.
Flower pots made from mayonnaise jars. DIY decor
The pot can be painted in an interesting way, creating a degraded effect. A flower pot in the shape of a strawberry is not at all difficult to make. A pot in the shape of a pineapple is made from self-hardening clay
