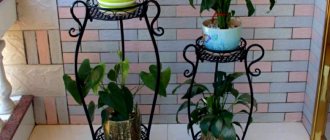
Is it possible to find a house in the modern world that does not have flowers? Probably not, almost every home has some kind of plant. But how many apartments are there in which the plant fits very well into the design of the room and is in a beautiful pot? Most likely only a few... Today we will tell you how to make a flower pot quickly and easily with your own hands.
Greenery on the windowsill
It doesn’t matter if you don’t have a garden; you can grow fragrant herbs on your windowsill all year round. And in order not to spend money on pots or just to please yourself with an unusual design, such beds can be arranged in metal tea boxes.
Weaving from newspapers
How to make a flower pot out of newspapers? The process of creating it is similar to making flower pots from willow branches. The only thing is that the paper must be properly prepared for work.
Preparation of blanks
To obtain strong “branches,” the newspaper must be twisted.
For this:
1The paper is cut into fairly wide strips 6-7 cm thick.
2Each strip is laid on a long knitting needle at an angle of 35-30°.
3We begin to wind the paper onto the knitting needle as tightly as possible, holding the tip of the newspaper with your finger for convenience.
4Glue the remaining edge so that we get a thin tube. One end should be slightly thicker than the other, so that in the future we can build it up by inserting one into the other. The length of the workpiece depends on the size of the future craft.
5 Remove the knitting needle from the tube and dry the glued area for 15-20 minutes.
6The resulting blanks can be immediately painted with gouache, watercolors, and acrylic paints. For these purposes, non-standard pigments are often used - for example, iodine, henna, basma, water-based wood stain, food coloring, etc. When creating patterns, ready-made products are coated with dye.
7To strengthen and protect from moisture, the finished pots are varnished. It is better to do this the first time at the preparation stage. The finished product is painted a second time.
We will not describe in detail how to weave flower pots from plastic bottles. The scheme of work is completely similar to weaving from newspapers or willow twigs.
Ready-made paper pots
Hanging flower pots are best used in rooms with sufficient light. If the room faces the shady side, it is better to grow indoor flowers on the window, where there is more light.
Methods of weaving from newspapers
A standard wicker flowerpot consists of a bottom, which is made separately, and sides. You can use any container as a form: from a bucket to a small jar.
There are many types of weaving. In difficult cases, several tubes are woven at once.
Paper weaving step by step
We'll stick to the simplest ones:
1First, you need to prepare a frame in the form of many rays emanating from the center of the bottom. For this you will need 12 tubes. They must be divided into 2 parts of 6 pieces and each of them must be secured with a clothespin.
2Fold both parts perpendicular to each other on a flat surface so that their intersection is in the center.
3Glue them together at the junction.
4Take a new tube, bend it in half and place the bend under any of the 4 crossed parts.
5 We begin to gradually braid them using the “rope” method, alternately twisting each part.
6After 2 rows have been intertwined, we begin to twist not several pieces at once, not 4, but 2 tubes at a time.
7 After a few more rows, we begin to braid each tube.
8When the bottom is ready, we begin weaving the wall. Take a suitable jar or other container and place it in the center of the bottom. To prevent the light form from moving out, it is better to fill it with something heavy, for example, stones.
9 Using a knitting needle, we make a small hole in the weaving next to the stand tube and insert a new piece of rolled newspaper into it, slightly moving the edge outward.
10The second tube must be placed under the adjacent rack.
11To prevent the rolled paper piece from breaking when bent, it is carefully pressed down and then placed perpendicular to the bottom.
12We begin to alternately braid each of the racks using 2 tubes.
13To make the workpieces softer, they must be kneaded periodically with your hands.
14The distance between them must be the same, so the racks must be adjusted periodically, installing them in the right place.
16The remaining ends of the tubes are intertwined vertically through several rows using a knitting needle. Excess ends are cut off.
17To ensure that the finished weaving looks neat, at the end of the work, the racks are threaded using a knitting needle into several rows of weaving and trimmed.
DIY positive pots
Ordinary flower pots can be transformed, just have paint in your arsenal. Here are some ideas on this topic.
DIY flower pots from plastic bottles
Using plastic bottles you can build a flowerpot for orchids. To do this, the container is cut in half. Stepping back from the bottom by 15-20 cm, cuts are made in the amount of 8 pieces to obtain petals. They should be bent inside the dish. The second half is filled with the substrate with the plant and inserted into the prepared base pot. Thanks to the curved petals, the flowerpot with a flower will be held.
You can create a flower pot in the shape of animals from a plastic bottle with your own hands. To do this, the animal’s muzzle is cut out in the front part of the element, and the tail is cut out in the back. To give the workpiece the desired shape, it is important to use sharp scissors. There are drainage holes in the bottom of the container. The outer surface of the resulting flowerpot is painted with acrylic paints. Using a permanent marker, draw the animal's face: eyes, mouth and nose. The finished flower pot from a plastic bottle should be coated with non-toxic craft varnish.
A beautiful flower pot can be made from an ordinary plastic bottle
Using a plastic bottle and a disk, you can create an elegant tabletop pot on a leg. The container is cut into two parts along a wavy line. An element with a neck with a tightly screwed lid is glued to the middle of the disk. After setting, the workpiece is painted with spray paint.
A plastic bottle can be cut lengthwise, leaving the neck and bottom in their original form. It is recommended to use an awl to make holes on the sides so that the structure can be hung.
Bottle pots in the shape of animals look unusual and original.
Tiny pots made of polymer clay
If you are a lover of minimalist design, then tiny polymer clay pots will suit your taste.
To make such a pot you will need polymer clay, a spoon or other suitable tool for selecting clay, a knife and a stove. First of all, knead the clay and, when it becomes soft and pliable, form a ball. Then hide the clay in the freezer for 10 minutes so as not to deform its shape in the next steps. Then, using a knife and spoon, remove the clay from the ball. Then put your mold back in the freezer, and then, using a sharp knife, give it the desired shape. If something doesn't work out the first time, you can start again. When you get the desired result, bake the pot according to the conditions indicated on the packaging of your clay.
You can also make cute houses from polymer clay.
What will you need?
- Polymer molding clay;
- galvanized mesh (to give a “waffle” pattern);
- foil;
- jute twine;
- flowers.
Before you begin the process of making the planter, be sure to read the instructions on the polymer clay package. Find out how to work with the material and find out at what temperature the products will need to be dried in the oven.
Stylish cement pots
Cement mortar and various food containers also make excellent pots.
Waste items for creating original flower pots with your own hands
You can use the most unexpected things to create flower pots. An ideal option would be elements of clay, earthenware or porcelain dishes in the form of cups, teapots, deep salad bowls and other containers. Such flowerpots will fit perfectly into Provence or country style. At your summer cottage, you can use enamel dishes for planting flowers. Teapots, pots, buckets and cans are suitable for this. Drainage holes are made using a drill.
Helpful advice! A bonsai pot can be made from a wide, shallow salad bowl.
Flowerpots made from old shoes look original. Boots, shoes, galoshes, boots are suitable for this. For drainage, holes are made in the sole of the products. Shoes can be painted with spray paint to give the flowerpots an original look. If you use bright rubber boots, you can leave them in their original form.
You can create a magnificent flower arrangement in an old unnecessary cage.
You can create an unusual flowerpot using old tulle, a tablecloth or a piece of fabric. For this you will also need cement mortar. The material is lowered into a container with the composition and remains in it until completely saturated. The flap is removed and laid out on a previously prepared container wrapped in film.
The fabric is formed into a product of the desired appearance with wavy edges. The container should remain in this form until completely dry. A ready-made, hand-made flowerpot made of cement and fabric can be painted using a spray can.
A flowerpot of an unusual shape can be easily created from a vinyl record, which must be preheated and then given the required configuration. The finished product can be left in black or painted in bright colors. A small square flower pot is created from old floppy disks, connecting their edges with glue.
A street flowerbed created from an old suitcase or chest that can be painted in a bright color looks non-trivial. A flowerpot made from an old umbrella looks very impressive. When unfolded, its internal space is filled with earth, where plants are planted.
They also make a flower pot from an old canister. To do this, one of its side parts is cut off. The bottom of the container can be fixed to the wall, which will allow you to create a pot in the shape of a face. The surface is coated with glue and sprinkled with sand, recreating the appearance of the sand man.
Fun pots using paper glue
You can also update pots using paperclay; another name for this material is paper clay. You can buy it or even make it yourself (the recipe can be easily found on the Internet). You will also need any available tools that can be used as stamps. If you want to make your pots colorful, wait a day for the clay to dry before painting.
Original table flower pots made from tin cans
You can create an original mosaic flowerpot from an ordinary tin can. To do this, the container is coated with a plaster solution, on top of which a mounting grid is laid. Next, the mosaic itself is performed. To do this, you can use pebbles, pieces of tiles, glass or shells. After the pot has dried, all voids should be masked with grout.
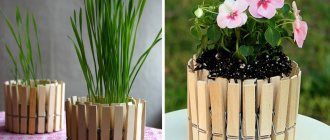
Do-it-yourself low pots for flowers can be created from tin cans and wooden clothespins, which are attached around the circumference of the container. The decor can be left in its original form or painted in different colors. In a similar way, you can decorate a tin can with colored pencils, tying it with twine or ribbon.
The tin can can be slightly dented, so the pot will look non-trivial
The tin can can simply be coated with different acrylic paints. In this case, the container may be in its original form, or the jar can be artistically dented. Another original solution would be to tie the container with twine or colored thick threads around the circumference of the product.
A pot of flowers woven from twigs looks unusual and original. To make it you will need thin, even twigs, a skein of twine, a piece of burlap, a cylindrical tin can and glue. The rods are intertwined and tied with twine according to the mat principle. The jar is lubricated with glue, onto which the burlap is fixed. After complete drying, the product is wrapped in a mat, which is secured with twine.
Pots made from tin cans painted in different colors will add color and mood to the interior
Handicrafts and flower pots
To decorate pots, you can use threads, lace, buttons and other sewing materials. And here are some ideas.
But what kind of pots can be made from felt.
How to create a flowerpot from a pallet, barrel, bars or wooden box with your own hands for flowers
Wooden products or lumber will be the ideal solution for creating an outdoor flowerpot. For this purpose, you can use a wooden barrel, leaving it as a solid structure or sawing it in half crosswise or lengthwise. The first option allows you to get two long flower pots at once. And in the second case, you should make a bottom for the upper structure.
You can build a wooden flower pot from old pallets. To do this, it is necessary to disassemble the structures into elements. The first step is to make the base. Then the side elements of the pot are assembled, which are fixed to each other using self-tapping screws.
An ordinary wooden box can easily be turned into a beautiful flower pot
To do this, long boards are sawn in half, and short ones - into three equal parts with the formation of beveled cuts. Boards with a bevel are connected to each other using self-tapping screws, forming a hexagon. Boards are nailed to each element, which will serve as the legs of the flowerpot.
The next row of wooden elements is added to the resulting frame. The finished product can be left in its original form, varnished, or painted.
Important! The finished structure must be treated with a special moisture-repellent and antimicrobial impregnation.
Whetstones or boards are suitable for making a flower pot.
You can use an old wooden box as an outdoor planter. It should be painted or varnished. You can create a flower box with your own hands from wooden slats and a sheet of plywood acting as a base. The slats are attached to each other using self-tapping screws, forming the walls of the flowerpot. They are placed vertically or horizontally.
Related article:
DIY flower pots: original decoration of the flower area
Products made from fabric, paper, wood, cement, branches, ropes, waste materials and other elements. Various options for decorating the product.
A tall flower pot can be made from block house boards. For this purpose, the products are cut into equal lengths according to the height of the future flowerpot. The elements are connected to each other using grooves. On the inside, the boards are fixed with a block and self-tapping screws.
Helpful advice! All butt joints should be treated with liquid waterproofing, which will ensure the tightness of the product.
And some more ideas for inspiration
Unusual street planters made from unnecessary things
With your own hands - How to make it yourself Beautiful and unusual shelves with your own hands How to make a beautiful and unusual shelf for books, etc.
Stylish flowerpots that will amaze with their appearance can be made from old or out-of-fashion items. Giving objects a second life is now fashionable
Here are a few garden planters that are definitely worth your attention.
It’s as easy as pie to make a planter for a summer house from an old chandelier; just place pots of flowers on it
But it is important to take into account their size so that the composition does not lose balance.
happymodern.ru
happymodern.ru
A flowerpot-bicycle will look original on the site. Painting it a single color will make it decorative. And you can place pots with plants not only on the trunk or frame, but also near the wheels.
youtube.com
blog.gardenloversclub.com
orchidlagoon.com
A hanging planter made from an old T-shirt is very practical and elegant. It is unlikely that anyone will guess what it is made of. Just don’t take clothes that are too old to prevent the fabric from tearing. There are different ways to cut a T-shirt into ribbons. Some can be found on the Internet, and your imagination will probably tell you some!
marliesmolema.nl
zakustom.com
Do you feel bad about throwing away an old leaky bucket? Turn it into a Provence style flower pot! To do this, you can apply a thematic design to the bucket, tie it with ribbons, burlap, or place lavender inside.
livemaster.ru
livemaster.ru
landscapedizajn.ru
westwing.ru
Do not throw away mugs with chipped or chipped handles. It’s better to make a pot-cup, decorating it with any available materials.
A flower pot woven from newspaper tubes will look impressive. Just don’t place it in the open air, otherwise the structure will quickly lose its attractive appearance.
youtube.com
maja-dacha.ru
madeheart.com
Papier-mâché flowerpot
If the collection of flowers is large, purchasing flowerpots for each of them is quite expensive. When using improvised means, you can not only save a lot, but also get the most unusual decorative products. An original papier-mâché floor or hanging planter can complement a collection of flower pots.
Papier-mâché cups
Paper-adhesive mass is an excellent material that is easy and simple to work with.
But it is better to use a painted and varnished product for planting flowers that are not irrigated with water.
So, let's describe the process of creating papier-mâché flower pots:
1We will glue the plastic container so that moisture does not dissolve the paper over time. You can use a mayonnaise bucket.
2The container must first be degreased and then coated with a primer for better adhesion (you can use regular glue).
3First, prepare the paste. For half a liter of cold water you will need a large spoon of flour. Brew it to a boil, remembering to stir so that no lumps form.
4Tear thin paper or newspapers into pieces measuring 4x4 cm. It is not recommended to use scissors and cut them - only with your hands.
5Mix the paste thoroughly with the torn paper.
6To strengthen it, you can add wood glue to the solution. A more homogeneous mass is obtained by adding chalk to the paste.
7You can also mix the composition with gypsum, clay or sawdust.
8When using cardboard, it must be torn into smaller pieces and first soaked in plain water, and then mixed with paste. The resulting mass is first squeezed out by hand, dried and ground on a grater.
9We begin to slowly, pressing tightly, apply the solution to the jar. We don't touch the bottom.
10Our product will take several days to dry.
11Using papier-mâché, you can simply decorate any container using the decoupage technique. To do this, blanks in the form of flowers or figures are prepared from paper and glue. Then they are glued to the flower pots and varnished. The gaps between applications can be decorated with decorative paper napkins.
12 Paint the work with watercolors, gouache or acrylic. The final stage is varnishing to impart water-repellent properties.
13The flowerpot in the shape of a stump looks very original. To do this, dried papier-mâché is painted first with black paint, and then with a second layer of strokes of ocher dye.
Finished papier-mâché work
Flower pots made of wood look very original. But, since such material will quickly begin to rot upon contact with moisture, it is better to make a larger container in which you can “hide” the plastic plant pot.
What materials are best to use?
Floor, table, wall or unusual hanging planters can be made from many types of materials. The most important thing is that it is strong enough and lasts as long as possible.
Flowerpot decor
You can make them from:
- sand and cement with the addition of liquid glass
- alabaster
- cerenzite: products from a solution prepared on the basis of calcium and aluminum salts are not only original, but also unusually durable
- wood: you can use both thin slats and massive wooden blocks of suitable size, in which the central part is removed
- vines: a wicker flowerpot-basket will fit perfectly into the decor of a room decorated in country style
- plastic: you can imitate weaving from plastic cut into thin strips or twisted plastic bags;
- heat resistant clay
- papier mache
- felt
- yarn, braid, twine, strong synthetic threads: they are coated with glue and wrapped around containers of a suitable size
For decoration, burlap, cotton fabrics of original weaving, twine, colored stones, nut shells, grain, tree bark, dried flowers, fur, paints and enamel, etc. are used. More massive flowerpots for garden flowers are made from rubber wheels.
Original decor of flowerpots using wooden clothespins
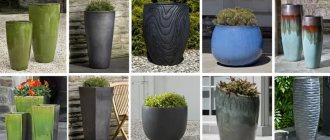
Do not forget that the shape of the container should be combined with the outline of the plant. After all, even the most unusual flower in an unsuitable flowerpot will look ridiculous.
