What material to use
You can purchase both natural and artificial threads. Materials of natural origin will make the grater a little more useful, but such things do not have a long service life.
Threads are sold in any market, so purchasing them is not a difficult task. You have to choose from the following fabrics:This is interesting: things knitted from synthetic thread have an impressive service life, up to one year.
Capron
Women's tights that have become unusable can find a second life. Describing such crafts from scratch does not take much time. Creating nylon graters is very simple.
Note!
- Patterns for knitting overalls for a newborn: step-by-step master class
- How to crochet a mouse and a rat: video master class on crocheting the 2020 symbol
- How to knit a warm hat with ears for a newborn boy and girl - video tutorials with patterns, instructions for beginners
Acrylic
Robust and reliable structure with an impressive service life. You can also knit a pole with your own hands from jute. You can use manila fiber, burlap, rayon and nylon.
Important! The tied pole, after completing work on it, must be boiled in hot water for about 10-15 minutes.
This way you will make it softer and eliminate possible “factory” bacteria and odors. It is important to choose a high-quality tool, starting from the rigmarole used. We recommend choosing hooks with a round end.
Features of crocheting polypropylene threads
Polypropylene thread has a special structure. It has a number of advantages over other threads, such as:
- strength;
- elasticity;
- volumetric mass, with minimal weight;
- resistant to hot water;
- does not wear out;
- does not deform;
- has antistatic properties;
- environmentally friendly.
All this determines the type of products that are knitted from propylene threads and the knitting methods themselves. The first thing you should pay attention to in yarn is the thickness of the thread. It can be determined at a glance, but in order to choose the right hook for the yarn, you should pay attention to the ratio of the length of the thread and the weight of the skein. You can take the hook that is indicated on the skein of thread.
The optimal fiber length for a washcloth is 250 m per 50 g.
For rugs and bags, you can choose thicker threads. This is especially true for rugs. The length of the thread in the skein in this case should range from 150 to 200 m per 50 g. Although, in principle, you can achieve tighter knitting if you choose a thinner hook. This way the density of the loops will become higher and the whole knitting will become a little denser and thicker.
Types of washcloths
Many girls and women are simply unable to take a bath without such a bath accessory. A good and tough tap does an excellent job of ridding the body of dead skin cells, and also allows you to cleanse the pores and skin.
Note!
How to crochet a beautiful scarf: video master class on creating unusual, beautiful, simple scarves for boys, girls, men and women
- How to knit a hat with a lapel using knitting needles or an elastic band: step-by-step instructions for beginners
- How to crochet a winter hat: 95 photos of new models of warm, fashionable, original knitted hats with a lapel and a beautiful pattern
Bath milk, shampoo or scrub are added to such procedures. By giving a similar gift to a woman and attaching a hand-knitted VEKHOT to it, you can make your mother or grandmother incredibly happy. We'll tell you how to learn how to do such things.
With hard and soft sides
At first glance, you might think that the method of knitting washcloths is a rather difficult craft, demanding on the skill level of the master.
However, this is not so - you can get ready-made needlework using a diagram and step-by-step instructions, adding to them a little attentiveness and perseverance.
The main skill that will be useful to you in business is the skill of knitting shaggy stakes. Before starting the lesson, you can practice and get your hands on a little.
To create a double-sided model, it is best to use hook No. 4. The fabric used is polypropylene thread, absolutely any kind.
Note!
- How to knit a beanie hat correctly with knitting needles: video master classes, patterns, knitting patterns for fashionable models
- Light and beautiful crochet shawl: photos of chic openwork scarves with simple patterns
Turban hat with knitting needles: how to knit a turban with your own hands, patterns, video master class with step-by-step instructions
You choose the color of the product yourself - you can make it in one tone, or choose several colors.
Please note: one surface will be pleasant, while the other will be dense and hard. The first one must be woven lengthwise, the second one – across.
Step by step guide:
- First, you need to complete a chain, which determines the horizontal size.
- The first and second lines are knitted from S/BN.
- The third line will be different for colored and plain washcloths. If you have a variegated model, you need to knit an air loop using two threads, then make two S/BN stitches and finish with a fluffy stitch. The last column is recreated from the chain from which the length was determined.
- To create a fluffy column you need 5 bars with a CAPAGE, secured using a weightless buttonhole. Then three cap pegs are knitted, and the procedure for creating a lush column is repeated again. You will have to weave in this way until the end of the column.
- In the fourth column, an air buttonhole is constructed, then you need to move on to the non-cap posts, placing them in the buttonholes of the previous section. If your creation has more than one color, the last buttonhole is secured with two threads.
- The fifth is knitted with yarn of the very first color, including a weightless buttonhole. Then you need to move on to alternating: 3 sc and a lush post. As a result, you will get a hedgehog washcloth.
- The sixth line is scored in the same way as the fourth.
- The seventh row is different if your item has several colors. In this case, at this stage, yarn of the next color is taken. Weaving is similar to the fifth line.
- The eighth row completely repeats the fourth.
- The design continues until you reach the required dimensions established by the very first chain. As you may have noticed, looped thread is the most important skill for knitting washcloths.
Their alternation occurs not through three columns, but through two. When you complete the second section, both planes are applied to each other and sewn together from the wrong side.
You can tie the completed creation along its entire length using a hook. All that remains is to add handles, which can be made from cotton ribbon.
Tip: do not forget to boil the finished washcloth - this will add softness.
Video lesson:
Crocheted washcloth
This master class is designed for those who do not know how to knit at all. The training begins with a story about how to properly hold the hook, ensuring its movement. The initial loops are also described in detail. The result is a chain of air loops, connected by a ring that serves as a cuff for the product. A row of single crochets is formed; five rows is enough.
In the next rows, elongated loops begin to form, which are draped over the thumb. The technique for creating these loops is discussed in detail on the screen. Further rows are knitted exactly the same until the washcloth reaches the specified length. You can change the color of the thread.
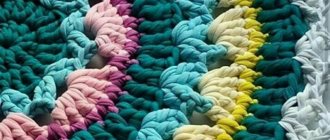
"Bumps"
This is a beautiful and colorful handicraft, which is a real pleasure to use. For this task you will need to use equipment No. 5 and yarn of several colors.
The procedure consists of weaving a line of thirty-six loops, which is subsequently secured into a circle.
Step by step guide:
- The first row is created using single crochet risers.
- From the 2nd to the fourth line it is worth taking cap columns.
- The image of cones is used as the main image of the washcloth. They are created to a maximum horizontal level determined by the wizard. The element consists of three yarn overs woven together. The cones alternate through two risers. Tip: The oval pattern should be staggered.
- Since the “circle” weaving model is used, you should finish the needlework according to the same pattern in which you started, only in reverse order.
- If you want to create handles, you can go two different ways: knit them separately and secure them, or start working on one and then move on to the second. The choice is yours.
Striped beach bag
Stages
- Cut the bags into rings according to the template, straighten them, and connect them into a thread.
- Start from the bottom. Dial in blue a chain of v.p. 30 cm long, knit in circular rows st. b/n 3 rows, adding 3 tbsp for expansion at the ends. b/n.
- Make a rise from 3 ch. and start knitting the actual fabric of the bag, also in the round, st. s/n according to the scheme.
- Having knitted 10 rows, change the color, knit 4 rows in green, then change the color and 4 rows in lilac.
- Change the color to blue and knit 11 rows according to the pattern, then 1 row of st. b/n and 1 row of “crawfish step”.
- Handles - pick up a green “caterpillar” ribbon 60-65 cm long, tie it in a circle 1 m next to the st. b/n, change the color to blue and tie with a “crawfish step” - 2 handles.
- Sew the handles to the fabric of the bag from the inside.
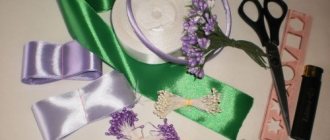
Elements
- 1 roll (60l - 20 bags) blue,
- 1 roll each (35l - 20 bags) of green and lilac flowers,
- hook No. 3.5 - 4,
- template for cutting 2.5 cm ribbons,
- scissors.
Step-by-step photo manual
"Spiral"
Another beautiful flat product that is a pleasure to give and use. The spiral consists of a double line, each of which includes forty-seven loops, fastened in a circle.
Detailed instructions for making a circular crocheted washcloth:
- The first row is knitted from RLS. They need to be placed in each loop of the main line.
- 2 and all subsequent sections are performed with elongated loops attached to each block. As soon as you finish working on the six elements, you should take a thread of a different shade. The color change is ongoing.
- The pattern, also called a “fox”, is created by shifting the shade by exactly one buttonhole in each section. Dimensions in length can be absolutely any. The process should be completed with the use of RLS. The washcloth-mitten is ready!
In the form of a ball
A crocheted washcloth (for beginners, step-by-step instructions may only be required at the beginning of knitting) in the form of a ball can be made in a short period, since it has a small amount of work.
To make the diameter of the finished washcloth 11 cm, you need to take 50 g of cotton yarn and a hook number 4.
The spherical shape is obtained by knitting several stitches into one loop. In this case, natural folds are formed.
The execution begins with knitting 5 air loops, which are subsequently closed into a small ring.
Another closed chain consisting of 40 loops is useful so that the washcloth can be hung to dry.
All circular rows begin with lifting using air loops (this method is described above).
The single crochet is replaced with one air loop. To replace the double crochet, knit 3 chain stitches. End the rows with a connecting loop.
Step by step knitting:
- 1st row: in a small (five-loop) ring you need to knit 18 single crochets.
- 2nd and 3rd rows: in each of the knitted loops of the previous row you need to knit 3 single crochets.
- As a result, after the 2nd row there should be 54, after the 3rd – 162 loops.
- The 4th row is completely knitted with single crochets.
You can get a more voluminous washcloth by replacing simple stitches with stitches with 1 or 2 crochets.
Dish scrubber
Using knitting needles, you can knit flat sponges for washing dishes. Any synthetic material that is durable and reliable will do. You can work with a crochet hook or knitting needles.
For beginners, the simplest version is suitable - a scarf pattern. Its peculiarity lies in the need to knit loops in the front and back rows. Knitted sponges can also be in the form of mittens, which are convenient to work with.
For a thing with a diameter of about 10 centimeters, you should purchase only 20 grams of matter. It is better to choose a medium thickness gimp. The work is performed with instrument No. 4.
You can use structures of different shades to create a multi-colored pattern. In addition to the main tool, you will need scissors and a needle. On the Internet you can find many master classes and videos that will help you work on this creation.
Let's sum it up
This tutorial will help you knit a washcloth. As you may have noticed while reading, this is a fairly simple craft that can bring a lot of pleasure from the process itself.
A homemade item, enclosed in a beautiful package, will be an excellent gift option for March 8th or New Year. To truly please any woman, add shampoo, scrub or body milk to the grater. You can also knit children's washcloths-toys, with which you can surprise your kids. Good luck!
Interesting ideas for crafts made from sponges
Foam rubber is a soft and pliable material. It cuts well and is able to take the desired shape with the help of ribbons or threads. Before you figure out what kind of craft you can make from a washcloth, it is advisable to familiarize yourself with the different options.
Decorative moss
Today, decorative moss is extremely popular in the production of creative works, which can give a beautiful look to any product. It is especially in demand for decorating New Year's decorations. You can make moss from an ordinary washing sponge, and at the same time make a Christmas tree.
Required:
- Foam sponge;
- acrylic based paint.
Stages of work:
- Use a scalpel or blade to separate the hard part from the foam base of the product.
- The soft part of the washcloth is moistened with water to remove static electricity and cut into small pieces.
- Dilute acrylic paint with water to a thick consistency, dip each piece of foam rubber, squeeze it out and put it on a paper sheet to dry.
The moss elements dry quickly because most of the paint has been wrung out. After drying, the sponge parts do not deform and retain their original structure.
Christmas tree
You can use the foam base of products as an independent material. In particular, with the onset of Christmas, all kinds of Christmas trees become in demand:
- A triangle is cut out of the prepared sponge and small pieces are plucked from the surface of the triangle with your fingers or tweezers.
- The Christmas tree is painted by dipping it in green acrylic paint. When the foam is saturated with paint, squeeze out the excess, place it on a dry surface and leave to dry.
You can powder this winter beauty with snow-white paint that imitates snow. After drying, the tree is tied with threads and used at your discretion.
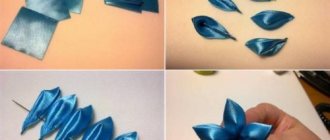
Pincushion "Fly agaric"
A great idea for crafts made from kitchen sponges are pincushions made by children themselves. The work is quite simple, since there is no need to paint the parts. Pincushions will decorate the interior of the room and will be useful.
To work you will need:
- Colored paper;
- napkin;
- packaging of multi-colored sponges;
- colored cardboard;
- brush;
- office glue;
- thin ribbons;
- gouache.
Preparation method:
- First you need to create the base of the needle bed. To do this, you need to cut out two squares of different sizes. A larger figure is cut out of cardboard, and a smaller one is cut out of colored paper. Next, a small paper square is glued to the center of the colored cardboard figure.
- The needle bar must have a loop so that it can be hung on the wall surface. To do this, take a thin tape and form a loop shape. It can be fixed in two ways: from the back of the cardboard base or by inserting it between a paper and cardboard square. The basis for the craft is prepared.
- Next, they begin to make the needle bed itself. Depending on the idea, cut out a circle, rectangle or square from a colored sponge. Foam rubber is easy to cut and children will have a lot of fun during this activity.
- The prepared parts are glued with the thick side onto the base, and grass is made from the remaining scraps by cutting the edges. All that remains is to paint the white specks on the cap with gouache. The fly agaric pincushion is ready.
How to knit a washcloth with your own hands: photo examples of the work of experienced needlewomen
Please repost
0