Exquisite box decorated using decoupage and craquelure techniques
Currently, decoupage boxes are gaining more and more fans, which is not surprising. After all, decoupage allows you not only to express your creative abilities with your own hands, but also to get an interesting thing. Even corresponding books appeared on sale. What is decoupage? This is a special technique with which you can transfer any picture to a surface. In this article we will look at the decoupage technique for a box.
Decoupage boxes in vintage style: where to start
The creative process begins with the search for the necessary materials. It’s good if you already have a box in mind that you want to decorate. If not, you should visit a craft store. Here you can always pick up an interesting thing for decoration
. You also need to choose an image that will decorate the accessory. The main rule of decoupage is that the design must be printed on the base. In theory, any picture could work, but there's a catch.
After carefully removing the image, we begin to carefully roll up the excess paper. Having removed the excess, we leave the thin cloth to dry, after which we very carefully clean the underside with fine sandpaper.
Working with rice paper also has certain nuances. First of all, you need to know that the density and, accordingly, the thickness of the sheets varies. There are thin leaves, and there are also quite thick ones. The latter are less convenient to use.
Another feature of rice canvas is the presence of fibers.
, which make it a little difficult to cut off the image. After the motif is separated from the main fabric, they must be trimmed with sharp scissors. For experienced craftswomen, all this is not difficult, but for beginners, it is best to decoupage the box with napkins or special cards. In addition to the decorative material and the box itself, you will need acrylic paints, sandpaper, acrylic varnish, glue, brushes, a foam sponge or sponge.
Required tools and materials
Preparation is an important step in the technological process. It is recommended to select a suitable box in advance and think about the style of design and surface decoration.
Decoupage allows you not only to express your creative abilities with your own hands, but also to get an interesting thing.
Tools:
- casket;
- napkins with the necessary patterns;
- sandpaper;
- screwdriver;
- degreaser;
- glue;
- acrylic paints;
- acrylic lacquer;
- soft foam sponge;
- scissors;
- brushes;
- stain;
- candle;
- padding polyester;
- scraps of fabric for patchwork;
- cardboard;
- needle;
- threads
Necessary materials for creating a box using decoupage technique.
When decorating, special napkins designed for decoupage are used. As an alternative, ordinary paper products with bright patterns are suitable. In this case, it is recommended to carefully separate the lower layers of paper.
The box decoupage technique involves the use of these items.
Box decoupage technique
So, having collected the necessary tools, we proceed directly to creativity. Perhaps the most ideal material for decoupage is wood. At the same time, using this technique, you can process both the tea box and the plastic surface with your own hands. Whatever material you choose, in any case, the box must be prepared first. To do this, we treat the surface of the box with sandpaper.
First, sand the wooden piece with sandpaper.
The workpiece can then be primed using acrylic primer.
Priming the workpiece with acrylic primer
It is better to remove metal elements using a screwdriver. The next stage is toning the workpiece. To do this, paint the box with acrylic paint.
The next step is to directly transfer the design to the surface of the workpiece. Such pictures for transfer can be purchased at a specialized store. To do this, we separate with our own hands the top layer of the decoupage napkin on which the design is applied. We tear out the elements of the drawing with our hands. Having placed the napkin on the desired field of the box, apply glue for decoupage.
One of the simplest ways to apply glue to a decoupage napkin
Leave until completely dry. Apply varnish on top in several layers. The next stage is decorating the box with your own hands.
Next, we decorate our work, depending on the chosen style.
First, we return all the elements removed at the first stage of work. Decorating the box depends solely on the style chosen for decoupage. In addition, the product can be refined using the craquelure technique.
The final stage is to coat the entire work with varnish.
To better understand the sequence of actions, watch the video at the end of the article.
Decoupage on wood for beginners
If this is your first time trying to create work using the decoupage technique, then take an object with clear and even edges. Decorating such surfaces is much easier compared to round or distorted surfaces.
Decoupage of wooden boxes for beginners will be more accessible when using drawings on thick paper. They're easier to stick to a surface, so you're much less likely to ruin the image. The drawing must be made using water-insoluble paints. Otherwise, when processing with glue, the pattern may flow and become smeared.
Don't choose too complex compositions
Cut out the image carefully, paying attention to small elements. The more detailed you cut out the picture, the more interesting and attractive it will look in the final version.
If the picture has a suitable background, then it is better not to use scissors to create the template. It is enough just to tear the picture along the contour so that the edges remain torn. This way the image will fit better into the design of the item.
Vintage suitcase
If you are lucky enough to keep an old suitcase intact, then decoupage it with your own hands, using a napkin, in vintage style. This master class for beginners will clearly show how to do this. Here are the accessories that will be needed in such a work process as suitcase decoupage:
- suitcase;
- napkins with a matching motif;
- glue;
- file;
- acrylic paints;
- acrylic varnish;
- candle;
- brush and roller;
- washcloth and sandpaper.
Clean the surfaces of the corners and repair the handle, and then degrease the suitcase with alcohol and leave it to dry.
Rub all the edges of the suitcase with a candle stub, and then paint it with beige acrylic paint several times, allowing time to dry between jobs, as shown in the photo. In order to get the antique effect, use sandpaper to go over all the edges, as shown in the photo, and remove the paint. Choose vintage style napkins and peel off the top layer. Place them on a surface coated with glue and go over them with a roller. The most central design of the napkin is placed on the file, and water is poured on top. Then it is leveled with a brush and applied to the suitcase. Remove the file, holding the corner of the napkin, and cover the design with glue. Let the product dry. Using a washcloth, blend the bronze-colored shadow over the entire surface and in the spaces of the image, as shown in the bottom photo.
The final touch is coating the suitcase with acrylic varnish and decoupage of the suitcase is completed. The master class in vintage style is completed, and such a musical suitcase will serve you for many more years.
Available blank: decoupage box
The blank for needlework can be made with your own hands, which is quite simple and affordable. You just need to put together the optimal box and paint it according to your own taste. The basis can be a rack frame or a metal type replacement.
However, not everyone can make such an element on their own, so you can also purchase a box in a themed store, for example, Ikea. There you can choose a product for every taste! And only then decorate it in the style you like and a riot of colors.
A standard wooden box made of slats is suitable as a blank.
While working you need to stock up on:
- Free time;
- Patience;
- There is a sufficient amount of materials for handicrafts.
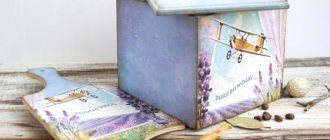
Decoupage in Provence style
Another fashionable technique is decoupage in Provence style.
Handmade box in delicate Provence style
Popular articles Owl pillow with pocket
To implement it, it is necessary to carry out the same sequence of actions. However, the Provence style involves the following nuances:
- using pictures of flowers as drawings;
- turning to pastel shades;
The peculiarity of the Provence style is floral motifs and pastel colors
Provence style is perfect for a round box. To transfer to the surface, it is better to use pictures with rustic motifs. It will be interesting to look at decoupage in the Provence style in combination with the craquelure technique. The craquelure style is characterized by the appearance of cracking of the picture.
Box in Provence style, made in lilac color
Progress
First, let's go over all surfaces of the cabinet with sandpaper, especially carefully - on polished ones; ideally there should be no gloss. Don't forget about the small drawers that are usually found in pieces of furniture.
Then use a ready-made primer or water-soluble glue diluted to the state of village milk to treat the sideboard using a wide brush.
When the coating has dried (from two to five hours depending on the air temperature), you can begin painting. For this we use acrylic paint.
Important! If it is very thick, it can be diluted with water, but not more than 5% of the total volume. We paint with the same wide (10 cm) brush, which we did not forget to put in a jar of water after priming so that it does not dry out
If it seems that one coat of paint is not enough, then you can apply another one.
We paint with the same wide (10 cm) brush, which we did not forget to put in a jar of water after finishing priming so that it does not dry out. If it seems that one coat of paint is not enough, then you can apply another one.
While the acrylic enamel dries, let's get to the fun stuff. We take ordinary three-layer napkins that we selected and bought in a store with large and small or the same pattern.
We tear off all excess with our hands (rather than cutting with scissors) and get decorative elements for decoupage. You will also need a multifora with a cut off white edge (you will get two parts), PVA glue, a spray bottle, a soft cloth and a small brush.
When the paint on the sideboard has dried and everything is ready, we proceed directly to decoupage. Lightly coat the places where you plan to transfer the flowers with PVA glue using a thin brush.
Important! The glue can be thinned a little
Then place an element of a three-layer napkin face down on one part of the multifora
Important! We do not separate the layers so that the drawing does not “creep” later.
Moisten with a spray bottle.
Cover with the second part of the multifora, without worrying about wrinkles.
And wipe thoroughly with a prepared cloth. All bubbles, wrinkles and even perforations will disappear before your eyes.
Now carefully remove the top film.
We calmly take the lower part of the multifora together with the pattern and apply it to the planned place on the sideboard, coated with PVA glue, with the film facing outward, since at first, before wetting, we placed the pattern face down. Using a dry soft cloth over the film, carefully rub the flower onto the furniture surface and carefully remove the multifora.
We wipe off excess moisture around the design, and coat the element itself with light movements of the brush with a thin layer of PVA.
The first element of decoupage is ready, you can proceed to the next one.
Important! All this action lasts only a few seconds and not because you need to hurry - you just don’t need to straighten anything for a long time. Although you should not tighten it, since a very wet napkin, even though it is three-layered, can tear when finally coated with glue
So, the process has begun and in five minutes half the job is done.
The same amount of time and the entire sideboard is covered in flowers.
And they didn’t forget about the boxes.
All that remains is to cover it with acrylic varnish after the drawings have dried.
And the new cabinet for the country veranda is ready.
In the same way, you can refine older furniture pieces.
Of course, such furniture is unlikely to be suitable for a modern city apartment, but in a dacha it’s the perfect place for it.
Since ancient times, household items have been decorated with painting or carving. And even those who do not know how to draw have access to such luxury. To do this, just master the decoupage technique in Provence style.
The use of this technique will extend the life of old and worn-out cabinets, chairs and tables. And besides, this will allow you to create a new interior style in your home and bring more novelty and tenderness to it.
This interior style appeared in France at the end of the 19th century. It was named after one of the provinces of this country.
The main idea of the Provence style is to bring a little rustic
interior and tranquility, which most residents of big cities lack.
The main characteristics of the style are:
Furniture for the Provence style should look as if you inherited it. That is, it needs to be aged during finishing.
Decoupage boxes in patchwork style
Patchwork is a very unusual handicraft that involves making both small and large crafts from scraps of fabric. Fabric decoupage of the box is a very bold and successful solution.
Patchwork is a very unusual handicraft
What is necessary:
- wooden box;
- lace;
- linen fabric;
- padding polyester;
- lock;
- glue;
- paints;
- tassels;
- varnish;
- texture paste;
- stencil;
- palette knife;
- sandpaper;
- masking tape;
- a thread;
- needle.
Progress:
- Clean the workpiece using sandpaper.
- Cover the fabric with white paint, leaving only the edges unpainted.
- Cut out squares from a napkin and remove all the lower layers from these parts.
- Attach these elements to the fabric and coat with glue.
- Lay padding polyester on the inside of the fabric, then fold the edges.
- Secure the structure in this position using masking tape.
- Pull the edges onto the cardboard using a needle and thread.
- Fix the workpiece on the lid of a wooden box.
- Apply structural paste to the side elements using stencils and a palette knife.
- Dry the work and be sure to varnish it.
Etching
Suitable for items of any size made of wood. Deciduous tree species lend themselves best to this processing method. In this way, you can give wood noble, rich shades without losing the natural beauty of the material’s texture.
Etching is carried out with various compositions - mordants. Some of them have complex names or a strong smell, but along with them there are many recipes available for making with your own hands, such as tea, coffee, compositions from leaves, bark; Potassium permanganate, blue, and vinegar are used. For those who feel like a bit of a chemist, tinting wooden surfaces is quite a suitable activity.
The process can happen in two ways:
1. Hand dyeing using a fiber-free cloth swab or a synthetic brush.
2. Dyeing by soaking in an etching composition.
Most often, the process takes place at elevated temperatures. After selecting and purchasing (mixing) the desired composition, the wood is cleaned of excess and sanded with sandpaper. Then there’s the etching-staining process itself. As a rule, the mordant recipe includes the time of exposure to the composition and the expected result. Basically, control is done visually and, of course, this is where creativity comes in.
Wooden box decor in shabby chic style
This work is so simple that even for novice needlewomen its implementation will not be difficult. There are only a few stages of work and several of its characteristic features that can be mastered fairly quickly. You just need to follow the instructions.
Progress:
- Carefully unscrew and remove absolutely all fittings from the workpiece.
- Mix dark paint with water. The consistency of the mixture should resemble low-fat kefir.
- Paint the structure with the prepared paint and wait until it dries.
- Use sandpaper to sand the outer part of the product.
- Rub the edges generously with wax.
- Now mix white paint with water and completely paint over the wooden box.
- After the white paint has dried, go over the corners with sandpaper so that the dark color begins to show in these places.
- Choose a suitable design on a napkin and cut out this motif.
- Layer this picture and use only the topmost layer in your work.
- Glue the napkins using water.
Glaze
Glaze
is a painting technique in which the lower layer of paint is visible through the upper translucent one. The technique is widely used not only in painting, but also in interior design, including the painting of objects. The technique allows you to obtain deep iridescent colors due to the translucency of the glaze layers.
Various paints and coloring compositions are suitable for glazing: watercolor, oil, acrylic paints, strongly brewed tea.
It is convenient to use a solution of acrylic paints. A wide palette allows you to get the desired color.
The paints are easily mixed with each other, diluted with water or acrylic paint thinner to the desired consistency, dry quickly after application, are resistant to moisture and mechanical stress and can be used on any surface.
Technological process:
Using a synthetic brush or sponge, apply the solution to the prepared surface, wait for it to dry and evaluate the result. Glazing does not allow you to completely paint over the structure of the base or the previously applied image; it only sets the tone. To enhance the effect, you can apply a second layer of glaze paint and then the color intensity will increase.
If you apply several translucent layers of paint of different colors, the result will be different shades that show through each other.
Spray
- droplets-splashes on the surface of the decorated product, which create the image of a thing that has passed through time, reflect the history of its use.
An artistically stained item in such a simple way receives a unique visual charm and a relief that is pleasant to tactile perception. This is all very important, since the items chosen for decoration are decorated for a beloved home and for people dear to the heart.
The process itself is very entertaining. Before you begin, you need to prepare your workplace. For example, cover the surface with newspaper or cloth. The tools you will need are a toothbrush or a hard brush. Materials: paints and water in a glass.
Wet the brush with water and put a small amount of paint on it. We try using a fingernail or a toothpick to release drops onto the still test surface of the sample, simply running the tool along the bristles.
With a wide brush, you can simply shake off the drops or tap the brush on your hand, then small colored droplets break off the brush and fly down. Having decided on the application process, it’s time to cast some magic.
Spraying is the last operation before varnishing. Drops applied on top of the varnish will differ from the general glossiness of the surface of the object, this effect will introduce an additional effect of a gap in time.
Crackle
- artificial aging technique, creating cracks in the paint or varnish layer.
1. Craquelures are divided into one-step (single-phase) and two-step (two-phase)
One-step craquelure
looks like a cracked layer of paint, through the cracks of which the lower layer of paint or the base of the product is visible. The base can be anything: glass, metal, plastic, wood and similar materials.
Two-step craquelure
looks like a network of thin cracks (cracked varnish) on the surface of any image or coating.
2. Eggshell crackle
Gives a bright, high-relief cracking effect. A clean shell is glued onto PVA or acrylic varnish in pieces at some distance from each other. Sometimes the relief is further emphasized by patination or the “dry brush” technique.
Faceted varnish
Colored self-crack varnish. Apply a thick layer to the surface and leave to dry. Forms large cracks.
4. Two-component microcraquelure
Gives the effect of thin cracks - cobwebs. Transparent, so it is often used over images.
After drying, cracks are often emphasized by patination.
Self-cracking paint with a one-step craquelure effect.
Delicate abrasions in the style of Shabby Chic or the Candle Rubbing Technique
The technique is simple and consistent. The corners, sides, joints of the primed planes of the object are covered with paint of a rich shade, the paint layer is rubbed with paraffin, then covered with light paint, most often 2 layers are required.
Now the mechanics:
Use sandpaper to remove the top layer where paraffin and the first layer of paint were applied. This is how abrasions, imitation of use, and the effect of aging appear.
This technique traditionally uses delicate pastel colors
with “sweet” shades, as if faded by the sun or faded with time:
• ivory color;
• white (but not snow-white, but as if slightly yellowed with time);
You can complement the “shabby chic” look with painting, motifs from decoupage cards or napkins, or add splashes. The final coat will be several layers of acrylic matte varnish.
Suitable for items of any size made of wood. Deciduous tree species lend themselves best to this processing method. In this way, you can give wood noble, rich shades without losing the natural beauty of the material’s texture.
Etching is carried out with various compositions - mordants. Some of them have complex names or a strong smell, but along with them there are many recipes available for making with your own hands, such as tea, coffee, compositions from leaves, bark; Potassium permanganate, blue, and vinegar are used. For those who feel like a bit of a chemist, tinting wooden surfaces is quite a suitable activity.
The process can happen in two ways:
1. Hand dyeing using a fiber-free cloth swab or a synthetic brush.
2. Dyeing by soaking in an etching composition.
Most often, the process takes place at elevated temperatures. After selecting and purchasing (mixing) the desired composition, the wood is cleaned of excess and sanded with sandpaper. Then there’s the etching-staining process itself. As a rule, the mordant recipe includes the time of exposure to the composition and the expected result. Basically, control is done visually and, of course, this is where creativity comes in.
Source
Decoupage in shabby chic style
Shabby chic in its idea is somewhat reminiscent of both Provence and vintage styles.
Romantic types will especially appreciate this box in the shabby chic style.
You could even say that vintage is an integral part of shabby chic. Translated, this phrase means “shabby chic.”
Character traits:
- light pastel colors;
- floral motifs of pictures;
One of the features of the shabby chic style is floral motifs.
- elements reminiscent of old grandmother’s things;
- lack of clear lines and geometric patterns;
- the use of pastoral motifs as an ornament, which makes shabby chic similar to the “rococo” style;
- the use of tea roses and angels as decorative elements; stylistic uniformity – a couple of decorative details in the shabby chic style are not enough
- a large number of delicate details.
Shabby chic style combines a large number of details
Set of boxes in shabby chic style
Using decoupage and craquelure techniques, you can decorate the box in any style; it will be especially interesting to do this for the holiday. Thus, New Year's boxes using the decoupage technique are very popular. A book will look interesting using this technique. Or you can use a book-shaped box for creativity.
Stylish box made using decoupage and shabby chic techniques
We hope that the presented ideas and videos helped you understand the decoupage box technique.
What it is?
Decoupage is a certain technique of decoration, which includes the ability to fix an image or pattern to any thing. The word itself comes from the French “to cut.” Pictures for decoupage are usually cut out, and the entire composition must be varnished.
The history of this technique dates back to the Middle Ages, when the Germans began decorating furniture in this way. However, decoupage flourished much later, in the 18th century, along with the fashion for Asian-style decor. Furniture makers from Italy and France imitated very expensive inlays with glued pictures, which were carefully varnished on top.
Despite the fact that it was just an imitation, such furniture was in great demand due to its attractive price. In England, decoupage craftsmanship gained particular popularity in the era of Queen Victoria; it became accessible to most segments of the population.
Already in the 19th century, decoupage needlework became widespread in Europe - only the styles changed, but the technique was improved. At the turn of the century, decoupage came to the American continent and became widespread there as a hobby.
In the modern world, decoupage art has received a new round of development, thanks to new technologies, convenient tools and the return of fashion to the styles of Provence, shabby chic and others. Our country is now experiencing a real boom in this type of decor.
Vintage wooden box
To carry out work using the decoupage technique, you will need material that can be easily purchased in a specialized store, namely:
- dark-colored wooden box blank;
- priming;
- glue, scissors, brush and washcloth;
- napkin or decoupage card;
- white lace;
- acrylic paints;
- 3D varnish;
- acrylic lacquer.
After you have prepared everything, you can conduct a master class and decoupage the box. First of all, you need to measure the size of the card or napkin and fit it to the box. Pour PVA glue into a small container, then dip the brush into it and begin to coat the entire surface of the box with it. Attach the image to the lid of the box and immediately apply glue on top of the image. Don't be alarmed if white streaks of glue remain; PVA, after drying, becomes transparent.
Glue the card or napkin using gentle movements to avoid the formation of folds and air bubbles. If they have already formed, lift the image and apply glue again. The lid of the box is left until completely dry. The next stage of work moves to the bottom of the box. This plane of the box, using decoupage technique, will be decorated with white lace. It is necessary to measure the length and cut a suitable piece. Since the decoupage of the box is done in a vintage style, the lace needs to be aged. This is done with your own hands. Take acrylic paints and spread a dirty beige shade on a plate. Lay the lace on newspaper so as not to smear the table. Next, dip the sponge into the paint and apply it to the material. Do this until you get the expected effect of the old look. Wait until the material is completely dry, and then turn it over to the other side and coat it with glue. Glue the lace to the side of the box.
Let's move on to decorating the inside of the box. We prime the entire surface and leave to dry. To prevent the box from looking too gloomy, paint the middle in a muted color in a bright shade, such as pink. For greater harmony, the outer and inner parts of the box, glue the lace on top of the pink shade. We are waiting for all the work to dry. The master class returns to working on the lid of the decoupage box. Now, you need to erase the boundaries between the card and the edges of the cover. Dilute dark brown acrylic paint and, using a sponge, apply it to the surface of the lid. It is necessary to highlight the outline of the image on the postcard. Use 3D varnish, which is applied along the entire contour of the design. The box is left overnight to dry in a dry and warm place. The last thing you can do to decorate the box is to paint it with acrylic varnish, about two or three times. Leave gaps between painting. And again we leave it to dry overnight.
After all the work done, the decoupage of the box, in vintage style, is ready. Use it for decoration or to store expensive small items.
Popular articles New Year's box
Volumetric painting
Now let’s gain a little patience and start drawing with an outline. For this painting I use Tair glass contours, they are very thick and do not spread. Let's get started.
We outline the upper part of the petal with a white outline. The thicker the line, the more voluminous our pattern will be. Then, with a thin brush, we draw the paint to the center of the flower, as if stretching it.
We draw leaves in the same way. Add lines and dots to fill the pattern. Our drawing should dry well, or better yet, leave it overnight. In the conditions of the master class, we needed an hour, but this time is not enough for the outline, because the paint inside remains wet. This means the pattern can be easily ruined.
In the meantime, while the flowers are drying, we will move on to the next stage.
Vintage decoupage of a round box
Decoupage of an antique round box is a simple and beautiful way to get an attractive product that will look great in a French country interior. In order to make vintage decoupage we will need napkins with large flowers, acrylic brown and white paint, gold pigment, wax, PVA, brushes, foam sponge, decoupage varnish.
We design the box step by step:
- Carefully sand the surface of the box and apply brown acrylic in several layers.
- We cover the semicircular edges of the box with wax.
- Apply white acrylic using a foam sponge.
- We sand the areas where wax was applied until the base is brown.
- Apply a dry cloth to the surface of the box and glue it with PVA. This way we completely decorate the workpiece.
- After the applications have dried, we apply brown acrylic with a sponge, and then gold pigment, to the protruding edges of the lid and the bottom of the box.
- We coat the product with a fixative varnish for decoupage or yacht varnish.
A round box with vintage decoupage is a great way to decorate your interior
If desired, the inside of the box can be decorated with fabric with a motif corresponding to the overall design, and floral designs can be applied using a stencil.
For voluminous decoration of a vintage-style box, you can use dried lavender flowers and polymer roses. The center of the box lid can be decorated with a plaster angel.
Imitation of worn cardboard
After brushing, we begin to imitate shabby, crumbling cardboard. For this stage we used this self-hardening clay.
Roll it out into a thin sheet and place it on the lid of the box coated with PVA glue. This will be our future cover.
We tear the edges and leave to dry. The thin layer of clay dries very quickly, we used a hairdryer.
After drying, sand the surface, removing excess pieces of hardened clay. It is better not to touch the torn edges; let them remain as they are dry.
Techniques and rules for performing decoupage
When working, you should follow a few simple recommendations.
Technological process
Decorated surfaces must be cleaned of old coating using sandpaper. The varnish and paint are removed from the wooden box, the cardboard boxes are cleaned of dust and minor dirt with a soft rag.
Perhaps the most ideal material for decoupage is wood.
- When working with paper, the box will need to be cleaned of traces of glue. To remove it, you can use a soft rag or cotton pad and a degreaser. All metal elements are removed from wooden boxes using a screwdriver.
- The surface of wooden products should be leveled. When leveling, acrylic primer is useful.
The primer is applied with a brush.
The design is carefully separated from the protective layer and applied to the surface to be decorated. It is better to apply the glue on top of the napkin, carefully smoothing out the resulting folds.
Such pictures for transfer can be purchased at a specialized store.
Applying varnish after complete drying will help consolidate the result.
Leave until completely dry. Apply varnish on top in several layers.
Paint, primer and brushes: which ones are better to choose
The necessary brushes can be selected in art and construction stores:
- Wide flat synthetic brush. It applies paint and primer, as well as glue and varnish. The pile should be gentle so that it is pleasant to rub across the skin of the face. Too hard a pile leaves a lot of marks.
- Tapered flat brush. With its help, narrow and small parts are painted. Both straight and beveled ends will do.
- Liner. Used for painting stems, thin curls and outlines. It should be the thinnest in the set, in size most often numbered 0. The longer the pile, the better.
- Artistic bristles. Used to artificially age the design, texture and texture. The pile should be hard, capable of slightly damaging a napkin or thin fabric. Preference is given to bristles of different lengths. The basis itself is broad.
- Fleitz. Used for varnishing the product. It should be very soft; when cleaning, do not use towels with lint.
- Fan brush. Optional, but some people use it for gluing and leveling napkins, as it has a wide range of piles.
As for paints, it is recommended to take the acrylic version, since, unlike watercolors and gouache, it has a number of advantages:
- fits on any surface;
- when dry, they turn into a waterproof film;
- wet acrylic can be easily removed with water.
Methods for thinning paper
It is not enough just to choose a suitable pattern to perform decoupage. The paper must be thinned. You can do this in the following ways:
- Apply varnish over the surface of the design and let it dry. Secure with tape on the back side. Remove the top part of the picture. It should turn out very thin, almost transparent;
- Several layers of varnish are applied to the picture. After it dries, the drawing is placed in water for half an hour. The workpiece is taken out and the inner layer is rolled up by hand;
- in the case of using photographic paper, it is also initially coated with varnish. When the varnish has dried, place the photograph on a wet surface for five minutes and pry up the cut, detaching the layer of paper from the photo itself.
Applying patina or patination
Patina
is a greenish-brown coating that forms on copper and bronze objects as a result of oxidation under the influence of the environment. In a broader sense, patina refers to signs of aging on any objects made from any materials.
Patination in decoration is an imitation of darkening of the surface, which in its natural form appears as color changes after a long period of time and frequent contact with hands. Patina can be dark, colored, metallic, white (liming).
The patination composition is applied to the edges, corners of the object, or vice versa, into the recesses of the relief parts. There are several types of patination.
Bituminous varnish is applied to the surface and the excess is immediately wiped off. The varnish remains only in the recesses, shading the surface. Secured with shellac varnish.
2. Acrylic-based patina
Acrylic paint, heavily diluted with water, is poured into the recesses of the relief, and the excess is wiped off with a clean cloth.
3. Chemical patina
A special oxidizer is applied to the paint with fine metal particles, which causes the metal surface to age (oxidize) within a few minutes.
Shellac varnish gives surfaces a warm light yellow or red-orange hue. Widely used in woodworking to emphasize the texture of wood, used as a protective and covering agent.
Rub over the surface and tint selected areas. It takes a long time to dry. Gives the surface a soft silky sheen.
Making chest decor
In order to breathe life into old things, you can decorate them yourself. It’s especially interesting that antique objects look great using the decoupage technique. Such ideas will be interesting, even for novice craftsmen. Take an old chest and remove all the fittings from it. Now, cover it with a special remover for old paint, which will help remove the top layer of old varnish and stain. Wait thirty minutes and remove the top layer with sandpaper. Leave the chest to dry.
Once again, you should sand the chest, and then cover the entire surface with stain, except for the one where the paper motifs will be applied. For the best effect, mix several shades of stain and apply to the decorative item.
Apply several layers of primer to the material and sand until the wood is smooth. Glue the pictures with glue to the sides of the chest, as shown in the photo.
Using a stencil, you can decorate the lid. To do this, apply construction putty and level it, and then quickly remove the stencil. Take bitumen and apply it to the white pattern, and then, with a sponge soaked in alcohol or kerosene, erase the excess strokes, as in the photo. The facade image can be made more subdued using craquelure, and then bronze construction powder. Acrylic varnish is applied on top of everything. The vintage master class is completed, the decoupage of the chest is completed. The result is a wonderful antique product that will decorate any corner of your apartment or house. This decoupage of a chest will look relevant in the countryside. As you have already been able to see by doing such master classes using the decoupage technique, creating such versions of products with your own hands is not easy, but very interesting and entertaining work that brings not only aesthetic pleasure, but also helps to diversify the same type of interior of an apartment, house or dachas Vintage items have long been in fashion and are entrenched in the works of experienced needlewomen. For beginners, it is recommended to watch videos and simpler master classes; it is better to start with them. When you are sure that you can duplicate decoupage lessons without problems, you can move on to a more complex level of skill. Don’t try to cover all facets of decoupage at once, do it gradually. It is quite possible that such a hobby can develop not only into an everyday activity, but also into a job that brings material income. After all, almost every person has an old thing in their house that they inherited from their grandmother. Over time, it has lost its desired appearance and requires restoration. This can be corrected by a person who is dedicated to working in the decoupage style and can correctly make the necessary decor. Examples of master classes can be found in large quantities on the Internet. On them, you are sure to find something suitable for you and your skill level.
Popular articles Men's postcard in the form of a shirt
Step-by-step instructions for beginners
Before you begin master classes on decoupage boxes, you need to understand the essence of its implementation. This will help beginners to master the technology of such decoration at the initial stage. First of all, you need to prepare tools and materials, namely:
- Decoupage box. For beginning craftsmen, it is best to take a ready-made wooden blank (such a product can be purchased at handicraft stores).
- You also need to get decoupage cards or napkins, which are sold at retail outlets specializing in hobby goods. In general, any type of paper with a pattern is suitable for the technique (regular table napkins, wallpaper, postcards, clippings from literature, etc.), but for a beginner it is still better to use special blanks.
- Sharp scissors for cutting out pictures.
- Brushes of different sizes for glue and varnish.
- Glue (regular PVA or for decoupage).
- Glossy or matte high-quality acrylic varnish (the durability of the product depends on the quality of the varnish).
- Acrylic primer.
- Sandpaper.
Popular articles Snow Maiden made of colored paper
Surface preparation
In order for the decoupage to turn out neat, the surface of the object being decorated must be perfectly smooth, so it must be properly prepared. This is done in several stages:
- Using sandpaper, you need to carefully sand the workpiece. This will help remove paint or varnish from the old product, as well as remove minor scratches and other defects.
- If the surface has very deep cracks or chips, they are first puttied, then the putty is allowed to dry for 3 to 5 hours, and then sanded again to a smooth state.
- Dust and debris remaining on the object after such treatment must be carefully removed, and then degrease the surface with acetone or an alcohol solution.
- After the workpiece is completely dry, an acrylic primer is applied.
- 30-40 minutes after the primer has dried, you can begin decoupage.
Paper thinning
The thinner the paper with the image, the more effective the decoupage will be.
Thinning the material is one of the important stages of the technique, so it must be treated with special attention, otherwise the design will look sloppy or completely deteriorate. For this reason, beginners are recommended to use special decoupage cards on rice paper, which do not require prior preparation.
In other cases, the paper is thinned using one of the following methods:
Using tape. Varnish is applied to the front side of the picture in several layers, and after it dries, tape is glued to the back side of the picture.
The adhesive tape is carefully peeled off along with the excess layers of paper. The procedure can be repeated several times until the picture becomes almost transparent. Softening in water
As in the previous method, the outer side of the image is treated with varnish, then the picture is lowered into a container with warm water for several minutes. The time it takes for the paper to soak depends on its density. The soaked drawing is carefully removed from the water and placed face down on a stationery file. Next, remove excess layers of paper, rolling them from the wrong side using careful finger movements. As a result, only a thin layer with a pattern should remain.
Decorating the product
The final stage of decoupage is the decoration process itself. This is the most enjoyable stage, because here you can give your imagination unlimited freedom. The decorating procedure can be divided into several parts:
- The object being processed is tinted with a certain color of acrylic paint (it all depends on the master’s idea).
- After the paint has completely dried, they begin to glue the prepared pictures. This is done in this way: using special glue or regular PVA, slightly diluted with water, the finished layer with the image is glued to the surface of the workpiece, where the pattern is very carefully smoothed out.
- After the picture lies perfectly flat, it is smeared with another layer of glue.
- Other images are glued in the same way.
- At the end of the work, the product is coated with two layers of transparent varnish.
- At the last stage, the product is decorated with additional decorative elements.
Box in the form of a book
Decoupage of a wooden box will look like an old book. This master class is interesting because it looks unusual and the box is, indeed, easy to confuse with an object such as a book. Here is a list of materials that will be useful in conducting the master class:
- wooden blank, shaped like a box-book;
- varnish;
- acrylic paints and stain;
- sandpaper;
- roller and spatula;
- suitable image for your taste.
First of all, the main task is to choose an ancient motif. Consider the fact that the image should have an antique effect, and you will do everything else with your own hands. In this case, the box does not require sanding, but is only covered with stain of a suitable shade. After the manipulations have been done, dry it with a hairdryer for a quick process. Only now, treat the surface with sandpaper. It is necessary to make it lighter and remove all irregularities. Sanding occurs in the direction in which the wood fibers are located. Cover the lid with several layers of varnish, taking breaks between applications. Place the picture on a stationery file and apply the same varnish to it. Attach the motif, picture side down, and go over it with a roller. Next, remove the file and use a rubber spatula to remove excess varnish and air bubbles. Wet the paper with water and wait until it is completely saturated, now you can roll it up. Dry the product with a hairdryer and varnish. While the lid is completely dry, we return to work on the rest of the box. Apply a layer of stain, a slightly darker tone than the previous time, and dry. Again, sand the surface. Further, the work will proceed according to the principle of a layer of stain and sanding of the same layer. When you are sure that you have applied enough stain, you can varnish the craft.
Take a disposable plate and acrylic paints that match the color. Squeeze them into a container and, using a sponge, apply them to the lid. Make sure that the washcloth is half dry, a very important point, do not overdo it with the amount of paint. Apply a dark tone along the edges of the product and along all edges of the box. As a result, you will get a dark color at the edges, which becomes lighter towards the middle.
All that remains is to coat the book-shaped box with varnish and decorate the edges as your imagination tells you. The master class is finished, the amazing antique book box looks perfect.
The purpose of the chest of drawers and its color
When choosing a design for a chest of drawers, it is important to consider in which part of the house you will place it: bedroom, living room, children's room or dining room.
Bedroom furniture should have many drawers of different sizes; such models are presented in abundance on the Ikea website. As a rule, the upper compartments are small and are intended for storing accessories and linen. The lower ones are more impressive and can accommodate bedding. If you attach a mirror to the tabletop, you can combine the chest of drawers with the dressing table
Bedroom furniture should have many drawers of different sizes; such models are presented in abundance on the Ikea website. As a rule, the upper compartments are small and are intended for storing accessories and linen. The lower ones are more impressive and can accommodate bedding. If you attach a mirror to the tabletop, you can combine the chest of drawers with the dressing table.
It is better to choose calm pastel colors for this piece of furniture for the bedroom. These colors can be: beige, soft pink, white, milky, cream.
Chests of drawers for the living room have more of a decorative function. Such furniture is decorated with beautiful carvings or all kinds of inserts made of leather, rattan and even precious metals. The color palette should match the overall design of the room.
If the chest of drawers is intended for the kitchen, then models with opening doors and drawers are best suited. The color should be in harmony with the rest of the furniture in the room and the tone of the walls.
For a child's room, a chest of drawers with large drawers is suitable, in which you can put toys, books, pencils and all the accessories necessary for a child. This time you can experiment with the palette.
A few words about technology
Many beginners, having heard the strange and incomprehensible word decoupage, mistakenly assume that a difficult-to-understand name equals a type of technique that is equally difficult to perform.
But if you translate this name into simple language, then everything turns out to be much simpler than it seems at first glance. In fact, the French word decoupage in translation means just “cutting” . That is, the essence of this technique is to cut out pictures and paste them onto the surface of objects in such a way that the resulting attached picture looks like a kind of painting.
The master’s main task is to erase the line between a paper picture and a decorated plane, and this is both a simple and complex job at the same time.
Varieties of decoupage
If you dig deep into the concept of decoupage, you will find a rather serious art, divided into types, effects and styles. So, first of all, technology is divided into five types:
Craftsmen who have mastered one or more types of this decorative and applied art apply additional effects that give the finished product a finished look that corresponds to the artist’s original idea and the chosen style.
The most popular effects are:
Decorating styles
Before you begin to implement your creative idea - decorating the box, it is very important to decide on the decoupage style. Today there are many trends in this type of needlework technique, but the most common and favorite among craftsmen are:
"Dry brush"
Dry brush
- a technique borrowed by decorators from painters. And if in painting this method is used to create an image, then in practical decor it is an excellent way to age an object and add more years to it.
The essence of the technique:
put a little paint on a flat synthetic brush, wipe off the excess, this is done on paper (palette, rag) until each hair of the brush produces a separate line.
And now, with light movements, lightly touching the object, we “dirty” it, paying special attention to the protruding parts: ribs, convex pattern, etc.
This way the relief is emphasized and abrasions are imitated.