Beautiful jars for cotton swabs
I think it’s no secret to anyone that beauty begins with the little things. Therefore, the first thing that needs to be done is to organize the storage of things such as cotton swabs and disks. Nowadays you can buy specialized containers in stores, but I prefer to make such decorative little things with my own hands, because this is how they can be made unique and inimitable.
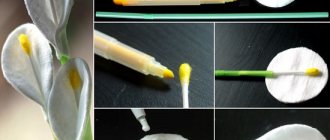
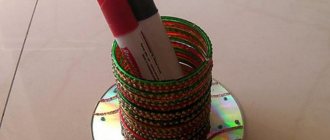
I chose small jars that I will transform. First you need to unscrew the lids, since these are the ones we will decorate. Then, using a can of paint, we paint them and leave them until completely dry.
Discreet but tasteful: several pearl manicure ideas for spring
“Don’t divide yourself into parts”: Tina Kandelaki on how to find your man
Choosing a haircut by age: how to get a haircut at 30, 40, 50, 60 years old
I painted the lids in several layers to make the color more saturated, and then carefully applied matte paint with a brush, carefully painting all the small curves. If desired, you can skip this step if you like glossy surfaces.
Once the lids are completely dry, we begin gluing the handles. Many will be surprised to learn that the jars will have handles. But I thought that it would be more convenient to take out the cotton pads by holding the handle.
As I wrote above, I chose vintage pens, in the shape of a square. Now we glue them onto the lids of the jars using Moment glue.
Make sure to apply enough glue as the handles need to adhere tightly to the surface.
Initially, it would be possible to glue the handles first, and only then paint the lids along with the new decorative elements.
The Italian flew to Russia specifically to play a popular song (video)
Peach coloring: 10 ideas for creating an incredibly delicate look
Aquarius - listen to intuition: forecast for all signs for the spring equinox
But I bought pens in different colors, so this was not necessary.
Master class Keeper of cotton pads 'Lady after shower'
I’ve been meaning to make a MK for the keeper for a long time, but I never got around to it. Here we are)
But I'll start with some background. I sewed my first keeper in November 2010. In this master class, coincidentally, I sewed my anniversary - 30th keeper =)))
I have a friend with whom we accidentally and without any agreements developed a tradition of giving each other handmade gifts for all sorts of holidays. I give her dolls, and she gives me her paintings. My friend is a sophisticated girl, she loves to take care of herself, and there are always many different bottles of cosmetics in the bathroom. And I wanted to give her not just another doll for the shelf, but something useful. The idea came to make a doll that would hide a package of cotton pads. Both useful and aesthetically pleasing. I was sure that this idea had occurred to someone before me. But after searching the Internet, I couldn’t find any ready-made solutions, so I had to come up with a system for attaching a package of cotton pads to the doll myself.
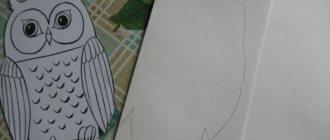
I took the Bath Angel tildo pattern as a basis. In principle, you can take any tildo pattern; almost all Tony Finanger dolls fit perfectly in size. I made a bunny, a scops owl, and a beach lady pattern. But mostly I used the Bath Angel pattern. For the guardian princess dresses, I took a pattern from another tilde. You can combine them, I often order keepers in nighties and robes, it looks very homey. In terms of hairstyles, there is also room for fantasy to run wild.
In this tutorial I will show you how to sew the easiest clothing option to sew: a fleece robe. Fleece is good because it easily hides various sewing flaws with its “fluffiness”; there is no need to process the edges. You don’t have to worry about the hairstyle either, the doll will have a towel on her head (I honestly got the idea on the Internet, but the one who first came up with it is just brilliant!)
So, we will need: - flesh-colored fabric for the doll's body - fleece of two colors (the main one for the robe, white is better, it is more universal and will suit any bathroom interior, and the second colored one is for decoration. This is how it looks on the doll). Fleece is good for jackets, i.e. thick, looks richer and more comfortable. - yarn for hair - thin satin ribbon - button (preferably on a stem, or with raised edges, i.e. not flat) - filler - buttons for decoration - pack of cotton pads for 100 or 80 pcs
The pattern contains details for both a doll in a robe and a princess. The dotted lines indicate the parts where the fabric needs to be folded if the robe is not made of fleece, but, for example, flannel. In this case, there will be two collar parts, not one. The length of the robe/dress is determined during the sewing process, it all depends on what package of cotton pads you are used to using for 80 or 100 pads. Pattern:
1. Sew a bust of a doll. My advice: first trace the patterns on the fabric, sew along the outline, and only then cut them out. We sew up the bottom of the body, and turn in the corners for aesthetics. To ensure that the doll’s arms bend freely and not stick out in different directions, fill them with filler not completely, but leaving 2-3 cm. We sew up the holes, controlling the length of the arms, it should be the same. We do not cut the ends of the thread and use it to sew the arms to the body.
2. The pattern shows two parts of the robe: the back and the front. From the fabric you need to cut one back piece and two shelves. In order not to waste paper, I make a cut on the paper part of the back along the collar, and when I need to outline the shelf, I simply fold in the excess:
3. Now let's decide on the length of the robe. Place the doll's body on the fabric, and under it a package of cotton pads (pull the string first, the length of the package will be significantly reduced). Mark where the shoulders of the robe will begin. I advise you to measure the length of the robe 2-3 cm longer than necessary, just in case. In my opinion, when the packaging peeks out from under clothes, it’s not very nice, because the main purpose of the toy is to hide the tube with discs. Then the excess can be cut off.
4. Cut out 1 piece of the back. If you are sewing a robe from fleece, then you don’t need to bend or tuck anything, so to save fabric, you can draw the details of the shelf end to end, and then simply cut them with curly scissors. If the robe is made from fabric that frays at the edges, you need to cut out each piece separately and trim the edges.
5. Sew the back and front panels along the shoulder seams
6. Sew in the sleeves. The top of the sleeve should match the shoulder seam:
7. Fold the robe and sew along the side seams. The most important thing at this step is that the seam under the armpits matches. Carefully trim off the excess fabric, I do this with zigzag scissors.
8. We find the middle of the collar part and compare it with the middle of the back collar. Sew on the collar. Please note that the collar must be sewn so that its front side is on top.
9. We put a robe on the doll. We decide on the length of the sleeve and cut off the excess.
10. Now you need to mark on the back the place where there will be a loop, through which we will then pull the string from the package of cotton pads. The location of the loop depends on what outfit the doll has, but it should be no lower than 3 cm from the edge of the body, otherwise the doll will fall over. You shouldn’t make it too high, otherwise it will be difficult to thread the string from a package of cotton pads through it. Although if the design requires this loop to be made higher, then when installing the tube you can use a regular crochet hook, then threading the rope will not be difficult. It will be very good if this loop can be hidden. For example, this doll’s loop will then be closed with a belt.
11. Now you can trim the hem of the robe.
12. Cut out the pocket piece, a 5x25 rectangle (this will be a towel) and a 2x60 rectangle (this will be a belt). Fold the long rectangle in half and stitch it with a zigzag stitch. Sew on the pocket. We wrap the robe on the left side and sew it to the doll’s body. We tie the belt and sew the knot to the robe, capturing the doll's body. We also fix the belt with several stitches under the armpits.
13. Cut off a bunch of yarn and sew it to the doll’s head. We mark the eyes with pins. Take a “towel” and artistically wrap it around your head, forming nice folds. We fix everything with needles.
14. Sew the towel to the head, remove the pins. Let's make eyes. I love when the tilde's eyes are made with a French knot. Sew or glue buttons for decoration. We sew the smell of the robe with a few stitches so that the robe does not open too much.
15. Take a narrow satin ribbon 25-27 cm long. Burn the edges with a match or lighter. Sew it tightly to the doll's back. The loop should be sewn as high as possible to the doll’s neck; you can sew it directly under the clothes. The main thing is that the doll does not fall over when hanging on a hook without packing discs inside. Sew the button tightly.
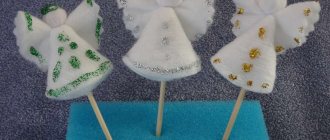
15. The final touch remains! Let's blush our cheeks. I do this using a pastel pencil and a regular cosmetic sponge. We sew one of the palms to the head, as if the doll was holding a towel. We insert the package of cotton pads inside, pull the string from the package through the loop on the back and wrap it around the button. All! Cotton pad keeper is ready, you guys are great! Both beautiful and comfortable!
The discs themselves are pulled out from below; the packaging has perforations. During use, the bag does not need to be removed; when the disks run out, the packaging is replaced with a new one.
Now there are many different variations of keepers on the Internet; some craftswomen have come up with the idea of giving dolls bags or jars for cotton swabs. So you can modernize this doll ad infinitum, the main thing would be the desire =)))
Now you can arrange a photo shoot:
Source: livemaster.ru
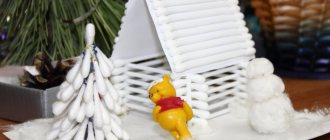
Towel shelf
If you still don’t have a shelf for towels in your bathroom, then this needs to be fixed urgently. I purchased three wooden boards, two of which are smaller in size than the first (which will be the base). Then, using screws and a screwdriver, I built a stand consisting of two shelves for storing towels.
Of course, it was also possible to paint it white, and besides, I still had the paint. But I wanted to leave the natural color of the wood, only treating it with stain, which would not only additionally protect it from moisture, but also give it a noble dark shade.
An attractive image is easy to maintain even after 50 years: 10 fashionable men's haircuts
Capricorn and 3 other zodiac signs whose glass is always half empty
Haircuts were not Aunt Tanya’s thing: Menshova remembered her first “stylist”
Rules for storing cotton discs
Pressed cotton wool is not a finicky product and retains its quality characteristics for a long time. This is an item for daily use, so an open pack will be used up quickly . However, the basic rules for storing these products should be followed.
Disc storage space
Cosmetic discs are stored where they are most often used : on dressing tables, on shelves in the bathroom, hung on hooks, placed on changing chests if they are used for baby hygiene, etc.
Everyone places this useful thing where it is convenient for him. However, it is recommended to take into account that the room temperature should be between -35°C and +40°C , and the product should not be exposed to direct sunlight. You should also take into account the humidity level - no more than 70% . When storing in the bathroom, this condition is difficult to comply with. In this case, choosing the right organizer will help.
Devices for placing cotton pads
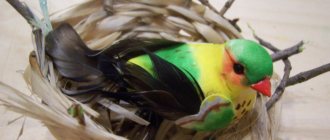
Manufacturers have made sure that cotton products are conveniently stored in their original packaging. The cone-shaped bag has a sewn-in cord , which makes it easy to hang it on a wall hook.
For those who care not only about functionality, but also about aesthetics, special devices for placing disks. Dispensers or dispensers come in different types and are made from materials that are resistant to temperature changes or high humidity: plastic, thick acrylic, glass, ceramics, steel, chrome, etc. Traditionally, they have an elongated cylindrical shape, where the products are placed vertically. There is an open area at the bottom or side, from where it is convenient to take them out individually without touching others. The container is closed with a lid on top so that dust does not settle on the cotton products and excess moisture does not penetrate.
Dispenser for cotton pads
Recycling advocates repurpose unwanted packaging from other items that fit into their shape into beautiful dispensers, decorating them to their liking. With a skillful approach, such a thing will decorate the house and save nature from excess garbage.
Taking into account the shelf life when storing cotton pads
There is a statement that 100% cotton wool can be used even after 100 years, since there is simply nothing there to deteriorate . This also applies to pressed cotton, if the packaging is not damaged. After opening the package, the product can be stored for a long time and not change its structure, provided that the requirements for the level of humidity and protection from dust are met. Manufacturers of non-sterile cotton pads indicate that the shelf life is unlimited. With sterile cotton products the situation is a little different.
Shelf life of sterile cotton pads
A sterile cotton product differs from a non-sterile one in that the former is treated with hot steam or ultraviolet rays in sterilization cabinets, after which it is immediately placed in a sealed package . They are used for medical purposes, in cosmetology, dentistry. For sterile discs in a hermetically sealed bag, the shelf life is defined as 5 years from the date of manufacture . After opening the packaging, it is recommended to use the product immediately, as otherwise the sterility effect will disappear.
Aesthetic hook for jewelry
Then I wanted to add one more element - an additional towel hook. Instead of the standard double metal hook, I opted for the same handle that I bought to decorate the jars.
It was decided to screw it to the shelf for storing towels. Having marked the center on the base of the wooden board, I drilled a hole there and attached the handle with screws. I hung the entire structure on the wall near the sink. The result turned out very beautiful.
Only instead of using a pretty towel hook, I use it to store my jewelry. So the result is a very aesthetically pleasing place to store jewelry.
This is how, thanks to three simple life hacks, we managed to give the bathroom a unique style and charm. Never be afraid to experiment with your interior!
Found a violation? Report content